Great for students as well as novelists
Whether you’re writing your first novel, or an essay paper for college, a Google Docs table of contents will help you keep things organized.
When you insert a table of contents in Google Docs, it updates automatically depending on how you format and structure your document. As you change the document, the table of contents will update every time you refresh an update.

In this article, you’ll learn how to add a table of contents to your document and how to make sure it stays updated.
Creating a Google Docs Table of Contents
As you’re writing your document, you’re creating your table of contents. Each header you add becomes another section in the table. Every subheader becomes a subsection as well.
All you have to do to get started is create the first header, highlight it, and then select the Normal text dropdown to choose your top level header style.
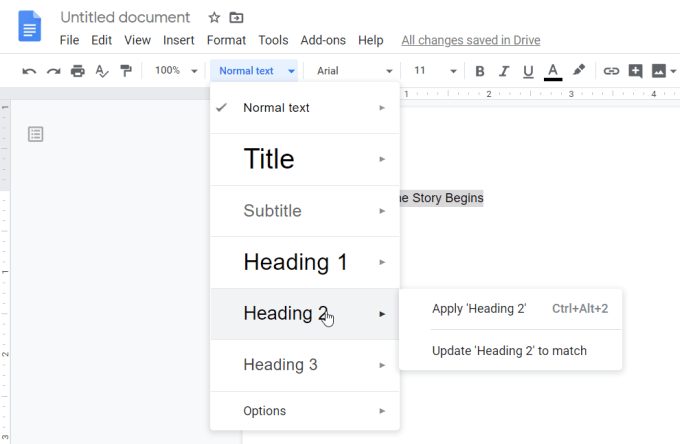
There are two approaches you can take to build your table of contents. You could write your entire document first, creating each header and sub-header as you go. Or, you could frame up your document with only the headers and sub-headers, essentially creating an entire outline before you begin writing.
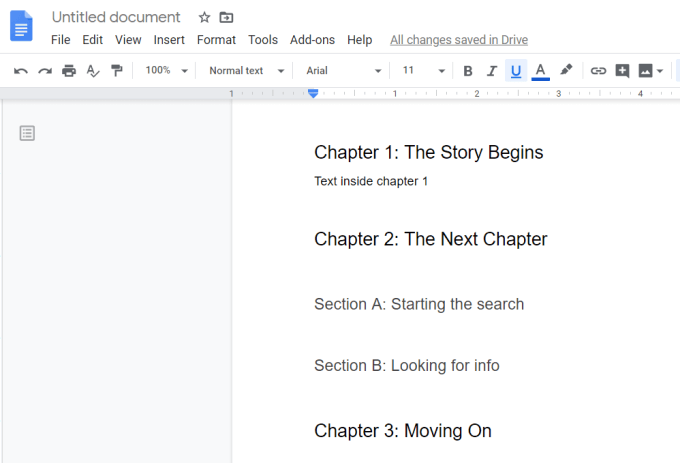
Either way, once you’re finished, inserting the table of contents into your document is simple. Just place the cursor where you’d like the Google Docs table of contents to go. Next, select Insert from the menu, and select Table of contents.
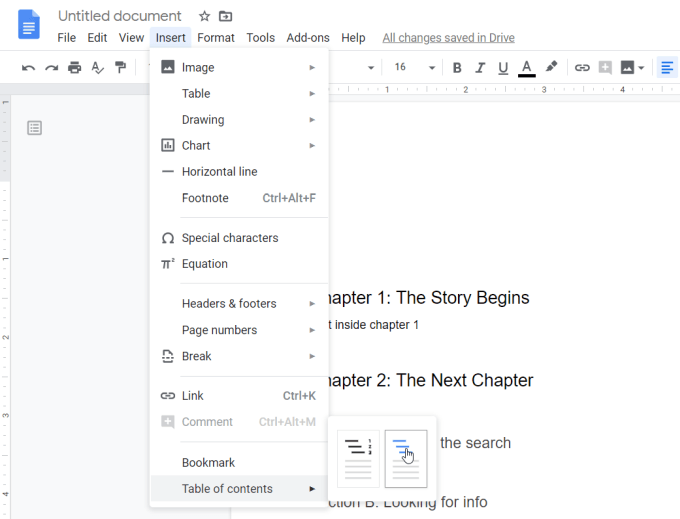
In the submenu that comes up, you’ll see two choices.
- With page numbers: This will display each line of your TOC with the page number where each header and subheader is located.
- With blue links: This will display each line of your TOC as a link that, when clicked, will navigate to the section of the document where that header is located.
How do you choose? If you’re planning on delivering your document in printed format, then you should opt for the page numbers option. If you’re sending it or sharing it electronically, then the blue links option is the way to go.
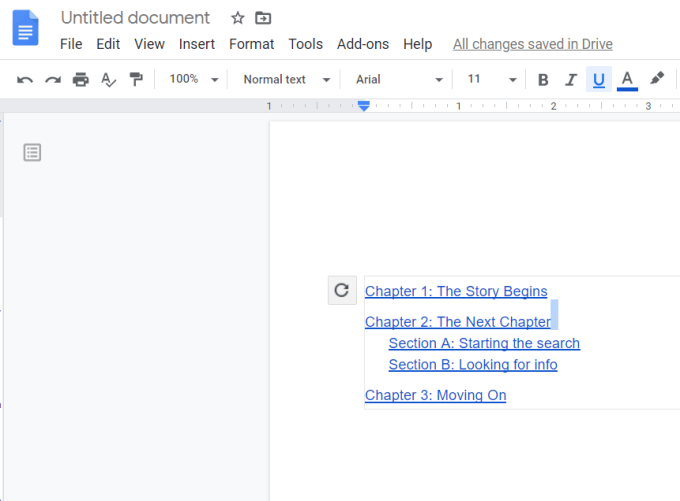
Once you choose an option, the Google Docs table of contents will appear in the document itself.
Google Docs Table of Contents Updates
As you can see, the table of contents formats itself according to how you’ve structured your document.
Top level headers (whether you start with H1 or H2) are flush with the left margin. Next level headers will be indented, and so on.
One thing you may notice as you start writing your document is that if you update any existing headers or add any new ones, the table of contents won’t update automatically.
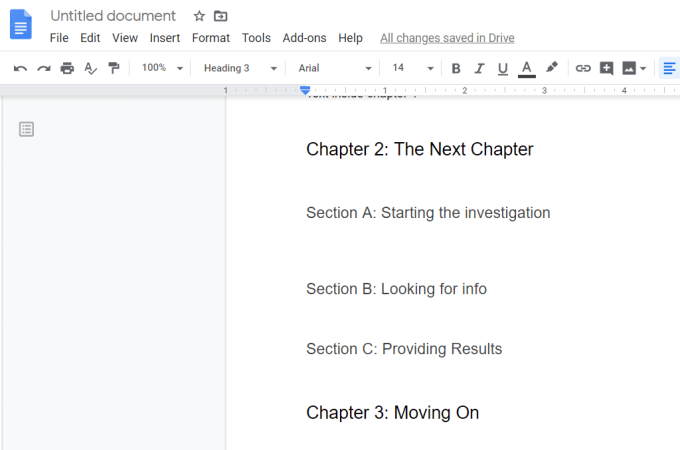
To update your table of contents, you need to scroll back up to the section where you inserted it and click in the table of contents area. You’ll see a circular arrow (refresh button) appear on the upper left corner of the TOC.
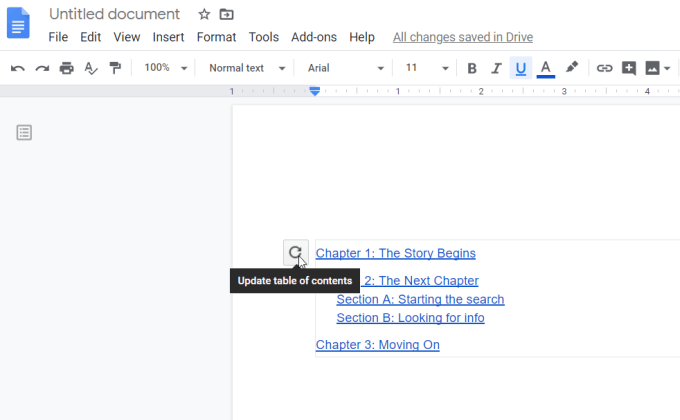
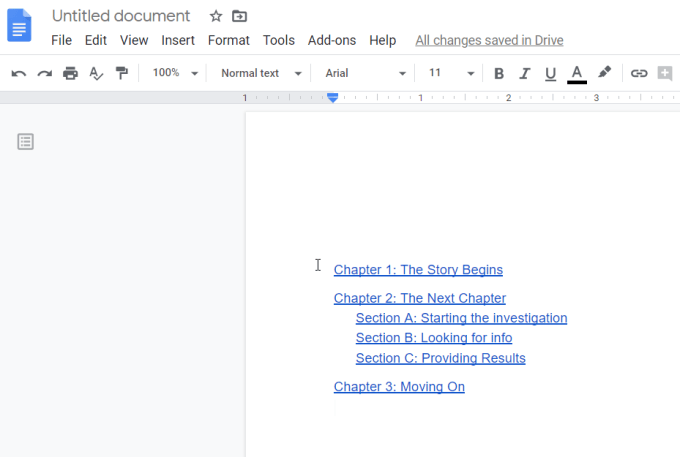
When you select this refresh icon, you’ll see the table of contents update to incorporate all of the changes you’ve made to the document.
An alternative to using the refresh icon is right-clicking on the table of contents and selecting Update table of contents from the pop-up menu.
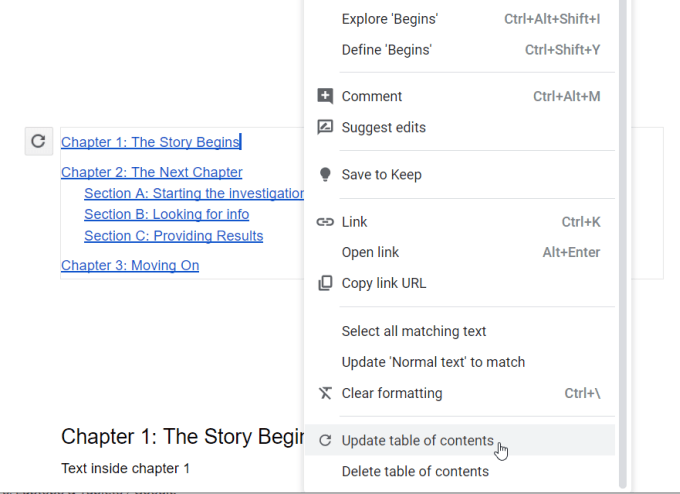
Either method makes your TOC match the current structure of your working document.
Alternatively, you can view the document outline (which looks just like your Google Docs table of contents) in the left sidebar. To do this, just select the Show document outline icon at the upper left corner of the document.
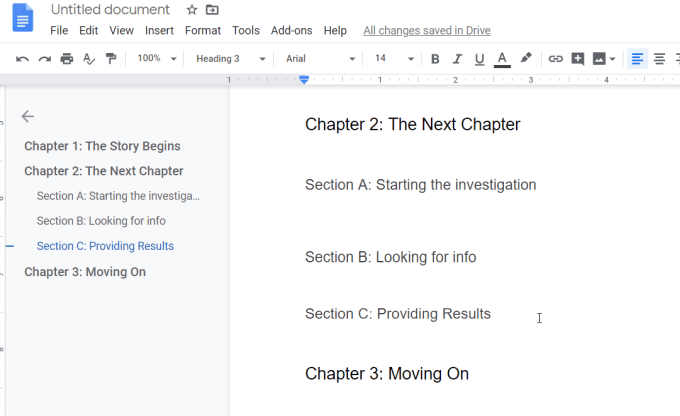
This will display the document outline on the left even as you’re scrolling through your document. You can select any section (header) in this outline to jump to that section of the document.
Formatting Google Docs Table of Contents
While the Google Docs TOC is inserted using the standard text format of your document, you can update it if you want to.
Just highlight the entire table of contents, then select Format from the menu, select Text, and select Size.
From the submenu, you can choose to either select Increase font size or Decrease font size.
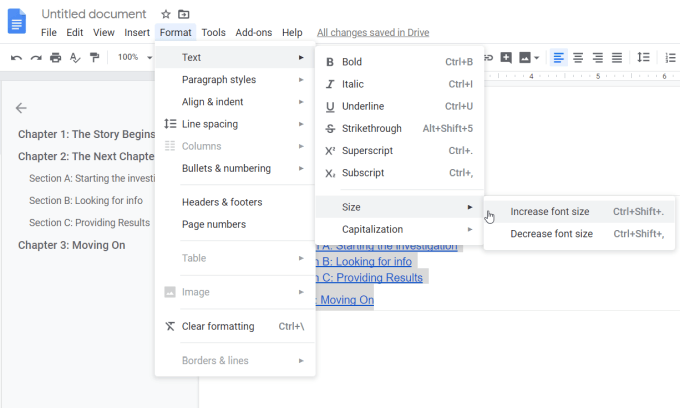
This will update the entire TOC to the new formatting setting you’ve selected.
The Search & Navigate Add-On
Another way to navigate your document using headers (but also bookmarks, phrases, and more) is through the Search & Navigate Google Docs addon.
Once you’ve installed the addon, select Add-ons from the menu, select Search & Navigate, and select Start.
This launches a panel on the right that you can use to navigate through your document using the same headers that are in your table of contents.
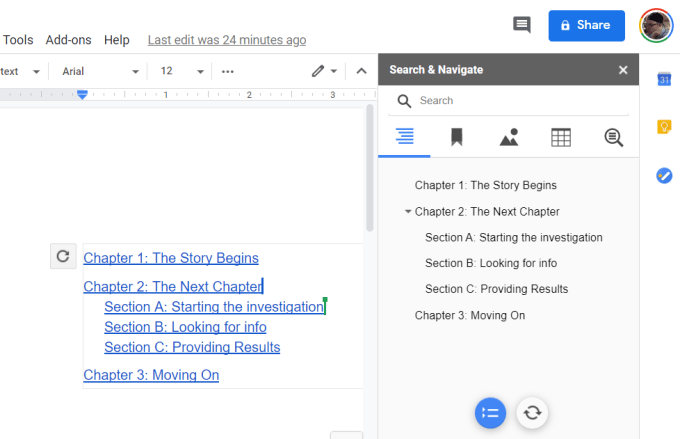
The reason this is a bit more useful than the regular TOC navigation panel is that there are other search features available.
- Bookmarks: Find any bookmarks you’ve created throughout your document.
- Images: Browse all images that you’ve included in the document.
- Tables: Scroll through all of the tables you’ve added.
- Search: Search your entire document using any search terms or phrases.
In Settings, you can enable the add-on to auto-start any time the document is opened. You can also enable the Case sensitive search feature.
Using a Table Of Contents
Not all documents you write will need a table of contents. But if you frequently write academic papers or similar documents and use a table of contents, Google Docs can fill the need. It’s also easy and quick to use in any document you create.


