Share with family, friends, and strangers
Did you know that Facebook gets 4,000 photo uploads every second? The social media platform has more than a billion users worldwide, and that number is expected to go up by 690 million in 2020. That’s an overwhelming number of photos being uploaded every day.
If you have a collection of photos uploaded over the years, depending on when you first joined the platform, Facebook lets you move photos into photo albums to organize them. You can then share them with your family and friends, and preserve memories.

We’re going to show you how to move photos around on Facebook so you can organize your collection to make it easier for you to manage, retrieve and share your collection.
How To Create a Photo Album In Facebook
A photo album on Facebook works like the usual photo albums that you insert photographs, pictures or stamps, except it’s a virtual photo book. Plus, you can share it with as many people as you want by tagging them on the album itself, or different photos you’d like them to see.
If you haven’t set your profile’s privacy settings to private, your friends and followers can browse your photo albums whenever they visit your page.

However, adding and managing photos on Facebook isn’t always easy, because they tend to change the user interface rather frequently.
Just when you’re familiar with doing simple things like adding a profile photo or organizing your photo albums, new size requirements are added or they change the interface altogether.
In Facebook, before you can move photos to a different album, you’ll need to create the albums.
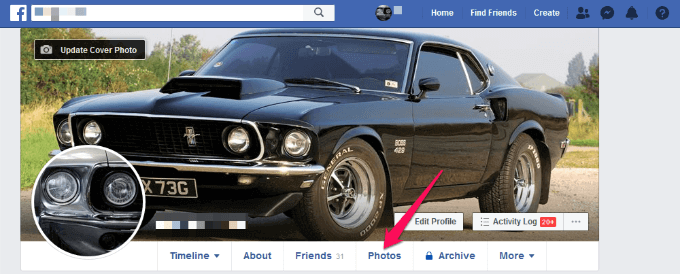
- To do this, go to your News Feed and click on your name in the upper left side of the screen, to open your profile.

- Next, click Photos.
- Click +Create Album.

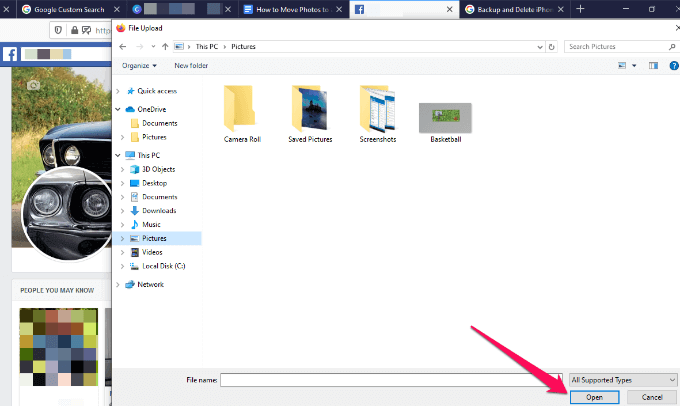
- Choose the photos or videos you want to add to your album, and then click Open.
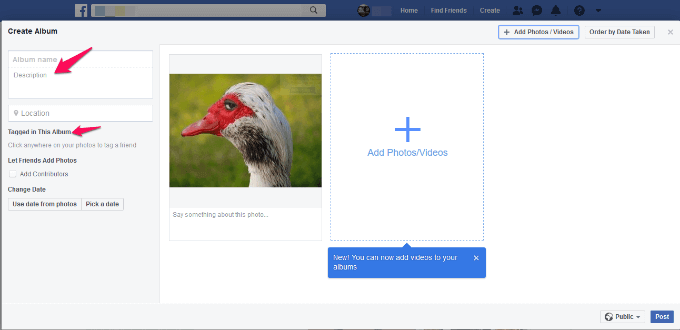
- Give the album a title, description or location. You can also tag your friends or family, add contributors, and choose who can view the photos in the album. For example, you can choose either Friends, Public and so on.
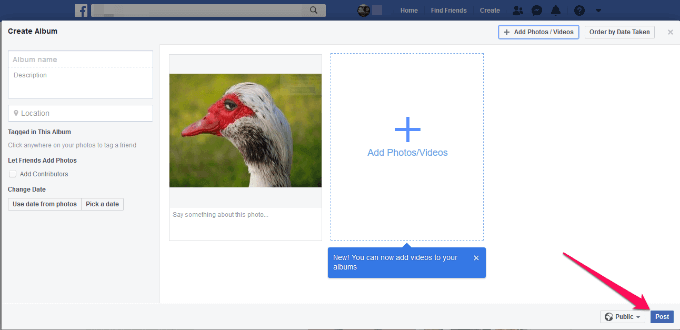
- Click Post to create the album. If you want, you can change your album covers to make them look fun and interesting.
Note: If you create multiple albums, you can move more than just photos. Facebook now allows you to move videos, text posts, check-ins, and more. You can also follow friend’s albums and get alerts when they’re updated, plus you can highlight your favorite collections by displaying featured albums on your profile.
Create a Photo Album Using The Facebook App
- If you’re using Facebook from your smartphone or tablet to create a photo album via the Facebook app, tap on the menu (three horizontal lines) at the top right side of the screen.
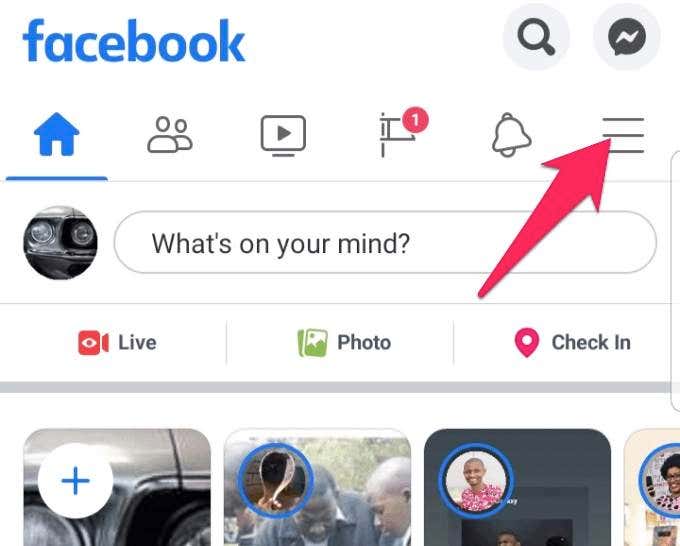
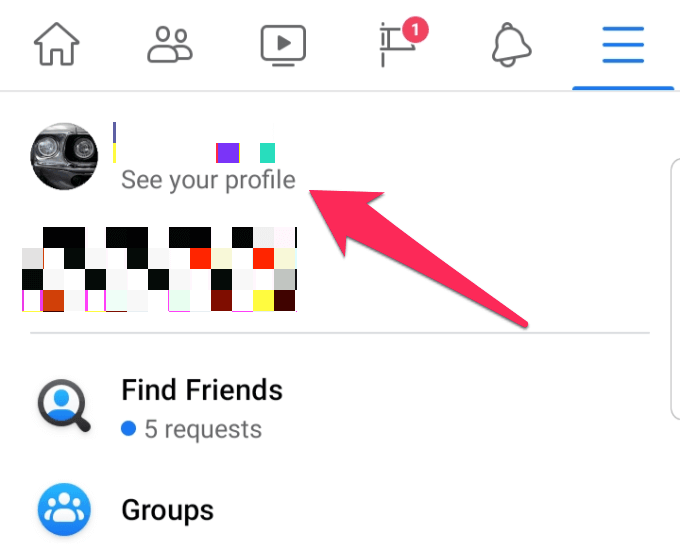
- Tap your profile name to open your profile page.
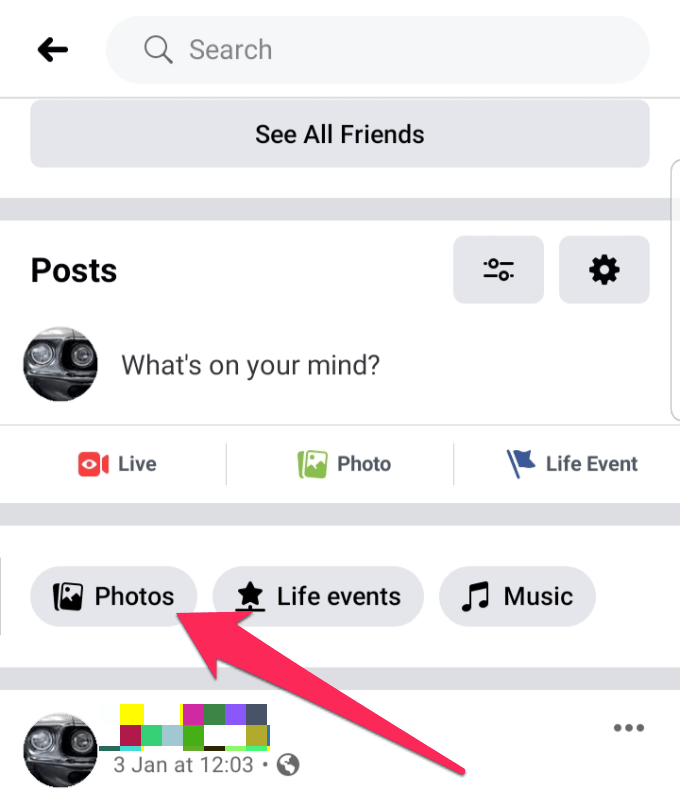
- Tap Photos, choose a photo and tap Done.
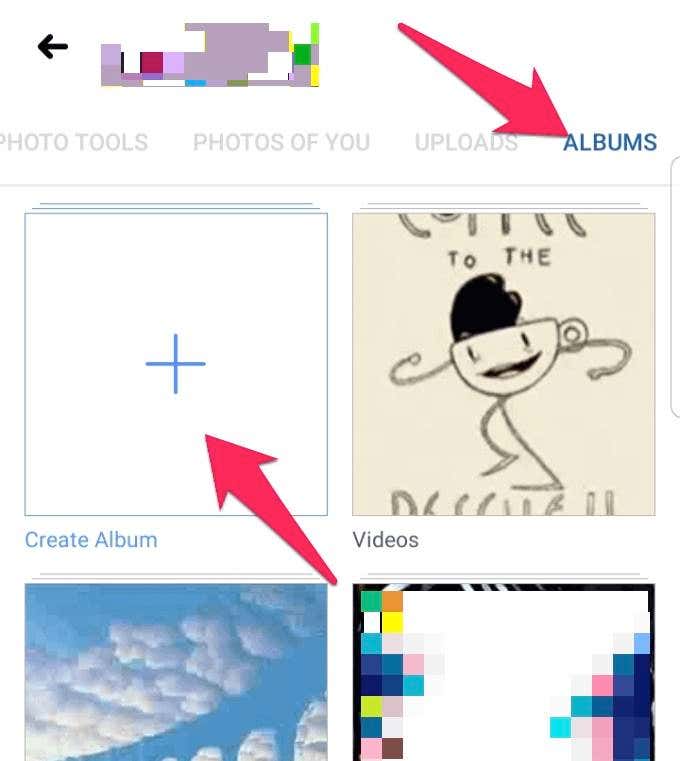
- Tap Album and then tap Create Album. Name the album and give it a description.
- If you want your album to have restricted access or available to the public, tap to choose privacy settings, and then tap Create.
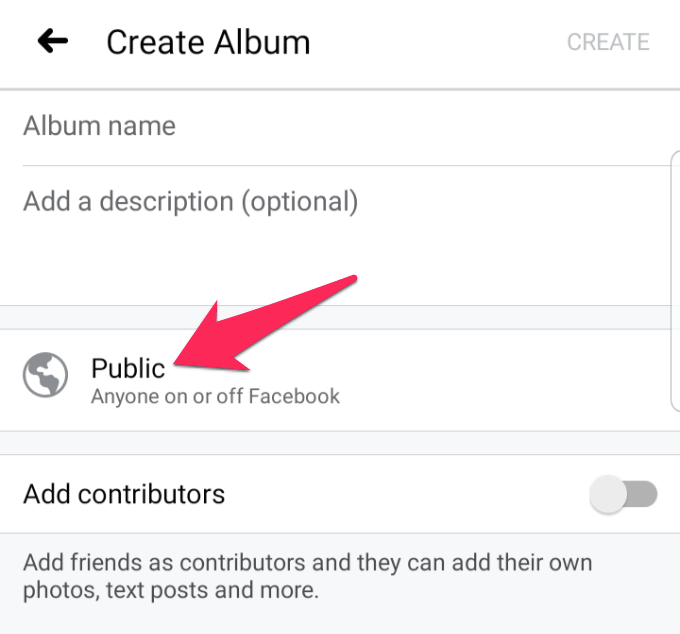
- If you want others to contribute to your album, toggle the Contributors switch and pick the names from your Friends list. Tap Done.
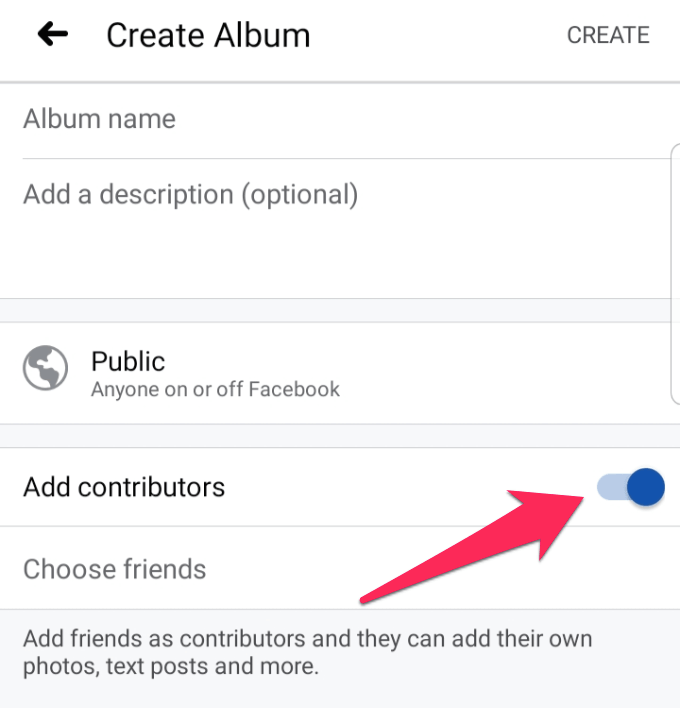
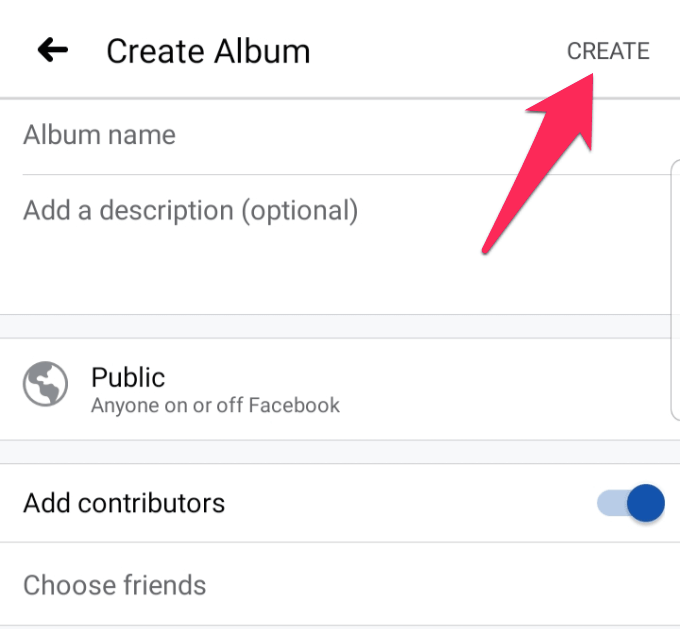
- Once you’re done, tap Create and your new album is ready.
Creating a Shared Album
A shared album on Facebook allows you and your family or friends to contribute photos and other media to albums, so you don’t have multiple albums for the same thing.
For example, if you have photos from your last prom, and your friends also have photos to share, you can put them all in a shared album and get notifications when it’s updated.
- To create a shared album, go to an album, and in the upper left side, find and click Add Contributor.
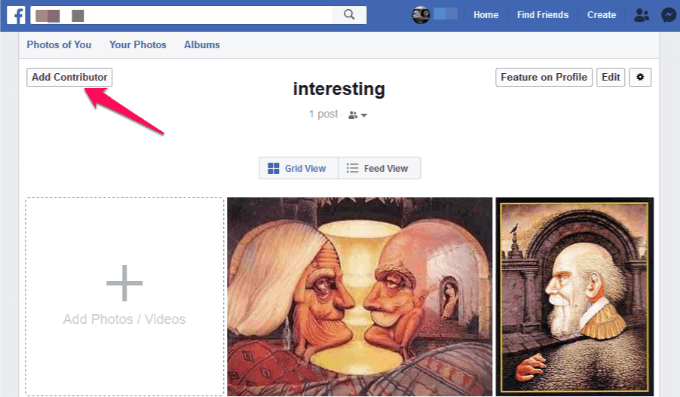
- Type the names of the contributors you want added to the album, and then choose an audience. The audience can be Album contributors only, Friends of Album contributors, or Public.
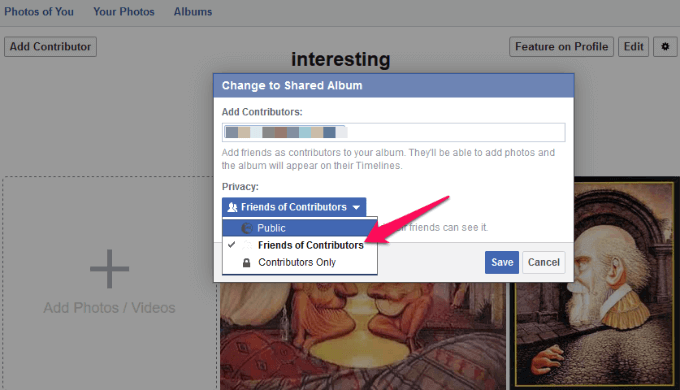
- Click Save.
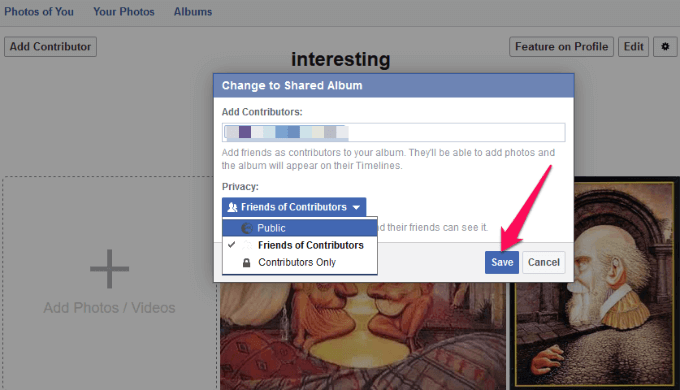
- Once you add contributors to the album, they’re free to add other contributors, tag photos, add photos or videos, and even edit the album.
Note: Contributors to a shared album can only delete or edit the photos or videos they upload. The album owner has deletion rights to all the content in the shared album. If you remove a contributor from the album, he or she can go to their activity log to delete the photos they added.
Facebook: Move Photos To Album
Now that you have your albums ready, it’s time to move your photos between albums.
- To do this, go to your timeline and click Photos under your cover photo.
- Click the photo album that holds the photo/photos you’d like to move to a different album. A new page will open showing all the photos on that album. Move your cursor over a photo or click Edit at the top right side (you can click the pencil icon if you prefer).
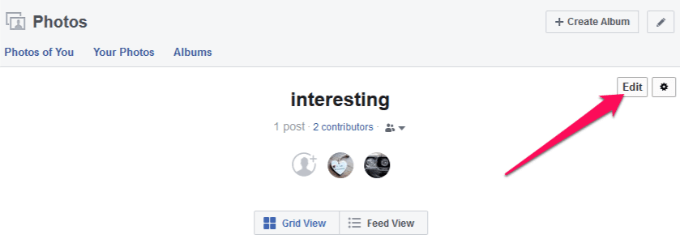
Note: Cover photos and profile photo albums don’t have the option to edit.
- Mouse over the photo and click on the arrow at the top right side. Click Move to Other Album.
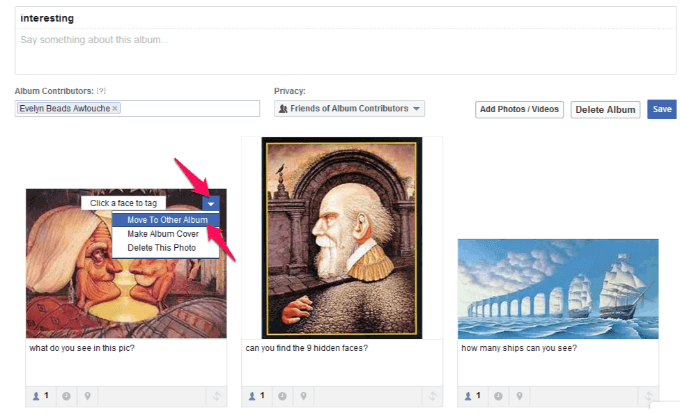
Note: If the photo you want to move in Facebook is part of a post, you’ll get a notification popup.
- Under the photo you want to move, click the drop-down list, and select the destination album.
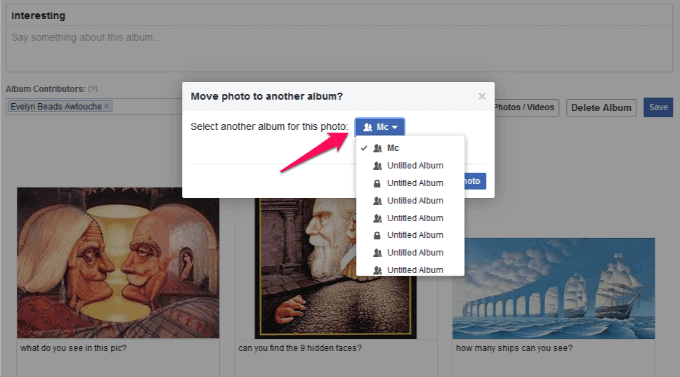
- Click Move Photo. Your photo/photos have been moved, but you’ll still be on the original album’s page. If you want to see the photo, click the Albums link, and click the album that holds the photo you just moved.
Note: You can’t move photos and videos between Facebook albums from your smartphone or tablet.
Facebook: Delete a Photo Album
Not all photo albums on Facebook can be deleted, for example Profile Photos, but you can delete any photos in such albums.
- For other albums though, you can delete them by going to your Facebook profile page, and clicking Photos. Click Albums and click on the photo album you’d like to delete.

- Click the gear icon at the upper right side and then click Delete Album.
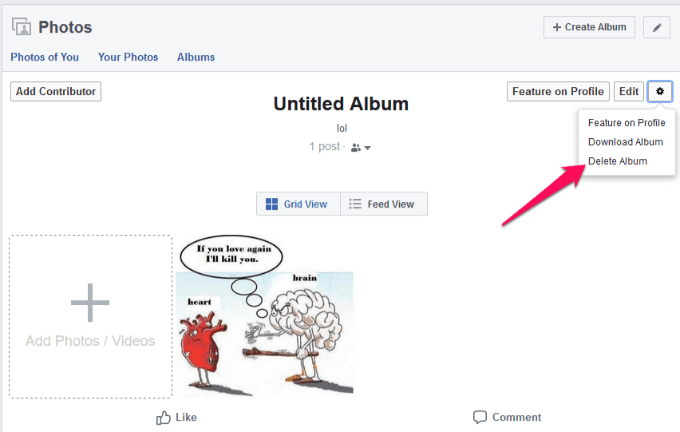
- Click again to confirm the action.


