Lets you work from your poolside cabana
Wouldn’t it be great to log on to a computer from anywhere? Imagine accessing your Windows computer from any Windows, Mac, Android, or iOS device. That’s the point of Windows Remote Desktop.
This tutorial will show you how to use Remote Desktop in Windows 11. You should also find instructions if your PC still runs Windows 10.
Remote Desktop Requirements
To use Remote Desktop in Windows 11 or 10, you must meet the following requirements:
- The target computer (host) must have the Pro or Enterprise editions of Windows 11. If you’re on the Windows 11 Home edition, you can’t use Remote Desktop. The same applies for Windows 10.
- Remote Desktop must be enabled on the host computer.
- The local device (client) must have the Remote Desktop App installed. It’s free from the Microsoft Store, Google Play Store, and App Store for iPhone and Mac.
- If you have an older version of Windows or a Windows IoT Enterprise client, download and install the Remote Desktop client for your system type. It’s available for Windows 64-bit, Windows 32-bit, and Windows ARM64 from the Microsoft website.
Enable Remote Desktop in Windows
You must enable Remote Desktop in Windows 11 or 10 before using it. To do that:
- Go to Start > Settings > System > Remote Desktop.
- Set the Enable Remote Desktop switch to the On position.
- Select Confirm to continue.

- Make a note of your computer’s name next to PC name—in Windows 10, you should find the name under the How to connect to this PC section. You’ll need it when you try to connect from the client device later.
- To see who can connect to the host, select the Select users that can remotely access this PC option—it’s located under the User Accounts section in Windows 10.
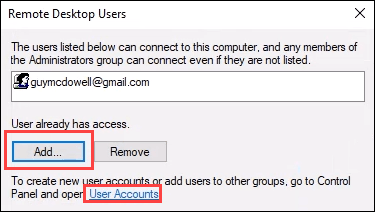
- The Remote Desktop Users window opens. Administrators and anyone listed here can connect to the computer. To add users, select the Add button. You can only add people who have accounts on the host. However, you can create and add new user accounts by selecting the User Accounts link in the window.
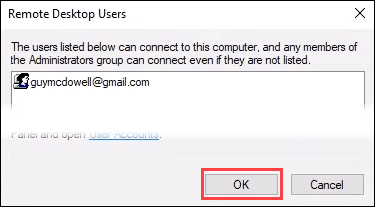
- Once you’ve set all the accounts needing Remote Desktop access, select OK to close the window. This enables Remote Desktop access for those people.
Use the Remote Desktop App to Access Your Windows PC
The steps for using the Remote Desktop app are very similar when connecting from a Windows PC, Mac, Android, or iOS device, so we’ll just cover connecting from Windows 11 or 10.
- Install the Remote Desktop app using one of the links listed under the Requirements section of this tutorial—e.g., in Windows, grab it from the Microsoft Store.
- Open the Remote Desktop app, select the Add button, then select PCs. You could add a Windows Workspace, too.

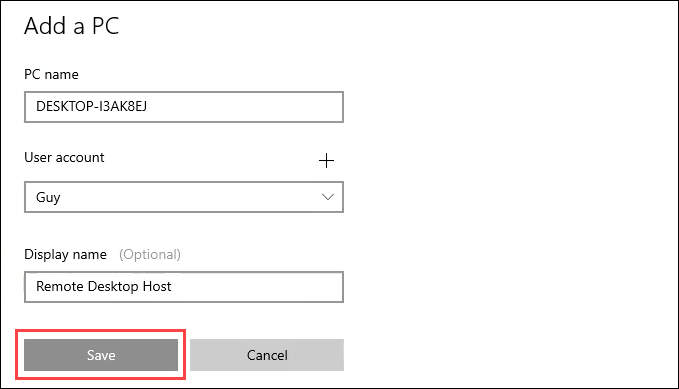
- In PC name, enter the name of the host computer to which you’re connecting. Then, select the User account you want to use. You may need to add it by selecting the + sign and following the prompts. Next, add a Display name. If you create several connections, this will help you tell them apart. Select Save.
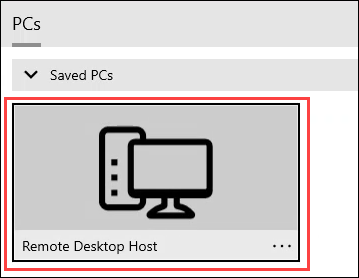
- Select the PC you just created.
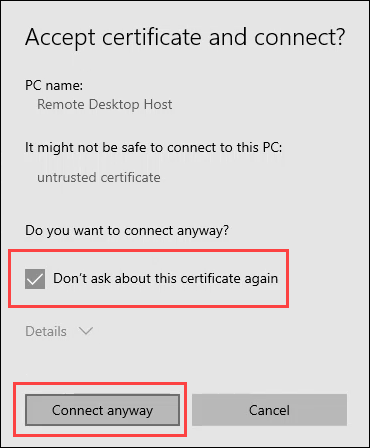
- There may be a security certificate issue. If you’re on your own computers, this isn’t as important as when connecting to unknown computers. Choose what to do accordingly. For this example, select Don’t ask about this certificate again and then Connect anyway.
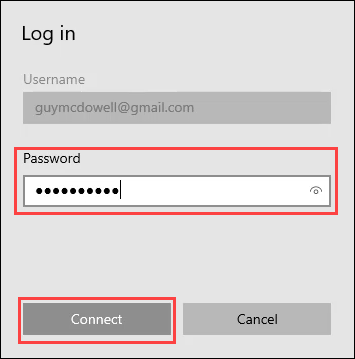
- Enter the Password for the account you’re using and select Connect.
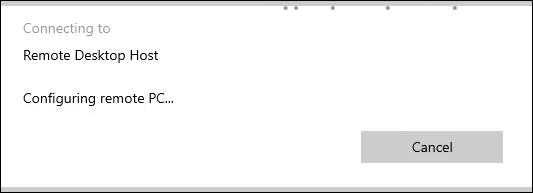
- It will take a few minutes to connect the first time. Be patient.
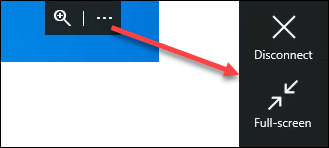
- Once you’re connected to the host, you’ll see a black tab near the top-middle of the screen. Selecting the More icon (three dots) will allow you to Disconnect or make the connection Full-screen.
Use Remote Desktop Connection to Access Windows Computers
If you used Remote Desktop on Windows Vista, 7, or 8.1, Remote Desktop Connection is the program you’ll recall using. If the newer Remote Desktop App doesn’t work for you, give the old client a try. It’s still present in Windows 11 and 10.
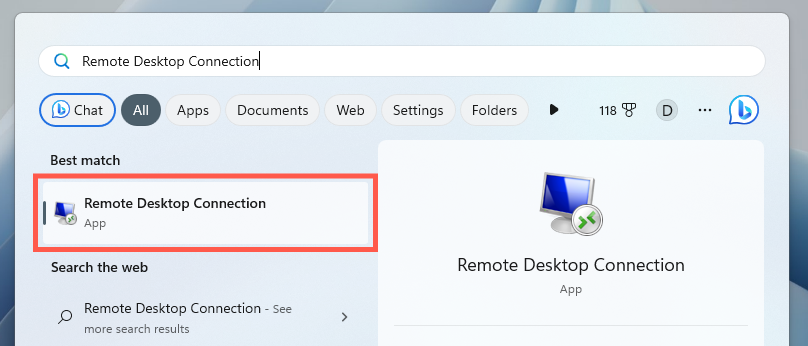
- Open the Remote Desktop Client. In the Start menu, it looks like the image below.
- Select Show Options to access all available Remote Desktop settings.
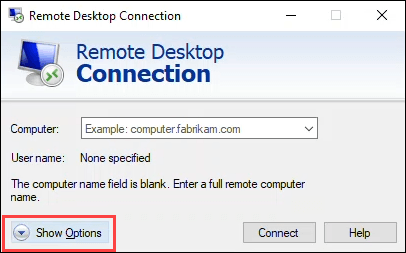
- You’ll see the General, Display, Local Resources, Experience, and Advanced tabs. Each of them offers several settings to customize your remote desktop connection. We’ll focus on the General tab. The default settings in the other tabs will usually be fine.
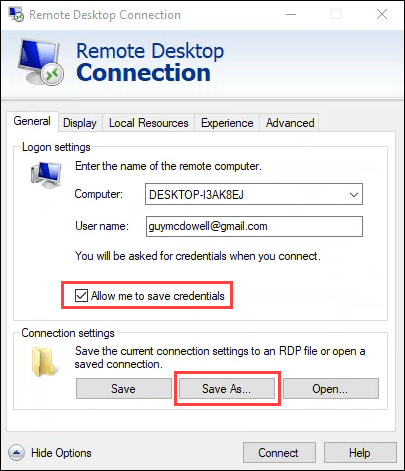
Enter the name and username of the host computer into the Computer and User name fields. To make connecting easier, you can check the Allow me to save credentials (optional). Then, select Save as to create a shortcut to connect more easily. Follow the prompts to save the connection.
- Select Connect to connect to the host.
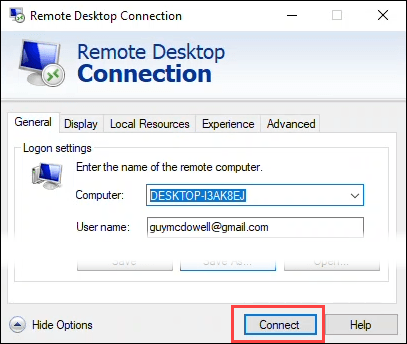
- It may ask you if you trust this remote connection. If you’re on your own computers, this isn’t as important as when connecting to unknown computers. Choose what to do accordingly. For this example, select Don’t ask me again for connections to this computer and then Connect. Note that you can copy and paste between your client computer and the host by checking Clipboard.
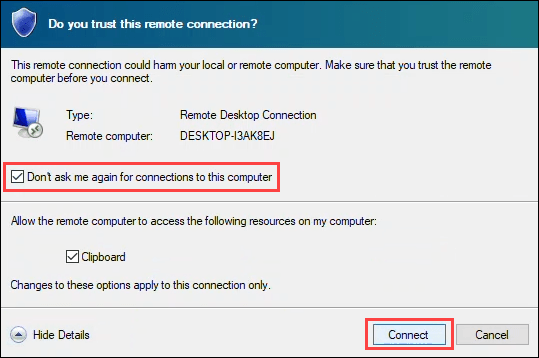
- The connection may take a minute for the first time connecting.

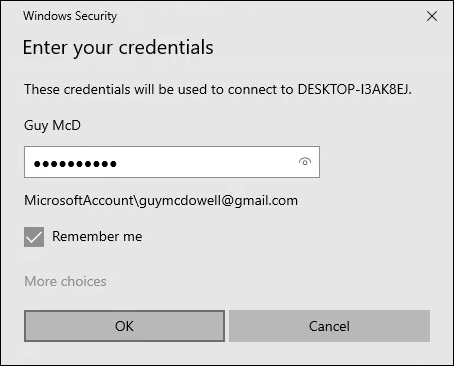
- Enter your password into the Enter your credentials window. Make sure the Remember me box is checked. Select OK, and you’ll be connected to the host computer.
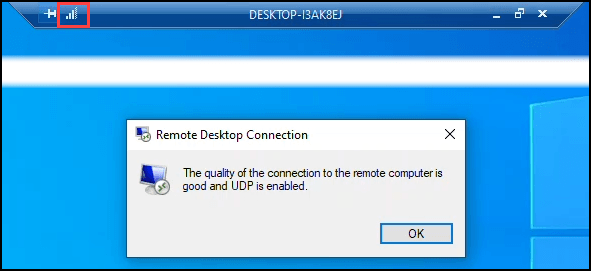
- Note the blue bar near the top-center of the window. Select the signal bars icon to check the quality of your connection. This step is optional but can be handy for troubleshooting network performance issues. To leave the session, log out of Windows on the host.
What Can I Do With a Remote Desktop Connection?
A remote connection can be a handy way to access your Windows 11 or 10 PC to get files or to help friends and family with computer problems. Really, anything you can do on your local computer, you can do via Remote Desktop.


