What do you do when your USB drive is not showing up after plugging it in? USB is an extensively adopted technology that allows you to plug lots of devices into your Windows PC every day. However, sometimes it’s not all plug and play.
Why Your USB Drive Is Not Showing Up
Your USB flash drive or thumb drive not showing up can be caused by several things.
- Damaged or dead USB flash drive
- Outdated software and drivers
- Partition issues or invalid file system
- Device conflicts
- Damaged USB port or faulty cables
We’ve rounded up some effective solutions if you’re experiencing USB connection issues. Most of these fixes also apply to different USB devices such as disk drives, mice, video game controllers, and more.
Also, check out our short YouTube video where we go through some of the solutions down below. If you’re getting a USB Device not Recognized error, we have a solution for that too.
How To Fix a Plugged-In USB Drive Not Showing Up
If your USB device isn’t detected, it’s best to rule out the most likely causes. Start with these quick fixes below before moving on to the more complicated troubleshooting steps further below. These fixes should work for both Windows PCs and Macs.
Step 1: Try the Easy Fixes
- Disconnect and reconnect the USB drive. Sometimes, a USB drive won’t get detected the first time, so try reconnecting the drive to see if your computer picks it up the second time.
- Check that your USB device is on. When you connect your USB stick to your computer, it should turn on automatically with flashing lights on the unit indicating activity. Some units have a dedicated power cable, or physical power button that you have to turn on manually, for your computer to detect it.
- Examine USB stick for damage. It’s possible that the flash drive could have been damaged without your knowledge, so check it physically for cracks or broken pieces to rule out this issue.
- Restart your computer. This may be an old tech support standby, but it fixes a lot of issues, especially those caused by software glitches. Unplug the USB stick, shut down your computer, and unplug it from the power source. Wait up to one minute before restarting your computer and trying the flash drive again.
- Are the drivers installed? Your USB stick may require manufacturer drivers to work. Read the manual and make sure that you’ve initially installed the required drivers before trying to use the drive.
- Try the USB drive on another port or computer. Rule out that the USB port itself is the issue by trying the USB drive in another port, or on another computer.
Step 2: Check For Device Compatibility
If your USB stick isn’t meant to work with your computer, then it won’t show up when you plug it in. In Windows, most USB 3 devices can connect to USB 2 ports.
However, with advances in technology, a USB 3 device may require a more powerful and compatible port to work. Check your computer’s instruction manual for compatibility information to make sure you’re plugging the USB drive into the correct port.
Step 3: Update Your Operating System
If you’re using Windows, updating the operating system includes important files that support different hardware and devices, plus fixes to any errors you may encounter.
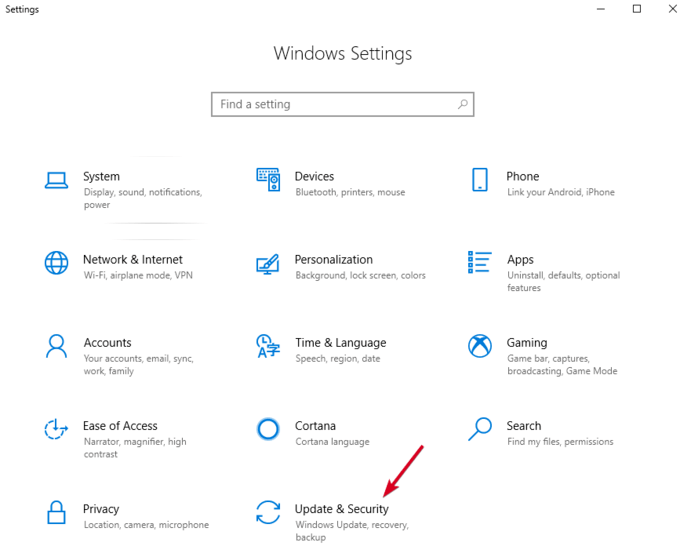
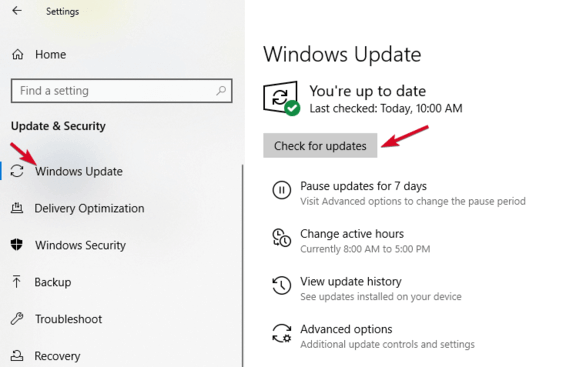
- Open Settings > Update & Security.


2. Click Check for Updates. If there are any pending updates, download and restart your computer before trying your USB stick again.

Step 4: Use Disk Management Tool
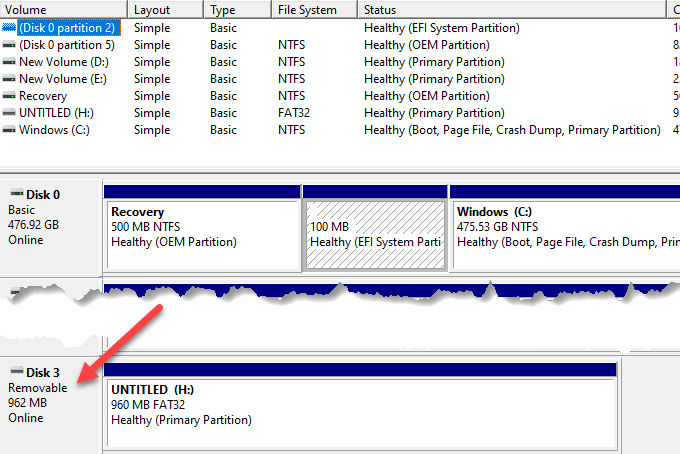
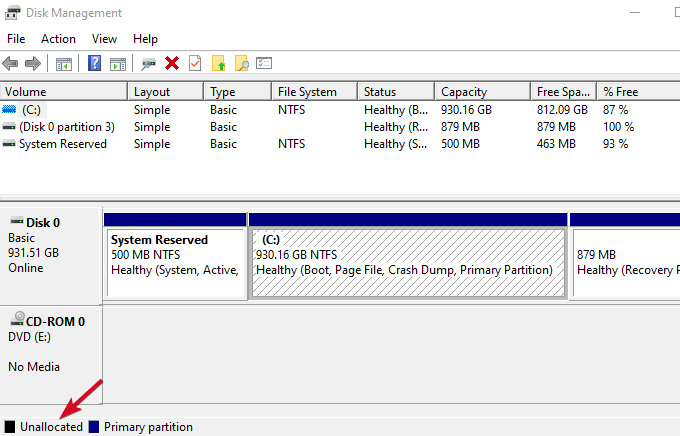
The Disk Management tool checks whether Windows will detect your USB stick. It also shows you all the hard disks connected to your PC, and you can review information like partitions, sizes, and more.
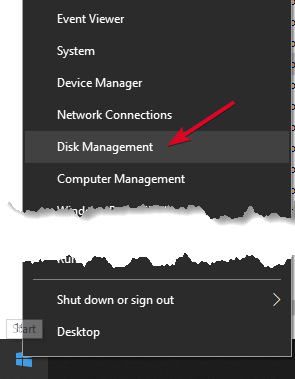
- Plug in your USB stick and right-click Start > Disk Management.
- Check for your USB stick under primary or secondary disks. If it doesn’t contain partitions, it’ll appear as Removable.

3. If you see it in the Disk Management utility, you can create a new volume and assign a drive letter. This way, you can partition or format the flash drive to make it easily detectable by other devices, including your PC.
4. If your USB drive is not showing up, it could be a driver or hardware issue, or the drive is dead.

Step 5: Try Plugging Into a Different Computer Or USB Port
Unplug the USB stick from the current port, and plug it into a different computer and/or USB port. If it works on the new USB port or computer, the USB port may be damaged or dead, or the computer itself may have a problem.
A faulty, damaged, or dead USB port presents problems such as failure to detect USB drives or display error messages. Check if the port is clean, dust-free, and firm. If it’s moving up and down or feels loose, then it’s faulty/damaged.
If you’re using a USB hub, unplug the stick from the hub and plug it directly into your computer. Some hubs have insufficient power for external drives to function, which may be the case with yours.
If the USB drive isn’t showing up even after trying a different port, computer, or checking in Disk Management, the drive is probably dead and needs to be replaced.
Step 6: Troubleshoot Drivers with Device Manager
You can troubleshoot driver issues using Device Manager, especially if your USB stick is detected by a computer other than the one you’re using, signaling a driver problem.
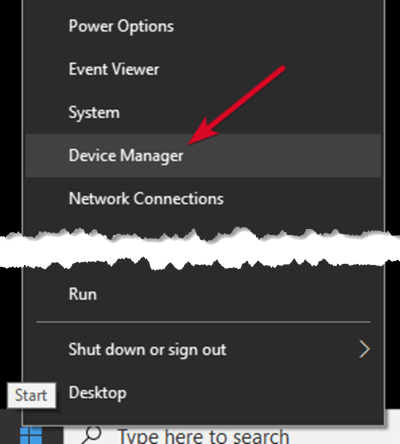
- Right-click Start>Device Manager.

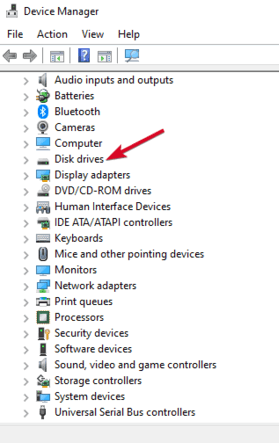
2. Expand Disk drives and check for a yellow exclamation point next to any of the listed devices. If there’s one or more with this mark, then the device(s) has a driver issue.

3. Right-click on the problematic device and select Properties to see the related error message. You can search for the error online to find a solution to the problem
You can also try the following solutions to resolve driver issues:
- Roll back the driver to revert to recent driver updates and restore the device back to a time when it was functioning properly.
- Download drivers from the device manufacturer’s site from the downloads page, support page, or by searching on the site for the right driver.
- Update the driver by right-clicking on the driver in Device Manager, selecting Update driver and following the prompts.
- Uninstall the device from your computer, restart it, and wait for it to reinstall the right driver and configurations.
Step 7: Reinstall Device Driver Software
Your USB drives may require specific manufacturer software installed to function properly. These drives usually come with the software included in the packaging or a link provided to the site where you can download the software. Locate and install the manufacturer’s driver software and then test the USB drive again. If you have already installed the software, uninstall it and then make sure to reinstall the latest version again.
Step 8: Use Device Manager To Scan For Hardware Changes
- Right-click Start and select Device Manager.
- Click Action > Scan for hardware changes.

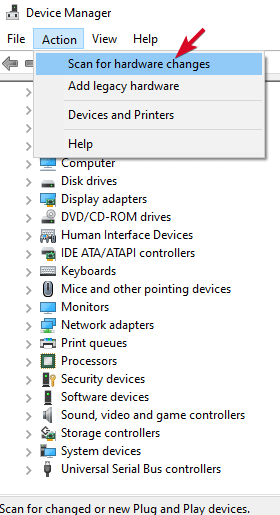
Windows will try to find your USB stick so you can access it again.
Step 9: Reinstall USB Controllers
This method will repair a USB driver that is unstable or corrupted.
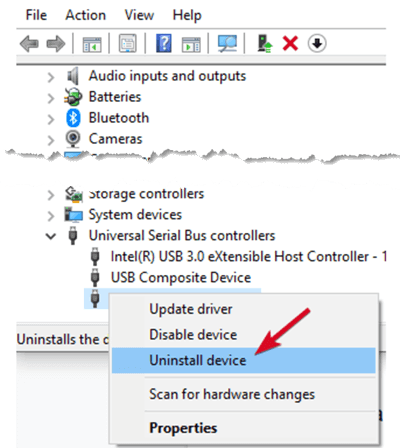
- Right-click Start>Device Manager and click on the Universal Serial Bus controllers to expand the list.


2. Right-click your device, click Uninstall, and then restart your computer to reinstall the controllers automatically.

Step 10: Create a New Drive Volume & Assign a Drive Letter
If your device appeared in the Disk Management step, you can create a new drive volume and assign a drive letter. The Disk Management tool fixes partitioning and file system problems with different drives.
However, your USB stick may show only Unallocated space, in which case you’ll have to create a new partition so that Windows and other operating systems can use it.
- Right-click Start>Disk Management, right-click on the Unallocated space>New Simple Volume and follow the prompts to create a partition.

If you still can’t see your flash drive, yet it’s partitioned, make sure it has a drive letter. This should be automatic, but you may need to assign it manually.
2. Right-click the drive’s partition and click Change Drive Letter and Paths.

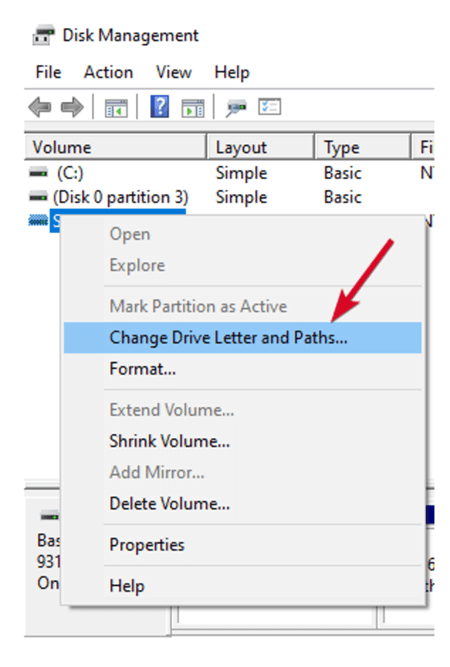
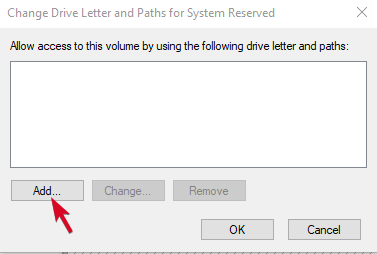
3. If it doesn’t have an assigned drive letter, click Add and pick a letter. If it already has a letter, click Change and choose a different one.

Step 11: Disable USB Selective Suspend Feature
This is a power-saving setting that helps reduce battery use by cutting power to your USB stick when it’s plugged in. To ensure your drive isn’t powering down for any reason, disable this feature so that power management settings don’t override the USB controller.
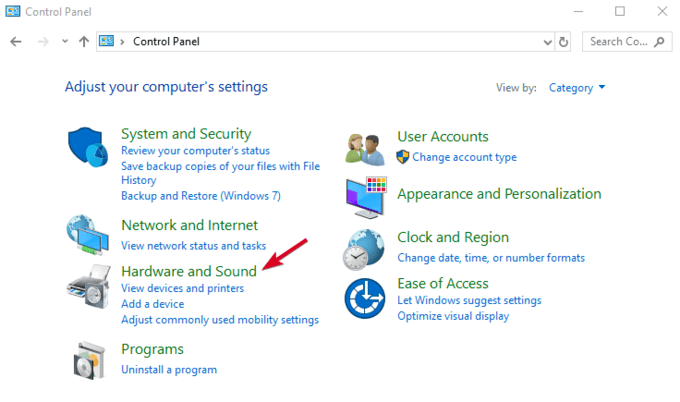
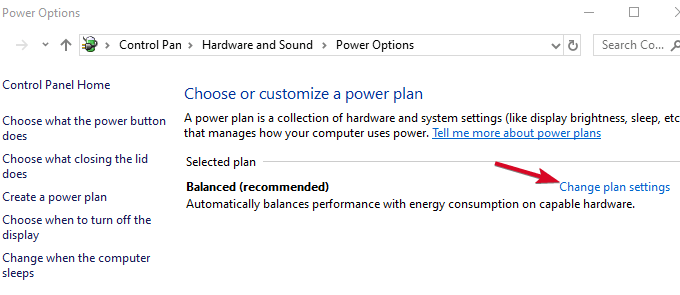
- Click Start>Control Panel and select Hardware and Sound.

2. Click Power Options>Change plan settings.

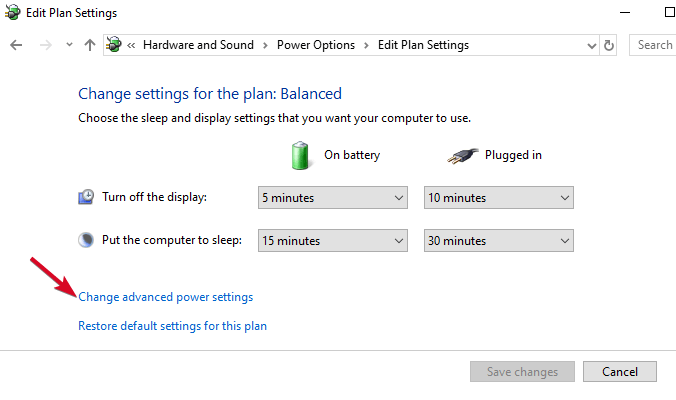
3. Click Change advanced power settings.

4. Go to USB settings and expand it.
5. Select USB selecting suspend settings and change the Plugged in drop-down menu to Disabled (Note: If you’re using a laptop, select On battery and change to Disabled in the drop-down menu).

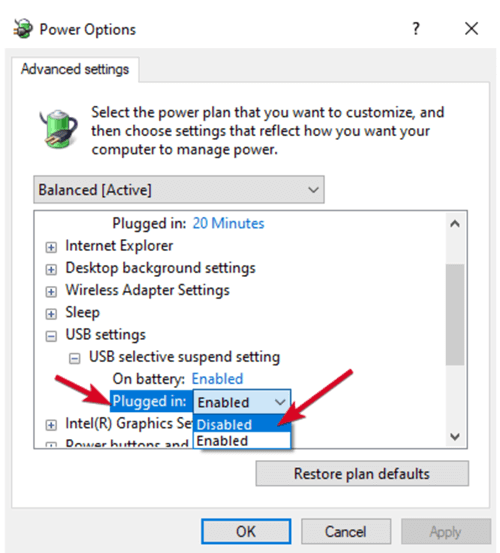
6. Select Apply>OK and restart your computer to effect the changes.
If all else fails, you can replace your USB stick as a last resort. Otherwise, we hope this guide has helped ease the process, and you now know what to do when your USB drive isn’t showing up when you plug it in.