In a previous article, we detailed how to use the tar command to create archives. While tar is a very common compression scheme for Linux, it isn’t nearly as popular for Windows and Mac OS X users, who will find most of their archives created using the zip format.
It’s easy to use Zip (to create) and Unzip (to expand) archives in Linux. In fact, most GUI archive management programs (such as Ark, File Roller and Xarchiver), will act as a frontend to pretty much any command line archiving program you have on your computer, and Zip is no exception. Of course, we can also use Zip from the Terminal. Here’s how.
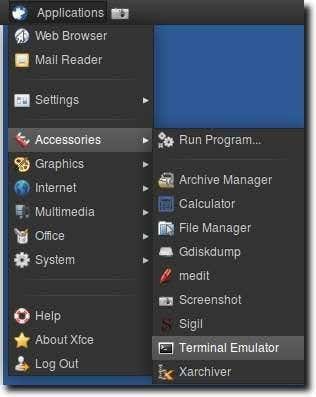
The first step, as you might guess, is to open the Terminal.
Next, type “sudo apt-get install zip unzip” (without the quotes), just to make sure we have zip and unzip installed.
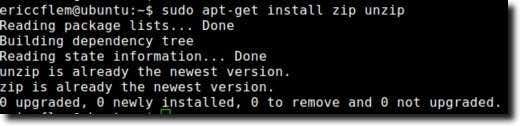
Note: if those two programs are already installed, you’ll receive a message stating this to be the case, as shown above.
Once installed, we can use zip to create archives (or modify existing ones), and unzip to expand them to their originals. For the sake of this article, we’ll create a new folder on our Desktop, called Stuff. In the Terminal, we can do so with a single command – mkdir /home/username/Desktop/Stuff (of course, you’ll replace “username” with your own username, as shown below, and if you already have a Stuff folder on your Desktop, you’ll want to change the name).
![]()
Now that we have a Stuff folder, we’ll use the ‘cd’ command to make the Stuff folder our current working directory.
cd /home/username/Desktop/Stuff
Now, type touch doc1.txt doc2.txt doc3.txt && mkdir Files into your Terminal, which will create a folder called Files, as well as three documents – doc1.txt, doc2.txt and doc3.txt – inside the Stuff folder.
![]()
One more command, to ‘cd’ into the newly-created Files folder (cd Files), because we’ll want some other documents inside that.
cd Files
Finally, type touch doc4.txt doc5.txt doc6.txt in order to create three new documents.
![]()
Now, type cd ../.. to change the Desktop back to the working directory.
![]()
Our next-to-last step before creating a zip file is to create a couple “extra” documents on the Desktop with the same names as files we just created, so type touch doc2.txt doc3.txt to create them.
![]()
Finally, open each of the two “extra” text files and add some text to them. It doesn’t need to be anything meaningful (or long), just so we can see that these documents are indeed different from the ones already created inside the Stuff and files folders.
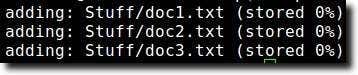
Once that’s done, we can start creating our zip files. The simplest way to use zip is to tell it the name of the zip archive you want to create, then explicitly name each and every file that should go into it. So, assuming our working directory is the Desktop, we would type zip test Stuff/doc1.txt Stuff/doc2.txt Stuff/doc3.txt to create an archive called test.zip (we don’t need to use the “.zip” extension in the command, as it will be added automatically), which would contain doc1.txt, doc2.txt and doc3.txt as found inside the Stuff folder.
![]()
You’ll see a bit of output, which informs us that three documents (doc1.txt, doc2.txt and doc3.txt) have been added to the archive.
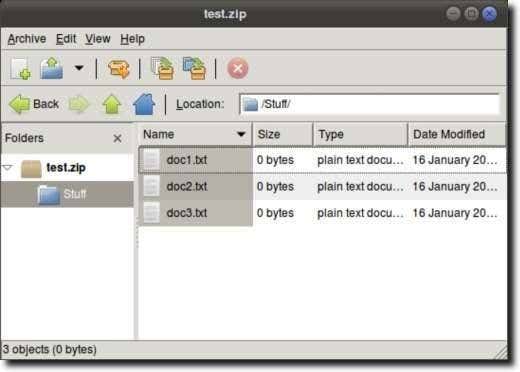
We can test this by double clicking the archive, which should be sitting on our Desktop. Doing so should open it up in the standard archive program (Ark in KDE, File Roller in GNOME and Xarchiver in Xfce).
Now, what about the Files folder? Assuming we want it, add the documents inside it, into our archive as well, we could use the same command as above, but add Stuff/Files/* to the end of the command.
![]()
The asterisk means to include everything inside the folder. So if there had been another folder inside the Files folder, it would have been added as well. However, if that folder had items inside of it, they will not be included. To do that, we would need to add -r (which stands for recursive or recursively).
![]()
It should be noted that the above two commands aren’t designed to “add” files to a zip archive; they’re designed to create one. However, since the archive already exists, the command simply adds any new files into the existing archive. Had wanted to create this archive all at once (instead of the three steps we’ve performed to gradually add files to it for educational purposes), we could simply have typed zip -r test Stuff/* and would have created the same archive.
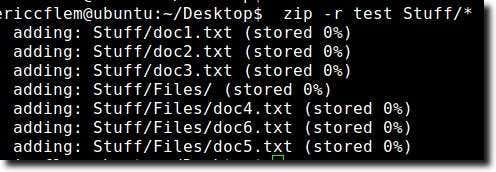
You’ll notice from the command and the output that the three files inside the Stuff folder are included, as well as the three documents inside the Files folder, so everything was accomplished in a nice, simple command.
Now, what about those two “extra” documents we created on our Desktop? Well, the way zip works is if you try to add a file to an archive that already exists in the archive, the new files will overwrite the old ones. So, since the documents we created on our Desktop (doc2.txt and doc3.txt) have content to them (we added “hello world!” to doc2.txt and “yay” to doc3.txt), we should be able to add those documents and then be able to test this. First, we’ll drag the two “extra” documents into the Stuff folder.
You’ll likely be asked if you want the new documents to overwrite the existing ones (this is in the folder, remember, not the zip archive), so let this happen.
Now that this is done, let’s add them to the archive by typing zip test Stuff/doc2.txt Stuff/doc3.txt

You’ll notice the above command now shows files being updated instead of added. If we now check the archive, we’ll notice the files appear to be the same, but when doc2.txt and doc3.txt are opened, you’ll see they now have content in them, instead of being blank as our original files were.
Sometimes in Linux, you’ll see that some files are hidden by adding a period (“.”) to the beginning of the file name. This is particularly common for configuration files, which need exist, but often aren’t visible (which eases up on clutter as well as makes it less likely a configuration file will be accidentally deleted). We can add these to a zip file quite easily. First, let’s assume we want to create a zip file called backup out of every file in a directory. We can do so by typing zip backup * into the Terminal.
![]()
This will add all files and folders, although any items in those folder will not be included. To add them, we would add -r again, so that zip -r backup * would be the command.
![]()
Now we’re almost there. To recursively add folders, files, and hidden files, the command is actually very simple simple: zip -r backup .
![]()
Now, unzipping is quite easy. Before we do anything, however, go ahead and delete the documents on the Desktop (doc2.txt and doc3.txt) as well as the Stuff folder. Once they’re gone, typing unzip test.zip will expand the contents of our original zipped archive into your current directory.
![]()
Note: If we hadn’t deleted the documents, we would be attempting to unzip the contents of our zip file into an existing file, so would be asked if we wanted to replace each and every document.
And that’s it! Zipping and Unzipping is a pretty common task, and while there are certainly GUI options available, with practice you’ll find performing those same tasks from the Terminal isn’t very difficult either.
Related Posts
Founder of Help Desk Geek and managing editor. He began blogging in 2007 and quit his job in 2010 to blog full-time. He has over 15 years of industry experience in IT and holds several technical certifications. Read Aseem’s Full Bio
