By default, the local Administrator account in Windows 10 is disabled. There are certain programs that require the user to be logged in using the local administrator account in order to install software or perform some action on the computer. Even though you normal user account is considered an “administrator” account, you will still be prompted by UAC when performing certain actions on the computer.
The built-in Administrator account will not receive the UAC prompts. In this article, I’ll walk you through the steps to enable the administrator account so you can log into it in Windows 10.
Method 1 – Local Users and Groups
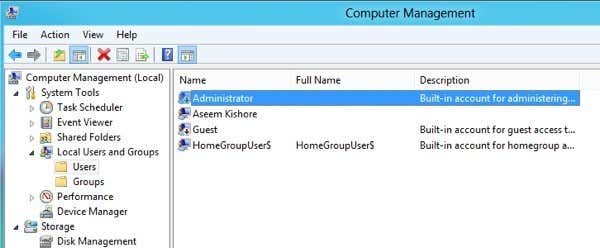
The first way to enable the built-in administrator account is to open Local Users and Groups. You can do this by right-clicking on Computer or This PC and choosing Manage.


On the Computer Management screen, go ahead and expand Local Users and Groups and then click on Users. You’ll see the Administrator account in the right-hand pane.

Right-click on the Administrator account and click on Properties.
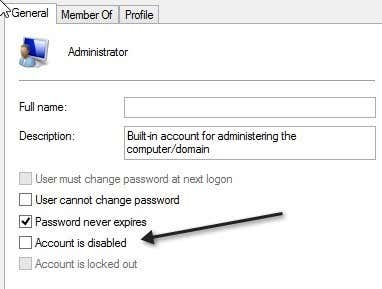

Go ahead and uncheck the Account is disabled box. It is also a good idea to set a password for the Administrator account since it has total unrestricted access to the system. Now you can log off your current account and you’ll see the Administrator account show up in the list of users.


Method 2 – Command Prompt
You can also enable and disable the local Administrator account via the command prompt. In order to do that, you have to open an elevated command prompt in Windows 10. To do that, click on Start, type in cmd and then right-click on Command Prompt and choose Run as Administrator.

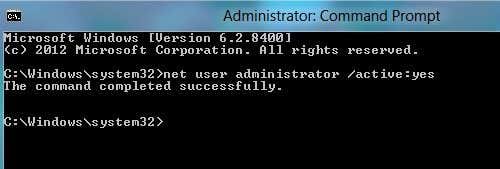
This will open the command prompt with elevated permissions. You may also get a UAC dialog where you just have to click Yes. At the command prompt type in the following to enable the built-in Administrator account:
net user administrator /active:yes

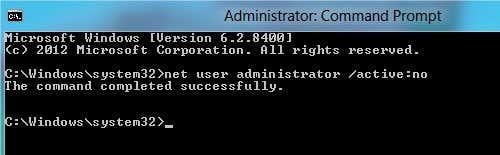
To disable the built-in Administrator account, use this command instead:
net user administrator /active:no

Method 3 – Local Security Policy
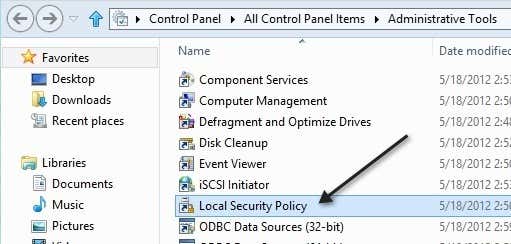
The last way to enable or disable the administrator account in Windows 20 is to use the local security policy. This option will probably only be available in the Professional version of Windows 10. To open the Local Security Policy in Windows 10, go to Control Panel and then click on Administrative Tools. You may also need to change the view to small or large icons instead of Category.

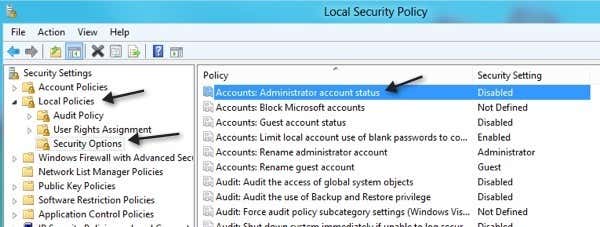
In the left-hand pane, click on Local Policies and then Security Options. The first item is Accounts: Administrator account status.

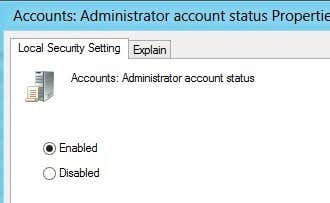
Double-click on the item and you can click on the Enabled radio button.

That’s it! Those are the 3 different ways to enable and log into the built-in Administrator account in Windows 20. If you have any questions, post a comment and I’ll try to help. Enjoy!