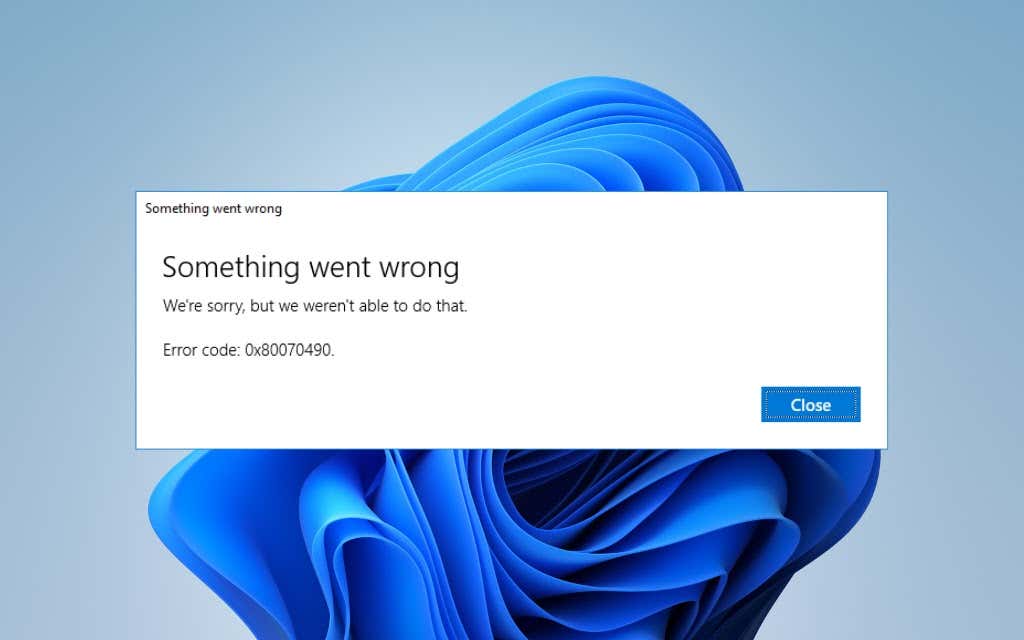
Do you keep running into “Error code: 0x80070490” while using Windows Update or the Mail app in Windows 10/11? It’s an error that you can resolve quite easily (although you may run into instances that require advanced troubleshooting).
Work your way through the instructions below to fix “Error code: 0x80070490” in Windows Update or the Mail app. If the error occurs in both, apply the fixes in the order they appear.
Fix Error Code 0x80070490 in Windows Update
“Error code: 0x80070490” in Windows Update is often the result of conflicts with antimalware programs, a broken Windows Update cache, or corruption in the operating system. The following fixes should resolve the Windows Update error.
Run Windows Update Troubleshooter
Microsoft knows that Windows Update is prone to numerous issues, which is why Windows 10/11 includes a built-in troubleshooter to help deal with them.
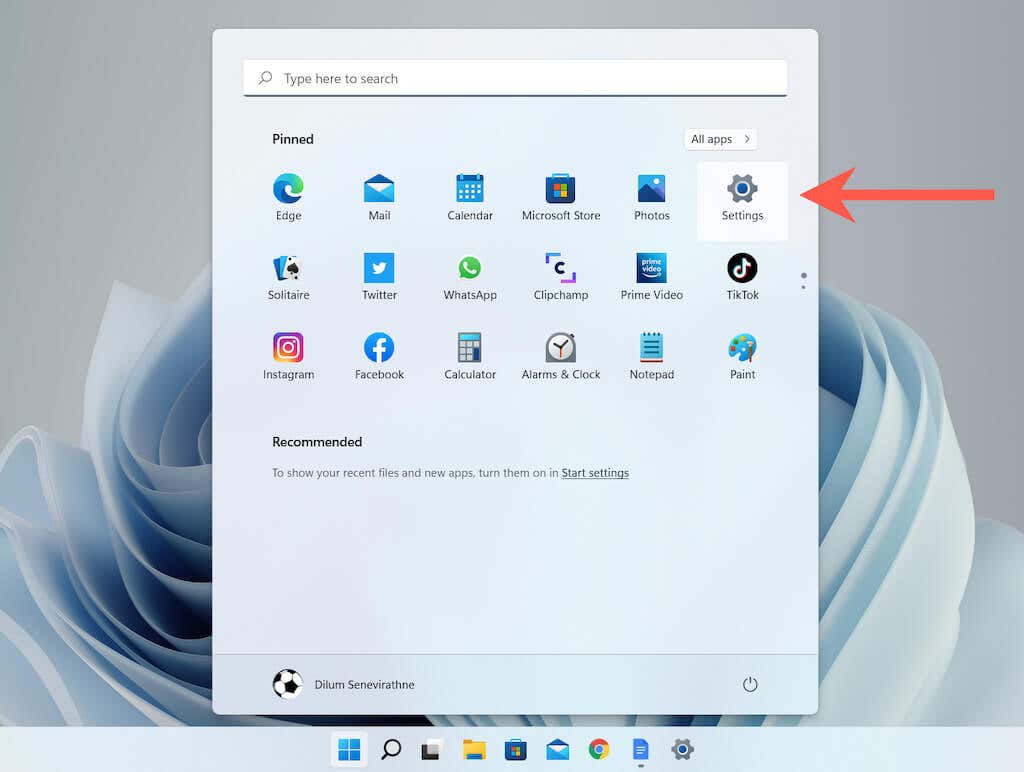
1. Open the Start menu (or press the Windows key) and select Settings.
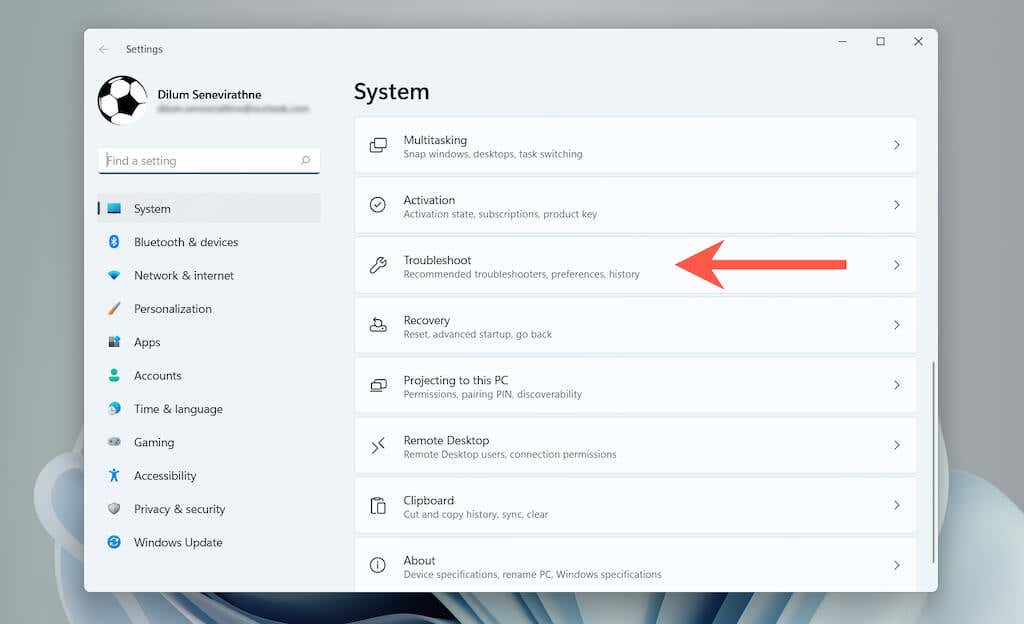
2. Select System > Troubleshoot (Windows 11) or Update & Security > Troubleshoot (Windows 10).
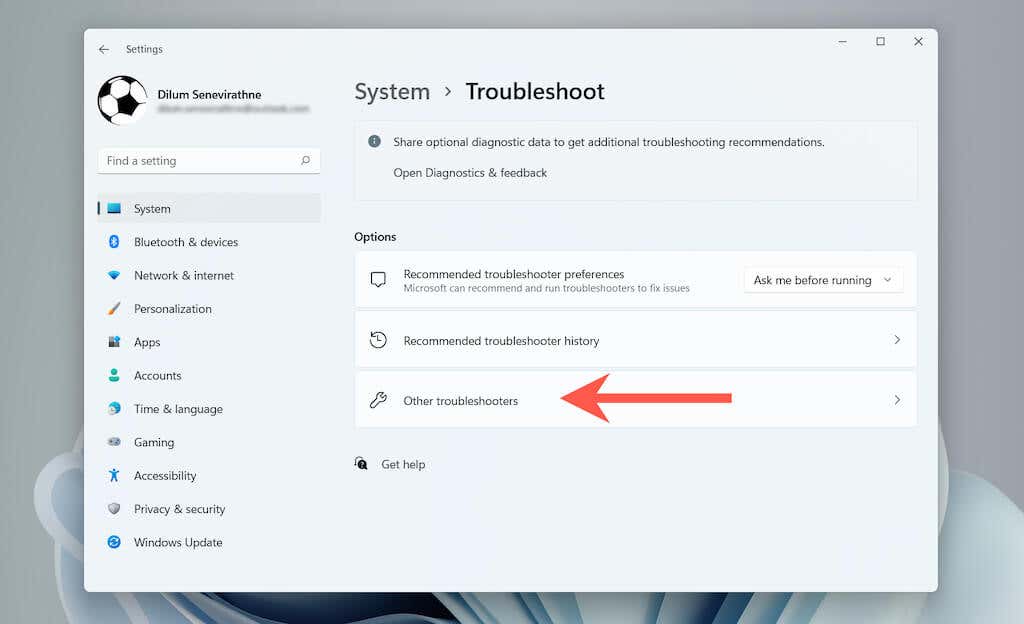
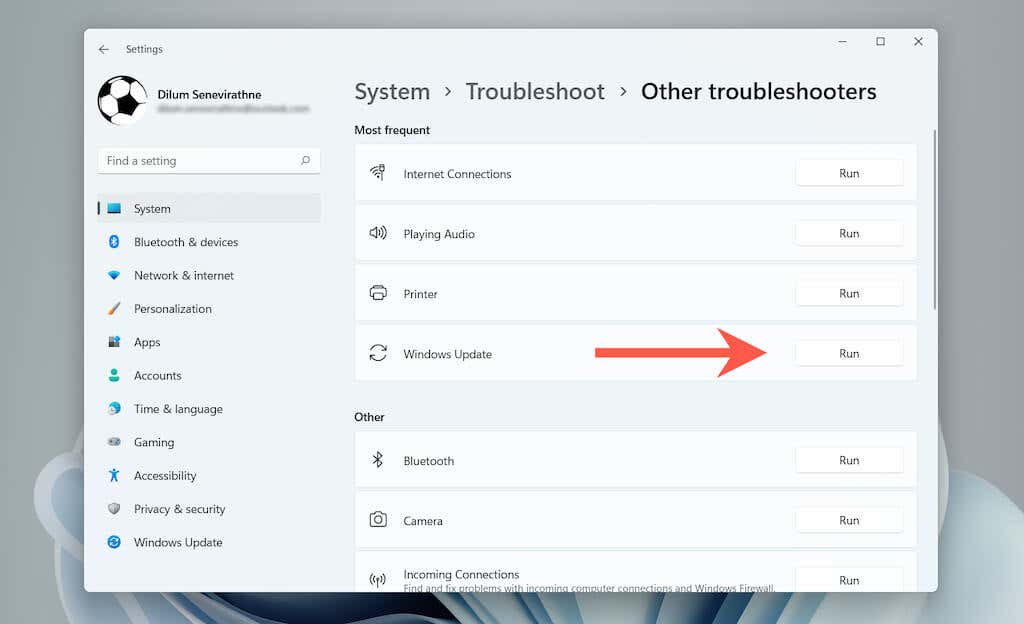
3. Select Other troubleshooters (Windows 11) or Additional troubleshooters (Windows 10).
3. Select Run next to Windows Update (Windows 11) or Windows Update > Run the troubleshooter (Windows 10).
Once the Windows Update troubleshooter loads, follow all on-screen instructions to fix any detected issues.
Restart Your Computer
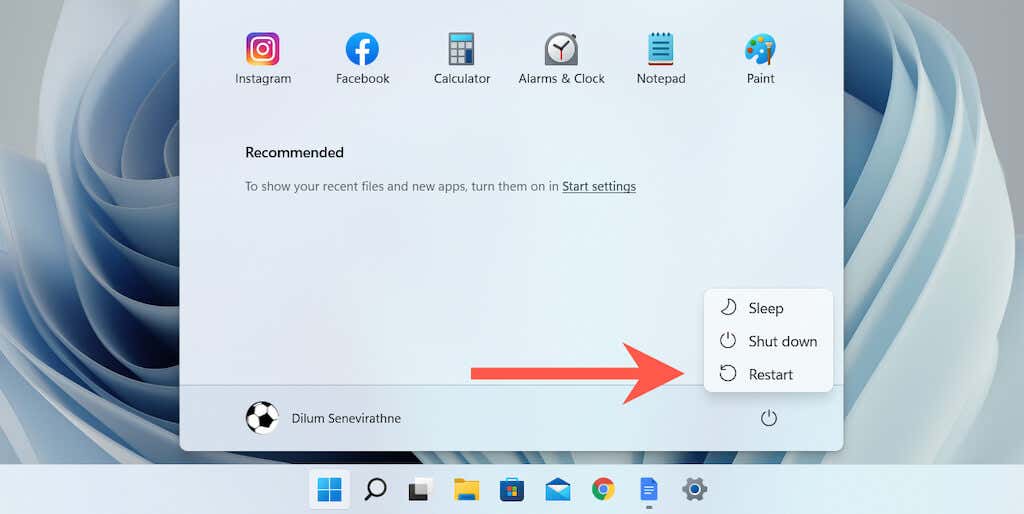
If the Windows Update troubleshooter failed to resolve “Error code: 0x80070490”, try restarting your computer – a simple action that usually takes care of most system-related anomalies. Once you’re back on the desktop, run Windows Update and see if the error recurs.
Pause Antivirus Utility Temporarily
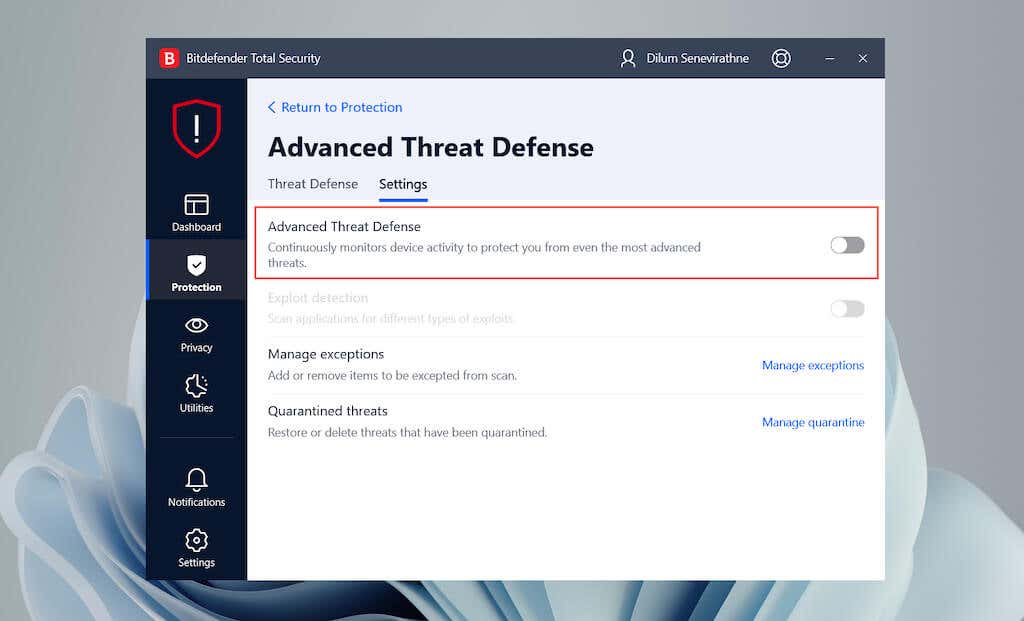
Third-party antivirus software often creates conflicts with Windows Update. If you have one installed on your computer, try disabling its live shields temporarily and check if that makes a difference.
You can usually pause an antivirus utility via its system tray icon. If not, check its configuration pane; you may want to refer to its online documentation for specific instructions.
Configure Windows Update Services
You must confirm that each system service related to Windows Update runs correctly.
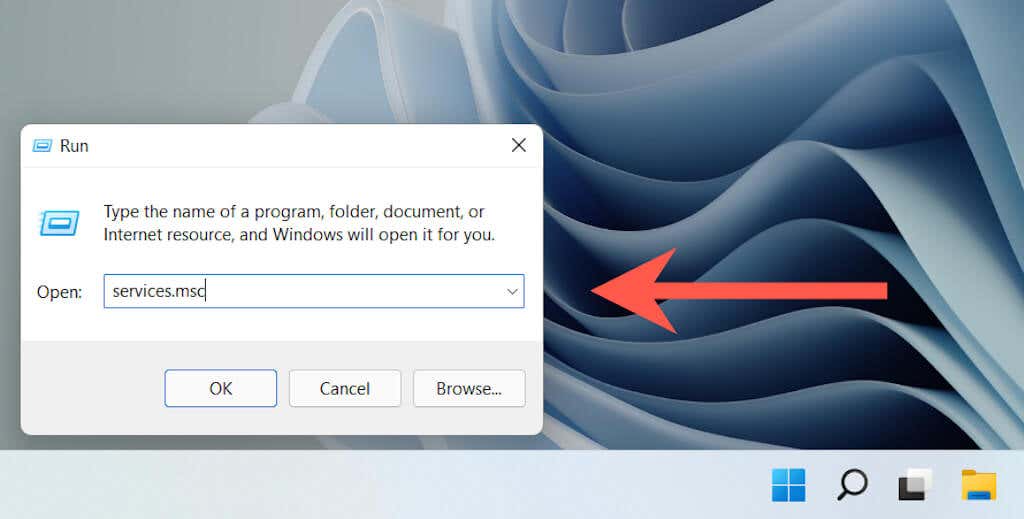
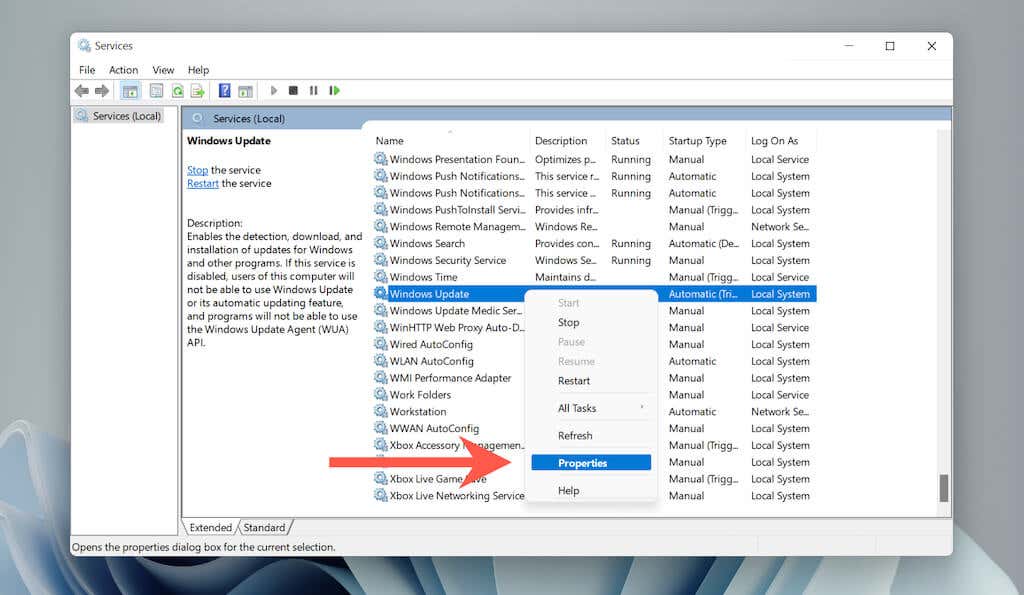
1. Press Windows + R, type services.msc, and select OK to open the Services applet.
2. Right-click Windows Update, Background Intelligent Transfer, and Cryptographic Services and select Properties.
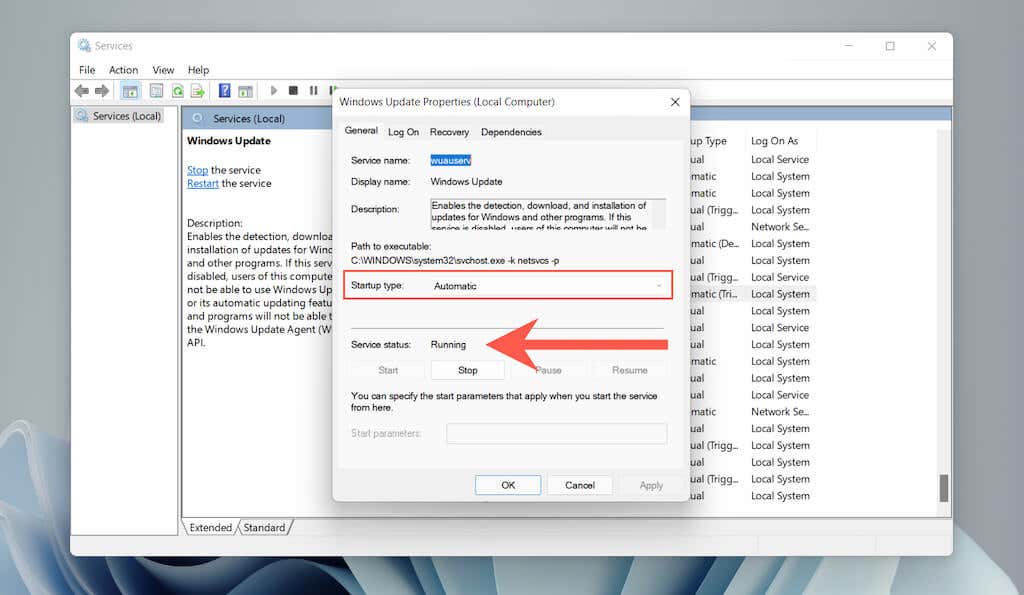
3. Verify that Startup type is set to Running and the Service status is Running (if not, select Start) in all three services.
Delete Windows Update Folder
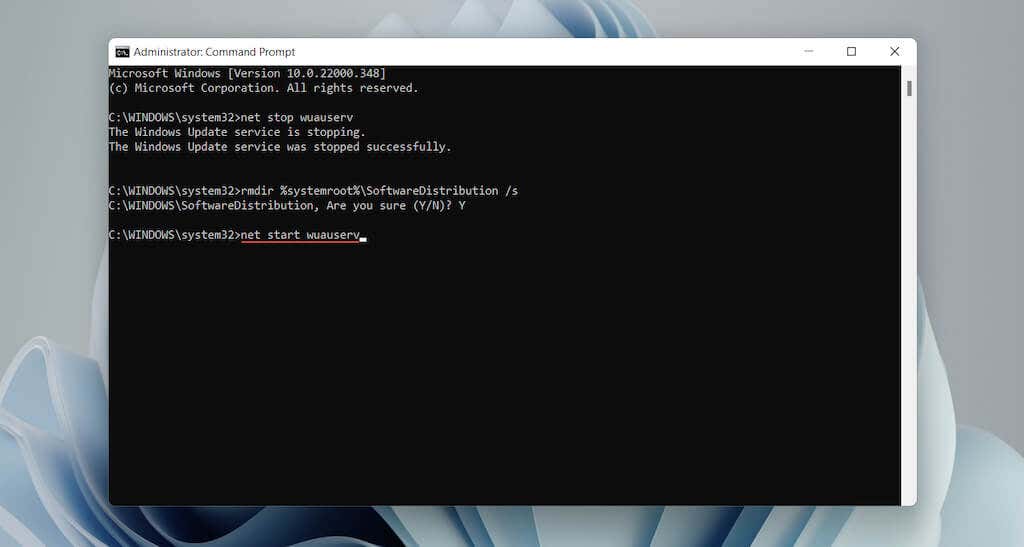
A corrupt Windows Update cache is another reason that results in “Error code 0x80070490.” Try deleting the folder that stores the cached files. The procedure involves running a series of commands using an elevated Command Prompt console.
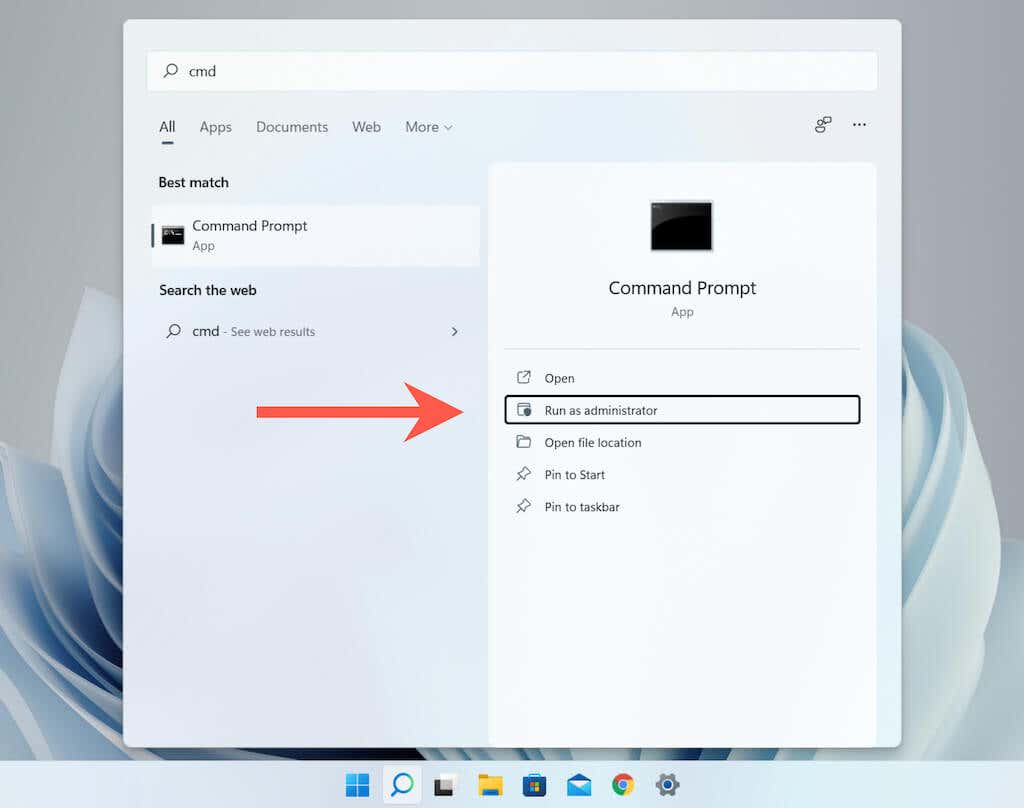
1. Open the Start menu, type cmd, and select Run as administrator to open Command Prompt with administrative privileges.
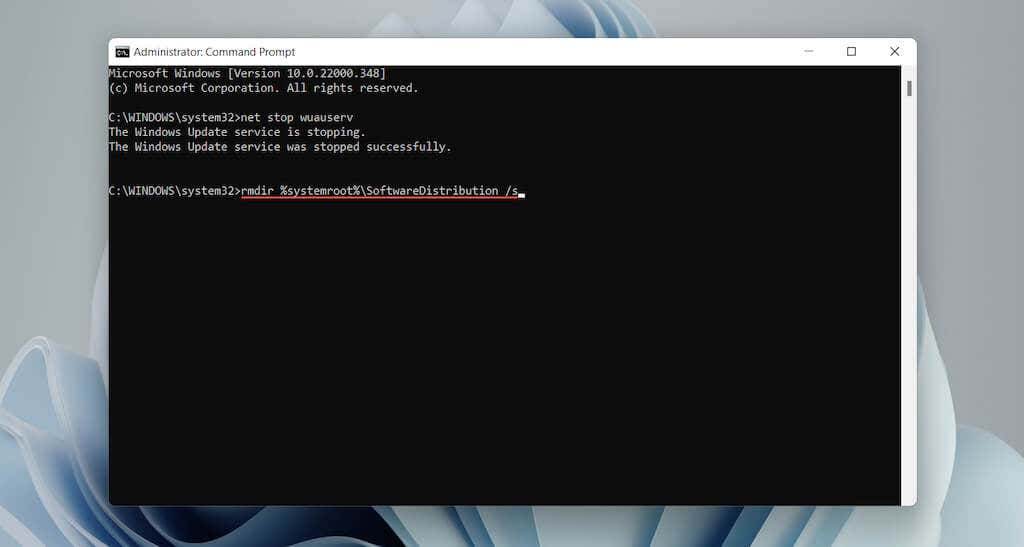
2. Paste in the following command and press Enter to disable the Windows Update service:
net stop wuauserv
3. Run the command below to delete the Software Distribution folder:
rmdir %systemroot%\SoftwareDistribution /s
4. Execute the following command to restart the Windows Update service.:
net start wuauserv
Run SFC and DISM Scan
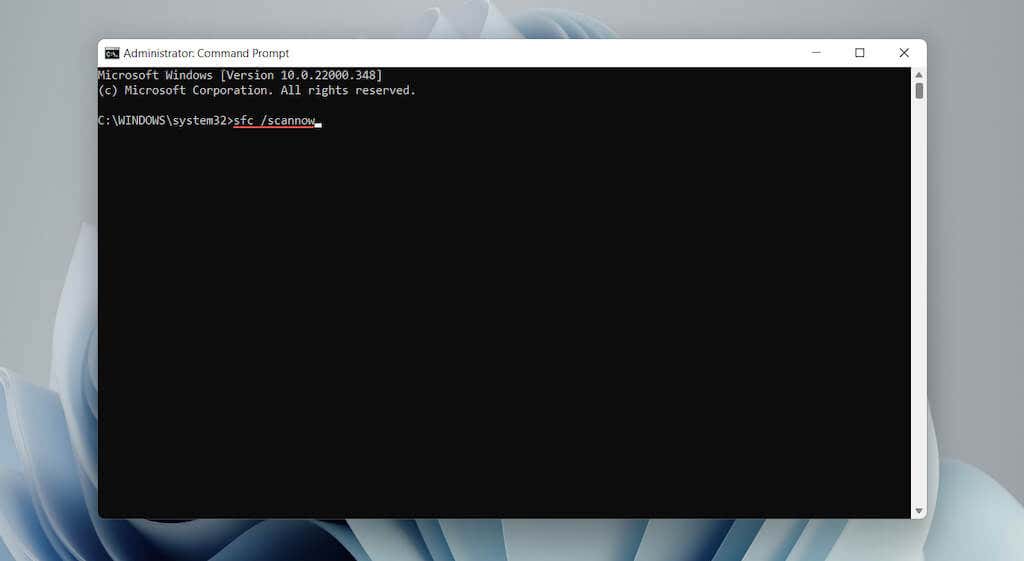
You may also want to run an SFC or a DISM scan. Both command-line tools can fix Windows errors by repairing missing or corrupt system files.
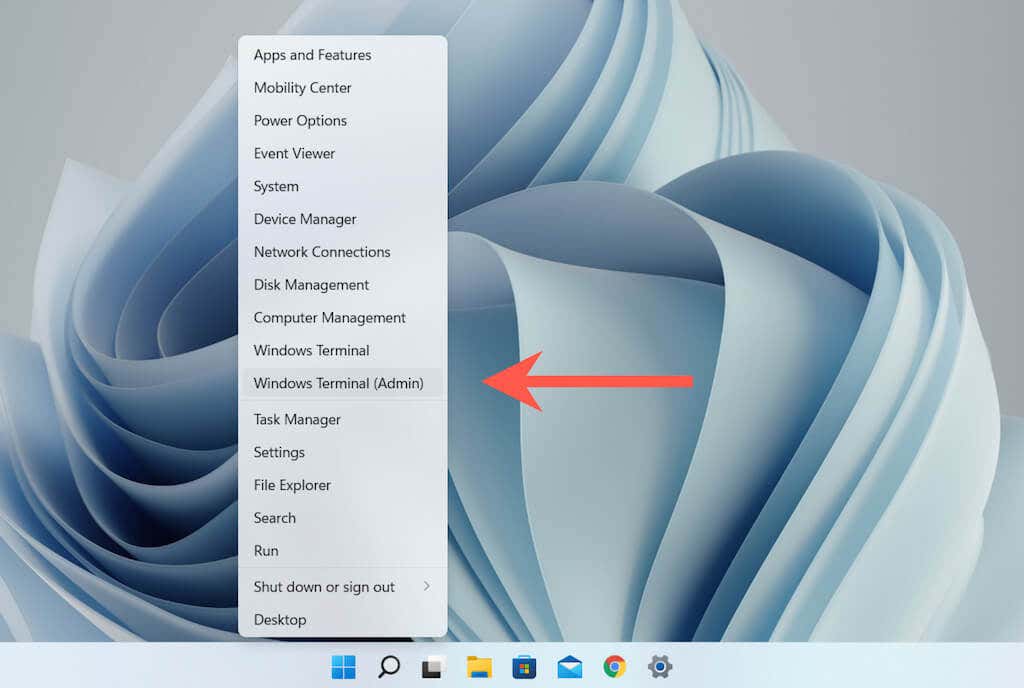
1. Right-click the Start button and select Windows Terminal (Admin) or Windows PowerShell (Admin).
2. Run the command below to initiate an SFC scan.
sfc /scannow
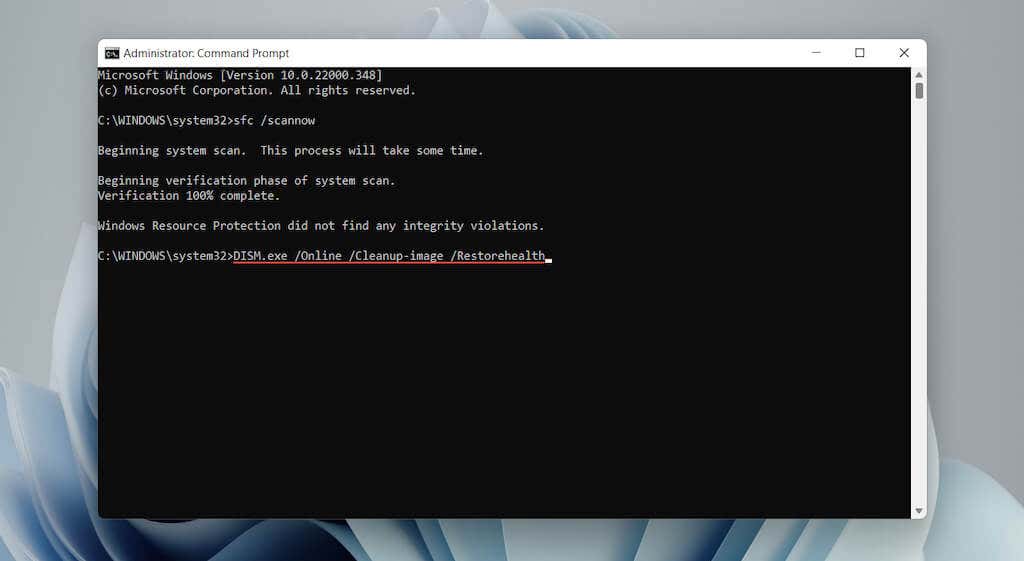
3. Once the SFC scan finishes, run the following to invoke the DISM tool:
DISM.exe /Online /Cleanup-image /Restorehealth
If the DISM command above fails, insert your Windows 10/11 installation USB or DVD and run the following command, replacing D with the drive letter of the external media:
DISM.exe /Online /Cleanup-Image /RestoreHealth /Source:D:\RepairSource\Windows /LimitAccess
Update Windows Using Other Means
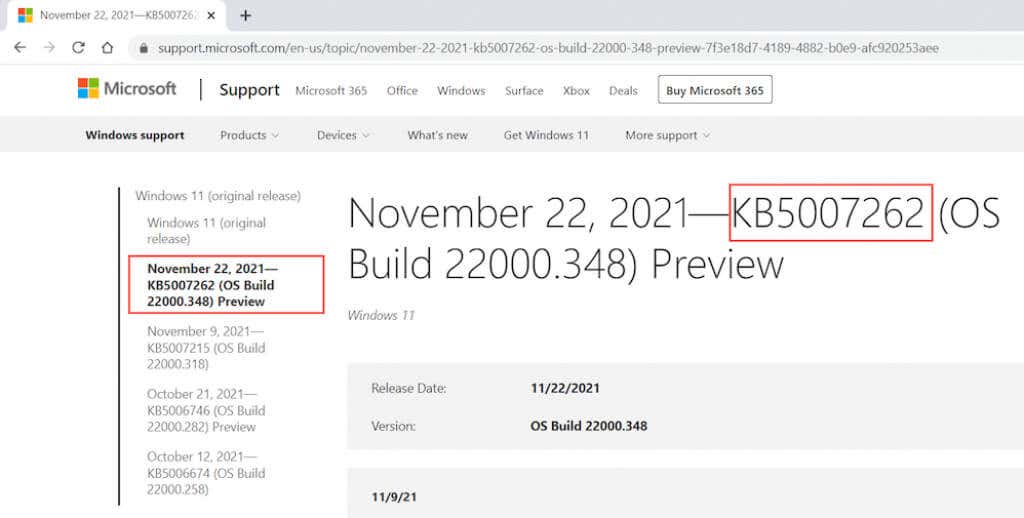
Updating Windows is another way to fix known issues Windows Update. However, since you can’t update the operating system normally, the alternative is downloading and installing the update files manually via the Microsoft Update Catalog.
1. Check the Windows Update History for Windows 10 or Windows 11 and note down the latest KB ID.
2. Visit the Microsoft Update Catalog and search for and download the update. Make sure to pick the file that matches the architecture (32 or 64-bit) of Windows on your PC.
3. Run the downloaded update file to install it.
Fix Error Code 0x80070490 in Mail App
“Error code: 0x80070490” in the Windows 10/11 Mail app mostly shows up while adding a new email account (e.g., Gmail or Outlook). The following suggestions and fixes will resolve the Mail error.
Run Windows Store Apps Troubleshooter
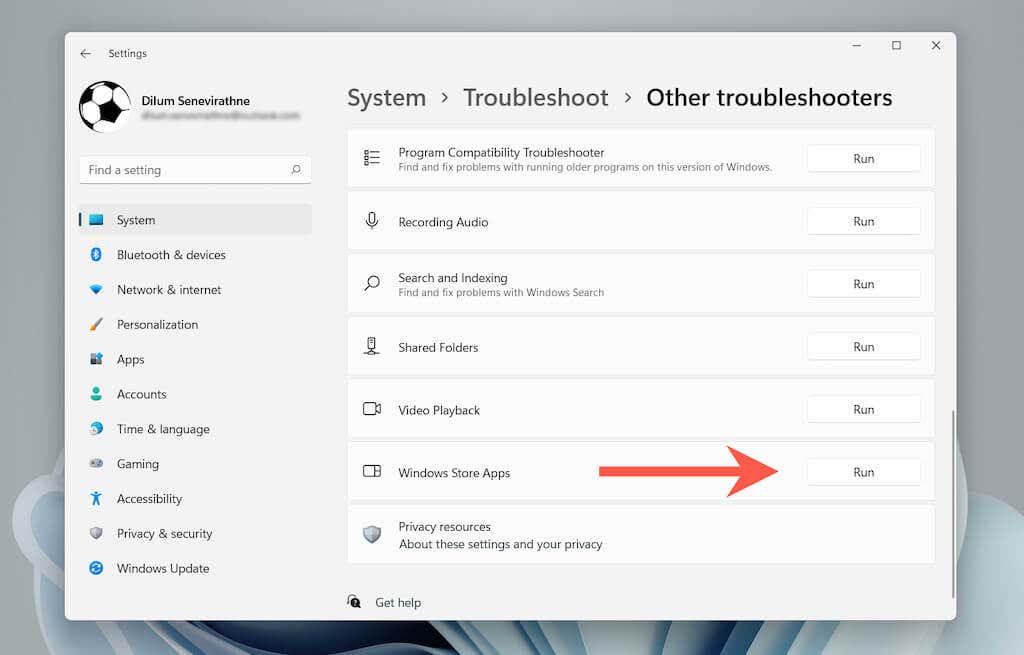
Windows 10/11 provides access to a built-in troubleshooter designed to address issues with Microsoft Store apps (including Mail).
Under Other troubleshooters or Additional troubleshooters, select Run next to Windows Store Apps (Windows 11) or Windows Store Apps > Run the troubleshooter (Windows 10) to open it.
Update Mail App
The following fix involves updating the Mail app. That should address any known issues behind “Error code: 0x80070490.”
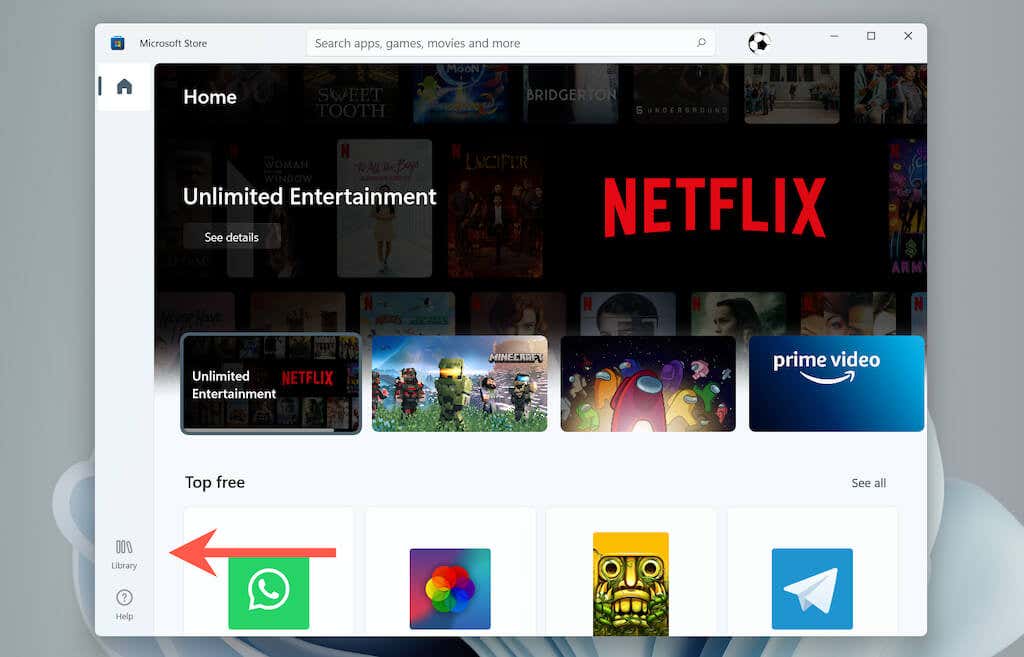
1. Open the Microsoft Store.
2. Select Library at the lower-left corner of the screen.
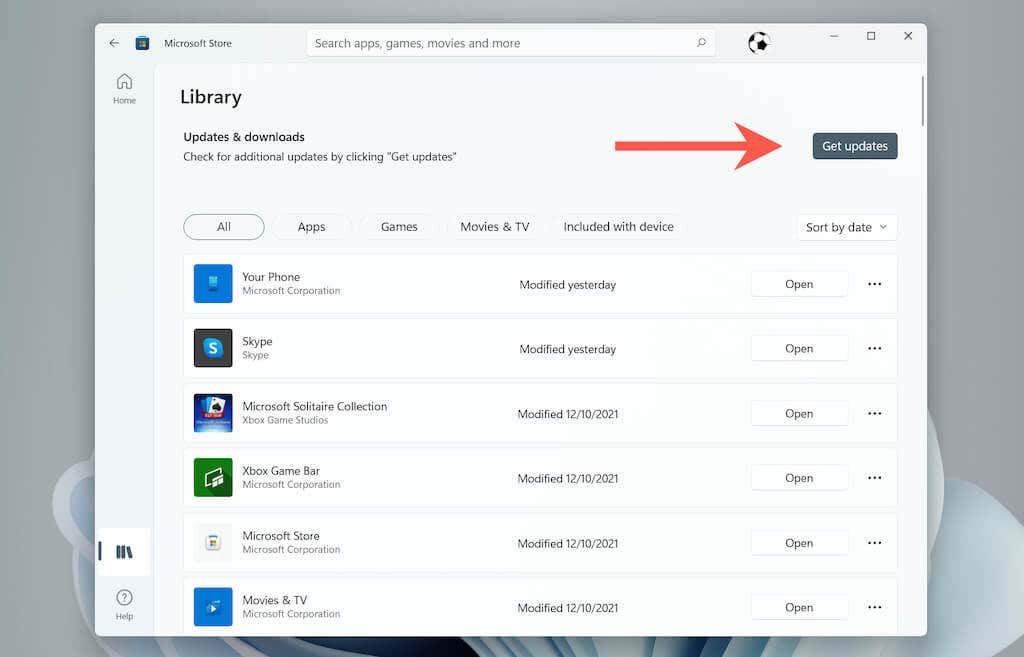
3. Select Get updates to update Mail and other Store apps on your computer.
Update Windows 10/11
If you aren’t running into the same error with Windows Update (if you are, use the above workaround), try applying any pending operating system updates next.
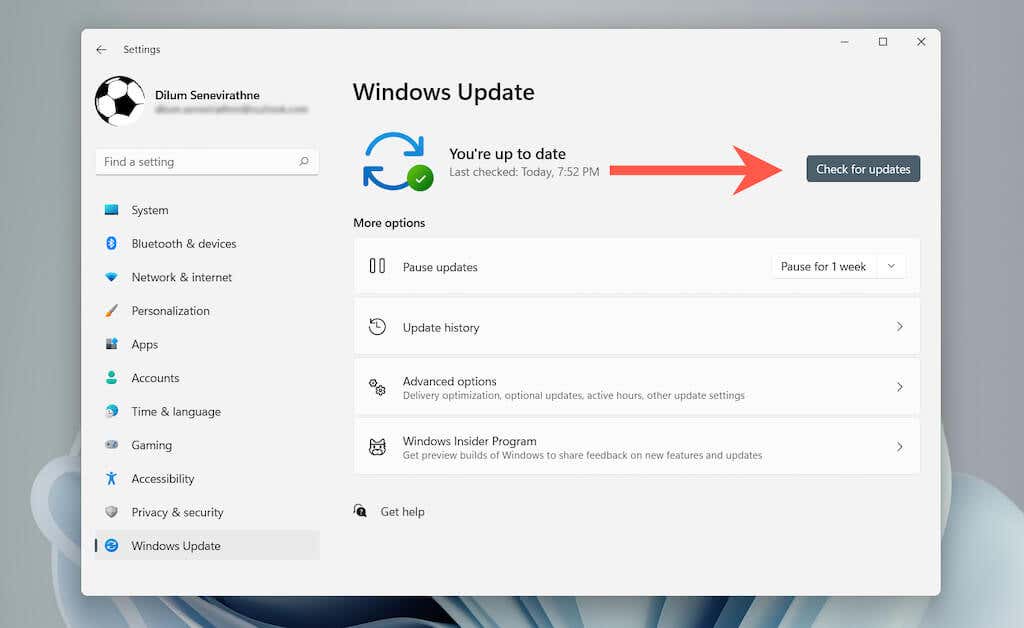
1. Open the Settings app and select Windows Updates.
2. Select Check for updates.
3. Select Download and install to apply the latest Windows updates.
Check Email Privacy Settings
Incorrectly configured email privacy settings can also result in the 0x80070490 Mail app error. Confirm if everything is set up correctly.
1. Open the Settings app.
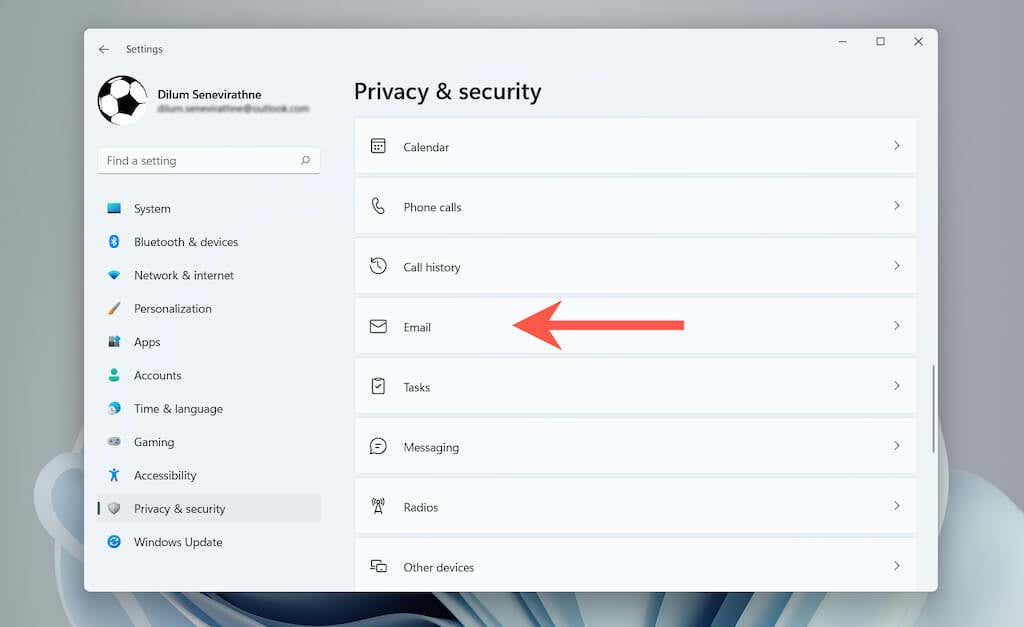
2. Select Privacy & security > Email (Windows 11) or Privacy > Email (Windows 10).
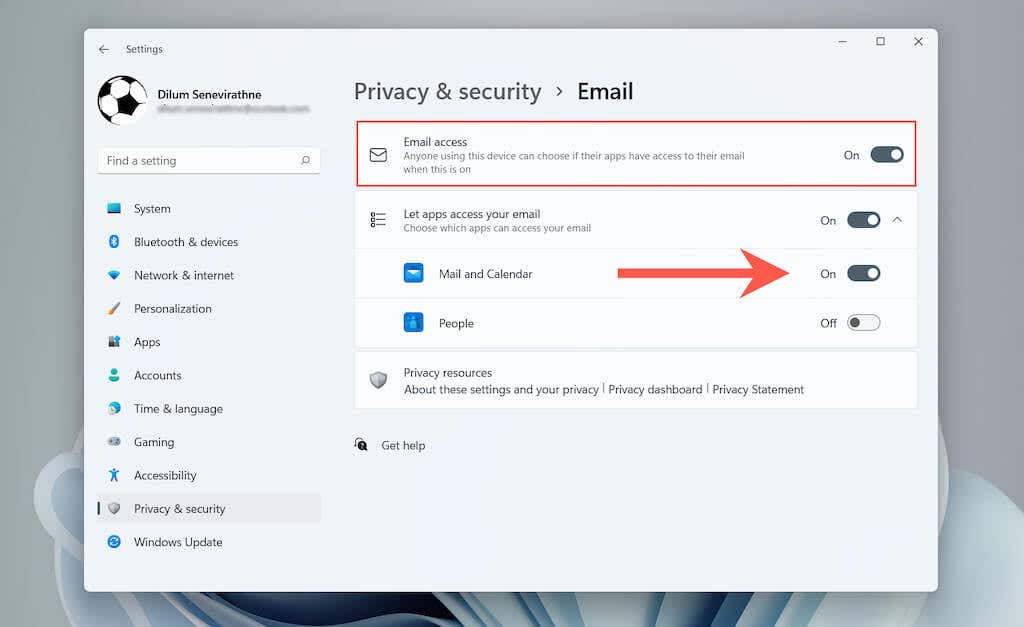
3. Turn on the switches next to Email access, Let apps access your email, and Mail and Calendar.
Set Up Account in Calendar App
Another way to fix “Error code: 0x80070490” is by setting up your email account in the Calendar app first.
1. Open the Calendar app.
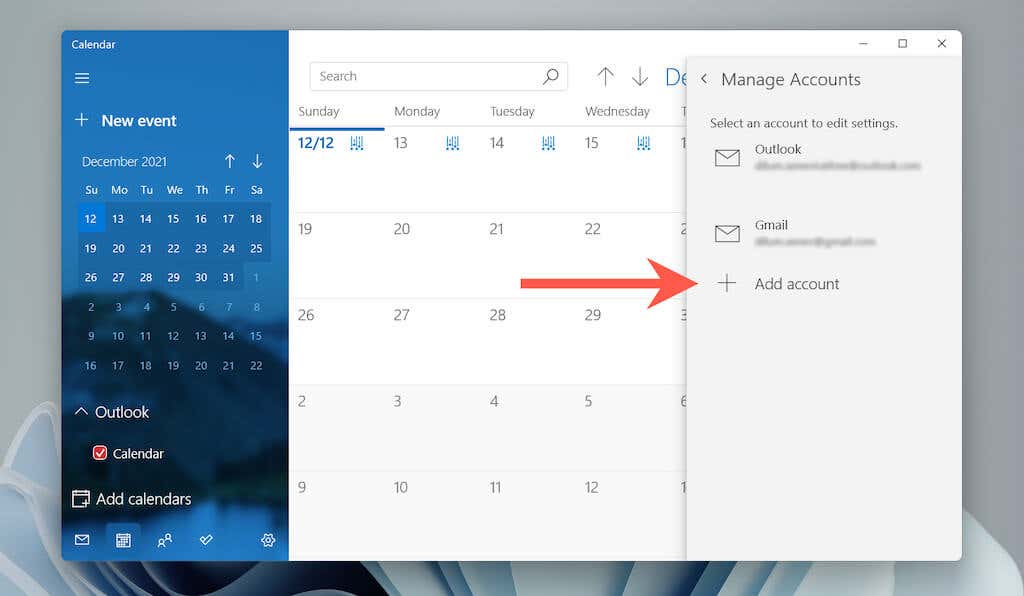
2. Select the Settings icon and choose Manage account.
3. Select Add account.
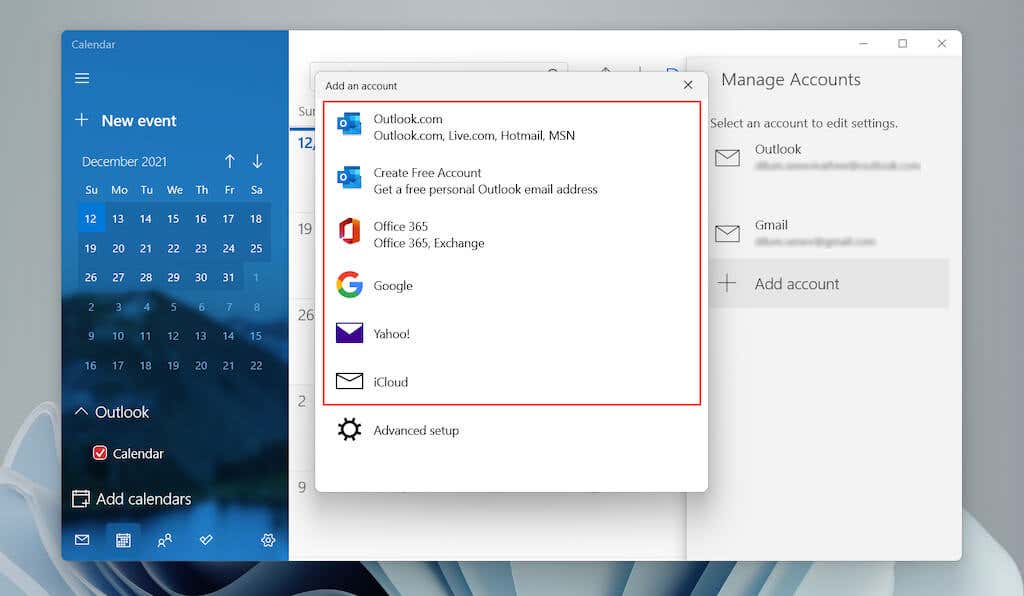
4. Select your email provider (e.g., Outlook.com or Google) and follow the onscreen instructions to add it.
Upon signing into Calendar, open the Mail app, and you should find the account listed on the sidebar.
Repair Mail and Calendar
You can also try repairing Mail and Calendar in Windows. That should rule out issues caused by a corrupt app installation.
1. Open the Settings app.
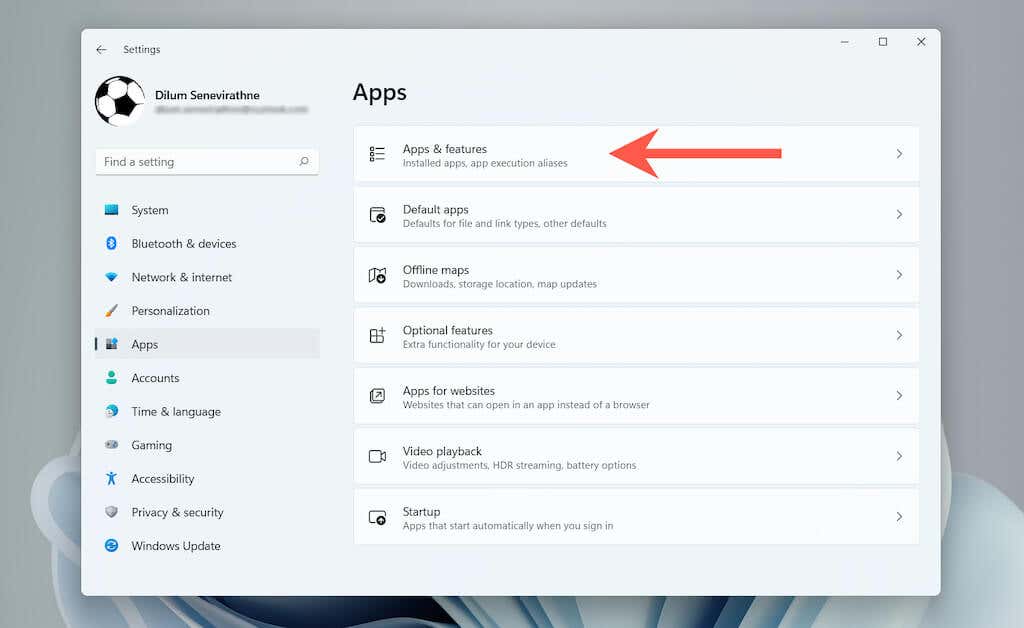
2. Select Apps > Apps & features.
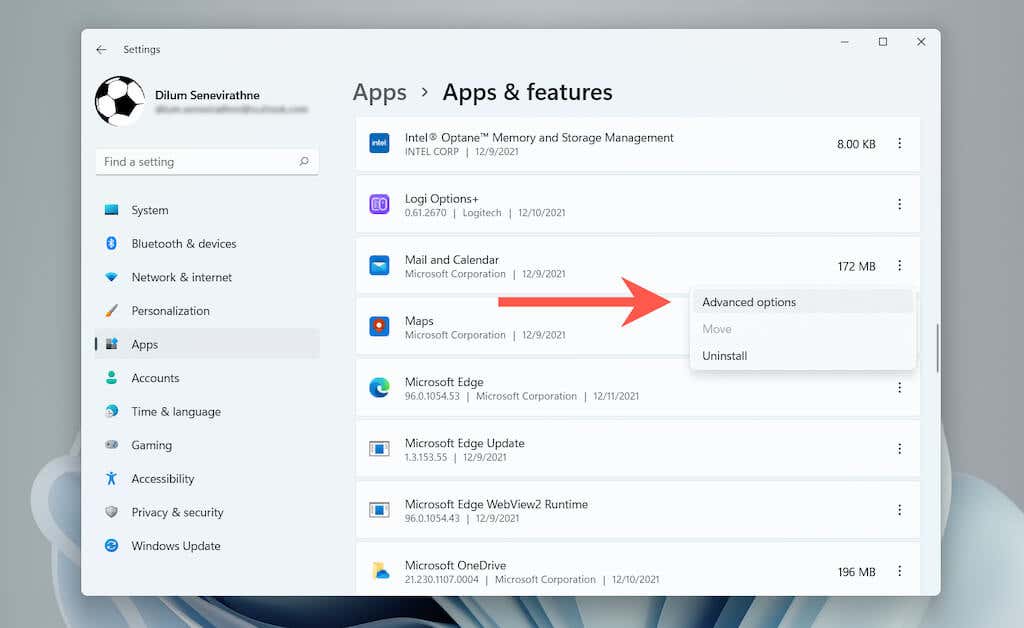
3. Scroll down and select Advanced options next to Mail and Calendar.
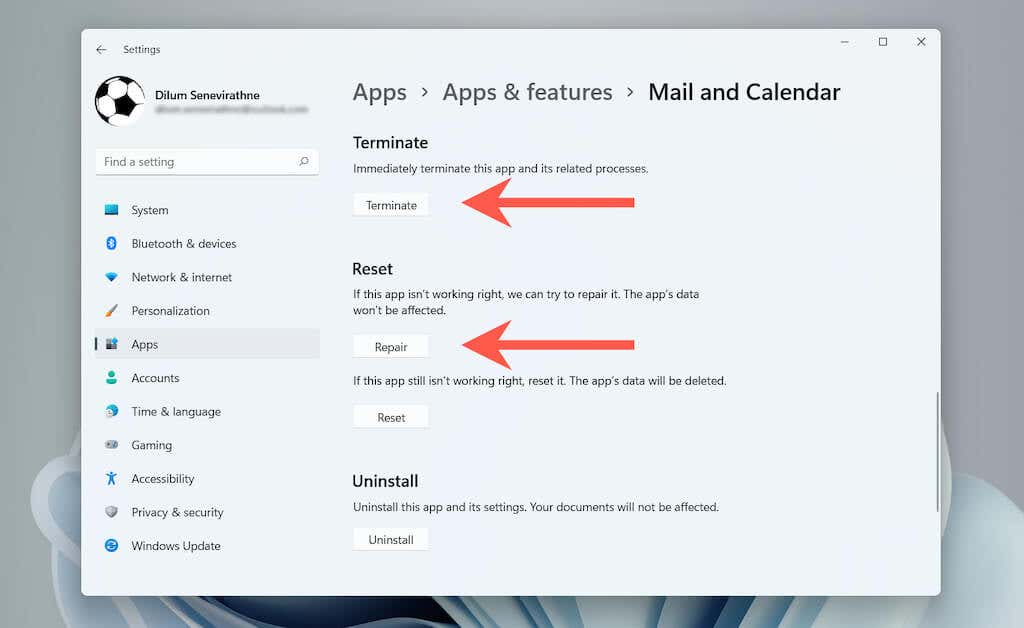
4. Select Terminate > Repair.
If repairing doesn’t help, you can choose to reset Mail and Calendar to factory defaults. To do that, select Terminate > Reset in the above screen.
Reinstall Mail and Calendar
Finally, reinstall both the Mail and Calendar apps in Windows. A fresh installation just might make “Error 0x80070490” disappear.
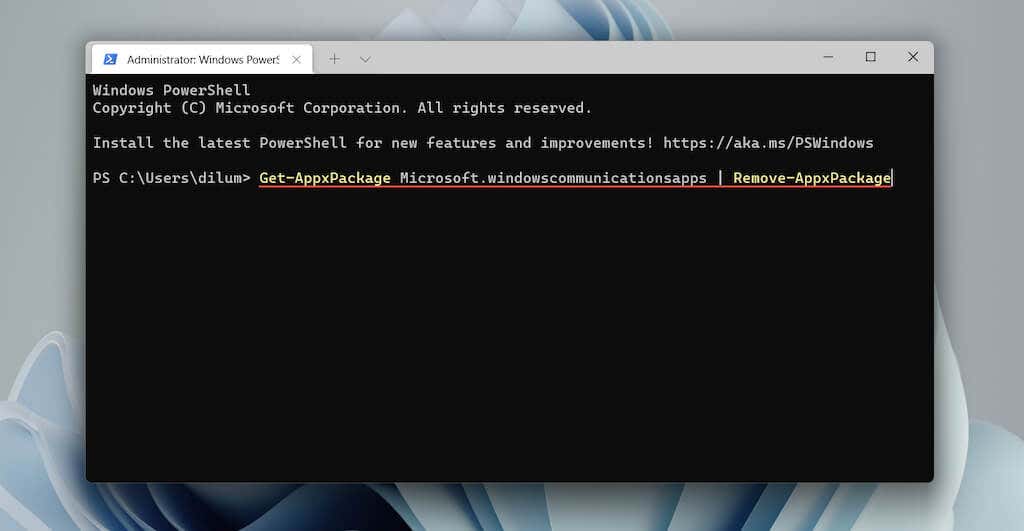
1. Right-click the Start button and select Windows Terminal (Admin) or Windows PowerShell (Admin) to open an elevated Windows PowerShell console.
2. Paste the command below and run it to uninstall the Mail and Calendar apps:
Get-AppxPackage Microsoft.windowscommunicationsapps | Remove-AppxPackage
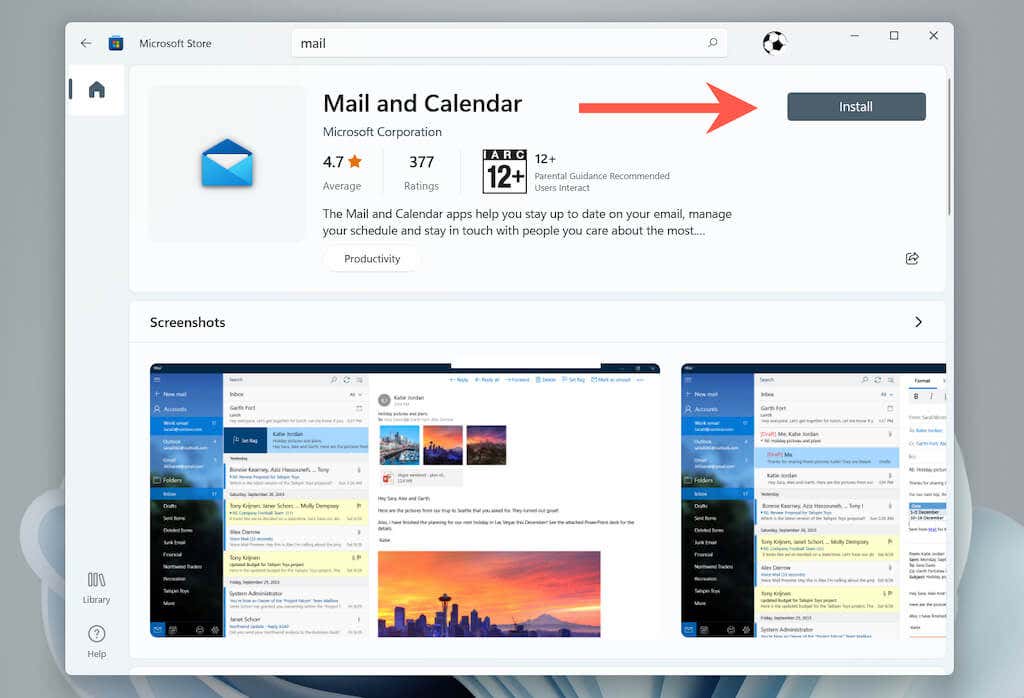
3. Open the Microsoft Store. Search for and install Mail and Calendar.
Hopefully, you fixed “Error 0x80070490” quickly. Keep the operating system and all Microsoft Store apps up-to-date to minimize the reoccurrence of this issue.
Related Posts
- Preparing for Windows 10 End of Support: Upgrading to Windows 11
- How to Fix a “This file does not have an app associated with it” Error on Windows
- How to Fix an Update Error 0x800705b4 on Windows
- How to Resolve “A JavaScript error occured in the main process” Error on Windows
- How to Fix the Network Discovery Is Turned Off Error on Windows
Dilum Senevirathne is a freelance tech writer and blogger with three years of experience writing for online technology publications. He specializes in topics related to iOS, iPadOS, macOS, and Google web apps. When he isn’t hammering away at his Magic Keyboard, you can catch him binge-watching productivity hacks on YouTube. Read Dilum’s Full Bio
