When you include a picture or slide background in Microsoft PowerPoint, you may not want it to be the main focus. Luckily, making a picture transparent in PowerPoint, as well as doing the same for a background, takes only a few steps.
The following features are available and work the same in PowerPoint on Windows and Mac. There isn’t currently a transparency option for pictures in PowerPoint on the web or Windows PowerPoint versions 2013 through 2019.
Make a Picture Transparent in PowerPoint
After you insert a picture in PowerPoint, you can change the transparency using a preset option or adjust the amount of transparency yourself.
Use a Preset Transparency
PowerPoint offers a handful of preset transparency settings that can make quick work of this task.
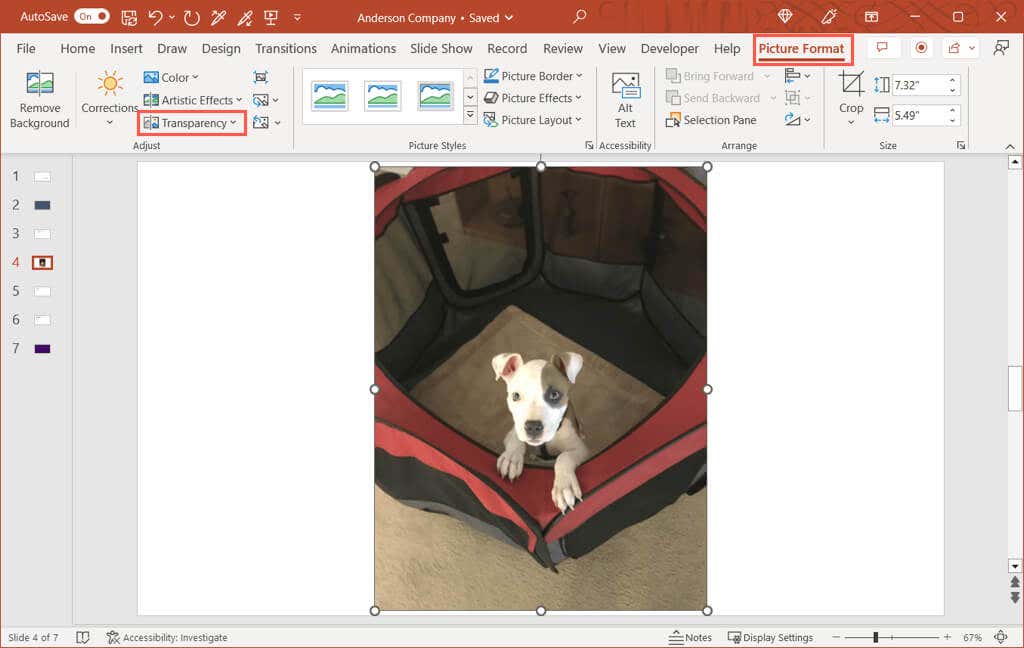
- Select your image and go to the Picture Format tab that appears.
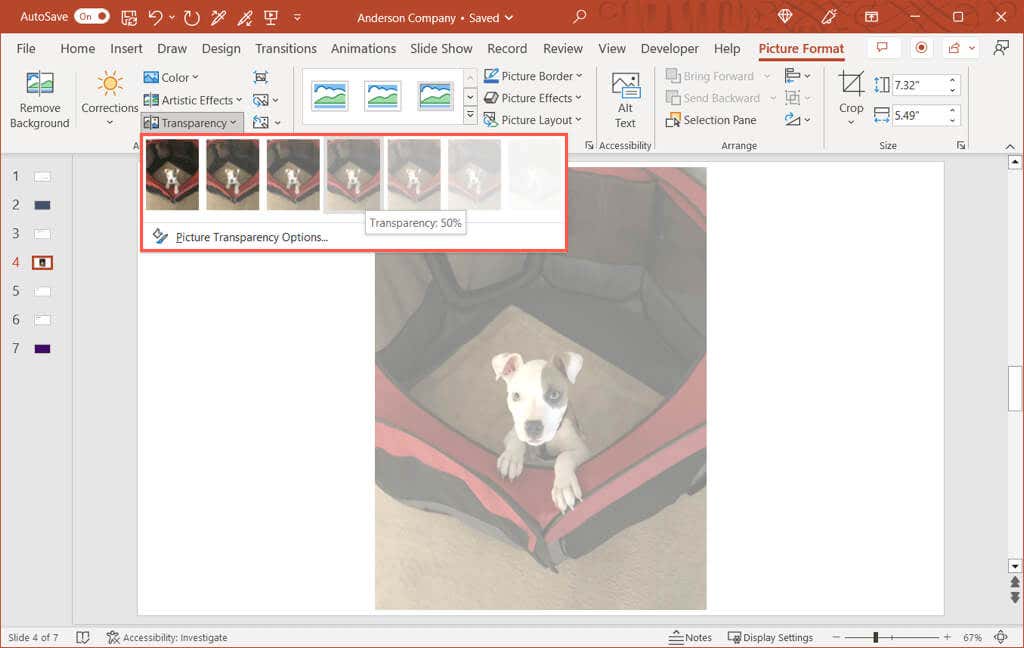
- In the Adjust section of the ribbon, open the Transparency drop-down menu.
- As you hover your cursor over each preset at the top, you’ll see a preview of your image using that option.
- Select the one you want to use and you’ll see your image update immediately.
Adjust the Transparency
If you prefer to adjust the picture’s transparency yourself, this is another good option.
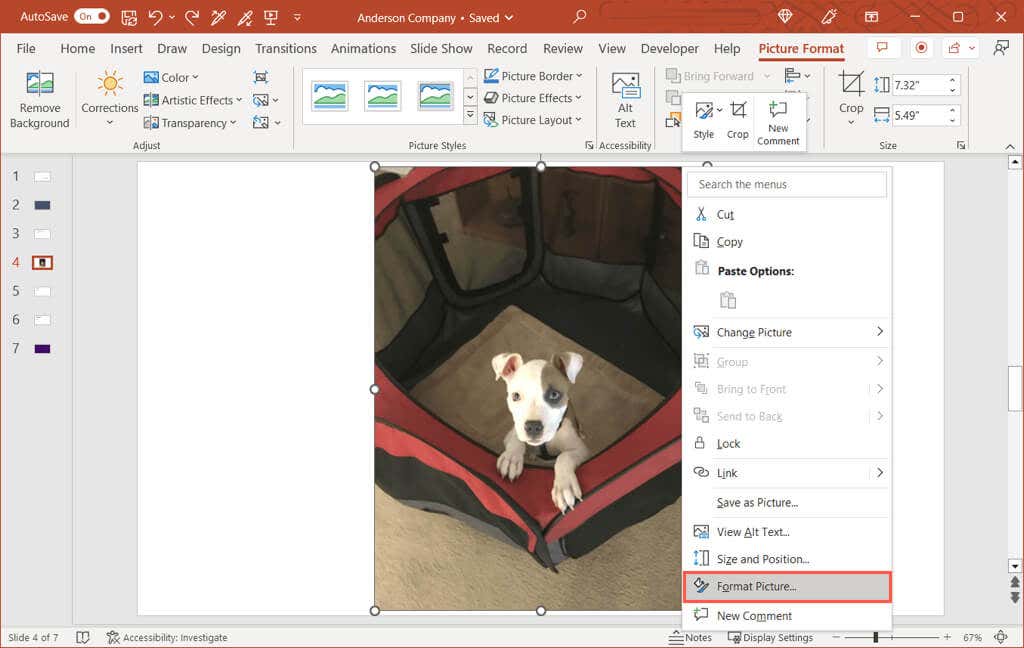
- Select the image and do one of the following to open the Format Picture sidebar:
- Go to the Picture Format tab, open the Transparency drop-down menu, and pick Picture Transparency Options.
- Right-click the image and choose Format Picture in the shortcut menu.
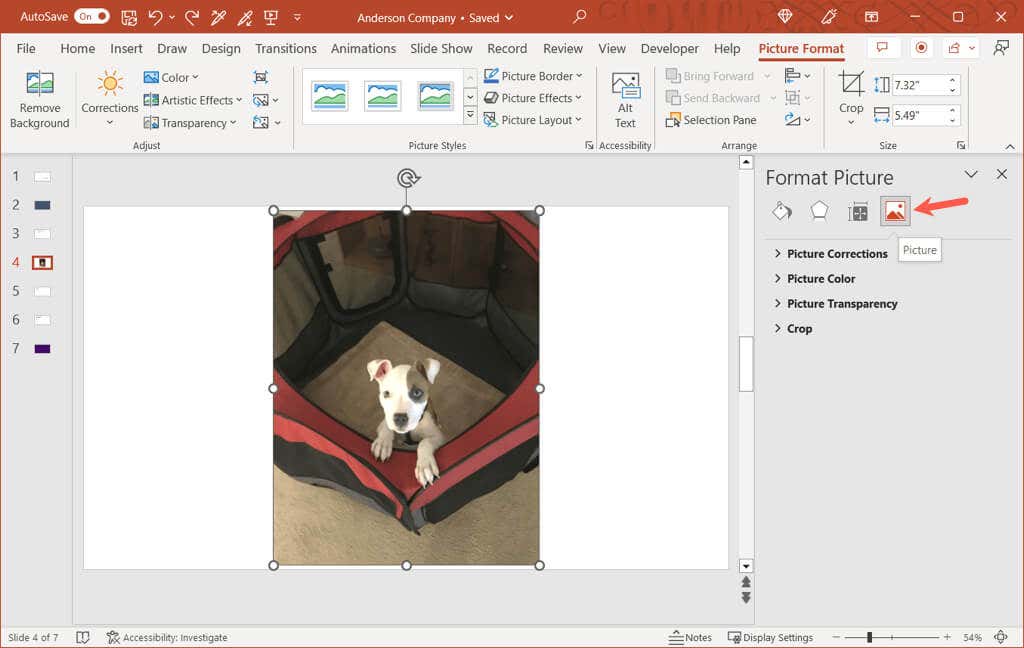
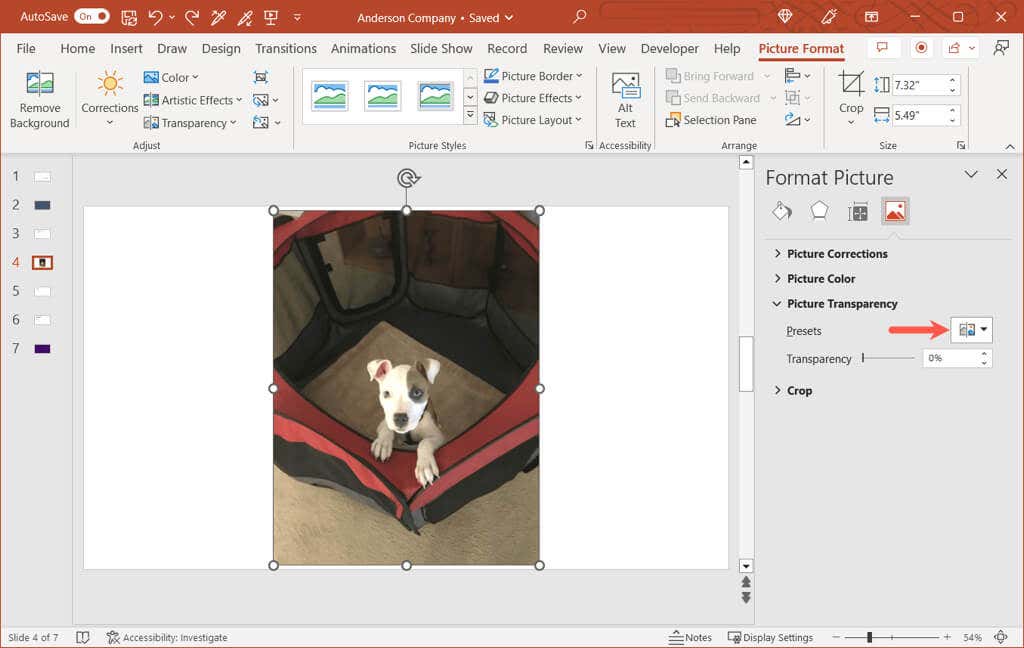
- When the sidebar opens on the right, make sure you’re on the Picture tab.
- Expand the Picture Transparency section if necessary.
- If you want to start with a preset that you can adjust, choose it in the Presets drop-down box.
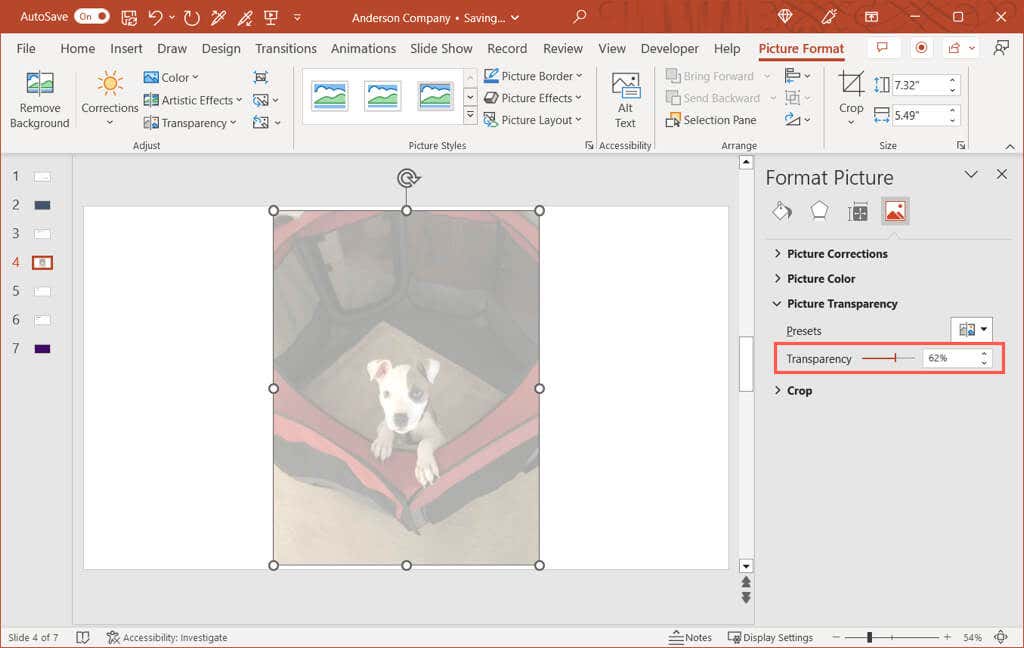
- Use the slider next to Transparency to increase or decrease the amount. Alternatively, you can enter a percentage in the box to the right or use the arrows to move up or down in small increments.
You’ll see the change to your picture immediately and can close the sidebar using the X on the top right.
Make a Part of a Picture Transparent
If your picture has a specific color that you want to make transparent, this is another option. Note that you can only use this feature for one color in your image.
- Select the image and go to the Picture Format tab.
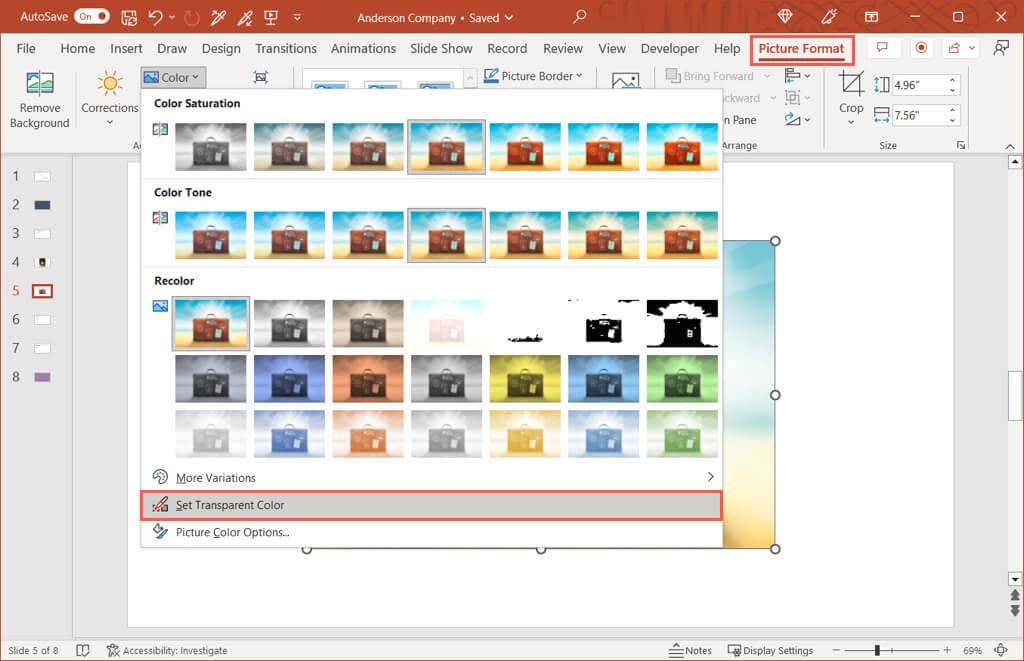
- Open the Color drop-down menu in the Adjust section of the ribbon and pick Set Transparent Color.
- When your cursor changes to a pen icon, use it to choose a single color in the image.
You’ll then see any matching colors in your picture become transparent. They become the color of the slide. Just note that some images have many color variations and pixels, so you may only see a small area’s opacity change.
Make a Transparent Background in PowerPoint
Just like changing a picture, you can adjust the transparency of a PowerPoint background. This includes picture or texture fill, gradient, and solid color backgrounds but not (currently) patterns and is ideal if you want to use a watermark background.
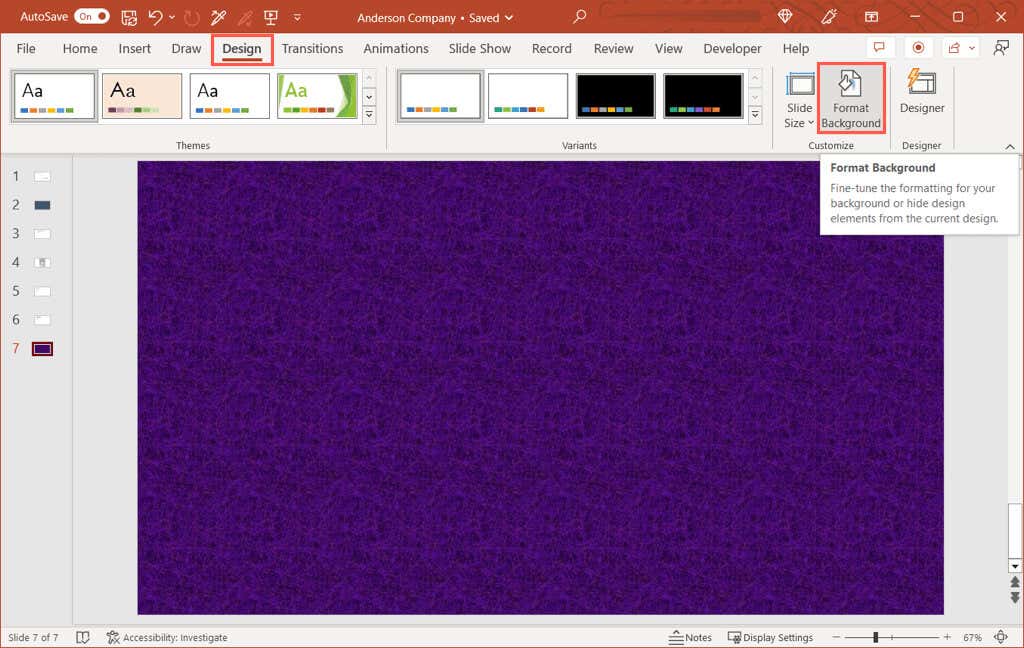
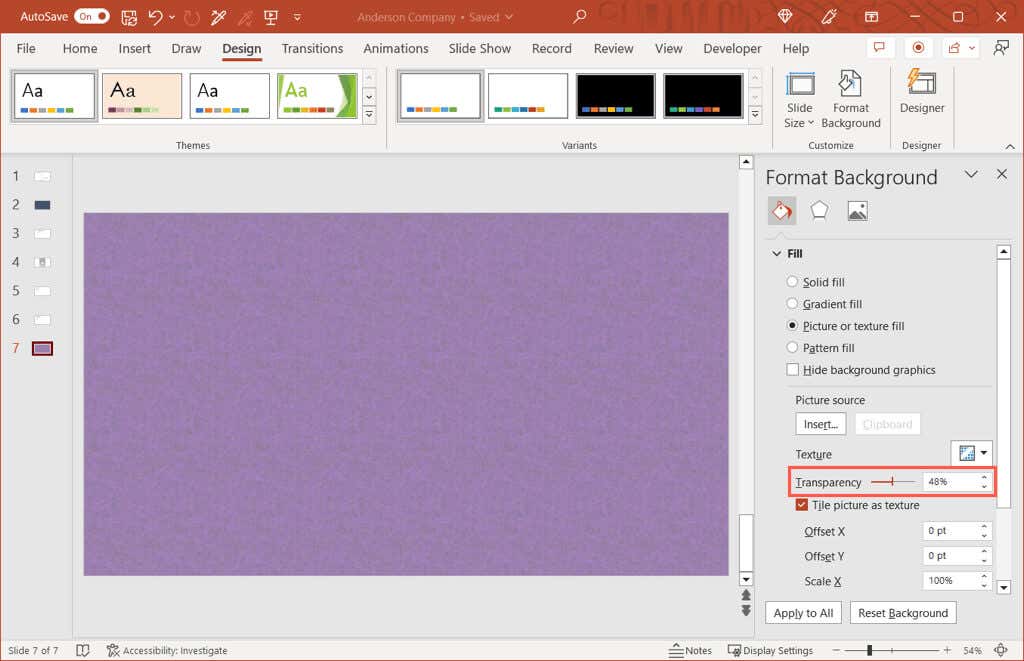
- Select the slide containing the background and go to the Design tab.
- Choose Format Background in the Customize section of the ribbon.
- When the sidebar opens on the right, expand the Fill section if necessary.
- Use the Transparency slider, enter a percentage in the box to the right, or use the arrows on the right side of the box to adjust the transparency level.
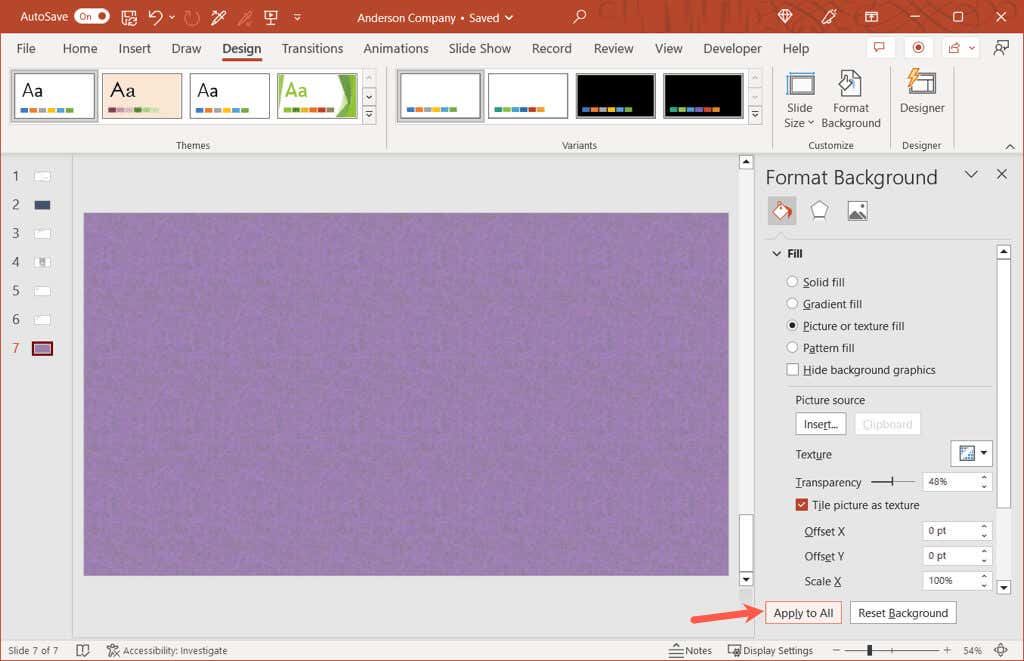
- You should see your background update immediately. If you’re using the same background on all slides in your presentation, you can change the transparency for all by selecting Apply to All at the bottom of the sidebar.
When you finish, use the X on the top right of the sidebar to close it.
Be Transparent With Your Images
With flexibility, you can adjust the transparency of a picture using a built-in preset or a background using an exact percentage. Whether you want the transparency at 20, 50, or 99 percent, you can edit images and backgrounds easily in your PowerPoint presentation.
For related tutorials, look at how to completely remove the background of an image to focus on the subject.
Related Posts
Sandy Writtenhouse is a freelance technology writer and former Project, Department, and Program Manager. She turned her education, job experience, and love of technology into a full-time writing career. With all sorts of gadgets in her home and her hands, she seeks to help others make life easier through technology. Read Sandy’s Full Bio
