Do you have trouble typing into the Windows Search bar on your Windows 10 or 11 computer? Work through the fixes in this tutorial, and you should be able to resolve the issue.
The Windows Search bar in Windows 10 and 11 can appear unresponsive for several reasons. For example, it could be due to a buggy instance of Windows Explorer, a broken search index, or a corrupt user account. We’ll show what you must do so that you can go back to typing into the Windows Search box normally again.
1. Restart Windows Explorer
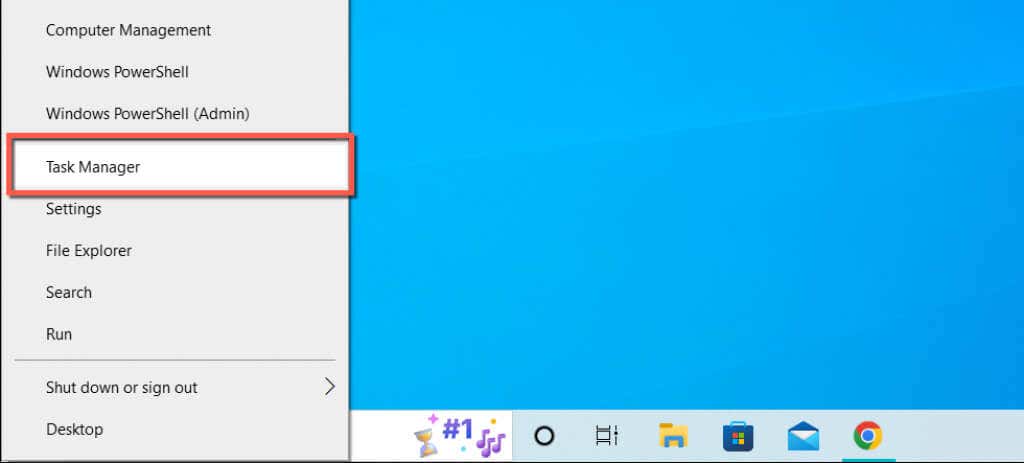
Restarting Windows Explorer is the best way to fix unexpected glitches and other anomalies with the Windows user interface. To do that:
- Right-click the Start button and select Task Manager.
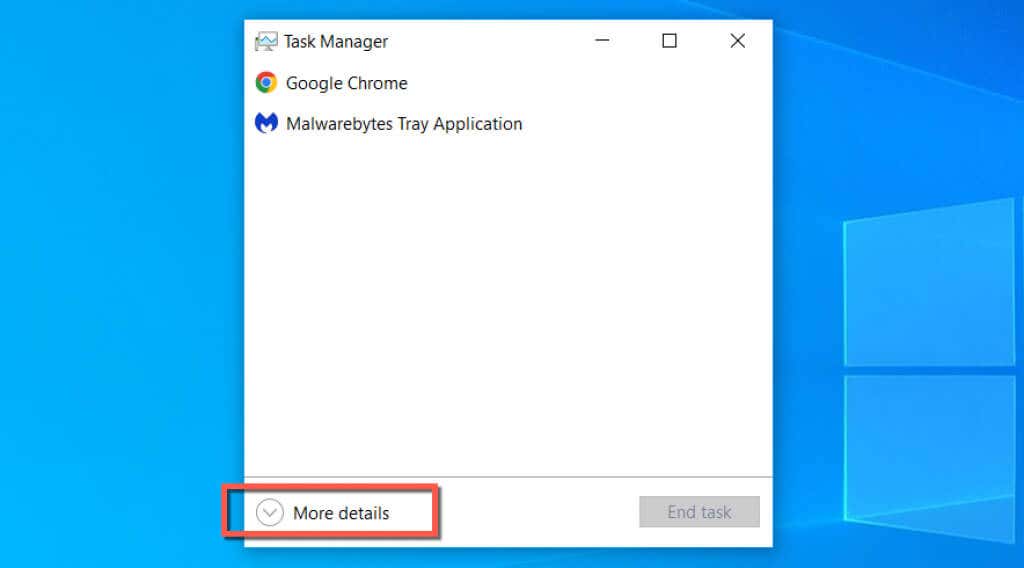
- Select More details to expand the Task Manager view.
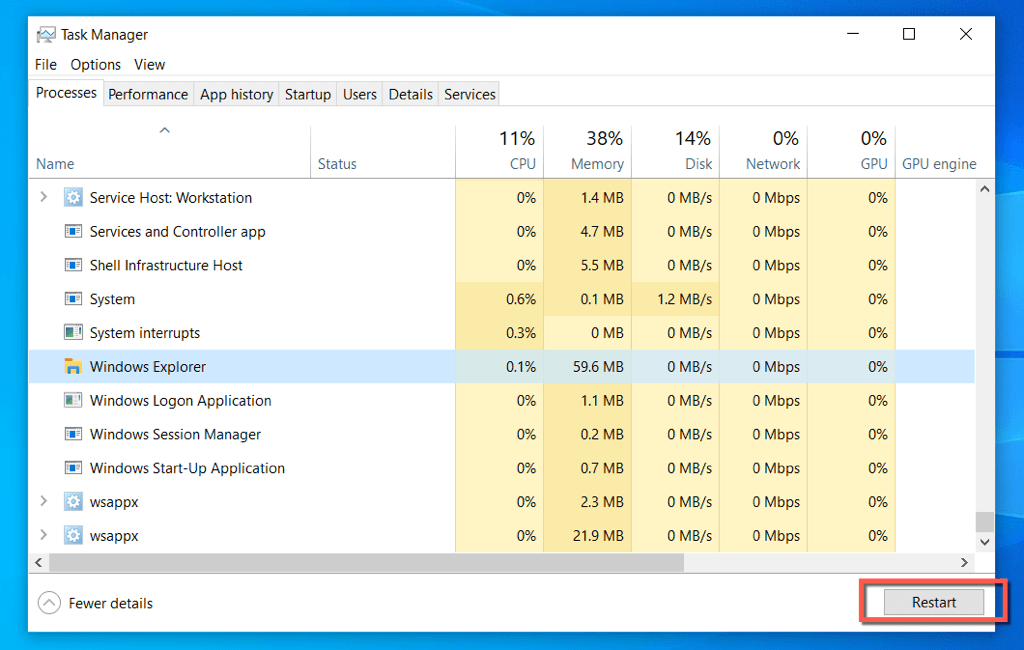
- Select Windows Explorer > Restart.
The taskbar and the desktop will briefly disappear as Windows Explorer reboots itself. You can exit the Task Manager after that.
Related: Learn how to troubleshoot when your Windows Search bar keeps closing unexpectedly.
2. End Windows Search and Cortana Processes
If Windows Search continues to fail to work, force-quit the Search and Cortana processes in Windows and check if that makes a difference.
- Open the Task Manager again.
- Highlight the Search and Cortana processes.
- Select End Task.
3. Restart the Windows Search Service
Continue by restarting the background service that manages Windows Search. To do that:
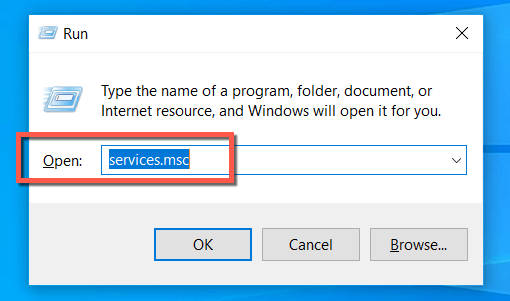
- Press Windows Key + R to open the Run box.
- Type services.msc and press Enter.
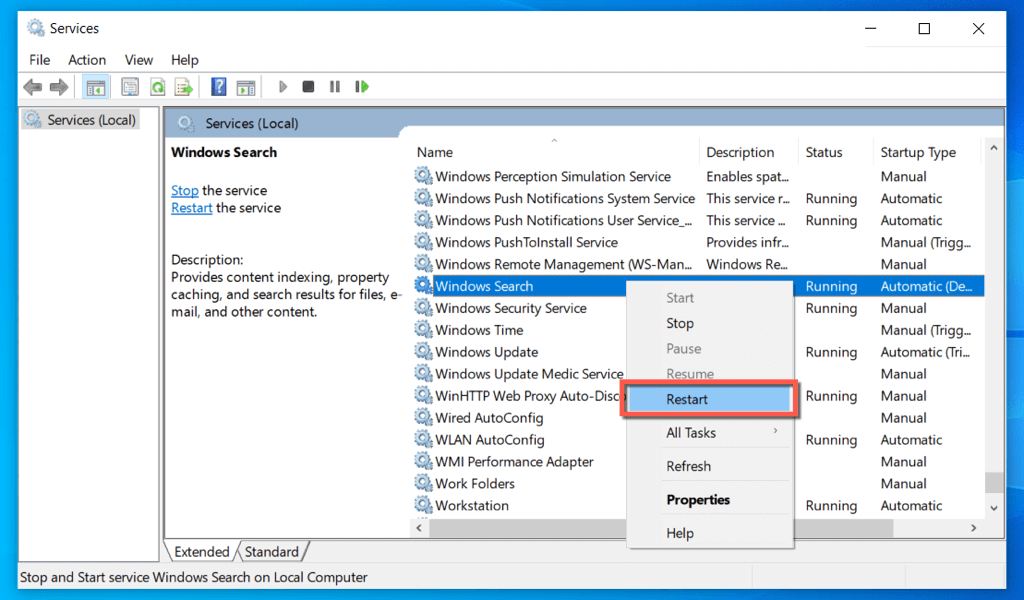
- Right-click Windows Search and select Restart.
4. Restart Your Computer
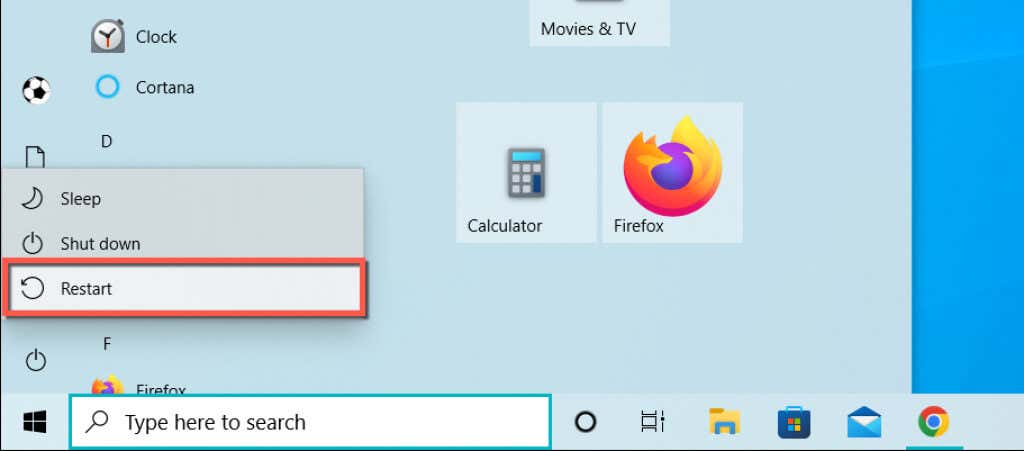
Have you tried restarting your computer yet? Sometimes, that’s all it takes to fix weird problems like an unresponsive Windows Search box, so just open the Start menu, select the Power icon, and choose Restart. If there are any unfinalized updates, select Update and restart.
5. Run Search and Indexing Troubleshooter
Windows 10 and 11 have a built-in Search and Indexing troubleshooter that automatically finds and fixes underlying issues with Windows Search. To run it:
- Right-click the Start button and select Settings.
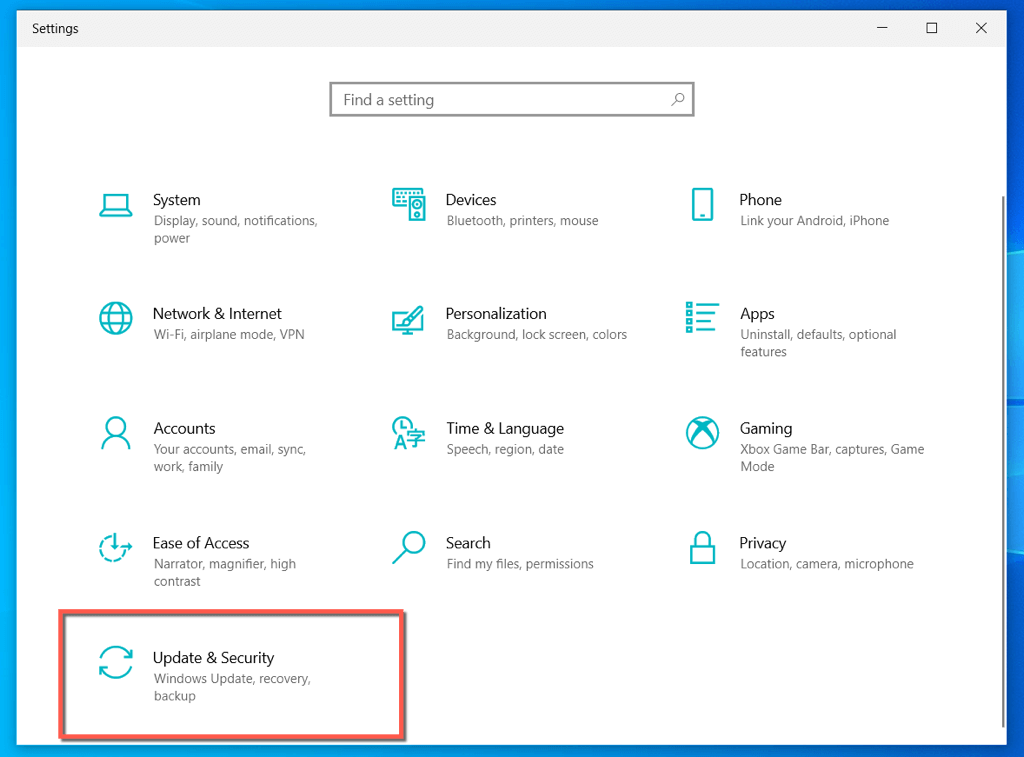
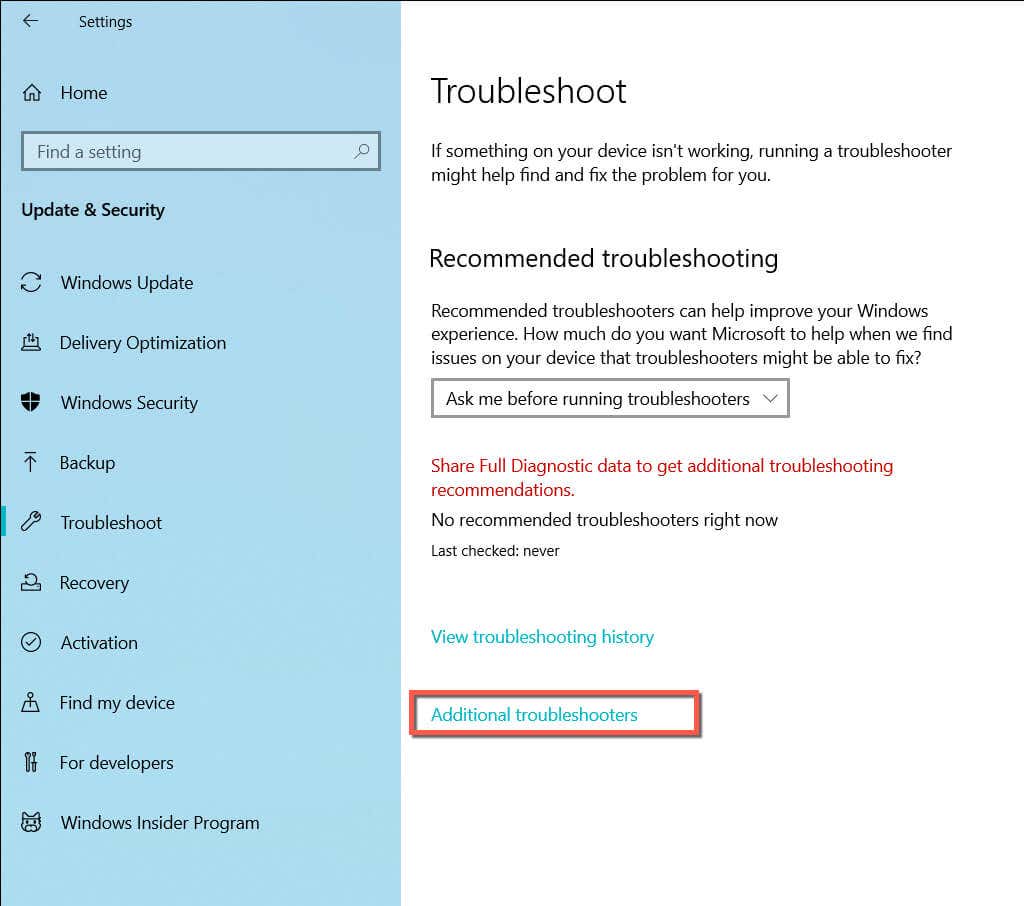
- Select the Update & Security category. In Windows, scroll down the default System screen instead.
- Select Troubleshoot > Additional/Other troubleshooters.
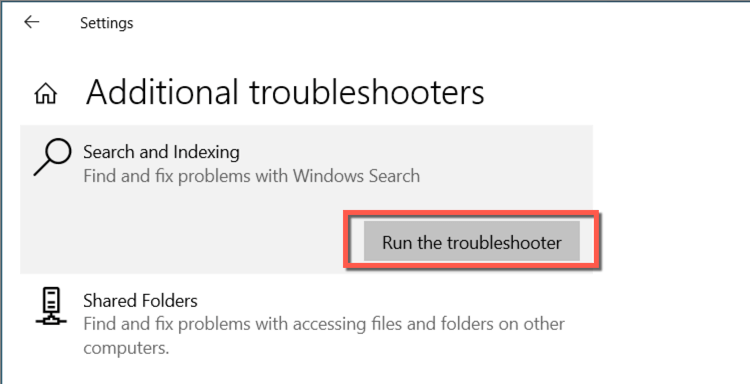
- Select Search and Indexing > Run the troubleshooter.
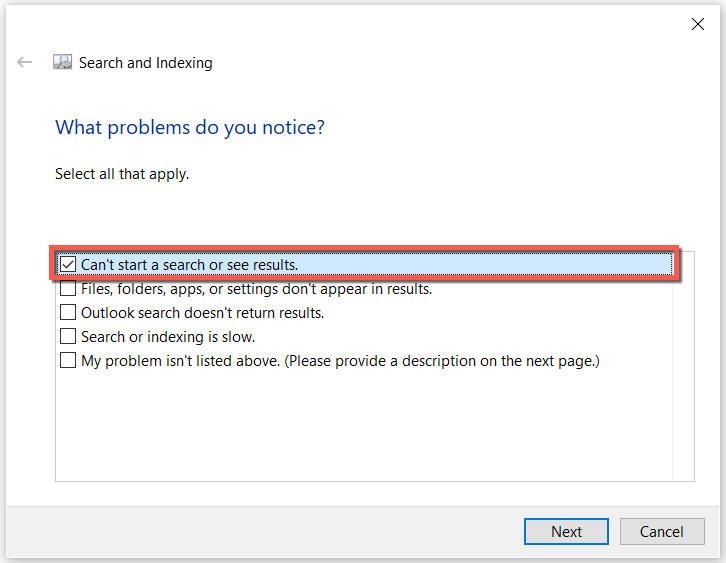
- Check the box next to Can’t start a search or see results and select Next.
- Wait until the Search and Indexing troubleshooter finishes troubleshooting your computer for problems.
6. Run the CTF Loader
CTF Loader is the service that manages the Alternative User Input and the Office Language in Windows 10 and 11. Running it tends to fix the Windows Search bar for lots of people.
- Open a Run box.
- Copy and paste the following file path:
C:Windowssystem32ctfmon.exe
- Select OK or press Enter.
7. Always Run CTF Loader at Startup
If the method above fixes the unresponsive Windows Search bar, but the problem recurs after a system reboot, try forcing the CTF Loader to launch at startup with this workaround.
- Open Run.
- Type the following path and press the Enter key:
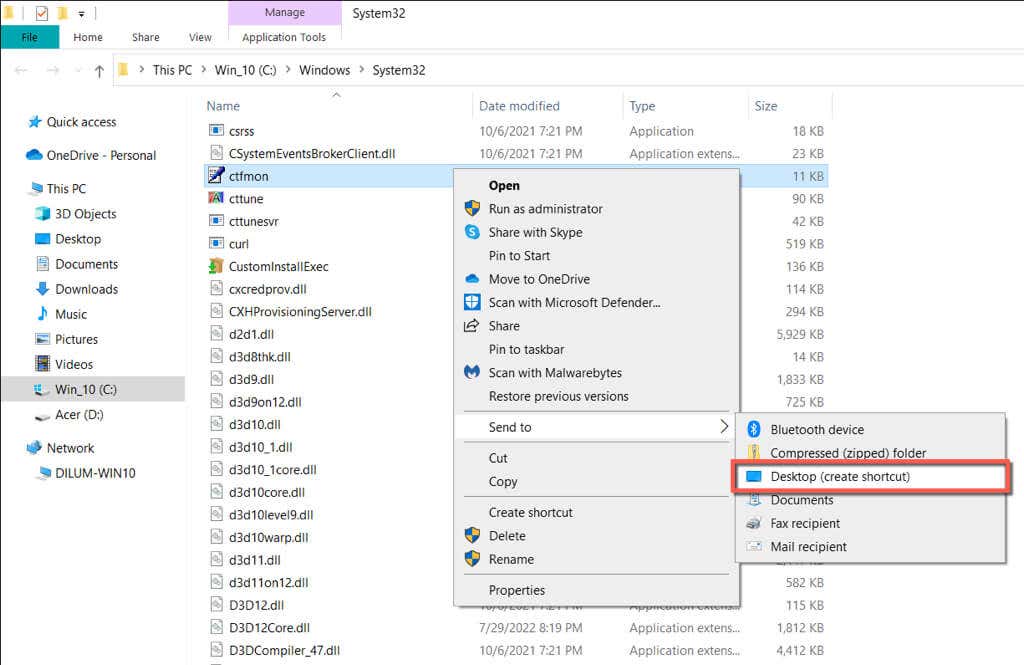
C:Windowssystem32
- Locate and right-click ctfmon.exe and select Show more options (Windows 11 only) > Send to > Desktop (create shortcut).
- Open another Run box and run the following command:
shell:common startup
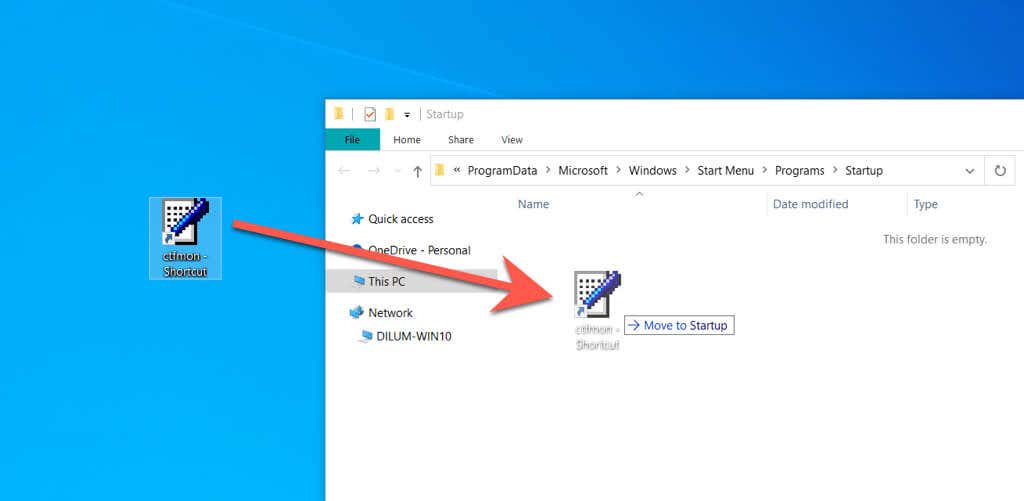
- Drag and drop ctfmon – Shortcut from your desktop to the File Explorer window.
- Restart your computer.
8. Rebuild the Indexing Services in Windows
Next, rebuild the Windows Search indexing services via the Control Panel in Windows. To do that:
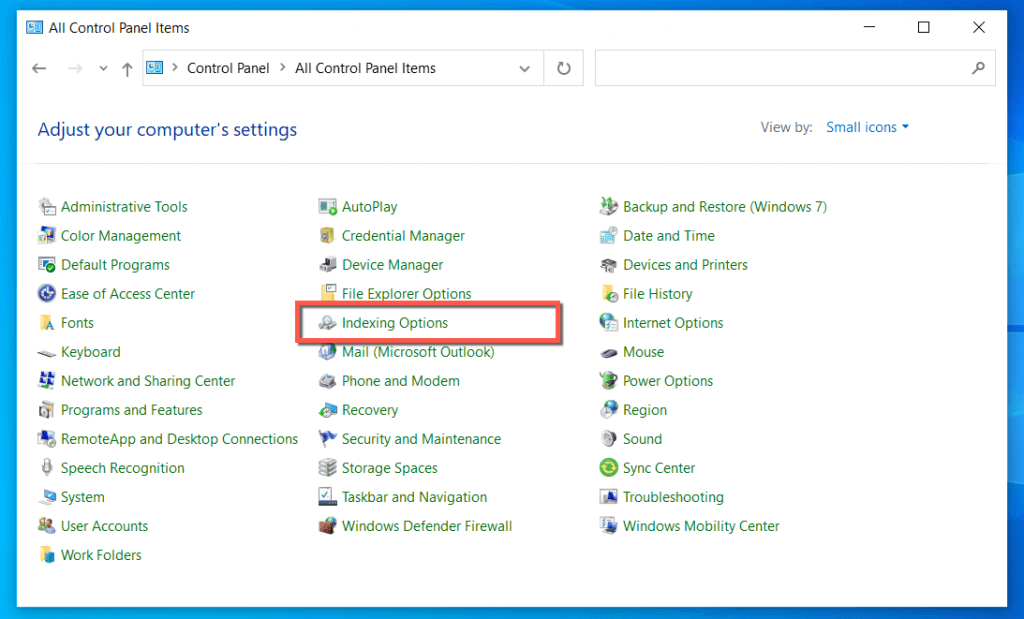
- Open Run, type control, and press Enter.
- Set View by (located at the top right corner of the screen) to Small icons.
- Select Indexing Options.
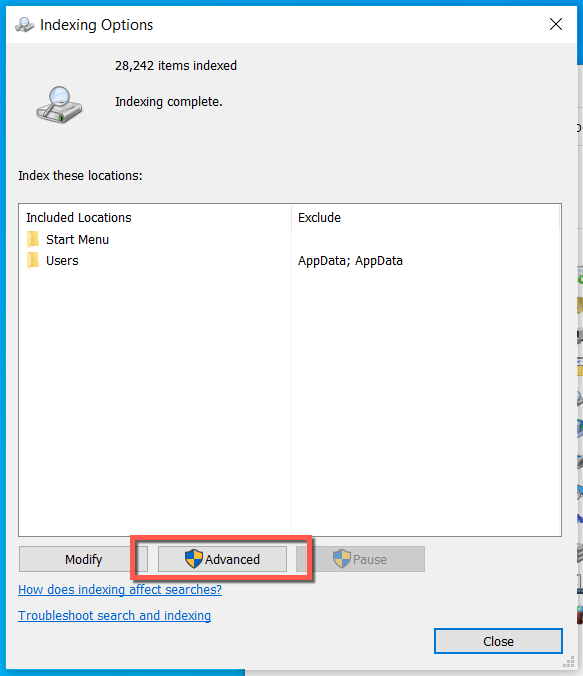
- Select Advanced.
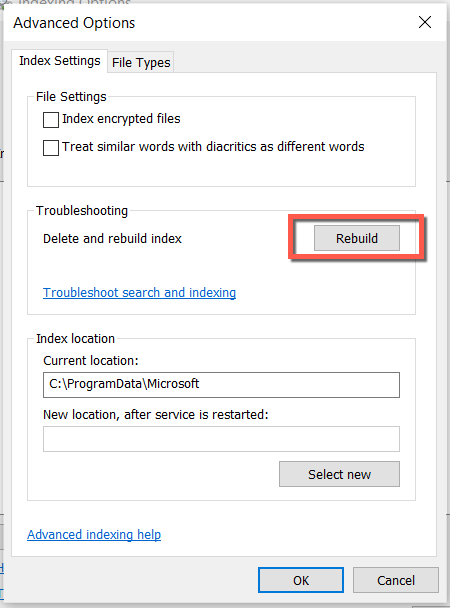
- Select Rebuild.
- Wait until Windows Search rebuilds its index.
- Select Close to exit the Indexing Options dialog.
9. Re-register All Microsoft Store Apps
Re-registering all Microsoft Store apps on your Windows PC is another known way to fix a freezing Windows Search bar. The following steps will help you with that.
- Right-click the Start button and select Window PowerShell/Terminal (Admin).
- Copy and paste the following command:
$manifest = (Get-AppxPackage Microsoft.WindowsStore).InstallLocation + ‘AppxManifest.xml‘ ; Add-AppxPackage -DisableDevelopmentMode -Register $manifest
- Press Enter.
- Wait until Windows PowerShell finishes executing the command.
- Exit the console and restart your computer.
10. Update Windows to Latest Version
If you still can’t type into the Windows Search bar, consider updating your Windows 10 or 11 installation. A newer operating system version could contain an update that fixes the problem permanently.
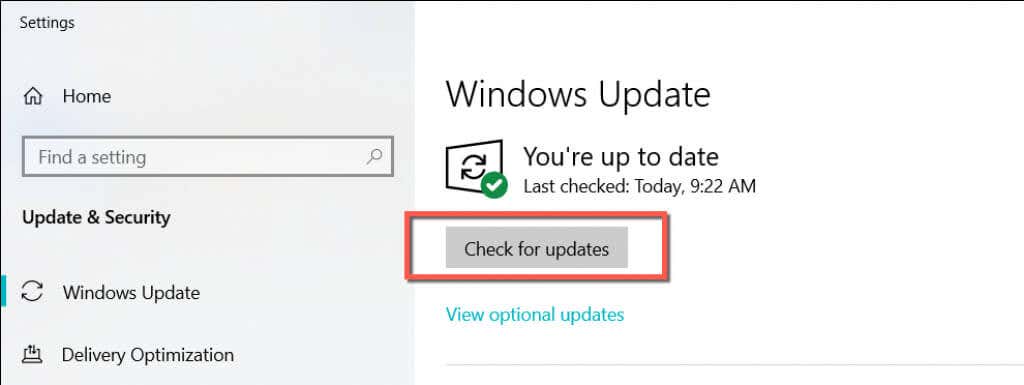
- Open the Settings app and select Windows Update.
- Select Check for updates.
- Install all pending Windows updates.
11. Check Your Computer for Malware
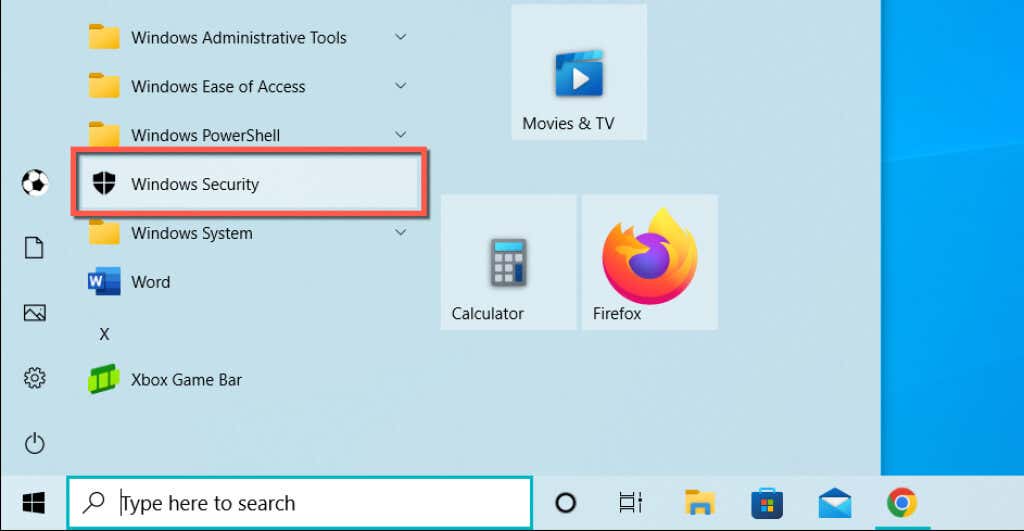
Malicious software and computer viruses can hijack components like Windows Search. Check your computer for malware with the built-in Windows Security utility if the issue persists.
- Open the Start menu and select Windows Security on your programs list.
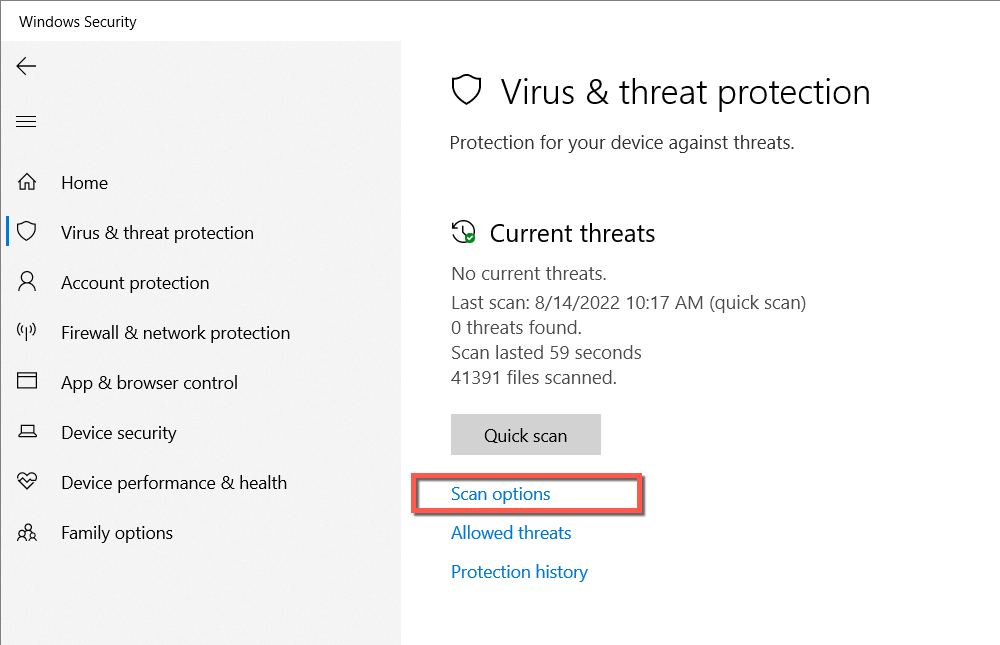
- Select Virus & threat protection > Scan options.
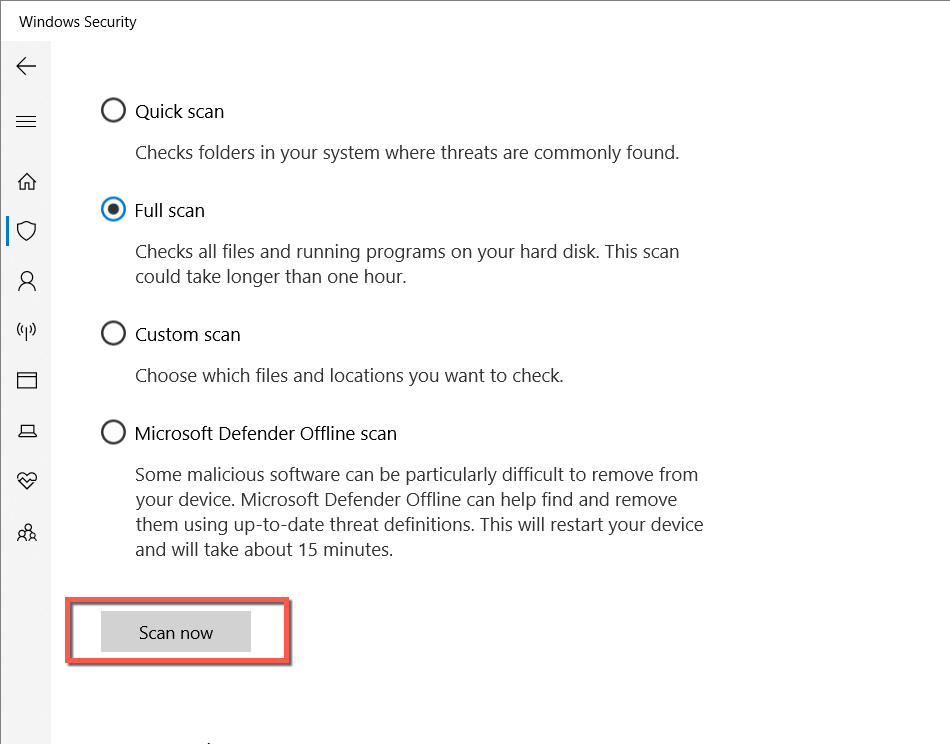
- Select Full scan > Scan now.
If nothing shows up on the scan results, follow up with a Microsoft Defender Offline scan. Or, use a dedicated malware removal utility like Malwarebytes to perform a thorough sweep for malware.
12. Run the System File Checker
The SFC (System File Checker) is a built-in Windows command-line tool that fixes possible corruption issues in the operating system. Running it could get the Windows Search bar responsive again.
- Open Run, type cmd, and press Ctrl + Shift + Enter to invoke an elevated Command Prompt window.
- Type the following command:
sfc /scannow
- Press Enter.
13. Perform a DISM Scan
After running the System File Checker, it’s a good idea to follow up with a DISM (Deployment Image Servicing and Management) scan to improve system stability. To run it, type the following into an elevated Command Prompt console and press Enter:
DISM.exe /Online /Cleanup-Image /Restorehealth
14. Create a New Windows User Account
On rare occasions, profile corruption issues can play a factor and stop Windows Search from working. Create a new Windows user account to test that.
- Open the Settings app and select Accounts.
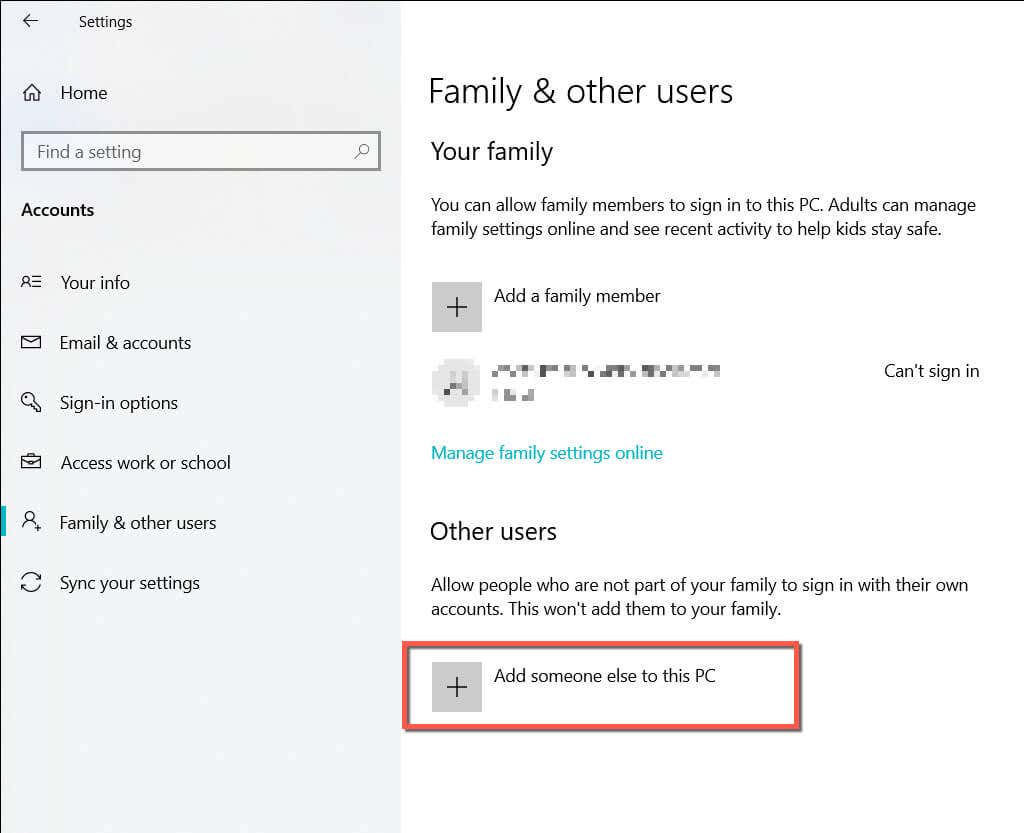
- Select Family & other users.
- Select Add someone else to this PC/Add account under the Other users section.
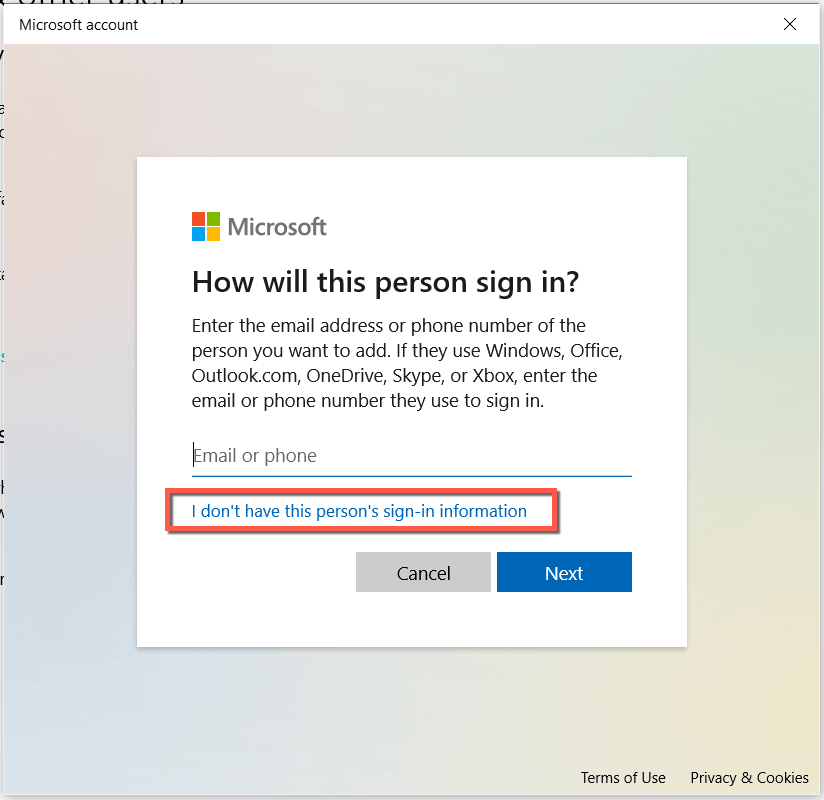
- Select I don’t have this person’s sign-in information.
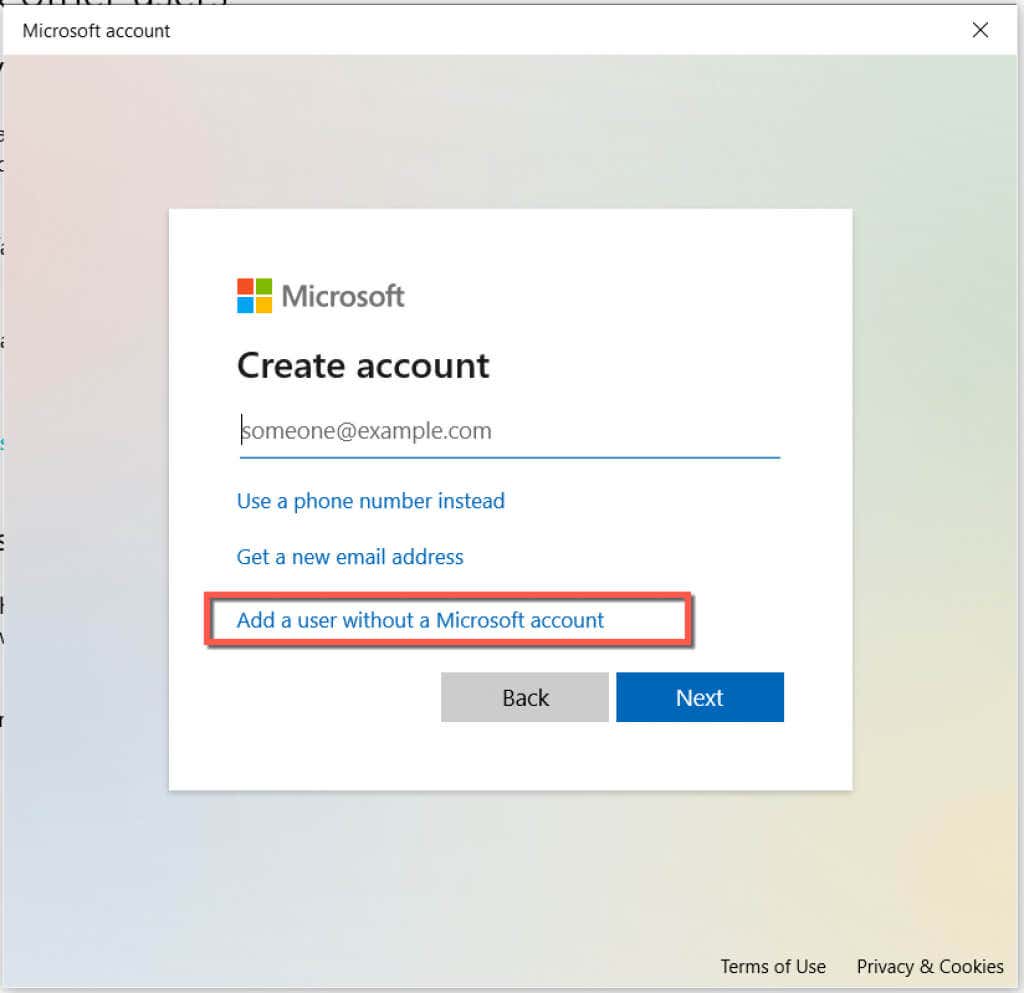
- Select Add a user without a Microsoft account.
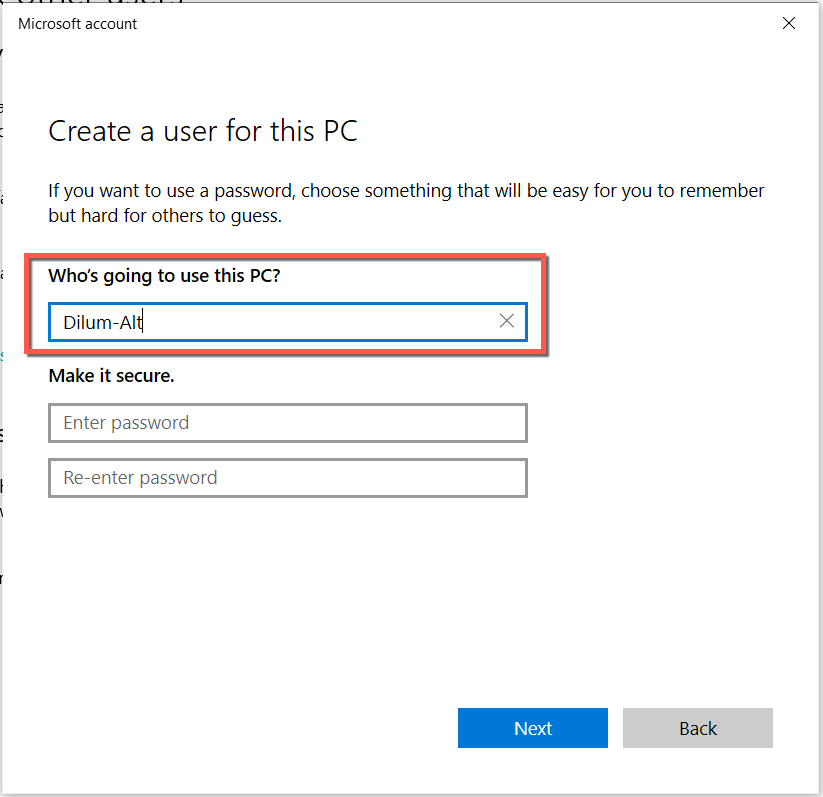
- Type in a username and password (optional) and select Next.
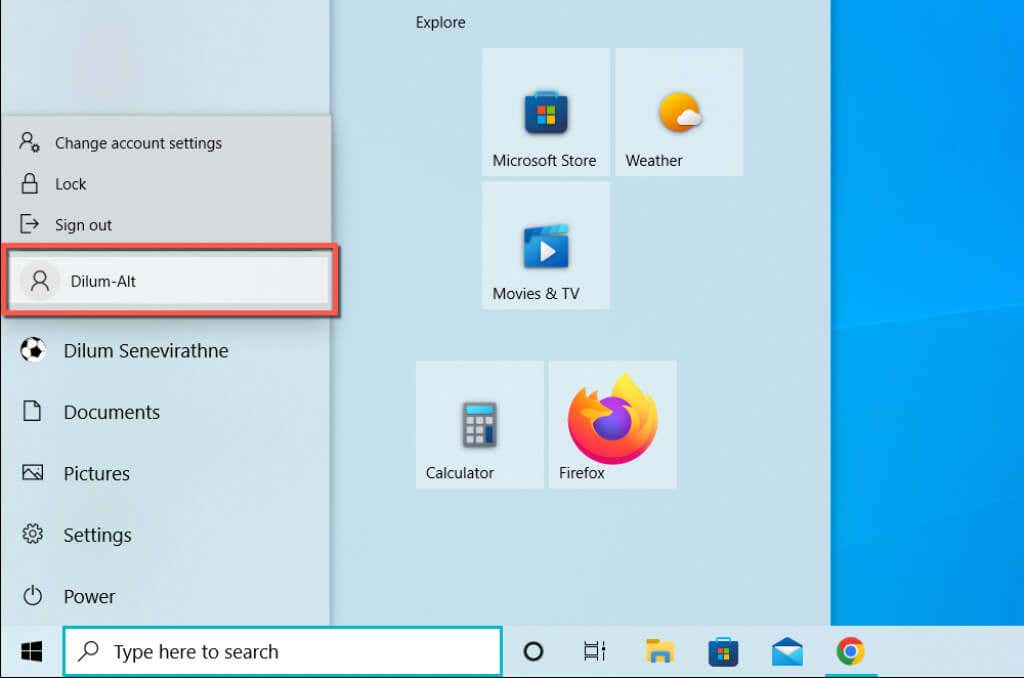
- Open the Start menu, select your user name, and choose the new account to switch to it.
If the Windows Search bar is working normally, learn how to switch to the new Windows user account permanently.
15. Reset Windows 10/11 to Factory Defaults
If none of the fixes above help, you’re dealing with a deeper system-related problem that only resetting Windows to its factory default settings can rectify. Back up the data on your PC before you begin.
- Open the Settings app.
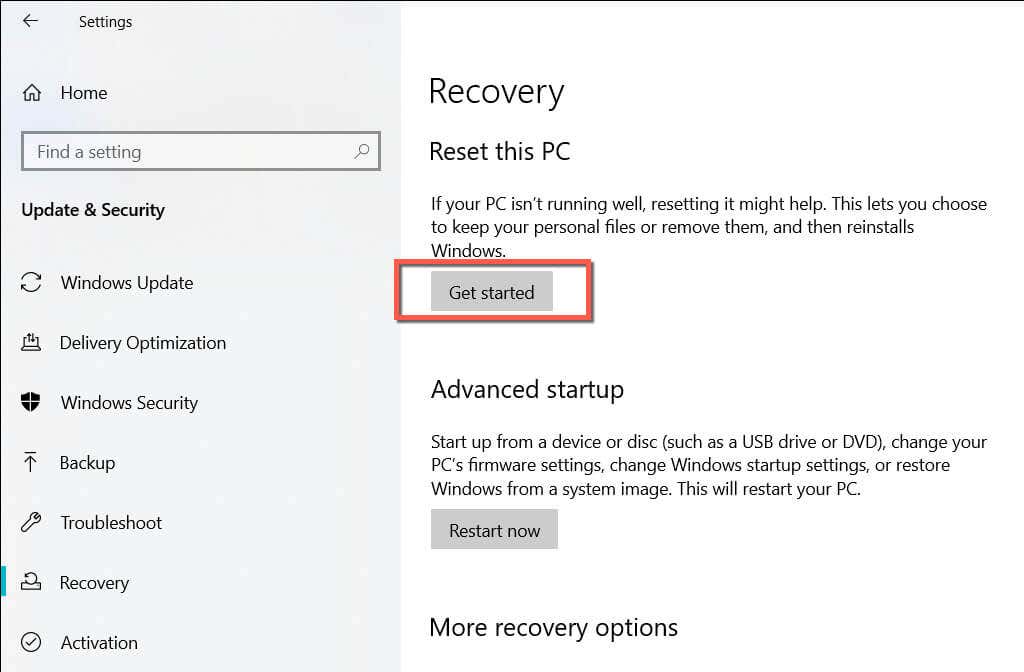
- Select Update & Security > Recovery > Get Started. In Windows 11, scroll down the System screen and select Recovery > Reset PC.
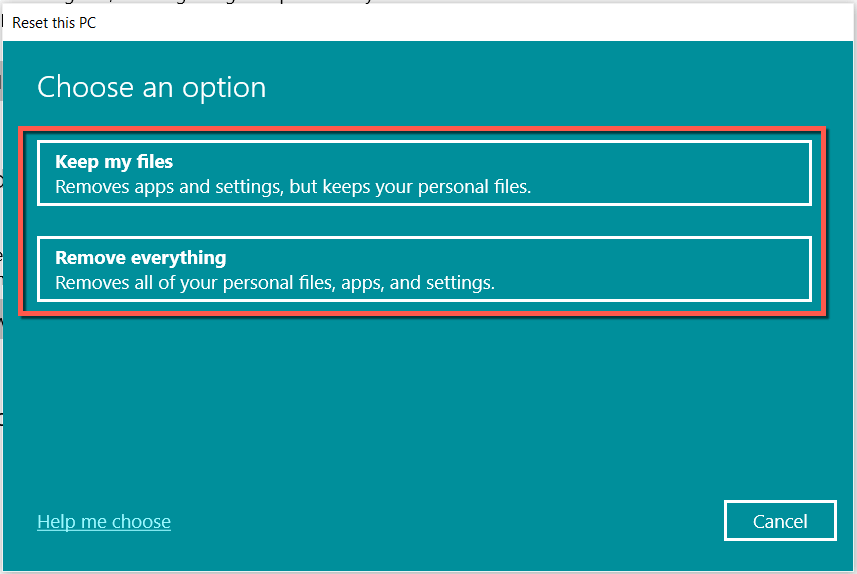
- Pick between the Keep my files and Remove everything options and wait until Windows resets itself.
For detailed instructions, check our complete guides to factory resetting Windows 10 and Windows 11.
You Can Type In the Windows Search Bar Again
An unresponsive Windows Search bar is an annoying issue to run into, but it’s also something that’s not hard to resolve. If the easier fixes don’t help, the other solutions in this post definitely will. Do share what works for you in the comments below.
Related Posts
- Preparing for Windows 10 End of Support: Upgrading to Windows 11
- How to Fix a “This file does not have an app associated with it” Error on Windows
- How to Fix an Update Error 0x800705b4 on Windows
- How to Resolve “A JavaScript error occured in the main process” Error on Windows
- How to Fix the Network Discovery Is Turned Off Error on Windows
Dilum Senevirathne is a freelance tech writer and blogger with three years of experience writing for online technology publications. He specializes in topics related to iOS, iPadOS, macOS, and Google web apps. When he isn’t hammering away at his Magic Keyboard, you can catch him binge-watching productivity hacks on YouTube. Read Dilum’s Full Bio
