Sometimes, valid Windows processes can run improperly, causing high CPU usage and slowing down your computer. Audiodg.exe is one such service.
Created by Windows to manage the system’s audio, this process is known to often cause problems and take up 100% of processing resources. Why do such problems occur, and how can you deal with them? Find out in this article.
What is audiodg.exe?
Starting from Windows Vista, audio services were moved to a separate profile like many other critical Windows services. This makes it difficult for the user to simply shut them down by mistake from the Task Manager.
Named Windows Audio Device Graph Isolation, this service is dedicated to producing your computer’s audio output. It is a certified Windows process, so it’s completely safe. Trying to delete or stop it forcefully will disable all audio on your system.
What Causes audiodg.exe High CPU Usage?
While audiodg.exe is a genuine Windows process, it can sometimes cause issues on your computer. Usually, the problem is related to its high CPU usage, making your PC lag at times.
This can happen due to many factors. Advanced audio processing like volume adjustment or audio effects is a common reason, as these services take up quite a bit of CPU power. Another reason can be outdated or faulty drivers for the soundcard on your computer.
Method #1: Disable Audio Effects
The first thing to do when audiodg.exe is acting up is to disable all audio enhancements on your PC. These enhancements use the CPU to process the sound output in real-time, which can cause issues during complex audio playback such as video games.
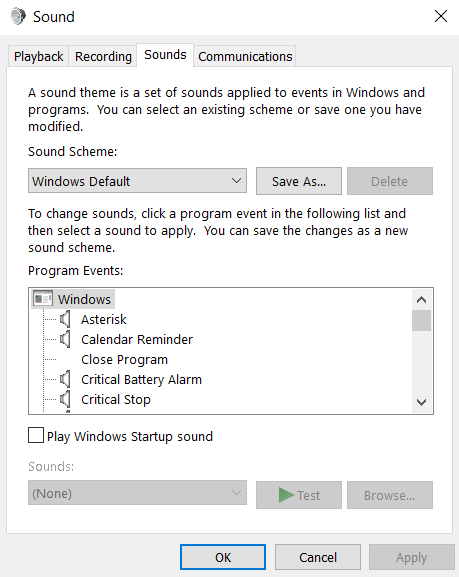
- Open the sound panel by right-clicking on the speaker icon on the taskbar and select Sounds.
- The sound panel allows you to modify all settings related to audio processing on your computer, including advanced effects.
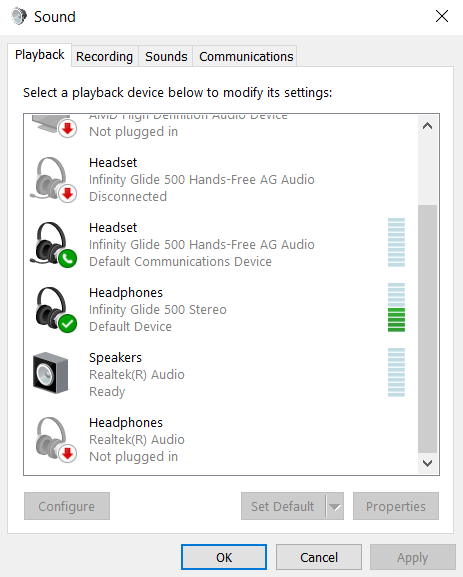
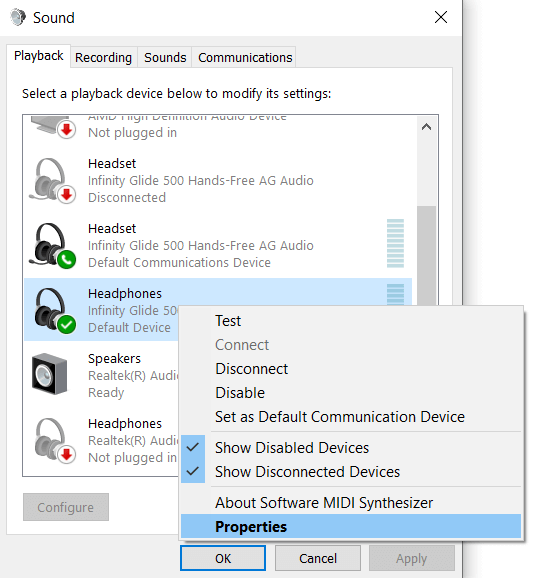
- Switch to the Playback tab to get a list of all the audio devices active on your computer. Search for your preferred speakers by scrolling down.
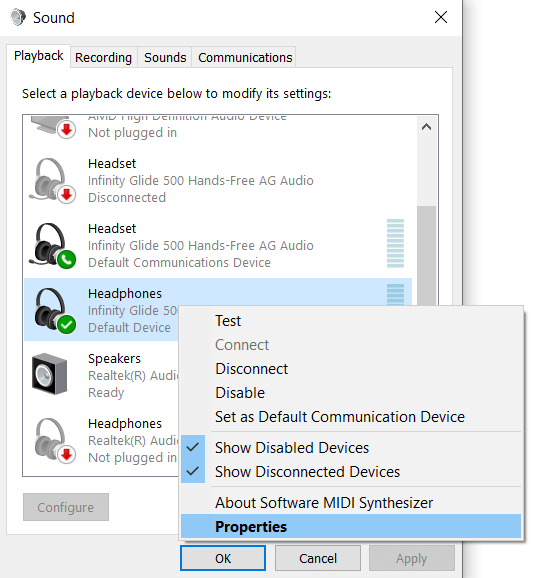
- Right-click on the active audio device and select Properties.
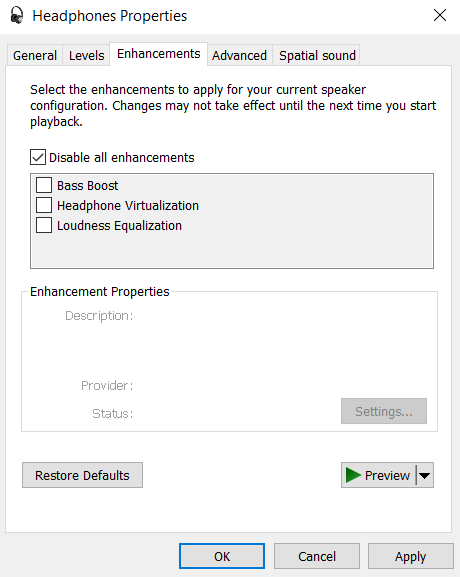
- In the properties window, switch to the Enhancements tab and check the Disable all enhancements option. Press the Apply button to confirm.
With audio effects disabled, the CPU usage of audiodg.exe should significantly decrease, allowing your PC to function smoothly.
Method #2: By Turning Off Volume Adjustment
Another audio enhancement often applied by the operating system is volume adjustment. While not as CPU intensive as audio effects, it still carries some overhead and can slow down your computer.
- As before, right-click on the speaker icon on your taskbar and select Sounds.
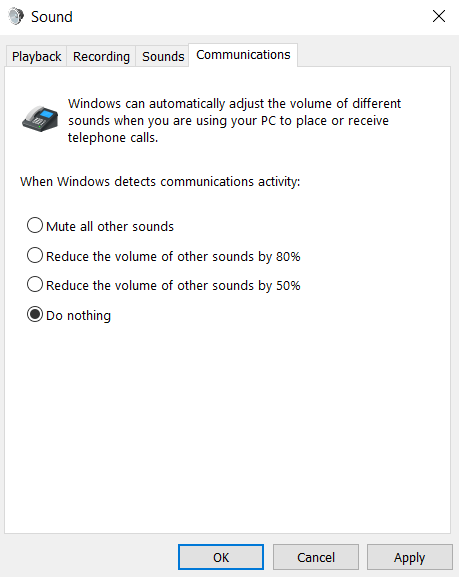
- In the Communications tab, select the Do nothing radio button and select OK to confirm. This will disable volume adjustment and reduce CPU usage.
Method #3: By Lowering the Sample Rate
The sample rate of audio can be considered the “resolution” of that sound. The higher the sample rate, the better the quality of the audio that is produced. On the flip side, higher sample rates also require more system resources, so you might want to tone it down if your PC cannot handle it.
- Once again, open the sound panel by right-clicking on the speaker icon on the taskbar and select Sounds.
- Now head to the Playback tab and find the audio device being used from the list. Right-click on it and select Properties to configure its settings.
- In the Advanced tab, you will find the option to choose a sample rate and bit depth. The number of options depends on the audio device used, but you should have at least one lower-quality option. Select it and select the OK button.
All audio output from the device will now consume lesser system resources. This will also reduce the sound quality, so use it only as a last resort.
Method #4: By Updating Audio Drivers
Very rarely, it is possible that the issues with audiodg.exe stem from outdated or incorrect sound card drivers. This usually happens because of relying on the default drivers installed by the operating system rather than using the correct drivers from the manufacturer.
Most guides will tell you to simply uninstall and reinstall the sound card from the Device Manager, but we do not recommend that approach. Doing so will get you the general-purpose drivers from Microsoft, not the optimized version meant for your hardware.
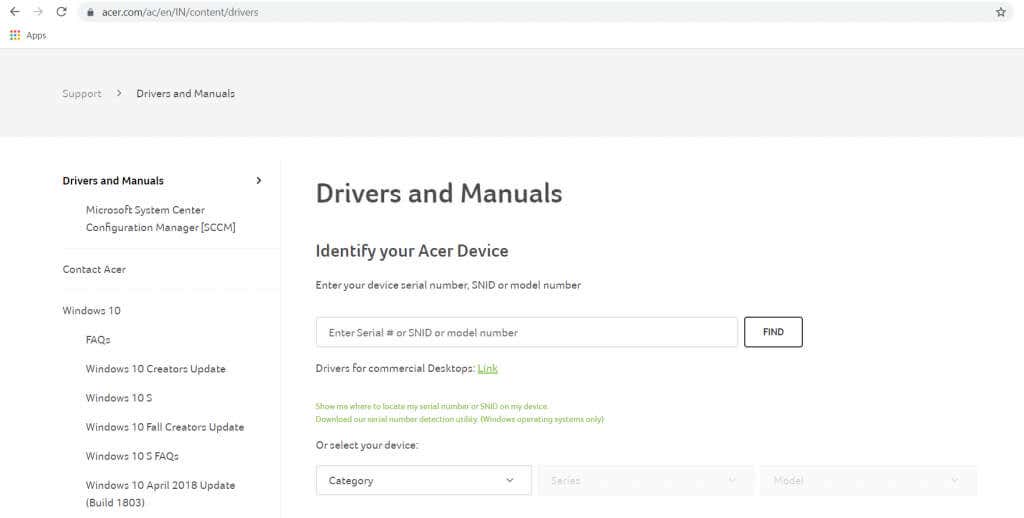
- To install the correct drivers for your system, head to the website of your computer’s manufacturer. For our test machine, this is Acer.
- Now you need to choose the model number of your PC. Most leading manufacturers will have an application for download that can auto-detect this information. You can always check the model number on your device itself.
- On the page showing all the drivers for your computer, scroll down until you find the audio drivers. Download this file.
- Run the downloaded setup to install the sound card drivers. This will usually require a system restart, after which the new drivers will take effect.
Running the latest drivers on your computer is one of the easiest ways to solve most problems, as manufacturers periodically update their drivers to fix reported bugs.
How To Fix audiodg.exe High CPU Usage?
The Windows Audio Graph Isolation service can often show extremely high system usage. This is caused by the audio processing taking up more resources than your computer can spare, affecting performance.
To fix this issue, you should try disabling all bells and whistles of the sound settings on your computer. This includes audio enhancements, volume adjustment, or a high sample rate. If that doesn’t work, try updating the drivers of your soundcard. Make sure you get the latest optimized drivers from the manufacturer’s website to give you the best performance.
Related Posts
- Preparing for Windows 10 End of Support: Upgrading to Windows 11
- How to Fix a “This file does not have an app associated with it” Error on Windows
- How to Fix an Update Error 0x800705b4 on Windows
- How to Resolve “A JavaScript error occured in the main process” Error on Windows
- How to Fix the Network Discovery Is Turned Off Error on Windows
