Windows 10 and Windows 11 are excellent operating systems. But if you see a consistently sluggish performance, it could be because of something called SysMain (earlier known as Superfetch).
In this article, we help you understand SysMain and why you might face a high disk usage problem with this service.
What Is SysMain (Superfetch)?
Superfetch, called SysMain after the Windows 10 1809 update, was introduced with Windows Vista and is a successor to Prefetch (a similar feature in Windows XP). The OS uses this feature to improve system performance over time.
Why over time? First, it studies your RAM usage patterns. Then the feature identifies programs you run most often on your PC. Once Superfetch has this information, it preloads these programs into your RAM. When you launch these programs, you’ll see them load much faster.
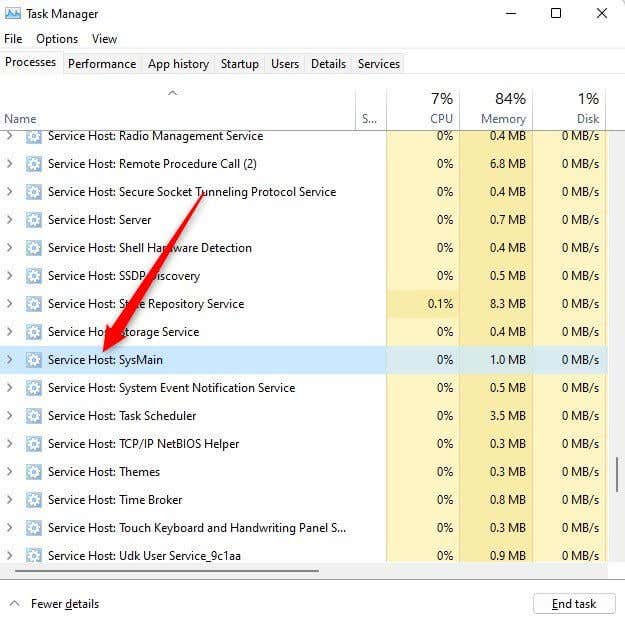
So, Superfetch needs resources. You might find Superfetch working in the background when you look at the list of system processes in the Task Manager as “Service Host: SysMain”:
Critically, Superfetch doesn’t deprive other programs of RAM. It only uses unused RAM. Any newly launched program will still have priority over Superfetch regarding RAM space. If required, Superfetch will free up RAM for another app.
If you believe Superfetch is causing performance issues on your computer, you can safely disable it. Below, we discuss a few ways to disable Superfetch and fix Service Host: SysMain high CPU usage problem.
Disable SysMain from Services
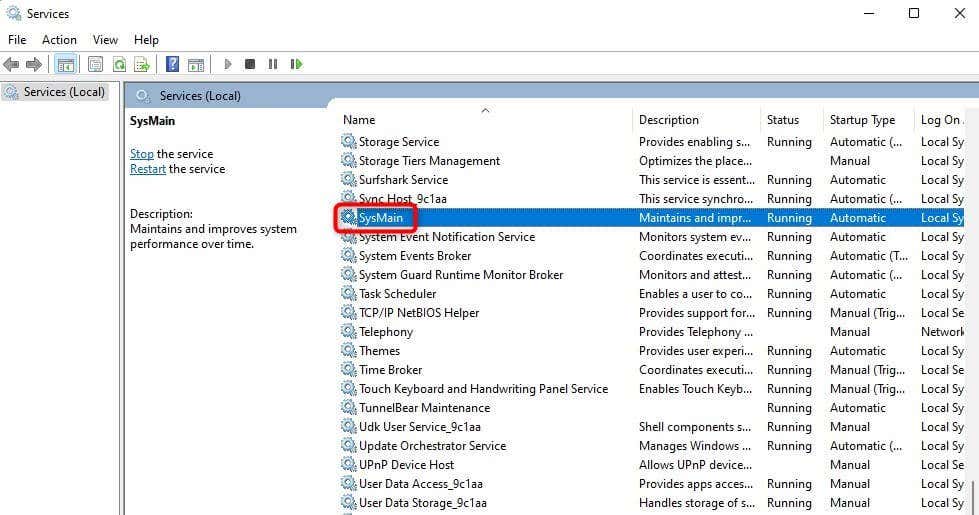
Since SysMain is a Windows service, the simplest way to disable SysMain is from the Services console:
- Press Win + R, type services.msc, and press Enter to launch the Services console.
- Scroll through the list in the Services console for a service named SysMain.
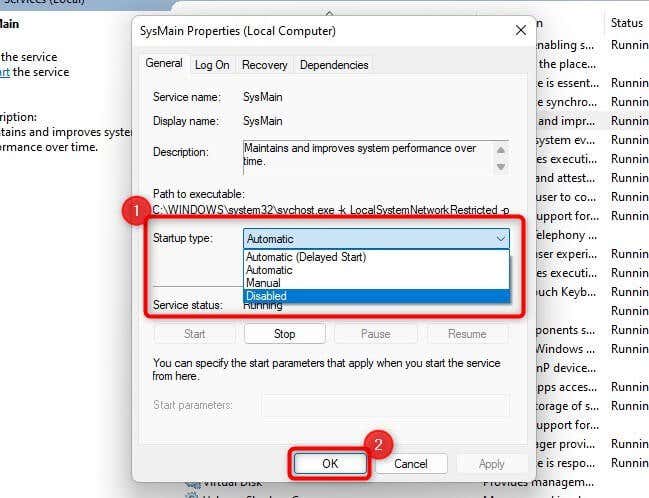
- Double-click on the SysMain service to open service properties. Alternatively, you can right-click on the service and select Properties.
- Select the Stop button to stop the service. Then, expand the Startup Type drop-down menu and select Disabled.
- Select OK to save and exit.
Disable SysMain Using Command Prompt
Using the Command Prompt to disable SysMain is quicker. If you’re comfortable using commands, here is how you can disable SysMain:
- Press Win + R, type cmd, and press Ctrl + Shift + Enter to launch an elevated Command Prompt.
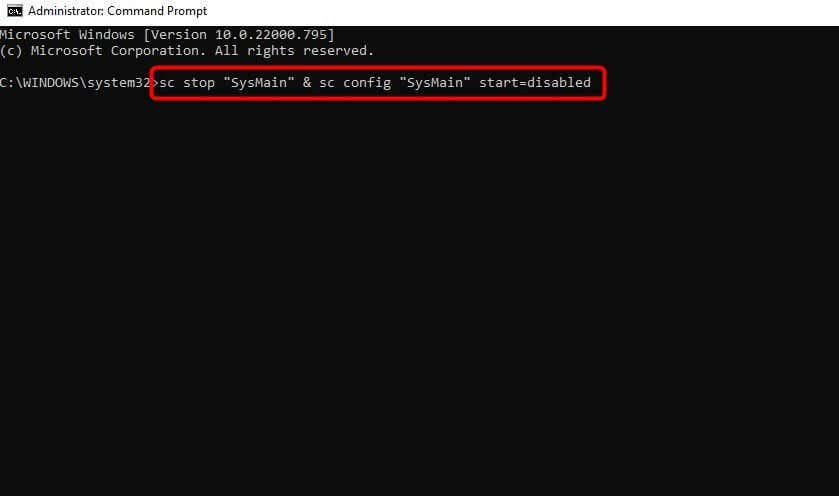
- Copy and paste the following command into the Command Prompt window and press Enter:
sc stop “SysMain” & sc config “SysMain” start=disabled
Disable SysMain from the Registry
If the previous methods don’t work for some reason, you can modify the registry settings to disable SysMain:
- Press Win + R, type regedit, and press Enter to launch the Registry Editor.
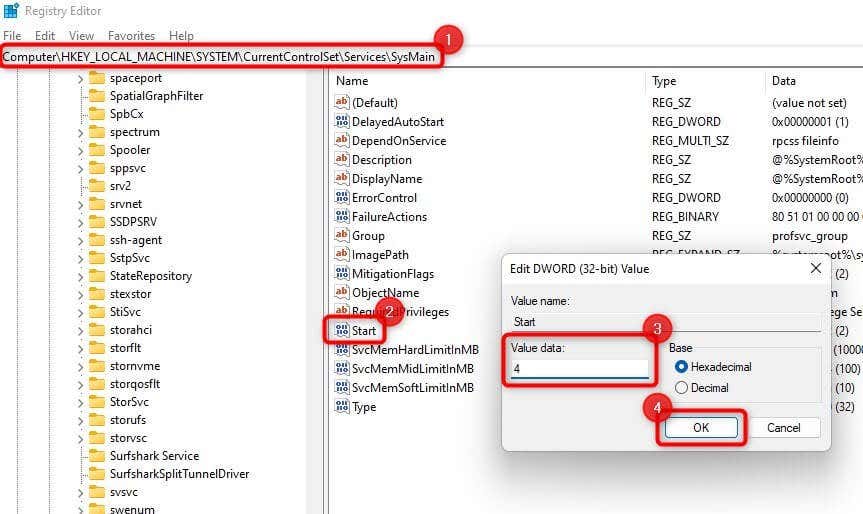
- Navigate to the following path using the left sidebar or copy and paste the following text into the navigation bar at the top and press Enter:
HKEY_LOCAL_MACHINESYSTEMCurrentControlSetServicesSysMain
- Search for a value named Start in the right pane and double-click on it.
- Change Value Data to 4 and select OK to save and exit.
Run SFC Scan
If you want to try resolving the SysMain high disk usage issue without disabling SysMain, you can try using the System File Checker (SFC).
SFC is a built-in utility on Windows that checks system file integrity. It automatically replaces the corrupt system files it finds during the scan, so if system file corruption is at the root of the issue, SFC might fix it.
- Press Win + R, type cmd, and press Ctrl + Shift + Enter.
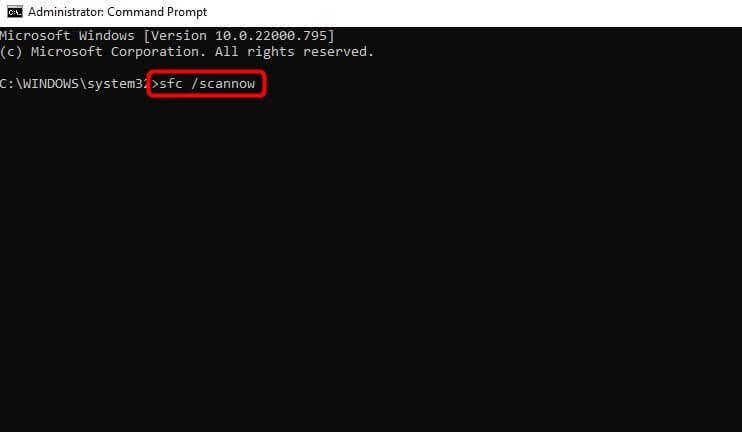
- Copy and paste the following command into the Command Prompt and hit Enter:
sfc /scannow
The scan will scan your hard disk for corrupt system files and replace ones that have become corrupt. Once the scan completes, restart your PC and check if the Service Host SysMain high disk usage issue persists.
Update Windows
It’s always essential to check Windows Update and see if an update is available for download. Microsoft is constantly looking for issues with Windows and releases updates to fix them.
If the previous fixes weren’t helpful, an update might be worth a shot:
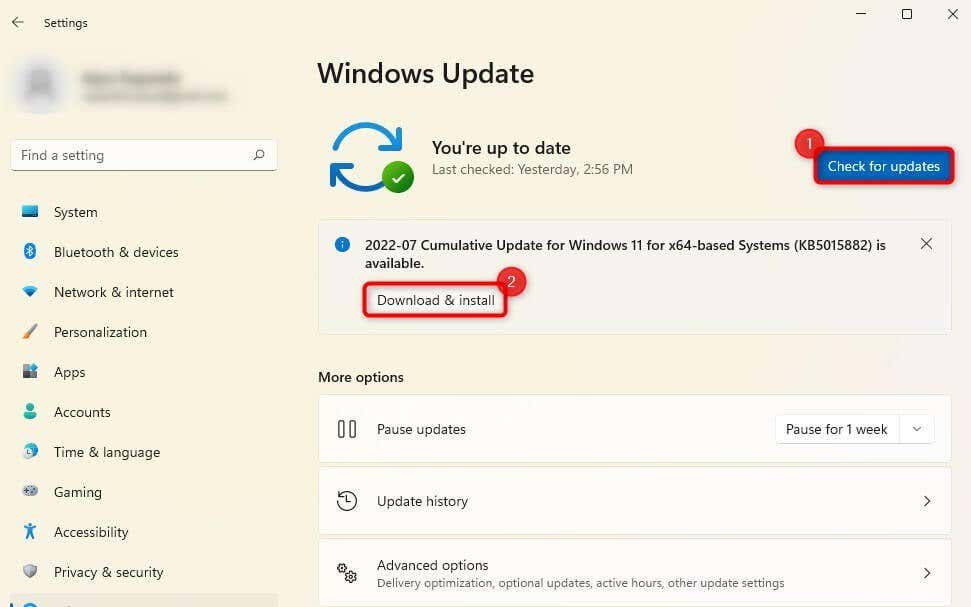
- Press Win + I to launch the Settings app and select Windows Update from the left sidebar.
- Select the Check for updates button.
- If updates are available, select the Download & install button to install them.
Restart your PC and see if that fixes the problem.
Replace Hard Drive with SSD
If you’ve been using your old mechanical HDD for a while, replacing it with a Solid State Drive (SSD) can optimize your computer’s performance and solve the high disk usage issue.
This might be especially warranted if you’ve tried troubleshooting and exhausted all methods to fix the issue.
Most modern computers have a slot to accommodate SSDs. However, if you’ve never purchased SSDs, use our SSD buying guide to make an informed decision.
SysMain Disk Usage, Normalized
Hopefully, you were able to fix SysMain disk usage with one of these fixes. SysMain isn’t necessarily a resource-hog. Windows introduced this intelligent feature to optimize RAM usage and deliver faster performance when using the most frequently used apps.
You can permanently disable it without severe consequences if it’s using a lot of memory. Alternatively, fixing system file corruption or a Windows update might help resolve the issue without disabling the SysMain service.
Related Posts
- Preparing for Windows 10 End of Support: Upgrading to Windows 11
- How to Fix a “This file does not have an app associated with it” Error on Windows
- How to Fix an Update Error 0x800705b4 on Windows
- How to Resolve “A JavaScript error occured in the main process” Error on Windows
- How to Fix the Network Discovery Is Turned Off Error on Windows
