Having Razer Synapse running in top shape is crucial when managing Razer devices. If the application fails to open on your Windows 10 or 11 PC, you must get it up and running as soon as possible.
Several reasons result in Razer Synapse not opening. For example, it could be a malfunctioning Razer process or background service, a corrupt or damaged program installation, or a missing system file or component.
Work through the suggestions and solutions in this troubleshooting guide to fix Razer Synapse opening issues in Windows 10 and 11.
1. Force-Quit Razer Synapse Processes
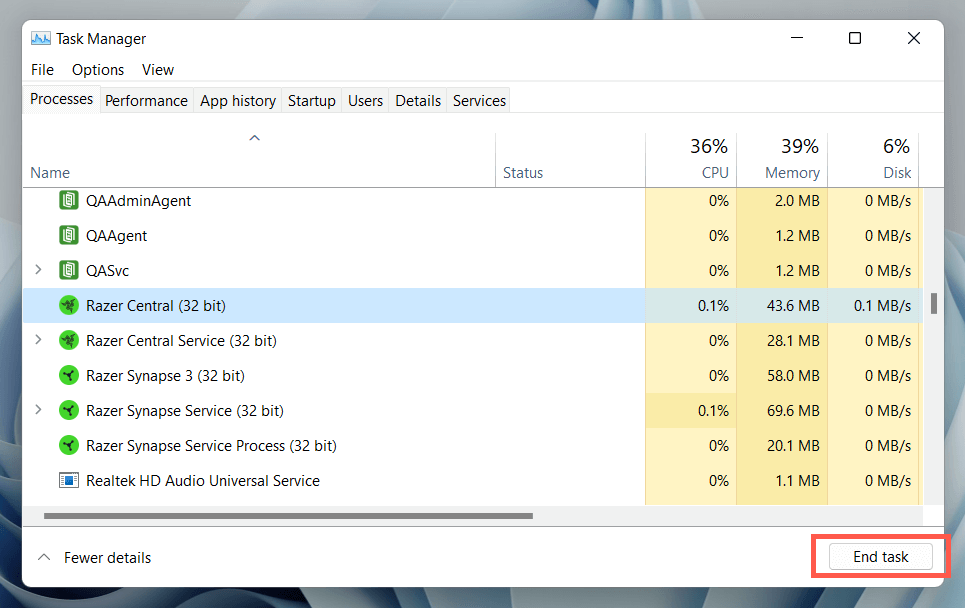
Sometimes, the underlying processes related to Razer Synapse can crash or hang and prevent it from running. Forcibly shutting them down before relaunching the program is the only way to fix the problem. To do that:
- Right-click the Start button and select Task Manager. Or, press Ctrl + Shift + Esc.
- Select More details.
- Scroll down the Processes tab and pick a Razer process—e.g., Razer Central.
- Select End task.
- Repeatedly quit all Razer processes that appear within the list.
- Open Razer Synapse via the Start menu.
Note: Continue with the rest of the instructions if Razer Synapse fails to show up. For best results, repeat steps 1–5 above before attempting each fix.
2. Restart the Razer Synapse Service
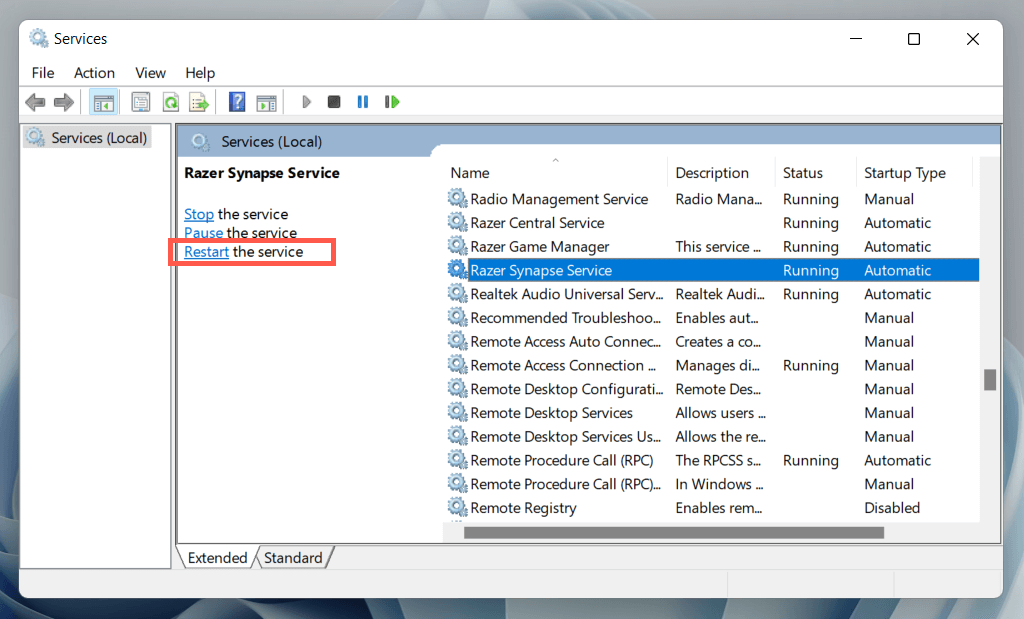
Razer Synapse relies on a background service to run in Windows. You must restart it if the problem persists. To do that:
- Press Windows Key + R, type services.msc into the Run dialog, and press Enter.
- Scroll down the list of services and select Razer Synapse Service.
- Select Restart the service.
3. Reboot Your Computer
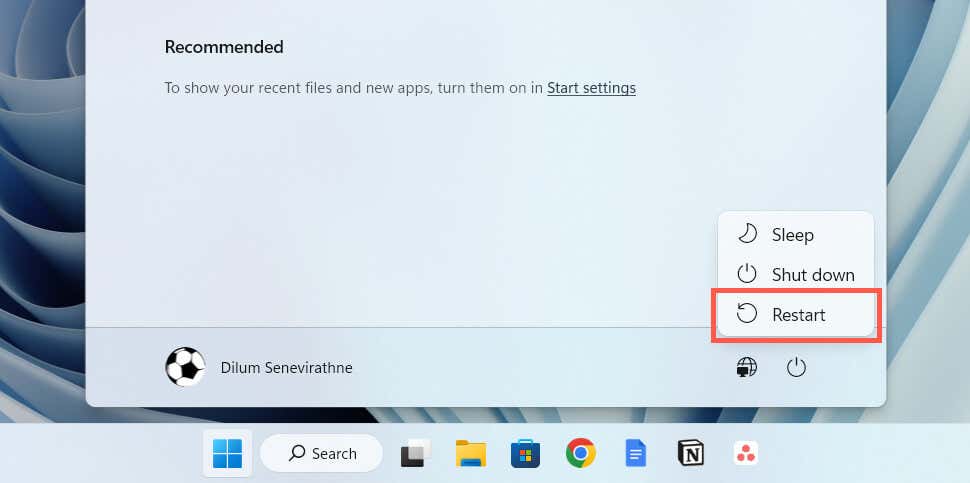
It’s a good idea to restart your computer next. That should clear any random faults with the operating system—e.g., obsolete system files or a corrupt hardware driver cache—preventing Razer Synapse from opening.
To do that, right-click the Start button and select Power > Restart. If there are any unfinalized Windows updates, choose Update and restart.
4. Run Razer Synapse as Administrator
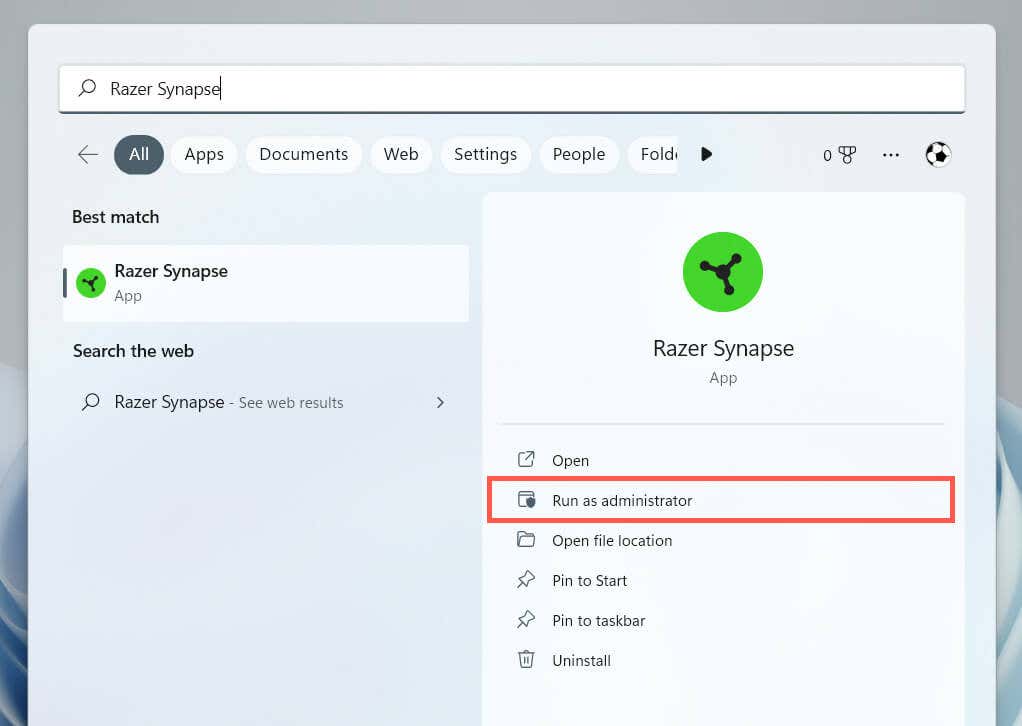
If Razer Synapse continues to fail to open, try running it as an administrator. That gives the program elevated system privileges and prevents launch issues from a lack of permissions. To do that:
- Open the Start menu and type Razer Synapse.
- Select Run as administrator.
- Select Yes on the User Account Control dialog.
If that helps, learn how to set up Razer Synapse to always run with administrative privileges.
5. Unplug and Reconnect Razer Peripherals
Rarely, Razer Synapse can fail to launch unless you unplug and reconnect your Razer peripherals. Remove their USB cables, restart your computer, and plug them back in again.
If you use any wireless Razer devices, switch them off and back on; you should also remove and reconnect all wireless USB Razer receivers.
6. Update and Repair Razer Synapse
Version-specific problems with the Razer Synapse software are another reason that poses problems when you attempt to open the program. Hence, it’s a good idea to check for and install any pending updates. To do that:
- Right-click the Start button and select Apps and Features.
- Scroll down and select Razer Synapse.
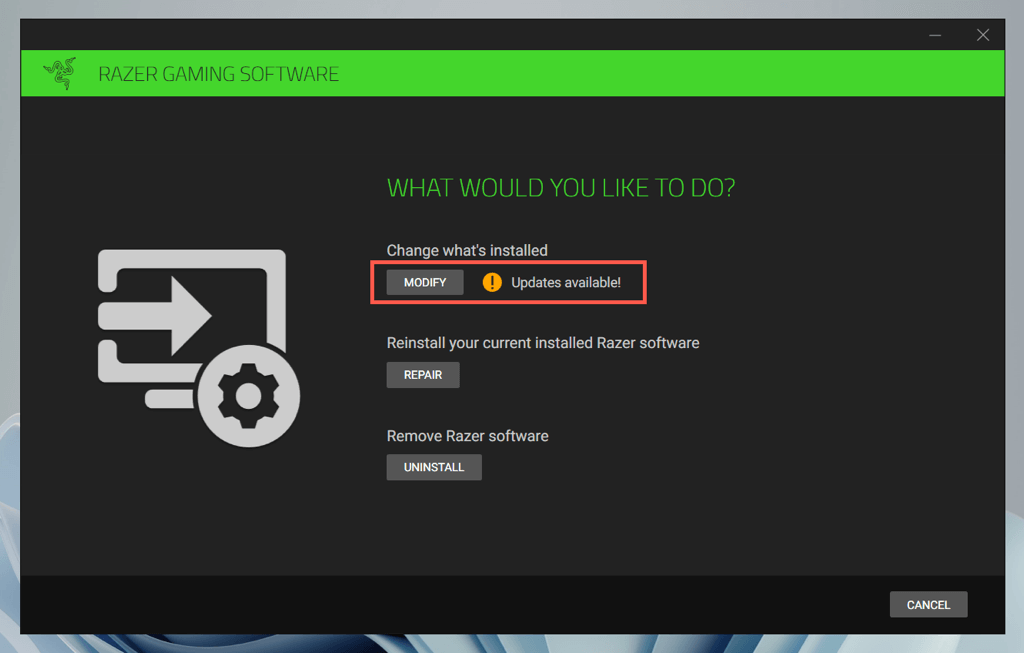
- Select Modify. In Windows 11, select the More icon (three dots) to reveal the option.
- Wait for the Razer Gaming Software user interface to show up.
- Install all available updates.
If the updates fail to fix Razer Synapse (or if there are no new updates), you must repair the program. Repeat the steps above, but choose the Repair option.
7. Reinstall Razer Synapse
If updating or repairing Razer Synapse doesn’t help, try reinstalling the program. To do that:
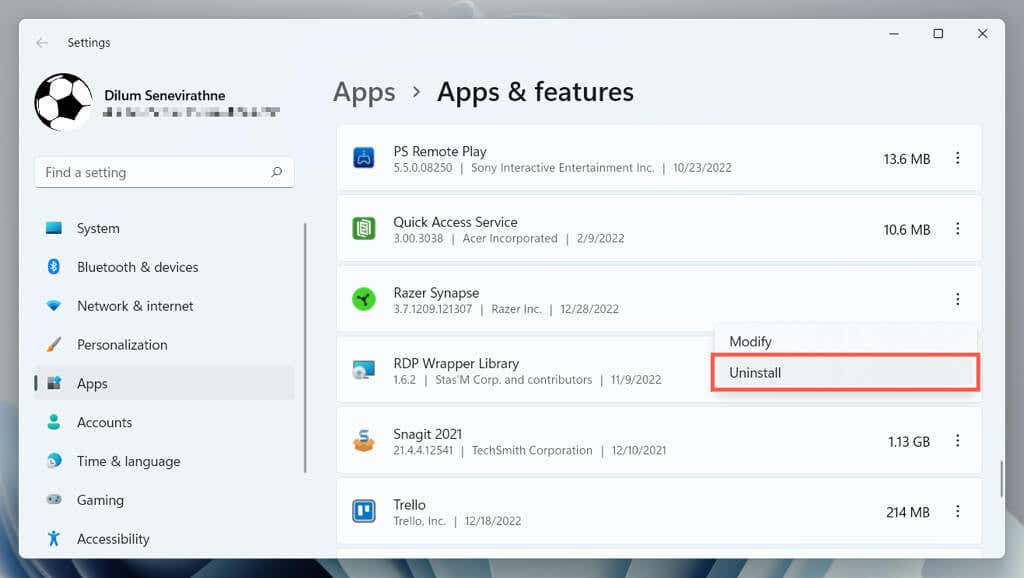
- Revisit the Apps & Features pane.
- Select Razer Synapse.
- Select Uninstall.
- Restart your computer.
- Download and clean install the latest version of Razer Synapse from its official website. If it opens, sign in with your Razer account to get your device settings and configurations back.
If you have trouble uninstalling Razer Synapse, use the Windows Control Panel to remove it. Here’s how:
- Press Windows + R, type appwiz.cpl, and select OK.
- Select Razer Synapse.
- Choose Uninstall.
8. Uninstall Razer Surround Sound
Razer Surround Sound is an optional application that boosts the capabilities of Razer headsets. However, it tends to conflict with Razer Synapse, so try removing it from your computer.
- Re-open the Apps and Features pane on your computer.
- Select Razer Sound.
- Select Uninstall.
If that helps, but you also want to use Razer Surround Sound, try re-installing the latest version of the program.
9. Reinstall Razer Device Drivers
Uninstall and reinstall your Razer devices to fix problems that result from corrupt hardware drivers. If you’re removing the drivers for a Razer mouse, you must use another pointing device to interact with the operating system in the meantime.
- Press Windows + R, type devmgmt.msc, and select OK.
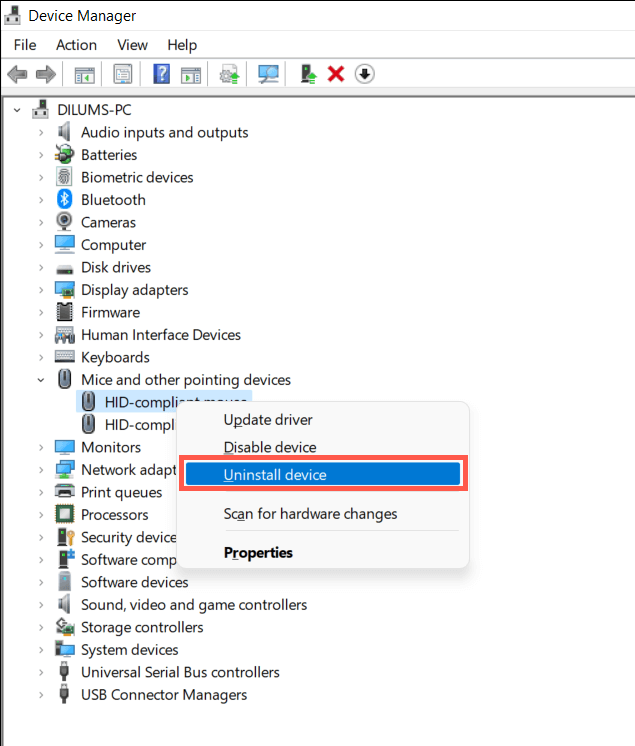
- Expand categories like Human Interface Devices and Mice and other pointing devices within the Device Manager.
- Right-click each Razer driver and select Uninstall device.
Note: Razer devices may also show up with generic Windows drivers—HID-compliant mouse, HID Keyboard Device, etc.
- Restart your computer. Windows will automatically install basic drivers during startup.
- Visit the Razer Support Center Downloads page to download and install dedicated drivers for your Razer peripherals.
10. Update Windows to Its Latest Version
Razer Synapse works best on the latest versions of Windows 10 and 11. To update the operating system and all system components:
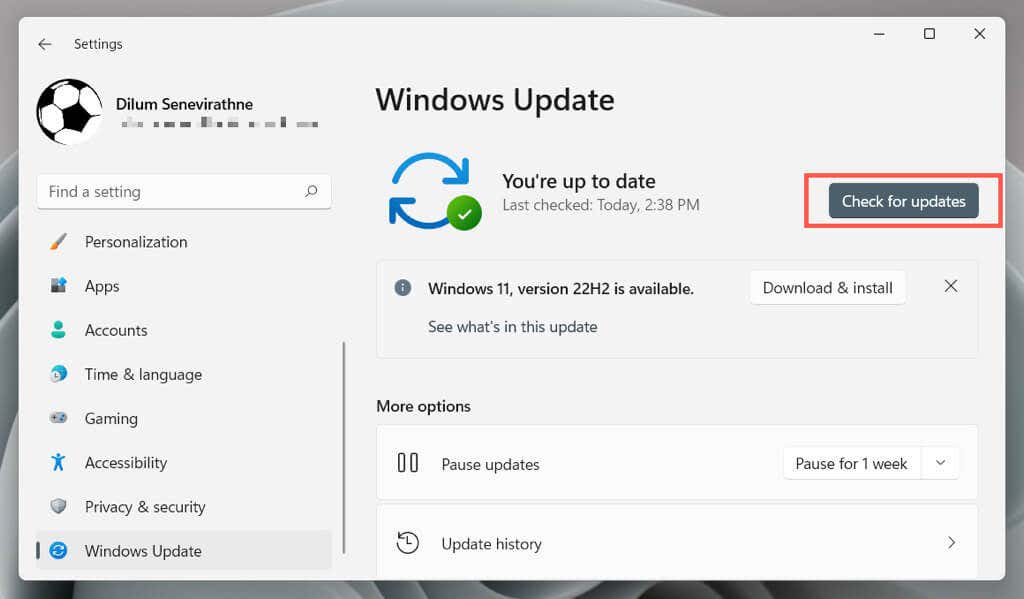
- Open the Settings app.
- Select Windows Update.
- Select Check for updates. If there are any pending operating system or component updates (e.g., .NET Framework), choose Download and install.
Razer also delivers hardware driver updates via Windows Update. To check, select Advanced options > Optional updates on the same screen.
11. Repair the Microsoft .NET Framework
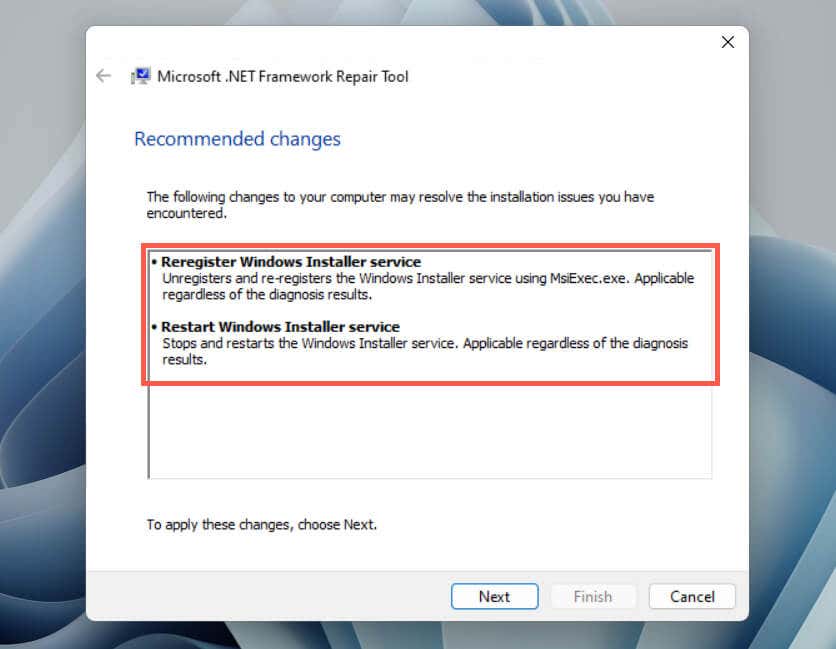
A defective Microsoft .NET Framework is also a likely explanation for a problematic Razer Synapse installation. The quickest way to fix that is to download and run the Microsoft .NET Framework Repair Tool.
If you need extra help, check our Microsoft .NET Framework troubleshooting guide for comprehensive step-by-step instructions.
12. Add Razer Synapse to Your Antivirus Software
Third-party antivirus programs can stop Razer Synapse from opening. If you have one on your computer, try pausing it. If that helps, add Razer Synapse to the utility’s software and firewall exceptions list to avoid false interference.
If you only use native protection via Windows Security, the Windows Defender Firewall might be what’s blocking the program from running. To fix that:
- Press Windows + R, type firewall.cpl, and select OK.
- Choose Allow an app or feature through Windows Defender Firewall.
- Select Change settings.
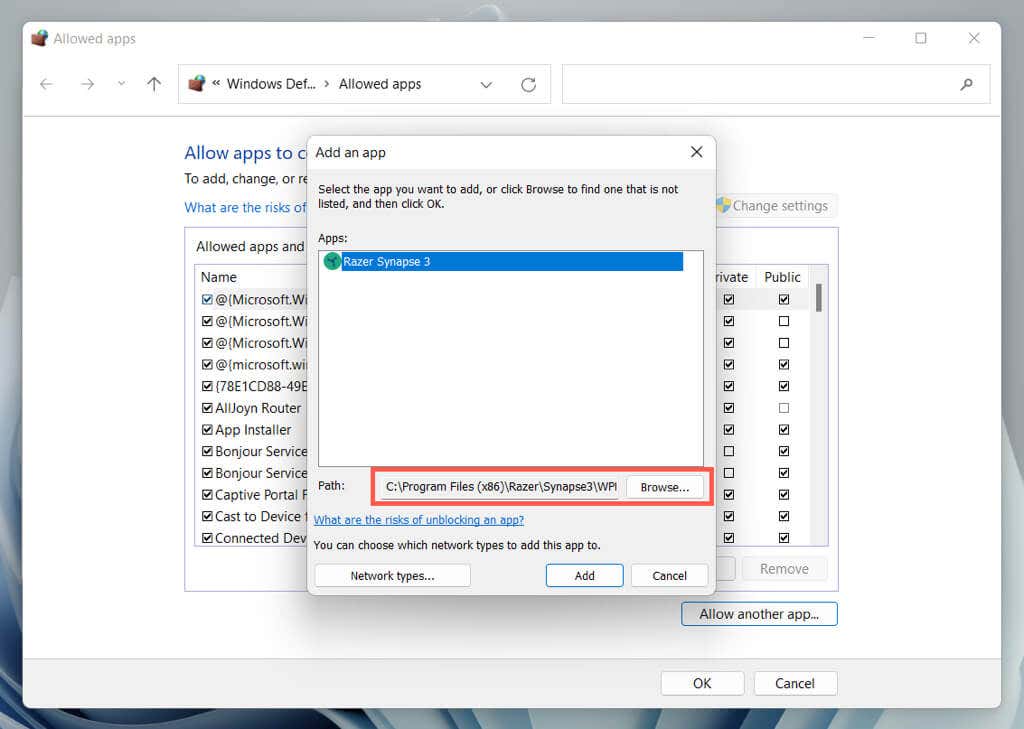
- Select Allow another app.
- Select Browse.
- Navigate the File Explorer pop-up and choose Razer Synapse 3.exe (the program’s version number may be different on your PC) from the path below:
C:\Program Files (x86)\Razer\Synapse3\WPFUI\Framework\Razer Synapse 3 Host\
- Select Add.
- Locate Razer Synapse within the list of allowed apps and check the boxes under the Private and Public columns.
13. Clean Boot Your Computer
Clean boot your Windows 10 or 11 PC to identify programs that conflict with Razer Synapse. To do that:
- Right-click the Start button and select Run.
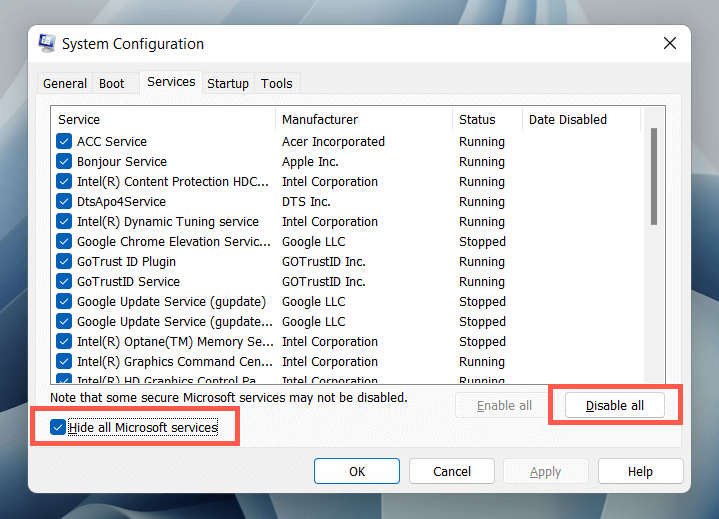
- Type msconfig and select OK.
- Switch to the Services tab, check the box next to Hide all Microsoft services, and select Disable all.
- Restart your computer.
- Reactivate each service and isolate the conflicting item if the problem goes away. Once you do that, update the related program, keep it disabled, or remove it from your computer.
Razer Synapse Is Opening Again
Hopefully, the solutions above did the trick, and Razer Synapse is opening on your Windows PC again. Quick fixes like force-relaunching Razer Synapse, restarting the underlying process or service, or repairing the program will almost always patch things up. Remember to run through them the next time the program fails to open.
If the problem becomes a persistent issue and none of the instructions in this tutorial help, contact Razer Support for further troubleshooting advice.

