Skype is a handy way for individuals and teams to keep in touch.
If for some reason you have no sound on Skype, there are a number of troubleshooting steps you can use to find the problem and get things back up and running again.
Some of the causes of this problem include:

- Hardware issues with your microphone, external speakers or headphones
- Old or faulty audio drivers
- Operating system interferences
- Issues with audio settings
- Playback errors in Skype
With these issues in mind, we’re going to show some basic and advanced troubleshooting tips if you have no sound on Skype.
How To Fix No Sound on Skype

Try the following techniques to resolve sound issues on Skype before moving to other advanced solutions:
- If you’re using headphones or a microphone, make sure the jack is properly plugged into the right audio input and output ports on your device.
- Install device drivers for audio USB devices like your headphones or microphone, and then re-launch Skype.
- For Windows PCs, compare the sound settings with the Skype Audio settings. To do this, open Control Panel>Sound (or Sounds and Audio Devices), and ensure the sound devices match.
- Check that you’re using the device selected in your Skype sound settings if you have multiple devices listed.
- Use a different pair of headphones or microphone.
- Check whether the audio in Skype is muted by looking at the microphone icon and checking if it has a diagonal slash across it.
- Some programs can prevent your microphone from working and you end up with no sound on Skype. If you knowingly or unknowingly installed such a program, check installed software and uninstall or disable the program.
- Check whether your internet connection is working as this could prevent you from receiving good audio during a video or voice call.
- If you’re using a wireless microphone or headphones, ensure they’re fully charged, and use the physical mute buttons on them to check if either device is muted or not.
Select the Correct Audio Device
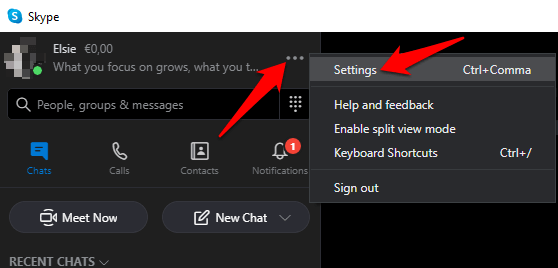
To ensure you’ve selected the correct audio device, open Skype, tap the three dots next to your profile name and click Settings.
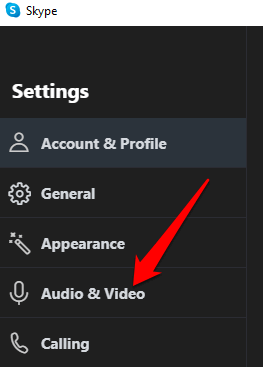
Click Audio and Video.
Under Audio, click the down arrow and select the audio device you’re using with Skype.
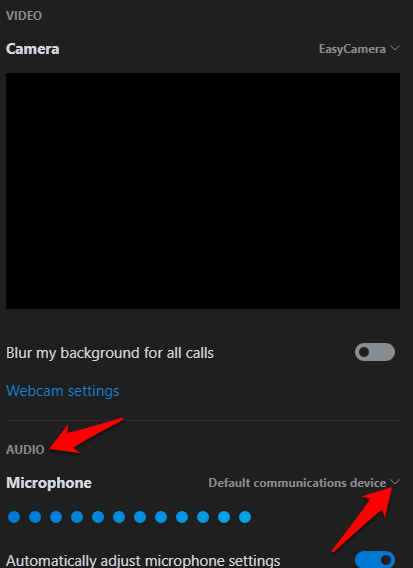
Note: If you’re using your computer’s native microphone, only one option will appear. Speak into the microphone and check the indicator bar for any movement. If the blue speech activity indicator shows some movement, then the microphone can hear you.
Make a Test Call
To do this, click Make a free test call at the bottom of the Audio and Video settings screen.
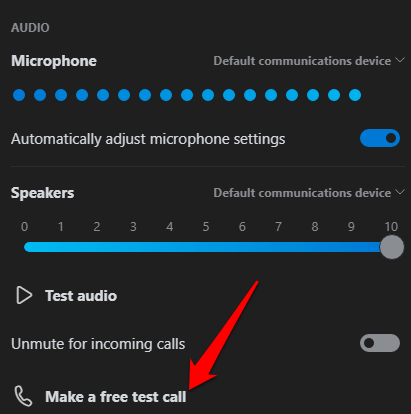
If you’re able to hear your message played back, the microphone is working, so the issue could be with the playback device or the other person’s connection.
If you’re using your mobile device, such as an Android smartphone or tablet, iPhone or iPad, use the steps below to make a test call.
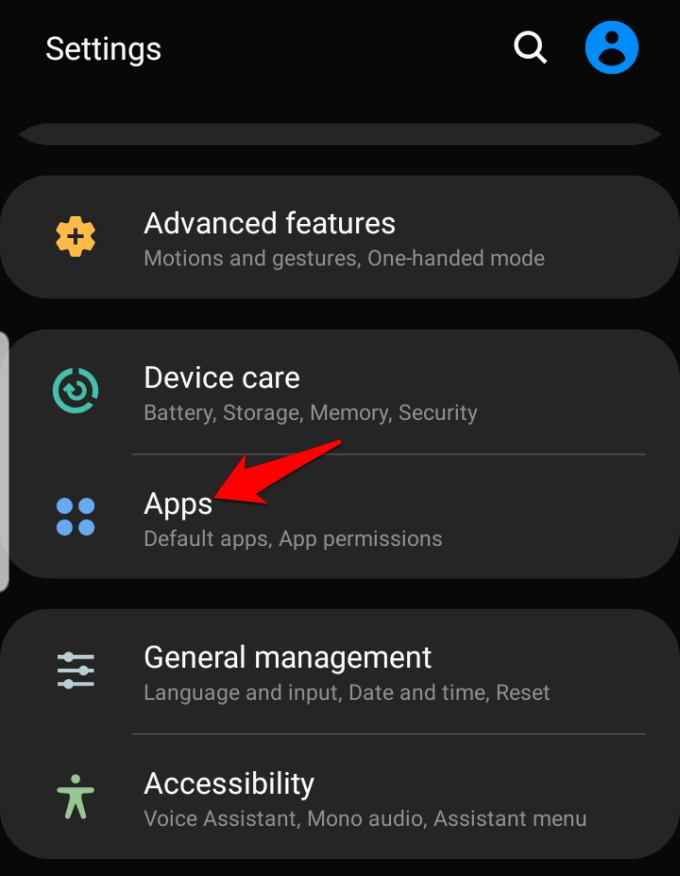
For Android devices, go to the Settings app on your smartphone or tablet and tap on Apps (or Application Manager depending on your device).
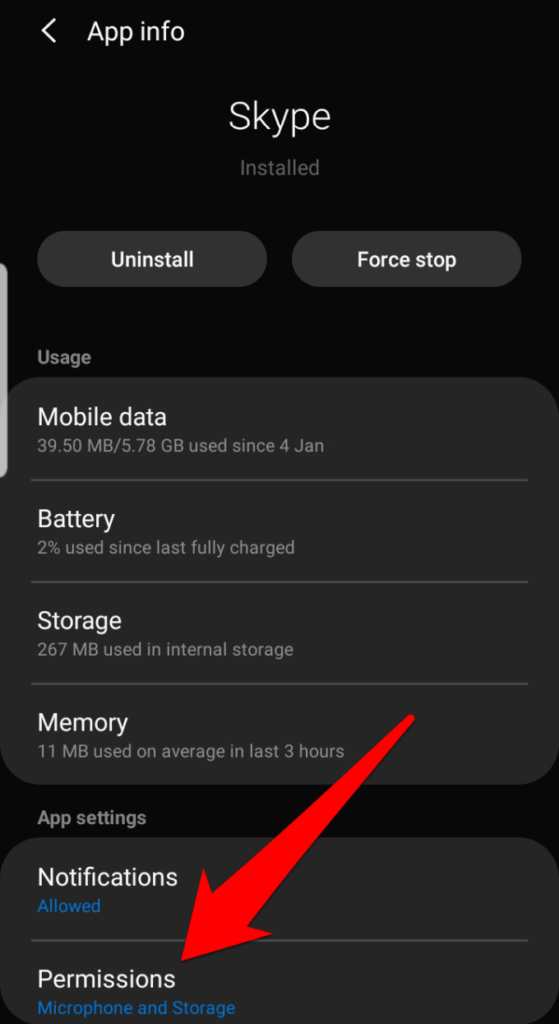
Tap Skype and select Permissions.
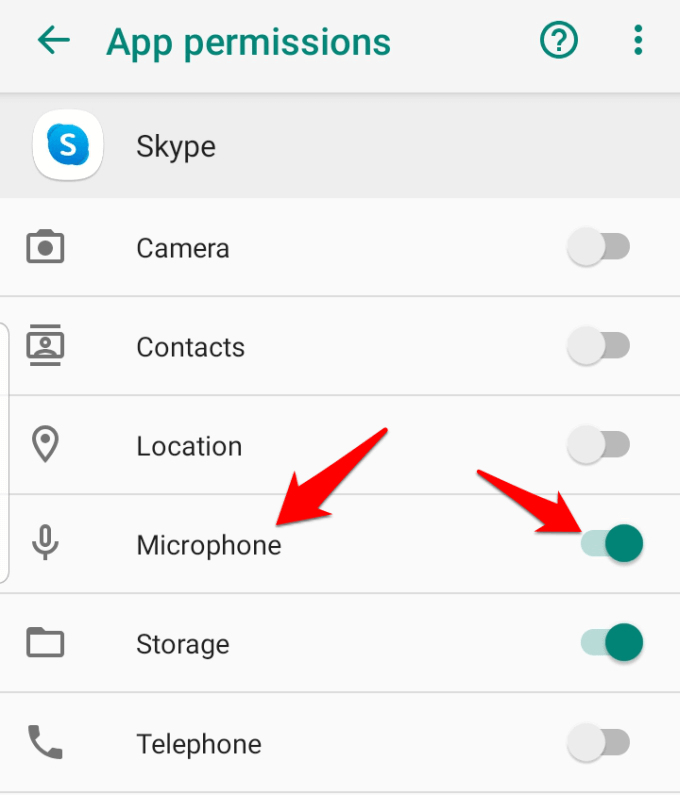
Toggle on the Microphone option.
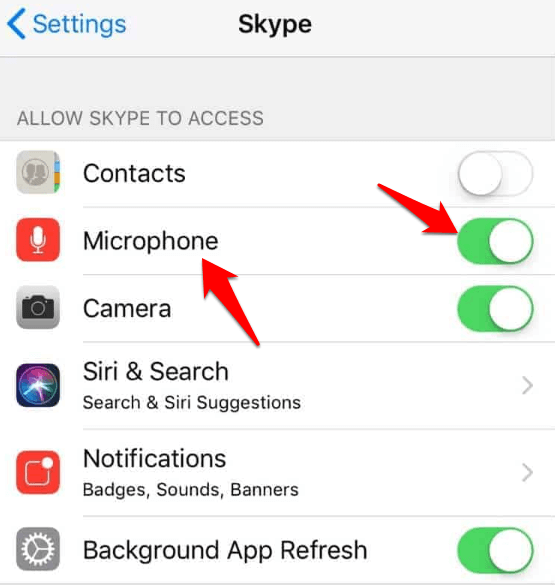
Make the test call and check if the sound is working again. For iPhone, iPad or iPod Touch, open Settings > Skype.
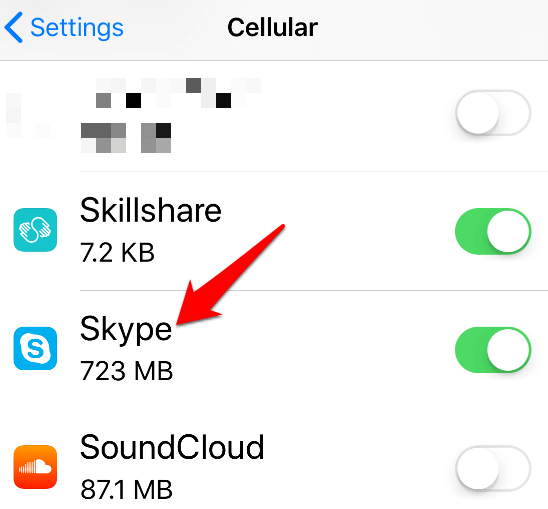
Check that the Microphone option is toggled on or green so that Skype can access the device’s microphone.
Check Audio Settings
To do this, click on the sound icon on your computer’s taskbar next to the date and time. Adjust the speaker volume using the volume slider control for your default playback device.

Check Your Device’s Audio Drivers
Still no sound on Skype? One of the main reasons for this could be faulty or outdated audio drivers. Check your audio drivers and uninstall, disable, roll back or update them to resolve the issue.
To do this, right-click Start > Device Manager and click the Sound, Video and Game Controllers to expand the category.
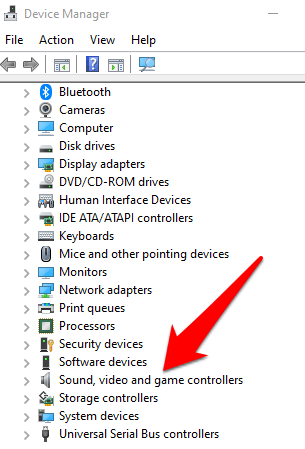
Right-click your audio driver, and select Uninstall Device.
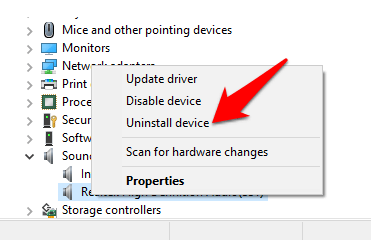
Restart your computer and check if the sound works again.
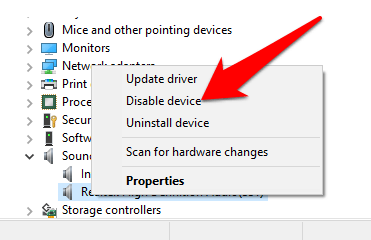
To disable the audio driver, right-click on it and select Disable device.
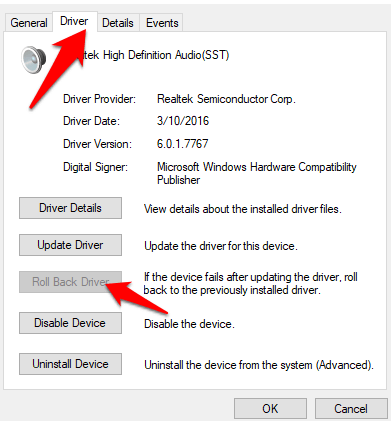
To roll back the audio driver to the previous version, right-click on it and select Properties.
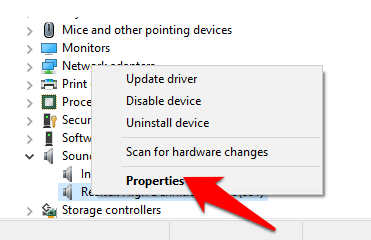
Under the Driver tab, select Roll-back driver, click OK and check the sound again.
To update your audio driver, right-click the driver and select Update Driver.
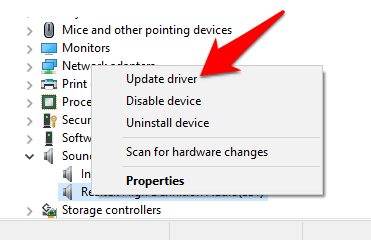
Select Search automatically for updated driver software and see if the tool finds newer drivers. Do the same for all your audio devices before checking if the sound issue on Skype has been resolved.
Disable Automatically Adjust Microphone Settings
This method allows you to manage audio levels that change when you make a voice or video call.
To do this, launch Skype, click on the three dots to open the Settings menu. Click Audio and Video and scroll to the Audio section. Toggle the Automatically adjust microphone settings switch to off.
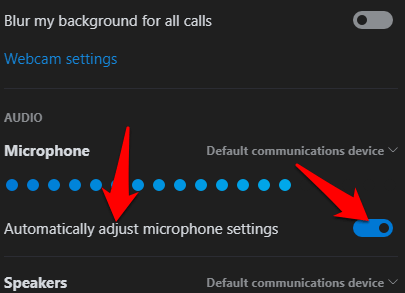
Make sure you select the default microphone and speaker levels, before starting another call and checking if the sound works again.
Reinstall Skype
If none of the above methods work, reinstall Skype and see if it resolves the audio problem on your computer.
To do this, open the Control Panel and click Programs.
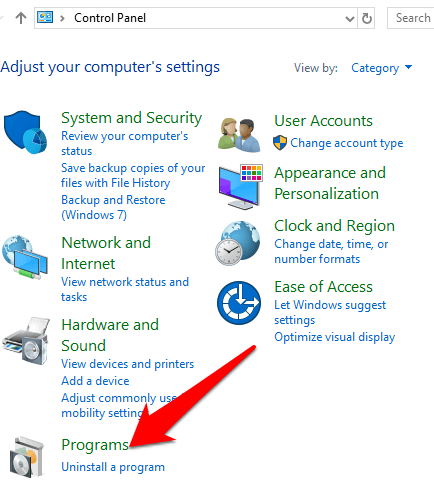
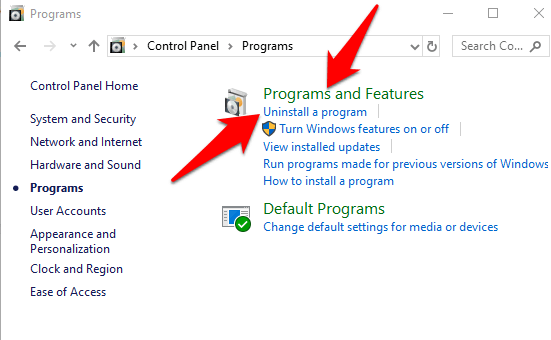
Click Uninstall Programs under Programs and Features.
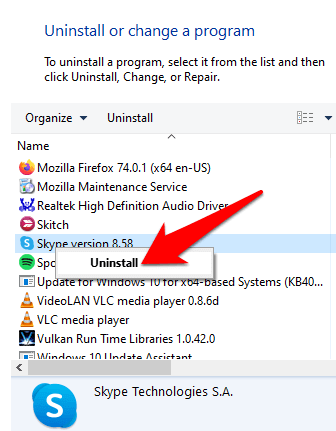
Find Skype, right-click on it and select Uninstall. Follow the instructions to completely uninstall Skype.
Open File Explorer, click This PC and go to this path: C:\Users\YOURUSERNAME\AppData\Roaming
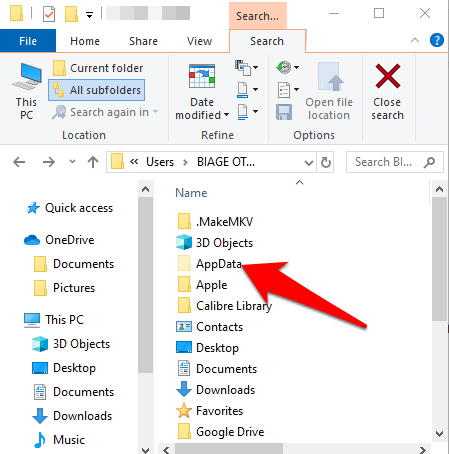
Note: If you don’t see the AppData folder, click the View tab and select the Hidden Items checkbox.

Open the Skype folder, right-click the xml file, and select Delete.

Delete the config.xml file that’s found in the folder with the same name as your Skype name. Go back to the Roaming folder, right-click and select Rename. You can set the name as Skype_old.

Download Skype again and check if the sound is back.
Did any of these solutions help fix the sound issue on Skype for you? Let us know in a comment below.