Be it Windows 10 or 11, bloatware remains a persistent and irritating problem for users. Dragging down your computer with their unnecessary processes, these applications can seriously impact performance, especially on low-end systems.
But removing them can be tricky. Many of these apps don’t come with uninstallers, and in many cases are even not displayed prominently. How can you find and remove bloatware from your computer? Let’s find out.
What Is Bloatware?
Generally speaking, the term bloatware is used to denote useless applications on your computer (or even a phone). They usually come pre-installed, bundled by your operating system itself. Sometimes, these might also be accidentally installed by the user.
These apps clutter up the storage, taking up unnecessary disk space that could be used for better purposes. Worse, some of these run on startup, increasing the boot time of your PC and slowing it down during usage by eating up memory and processing power.
To ensure that your computer can function as smoothly as possible, it is highly recommended to remove all of such extraneous applications. Deleting bloatware is one of the easiest ways to speed up your PC and reduce system load.
1. Uninstall From the Start Menu
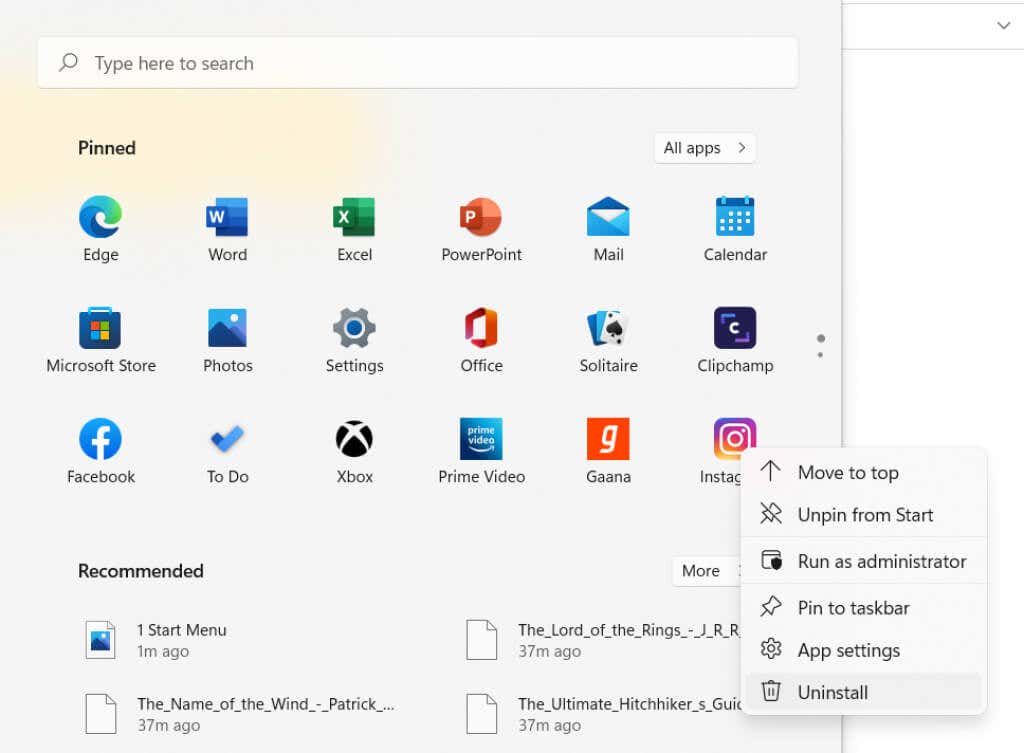
Bringing up the Start Menu unfolds a whole list of games and apps you don’t remember installing. On Windows 11, some of these aren’t actually present but are installed when clicked, but on Windows 10 there is no such comfort.
So how do you remove these apps?
- It’s pretty simple, actually. Just right-click on the icon (or the tile, in Windows 10) and select Uninstall.
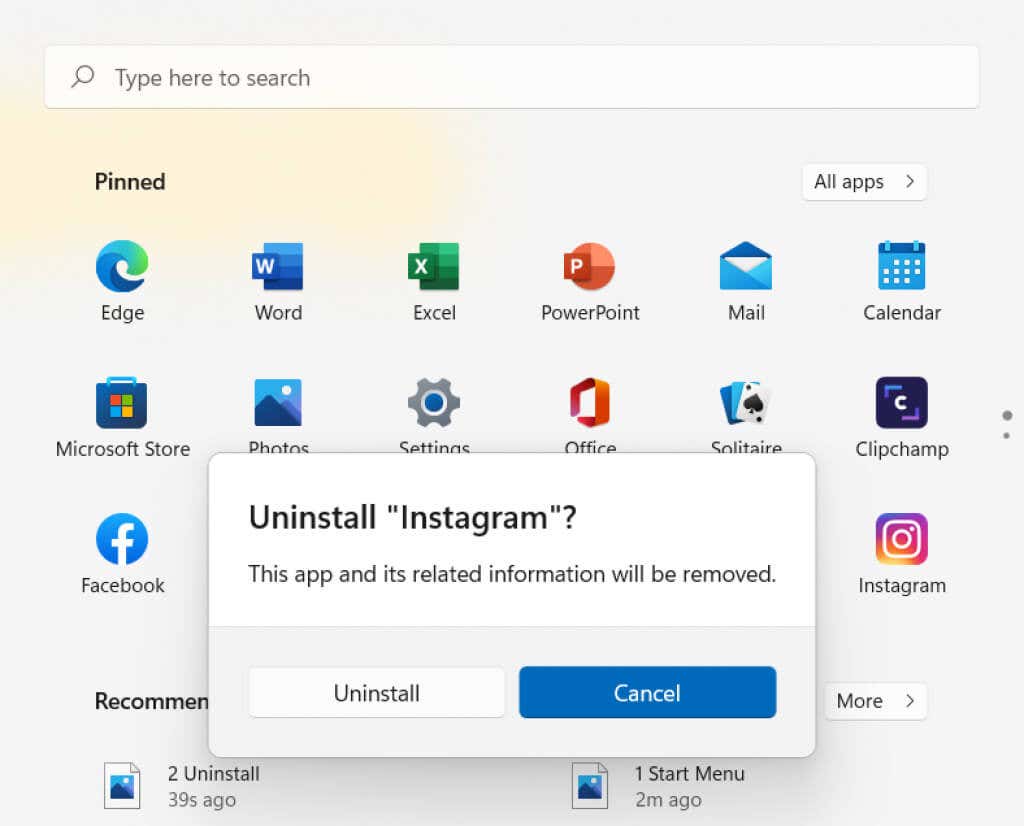
- A small window will pop up, prompting you to confirm your decision. Hit Uninstall once again to delete the application.
2. Add or Remove Programs
Not all bloatware shows up on the Start Menu. There are many other equally useless applications that are hidden in some directory of your computer. Instead of trying to track them down manually, you can use the built-in utility for it.
Add or Remove Programs is a Control Panel tool that, as the name suggests, allows you to install and uninstall applications. It is the best way to locate all the apps present on your computer, and remove them.
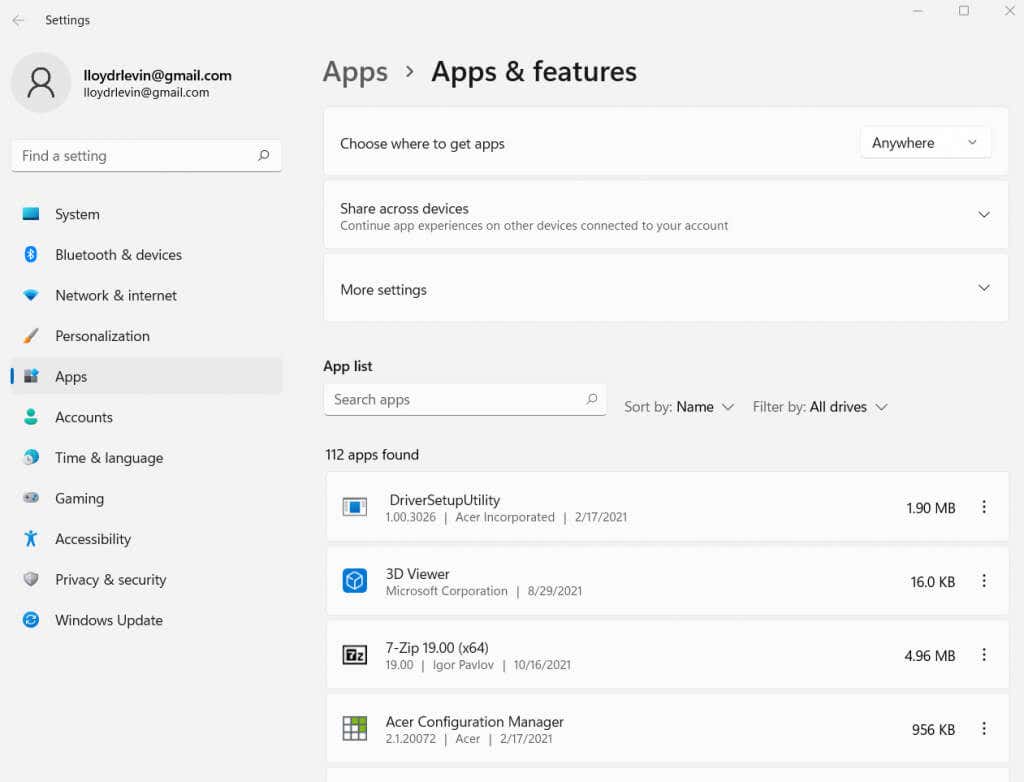
In Windows 11, it has been folded into the Apps tab of the Settings, though it works exactly the same way. Interestingly enough, you can still find the old interface in the Control Panel, and remove programs from there as well.
- On both Windows 10 and 11, you can find it by searching for Add or Remove Programs in the Start Menu. You can also navigate to the utility directly, by heading to the Control Panel and selecting Uninstall a Program. (Note that while this approach works in Windows 11 too, the newer version of the tool is located in Settings > Apps > Apps & Features).
- You will see a list of all the applications installed on your computer, sorted alphabetically. You can search for specific apps, or use different sorting and filtering criteria to narrow down the list.
- Right-Click on the app that you wish to remove (in Windows 11, click on the three-dot menu) and select Uninstall.
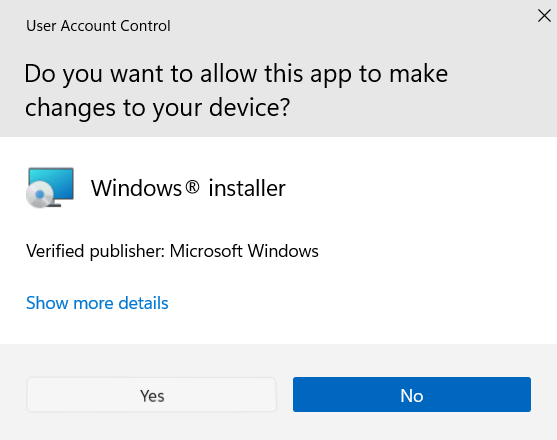
- Depending on account permissions, you may be prompted to allow the tool to make changes to your computer. Hit Yes to proceed.
- The utility will now run the selected application’s dedicated uninstaller – if it has one. Otherwise, you will see a generic Windows Uninstallation Wizard do the job.
And that’s it. You can keep removing programs listed in this window like this, one at a time. You can also view the size of each app listed alongside the name, allowing you to judge the worst bloatware and prioritize accordingly.
3. With the PowerShell
So far we have looked into methods to delete third-party apps. But what about games and applications that are bundled with Windows itself? Such apps cannot be uninstalled directly, either from the Start Menu or from the Control Panel.
To remove such programs, you need to use PowerShell.
PowerShell is a command-line utility that allows you to automate tasks and manage your computer through scripts. It basically acts as a modern, more powerful version of the Command Prompt. Using PowerShell commands, you can disable or remove even Microsoft applications that are normally impossible to delete.
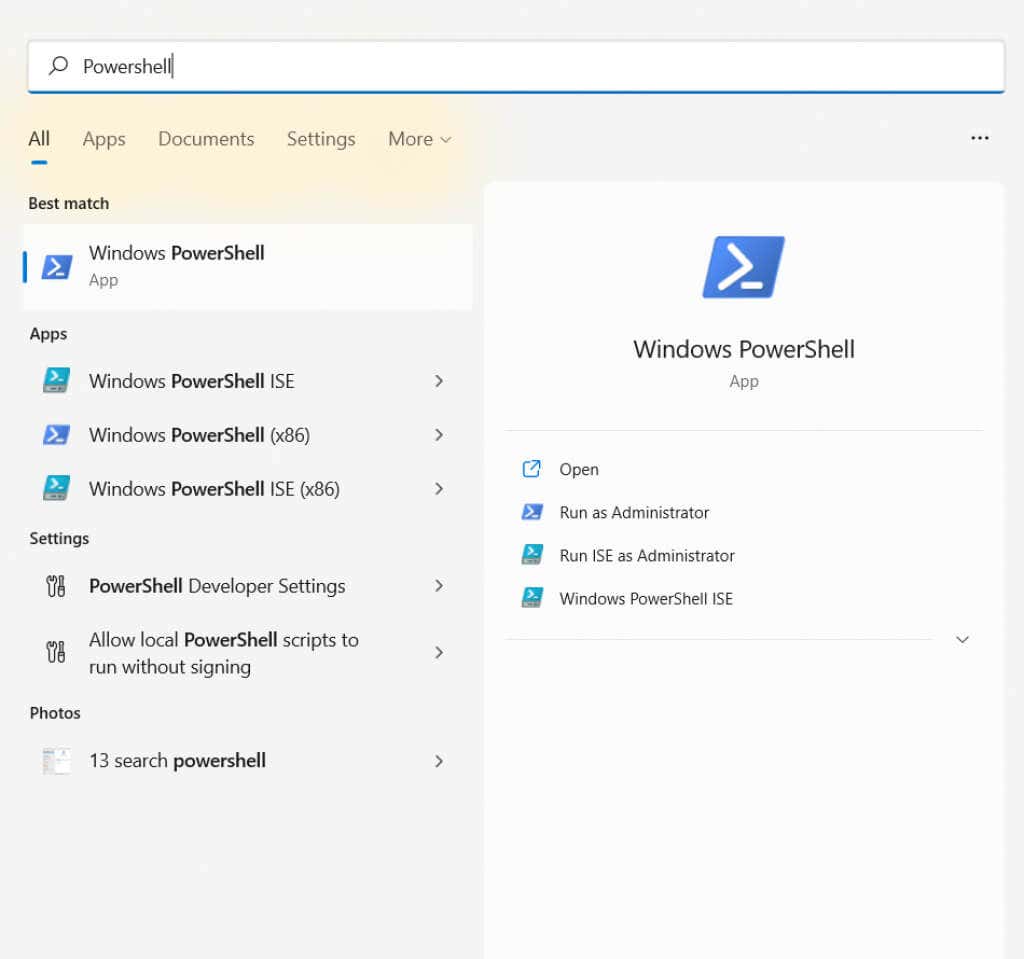
- To open PowerShell, just search for it in the Start Menu.
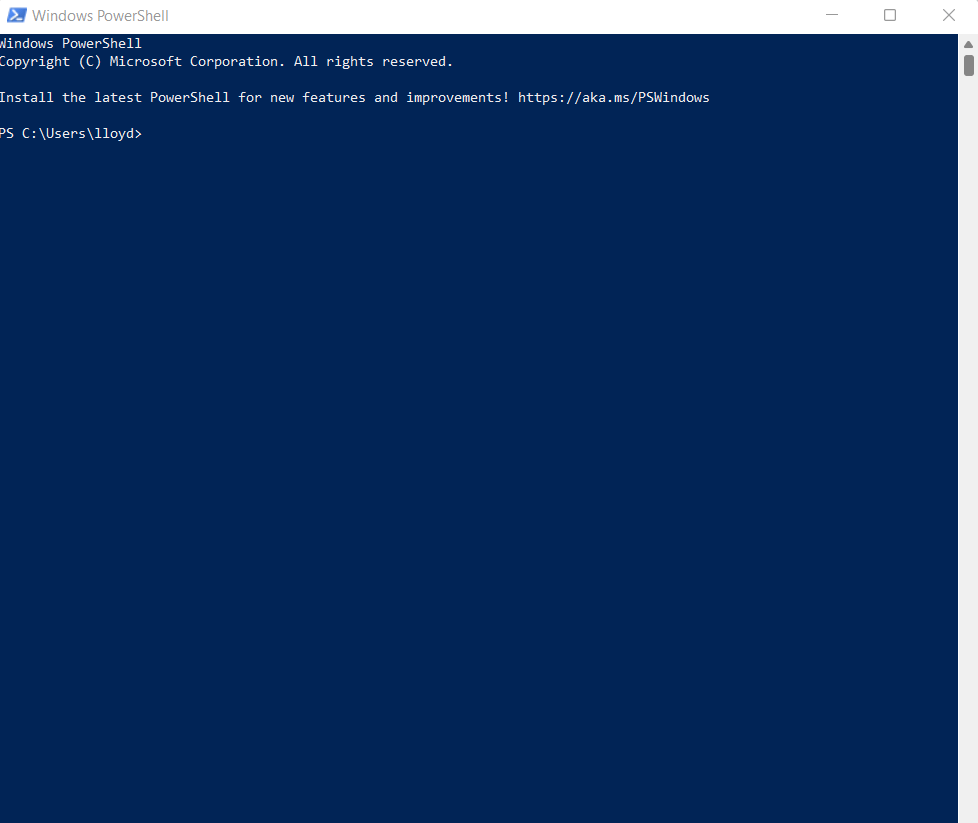
- Make sure you Run as Administrator because many commands require administrator privileges to work. A fresh PowerShell terminal will open.
- The simplest command you can use to get rid of a protected app is the Remove-AppxPackage. Unfortunately, it only hides the specified app, instead of deleting it.
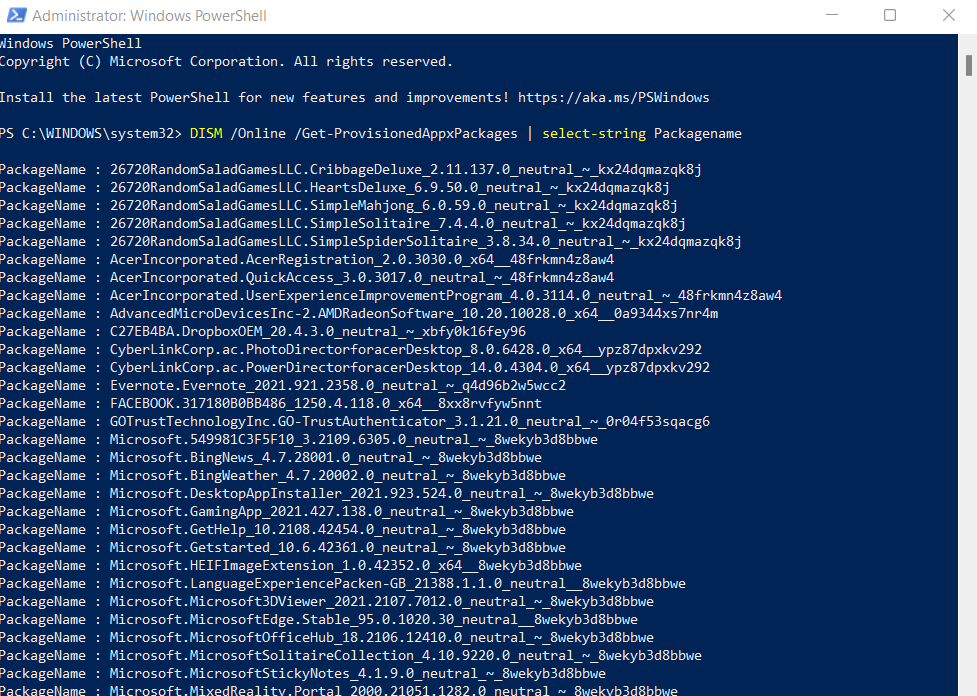
- To actually delete the apps, we first need to get their full package names. Use the DISM /Online /Get-ProvisionedAppxPackages | select-string Packagename command to obtain a list of all the active packages on your computer.
- While the names might appear to be a bunch of gibberish, pay attention to the first few words to determine the real names. Simple Solitaire, BingNews, etc. are the names of the apps as we know them. Copy the package names of the apps you wish to remove and paste them into a notepad file for now.
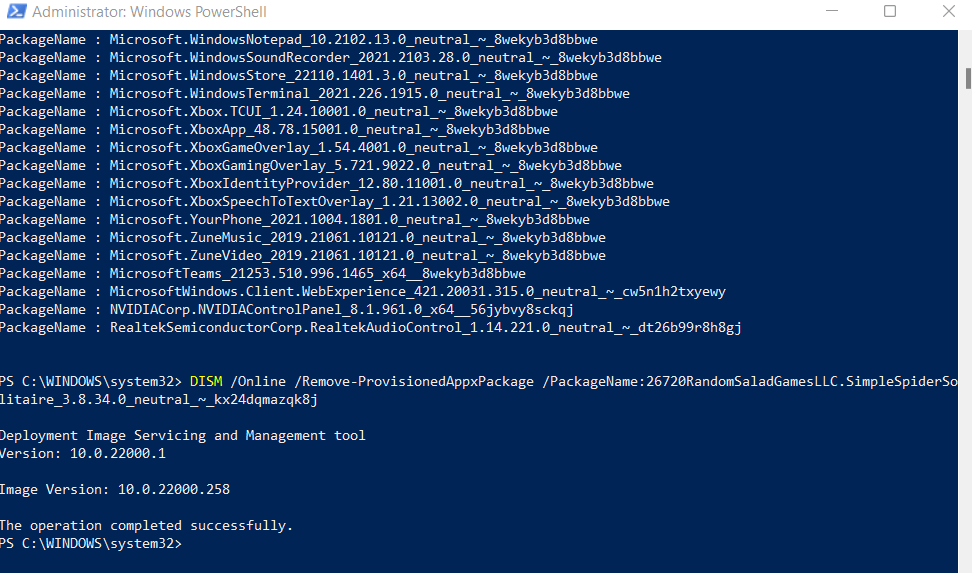
- Now we use the command DISM /Online /Remove-ProvisionedAppxPackage /PackageName:PackageName, where PackageName should be replaced with the actual name of the package you copied in the last step. This will remove the app from your computer, as well as preventing it from automatically installing again.
If all of these commands seem a bit too complicated to you, here is a brief explanation. Basically, there is a service called DISM (Deployment Imaging Service and Management) that is responsible for downloading and updating core utilities and applications. With these commands, you are simply removing the apps from this list, so that it’s no longer updated by Windows.
4. Through an Automated Script
While PowerShell commands are certainly powerful, they can be a bit too technical and difficult to use for a casual user. Wouldn’t it be great if there was an app to do the same thing automatically?
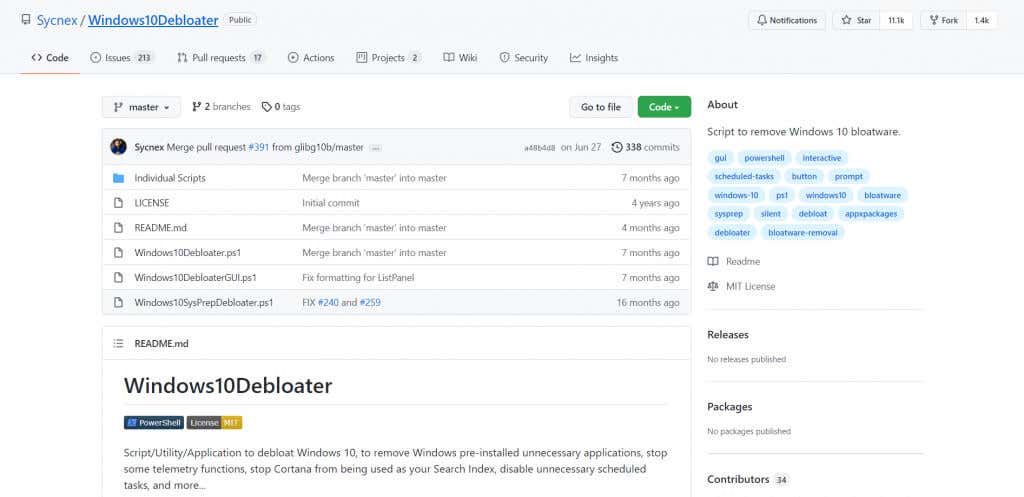
Turns out, there is. Windows10Debloater is a nifty little free tool that can thoroughly remove bloatware from your computer, including protected Microsoft apps you cannot uninstall directly. It does so through PowerShell commands similar to the ones we discussed in the previous section, without you having to write a single line of PowerShell script yourself.
- Like many community-managed tools, the Windows10Debloater is hosted as a Github repo.
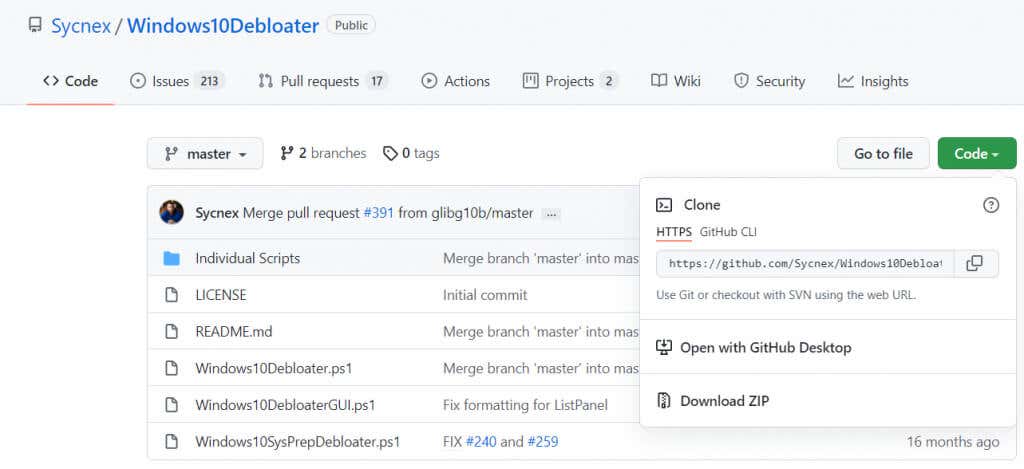
- To download the utility, use the green Code button and select Download ZIP. This will download the whole package as a zip file to your computer.
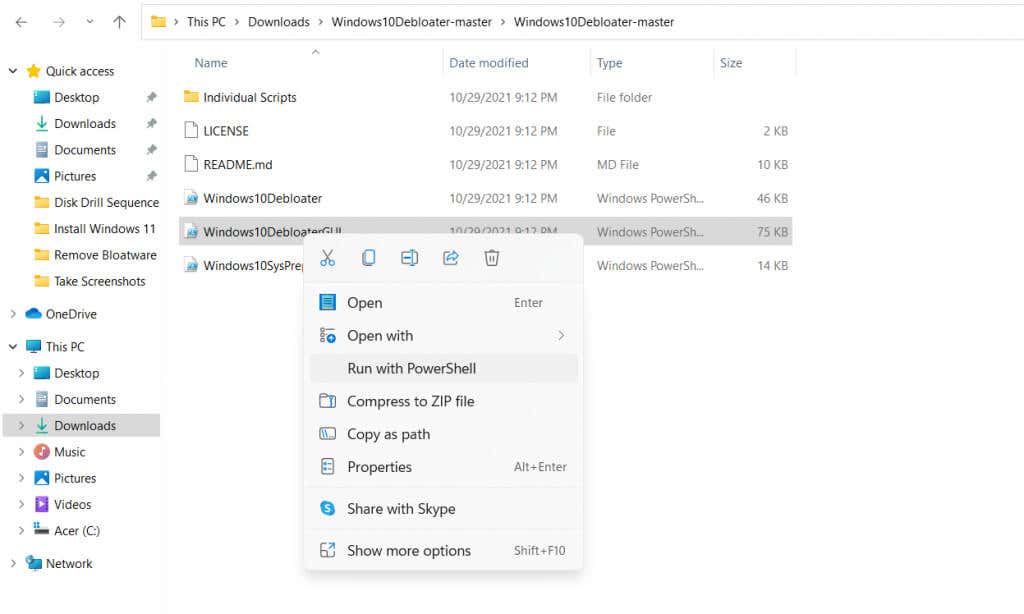
- Extract the downloaded file to get a bunch of files and folders, including three PowerShell scripts that can be used to run the tool.
- Each of these is a different version of Windows10Debloater. Since the GUI version is the easiest to work with, right-click on Windows10DebloaterGUI and select Run with PowerShell.
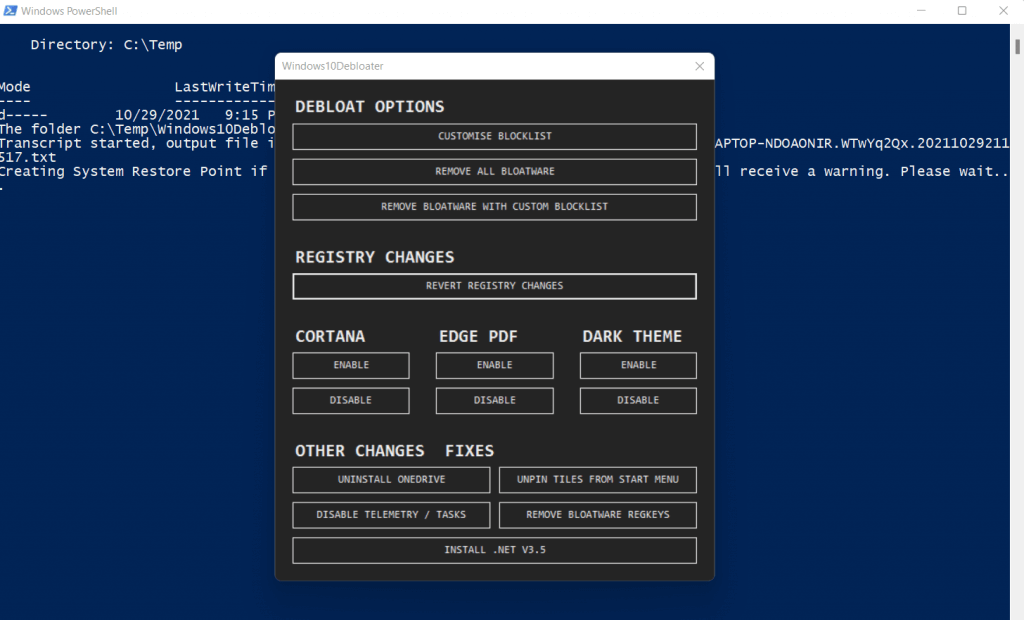
- A PowerShell terminal will open, coupled with a new GUI window representing the application. Just hit the REMOVE ALL BLOATWARE button to delete all unnecessary applications from your computer.
And you are done. A series of commands will run in the PowerShell terminal, carrying out the necessary tasks. None of them need any user input, and the process will be completed before you know it.
This makes Windows10Debloater an excellent tool even for casual users, as it requires no technical knowledge to use. You can even use it to uninstall Windows components like OneDrive or unpin tiles from the Start Menu, all without writing any code.
Why Do You Need to Remove Bloatware From Your PC?
If your PC takes a long while to boot up or isn’t running as fast as it used to, the culprit might be bloatware. Unnecessary applications are the bane of any computer, as they take up critical system resources without providing any utility.
For this reason, it is always recommended to remove bloatware from Windows. You can manually uninstall such apps from the Start Menu or the Apps & Features panel, or even use PowerShell commands for the peskier ones. You can also kill these processes while they are running, though it is advisable to remove them altogether.
In case that sounds too tedious, you can always use an automated tool like Windows10Debloater to do the job for you. It uses PowerShell scripts to clean up your PC, removing all junk applications and bloatware while leaving the important parts untouched. Running the tool once after a fresh Windows install is a great way to keep your system fast and unburdened.
Related Posts
- Preparing for Windows 10 End of Support: Upgrading to Windows 11
- How to Fix a “This file does not have an app associated with it” Error on Windows
- How to Fix an Update Error 0x800705b4 on Windows
- How to Resolve “A JavaScript error occured in the main process” Error on Windows
- How to Fix the Network Discovery Is Turned Off Error on Windows
