How many times have you had to write up a quick query in SQL Management Studio for someone and then export the data out to Excel? Exporting data from SQL Server is a fairly long process and involves several steps, but once you do it a few times, it’s not bad.
One thing I learned about saving SQL query results into Excel format or CSV format is that it’s best to use the SQL Import and Export Wizard rather than trying to right-click on the results and saving them.
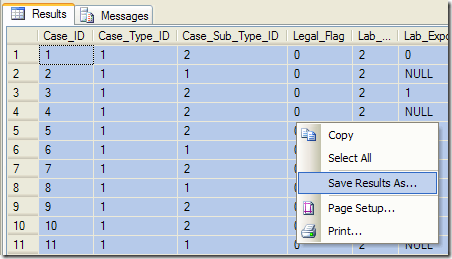
You can always right-click and choose Save Results As, however, the CSV file that you get will not contain the column headers! This is a royal pain if you have 50 columns.
Export SQL Data to Excel
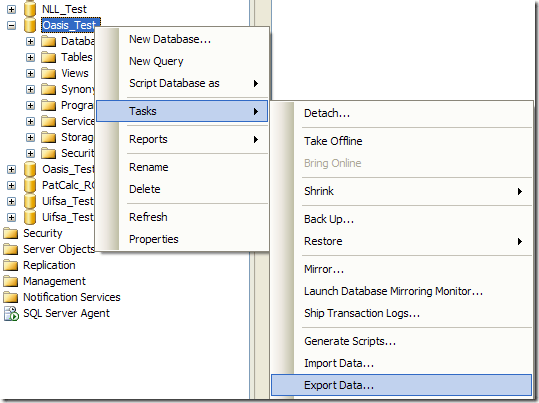
To export SQL data the correct way, right-click on the database (not the table) and choose Tasks, Export Data.
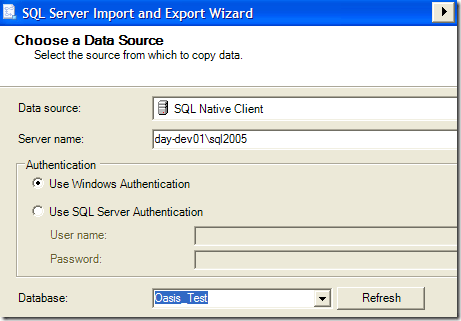
Next, you need to choose the Data Source. If you right-clicked on the database name, then everything should come up automatically.
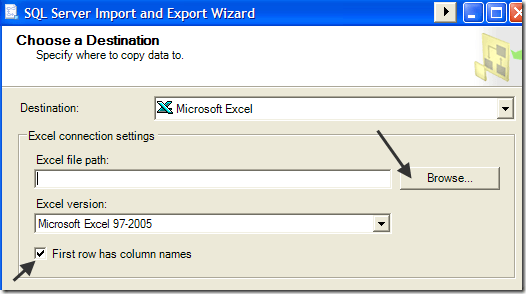
Now you need to choose the Destination. Go ahead and pick Microsoft Excel from the drop down list. After that, you will need to click Browse and choose the location for the output Excel file. Also, be sure to keep the “First row has column names” box checked.
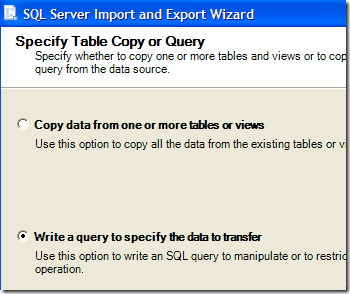
Next, you can either choose to export an entire table/view to Excel or to write your own query. In my case, I will write a specific query for the data that I want to export.
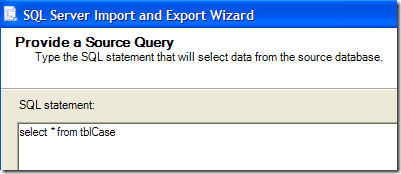
Type in your query and then click Parse to make sure that everything is correct.
Finally, click Next and then click Finish. Your SQL data will be outputted into an Excel file and it will include all the column headers too! Enjoy!
