There are a few different ways that you can blend images together using Photoshop. Some of them will give you a more simple effect, such as changing a layer’s Opacity. You can also use a Layer Mask to blend your pictures into one clear image.
Depending on what kind of effect you want to achieve, you can try these different methods and see which one works best for your project. Some of these are easier to achieve, though all of them are pretty simple to do overall.
Here you can read how to blend your images in multiple ways all in Photoshop.
Blend in Photoshop With a Layer Mask
The most popular way to blend two images together in Photoshop is by using a Layer Mask. This route produces a very smooth blend, and can be used in many different ways. You can control where the images are blended together so that you get exactly the end product you want.
First, you’ll want to have the two images you want to blend together in separate layers in Photoshop. Make sure you select the top layer first before you add the layer mask.
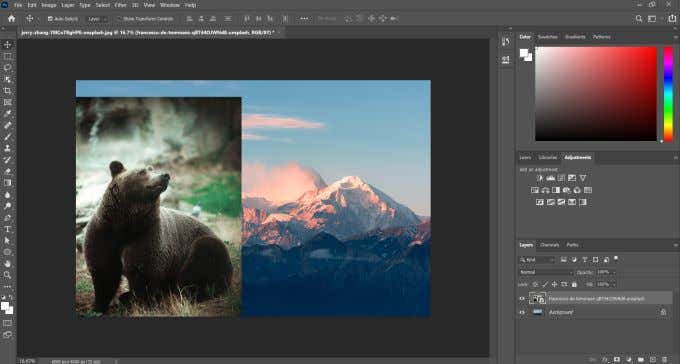
To add the layer mask, click on the icon at the bottom of the Layers panel, which looks like a square with a circle in the center. The layer mask will then show up next to the image in your selected layer.
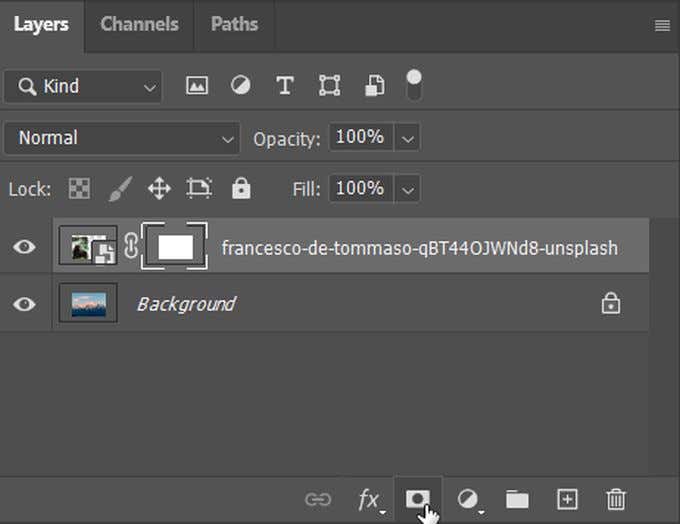
Layer masks work by allowing you to fill in places you want the image to either be clear so the image underneath shows, or filled in. It works by using only white, black, and grey to hide or show the parts you fill in.
So in the layer mask, you can use the brush tool to paint with black to hide the top layer image, or with white to show more of it. You can also use tools such as the gradient tool to smoothly blend images horizontally or vertically. You can look in the layer mask thumbnail to see what areas are black and which are white.
You can’t necessarily erase what you’ve done in a layer mask, but you can bring parts of an image back using the white brush tool, or get rid of parts using black.

You can also combine layer masks with blend mode on a layer to put certain effects over an image. Then you can add or remove parts as you please.
Use Blend Mode
Layer blend modes add yet another option for blending together two images in Photoshop with varying effects. It’s different than using just the opacity, as you have more options than just fading one image into another. But unlike the layer mask method, blend mode also affects the entire layer it is applied to.
It’s a great way to add subtle textures or patterns to photos. To use it, again you’ll want to first have your images on separate layers. Then, you can find the Blend Mode dropdown next to the Opacity option.
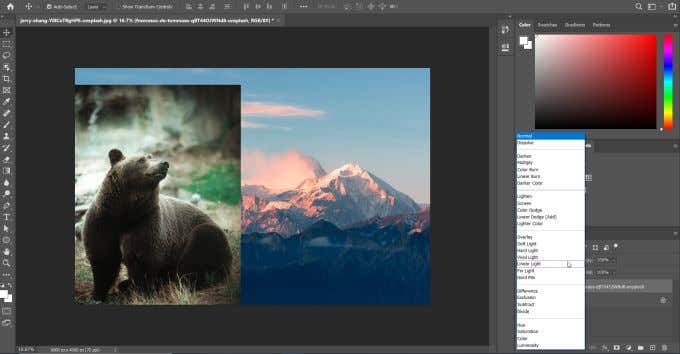
Click on this dropdown and you’ll see all the blend modes available. They are grouped together by what sort of function they do. These are normal, darken, lighten, contrast, comparative, and components, in that order.
For example, the Multiply blend mode will darken your selected image by removing the bright whites and darkening grays. This can result in an interesting effect depending on how you use it. Be sure to try multiple different blend modes and see which one gives you the result you’re wanting. In this image, I used the Screen blend mode as well as a layer mask to achieve this effect.
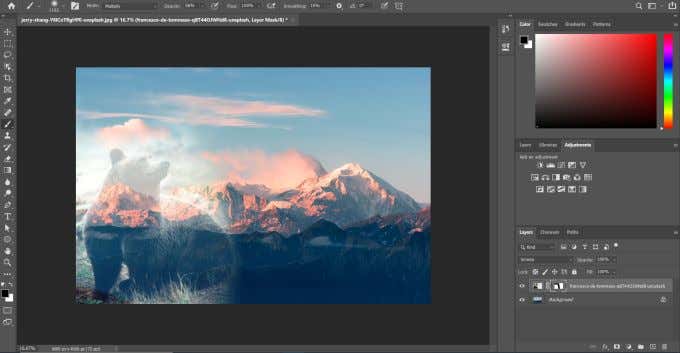
If you want to, you can also combine using blend modes with opacity. This can help you produce even more effects that may look better for you. Blend modes and opacity are two separate features, which is why you can easily use them together.
Blend in Photoshop Using Layer Opacity
Another option for blending is to use a layer’s opacity setting. This gives you less control over where an image blends into another. But if you just want a quick way to blend one image over another this can definitely work.
To do this, have your two images in separate layers in Photoshop. Then, select the layer that you would like to make transparent. Keep in mind, the top layer will always cover the bottom and changing the opacity will change how much you see of the bottom layer image.
You can change the opacity of your selected layer by finding the opacity in the top-right of the layer panel. You will see a box at 100%. Changing this will change how much of the entire layer is visible, with 0% meaning none is visible and 100% meaning all of it is.
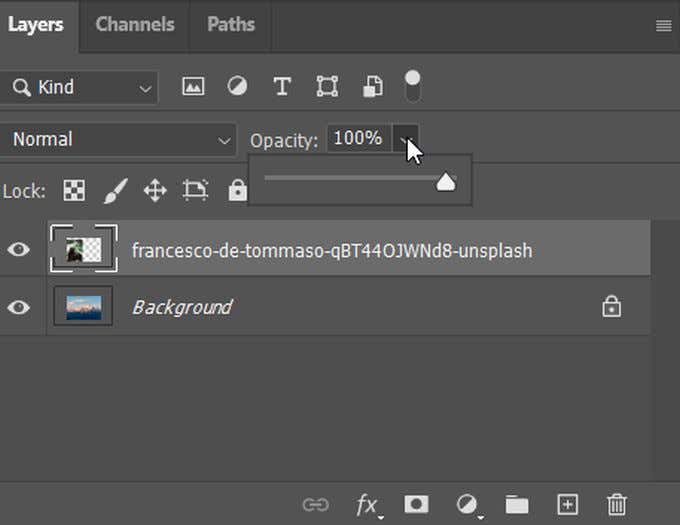
Change the opacity to the amount that works for you. You can always experiment with lower or higher opacities to see how it looks.
Tips For Blending Photos in Photoshop
When you’re combining two images together, there are some things you’ll want to keep in mind to ensure you like your final product.
Be sure that you position your photos beforehand the way you want them to show up when they’re blended together. Look at what details you want to include in the final picture, and position them with that in mind.
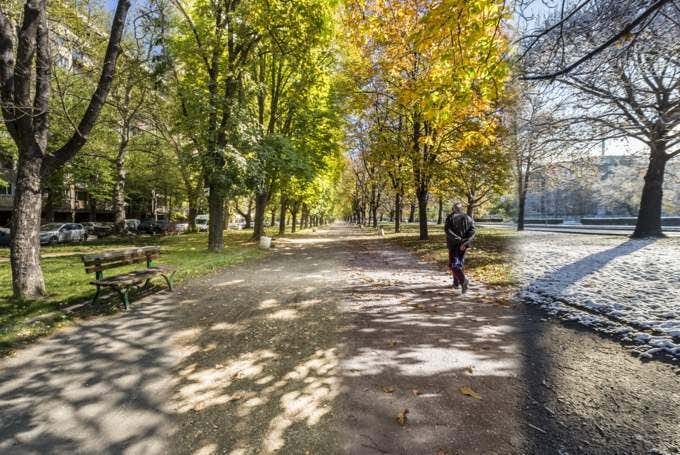
You should also know that erasing parts of layers is not an ideal method to blend them together. This is because you’re removing parts of an image permanently, and if you decide something isn’t working, it’s not as easy to go back and change things.
If you keep trying the same method to blend in Photoshop and aren’t getting the results you like, don’t be afraid to experiment with multiple methods. Just be sure you have backups of your photos just in case something goes wrong, so you can start over if you need to.

