Are you a power user looking for ways to boost the performance of your PC? If so, you might want to consider enabling Ultimate Performance in Windows. It’s a power plan that eliminates energy management-related delays and ensures the CPU and other hardware components always work at their maximum.
Enabling Ultimate Performance requires manual effort, as the chances are it’s not available on your Windows installation by default. This tutorial will explain what Ultimate Performance is and how to activate it in Windows 11 and 10.
What Is the Ultimate Performance Mode?
Ultimate Performance is a power scheme for Windows 10 and 11 Pro Workstation editions that prioritizes performance over energy efficiency. Unlike other power plans, it removes the micro-latencies between a hardware component requesting and receiving power and primes the system to respond instantly to demanding tasks.
The power plan is ideal for high-end workstations that handle business-critical tasks, where even the slightest delays can make a difference. However, since it makes everything run on high gear, it can also bump up the performance on personal computers—e.g., you may see noticeable improvements during intensive activities like video editing and encoding.
Ultimate Performance works by setting the processor state to 100%, meaning the CPU always operates at its highest frequency. Additionally, it prevents the hard disk from turning off when it’s not in use, ensuring that data is instantly accessible.
Ultimate Performance also stops the operating system from hibernating, modifies the wireless display settings to avoid random Wi-Fi disconnects, and prompts the graphics hardware to work faster.
On the flip side, all the above translates to increased power consumption and reduced battery life. It can also rev up the fans, create overheating issues in poorly ventilated systems, and adversely impact hardware longevity.
Ultimate Performance is not present on the standard Pro and Home editions of Microsoft Windows, but you can activate it through the Command Prompt or Windows PowerShell. Even if you run Pro for Workstations, you may not see the power mode on laptops; again, you can enable it through the command line.
How to Enable the Ultimate Performance Power Plan
Assuming you have the Pro for Workstations edition of Windows 10 or 11 running on your computer, you can enable Ultimate Performance through the Control Panel‘s Power Options console. Here’s how:
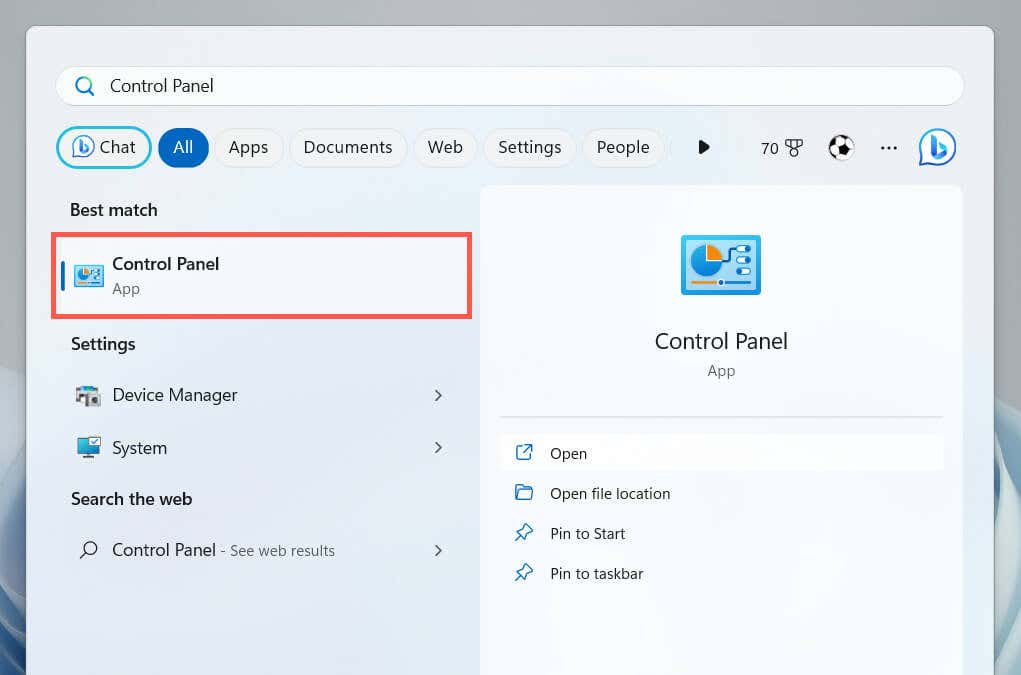
- Open the Start menu, type Control Panel, and press Enter.
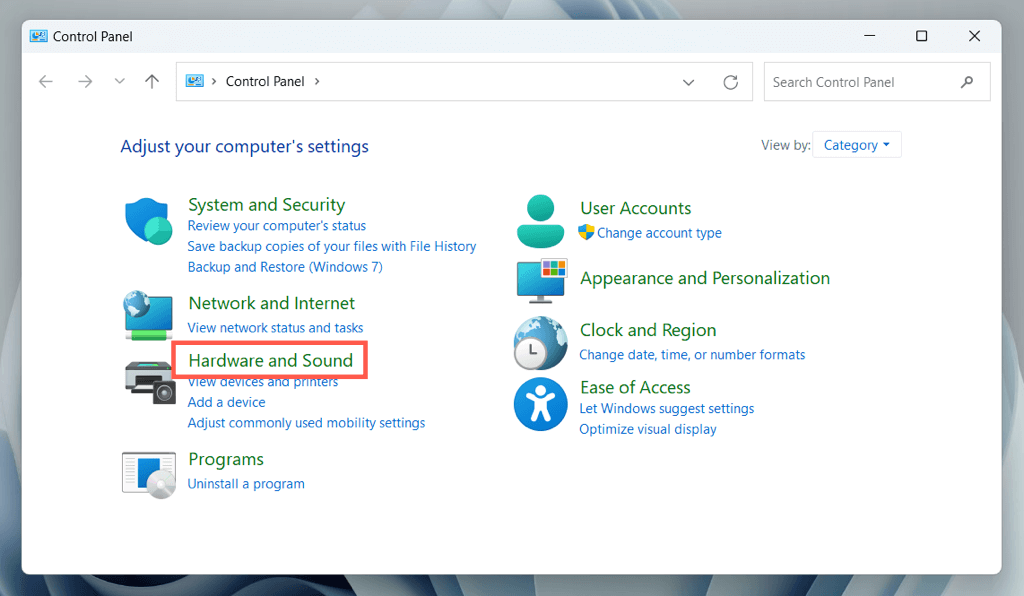
- Select Hardware and Sound.
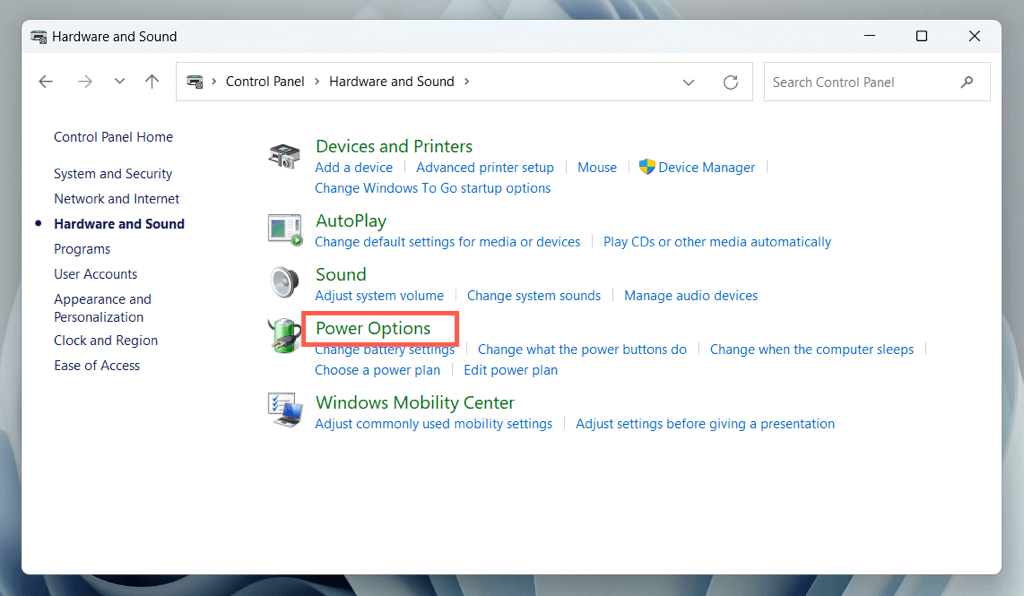
- Select Power Options.
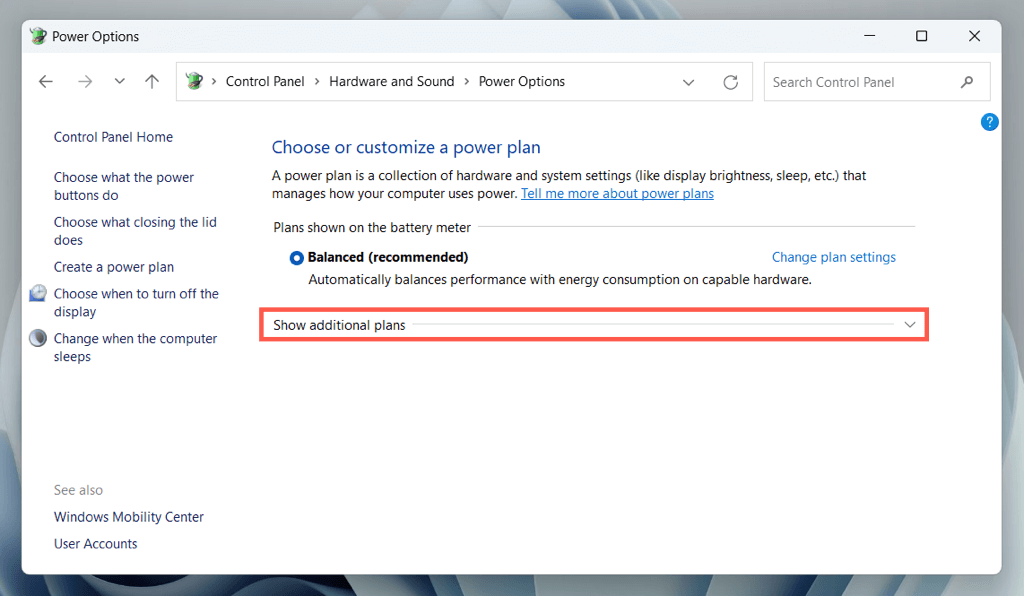
- Expand the Show additional plans section.
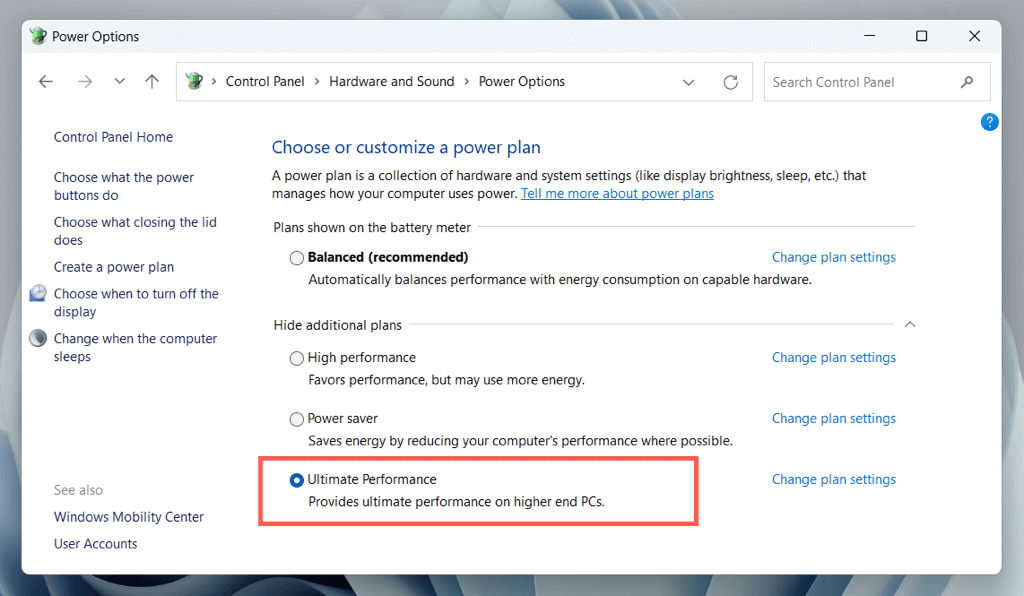
- Select the radio button next to Ultimate Performance.
Note: In Windows 10, you can launch the Power Options console through the Settings app—right-click the Start menu, select Settings, and go to System > Power & sleep > Additional power settings.
How to Add the Ultimate Performance Power Plan
If you don’t see the Ultimate Performance power plan within the Power Options console in Windows, you must use an elevated Windows PowerShell or Command Prompt console to unhide it. To do that:
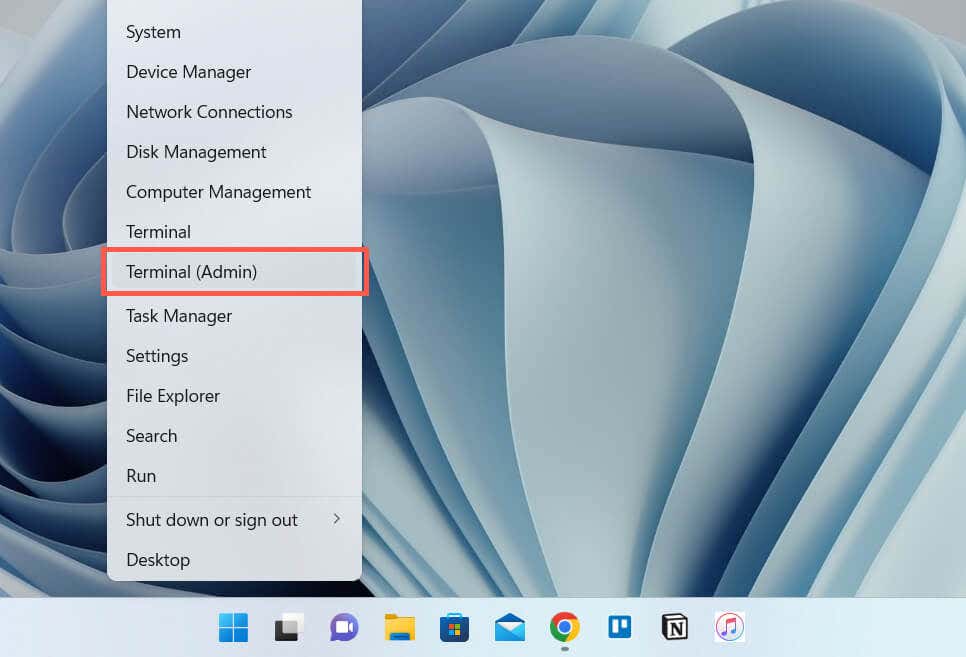
- Right-click the Start button and select Windows PowerShell/Terminal (Admin). Or, open the Start menu, search for cmd, and choose Run as administrator.
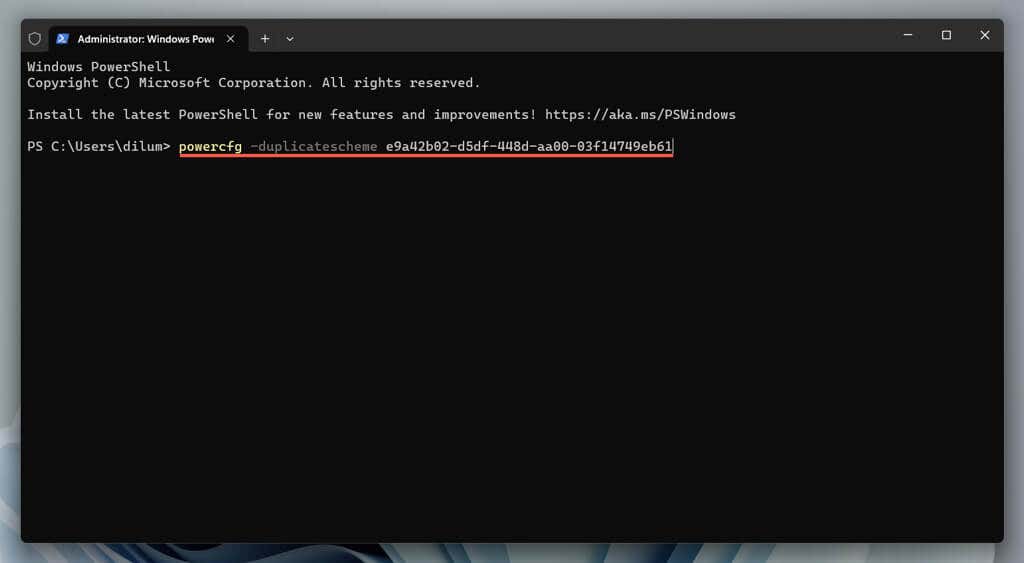
- Execute the following command:
powercfg –duplicatescheme e9a42b02-d5df-448d-aa00-03f14749eb61
Revisit the Power Options console. If the Ultimate Performance plan isn’t present, restart your computer and check again. Alternatively, run the activation command below to turn on Ultimate Performance through the command line itself:
powercfg /setactive e9a42b02-d5df-448d-aa00-03f14749eb61
If Ultimate Performance continues to fail to appear within the Power Options pane, you must disable Modern Standby in Windows. The quickest way to do that is to run the following command through an elevated command line:
reg add HKLMSystemCurrentControlSetControlPower /v PlatformAoAcOverride /t REG_DWORD /d 0
Once you do that, re-run the Ultimate Performance activation command:
powercfg –duplicatescheme e9a42b02-d5df-448d-aa00-03f14749eb61
Restart your computer, bring up the Power Options console, and Ultimate Performance should be present among the list of power plans.
How to Customize the Ultimate Performance Plan
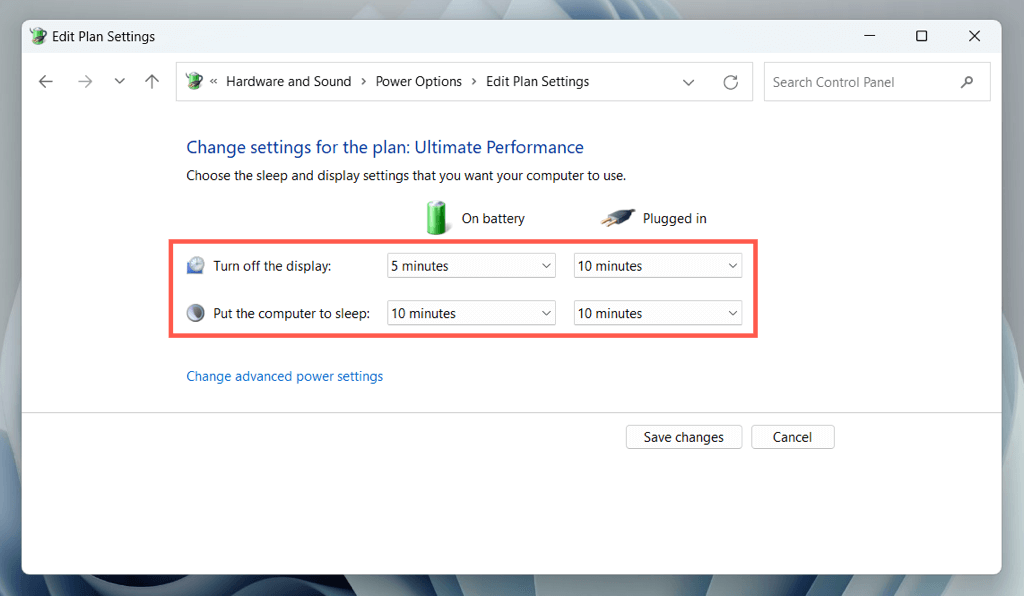
Ultimate Performance is customizable like any other power plan on your computer. Select the Change plan settings option next to Ultimate Performance on the Power Options console. On the screen that follows, you get to determine when your desktop or laptop should turn its display off or go to sleep.
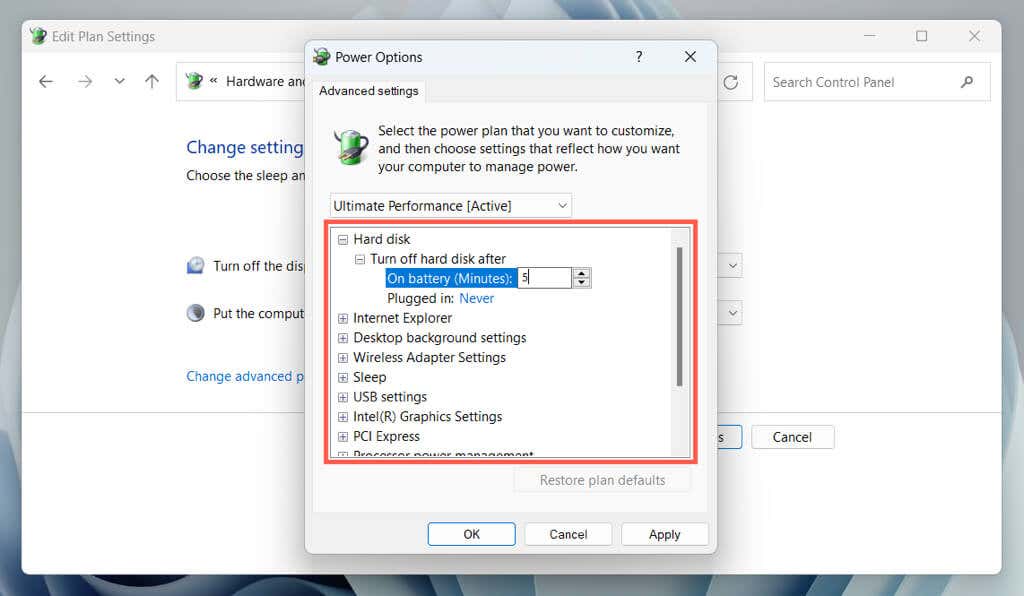
To customize other aspects of the power plan, select Change advanced power settings. For example, if you prefer having the hard drive turn off after a specific amount of inactivity on battery power, expand Hard disk > Turn off hard disk after and enter the time period into the field next to On battery (Minutes).
Dive into other categories like Wireless Adapter Settings, USB settings, and Processor power management to tweak the Ultimate Performance power plan per your preferences.
How to Switch Back to Another Power Plan
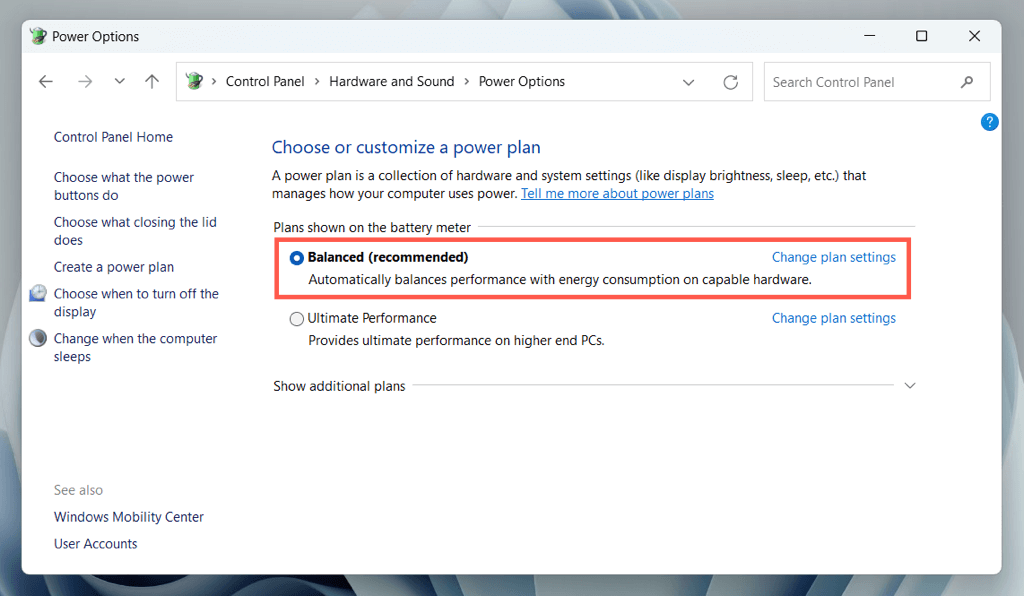
Ultimate Performance consumes lots of energy, so it’s a good idea to switch to an alternative mode, such as the Balanced power plan, for instances where your computer doesn’t need to run at full throttle.
To do that, re-open the Power Options console and enable the radio button next to the Balanced (recommended), Power Saver, or High Performance power plans.
How to Delete the Ultimate Performance Power Mode
If you decide that Ultimate Performance isn’t for you, it’s possible to delete it from the list of power plans.
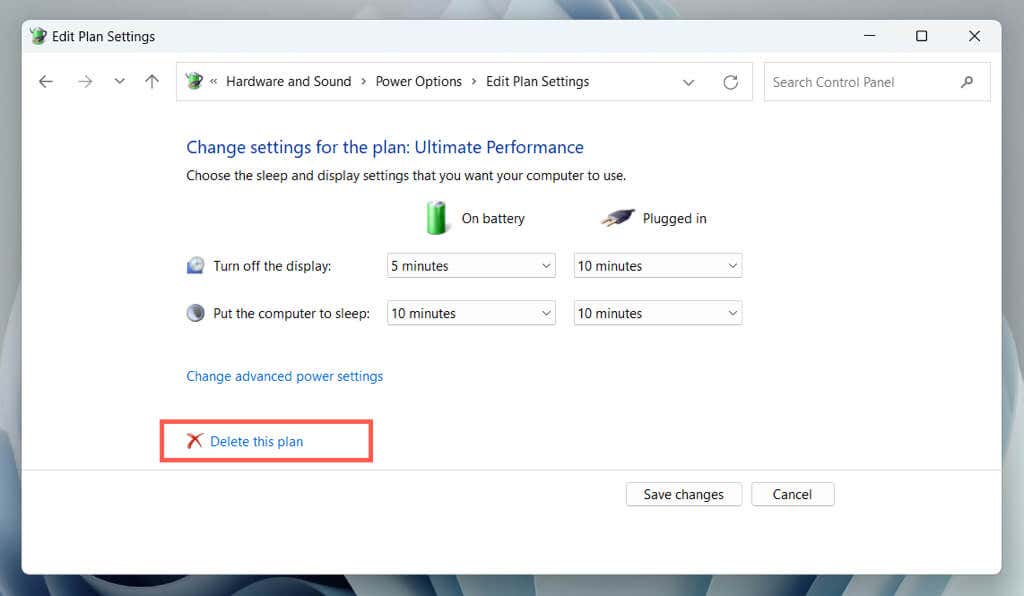
To do that, open the Power Options console and switch to an alternative power plan. Then, select Change plan settings next to Ultimate Performance and choose Delete this plan.
To restore the Ultimate Performance plan later, run the following command through Windows PowerShell or the Command Prompt:
powercfg –duplicatescheme e9a42b02-d5df-448d-aa00-03f14749eb61
Get Ultimate Performance on Your Windows PC
Ultimate Performance is a powerful tool to speed up your computer, but it doesn’t need to be active all the time. Instead, enabling it only when you need extra performance can increase power savings and reduce thermal-related problems. It’s also important to use the power plan with caution on laptops and other portable devices due to its excessive toll on battery life.
Overall, understanding how to enable and use the Ultimate Performance power plan can help you optimize your computer and ensure it’s running at maximum performance when you require it the most.
Related Posts
- Preparing for Windows 10 End of Support: Upgrading to Windows 11
- How to Fix a “This file does not have an app associated with it” Error on Windows
- How to Fix an Update Error 0x800705b4 on Windows
- How to Resolve “A JavaScript error occured in the main process” Error on Windows
- How to Fix the Network Discovery Is Turned Off Error on Windows
Dilum Senevirathne is a freelance tech writer and blogger with three years of experience writing for online technology publications. He specializes in topics related to iOS, iPadOS, macOS, and Google web apps. When he isn’t hammering away at his Magic Keyboard, you can catch him binge-watching productivity hacks on YouTube. Read Dilum’s Full Bio
