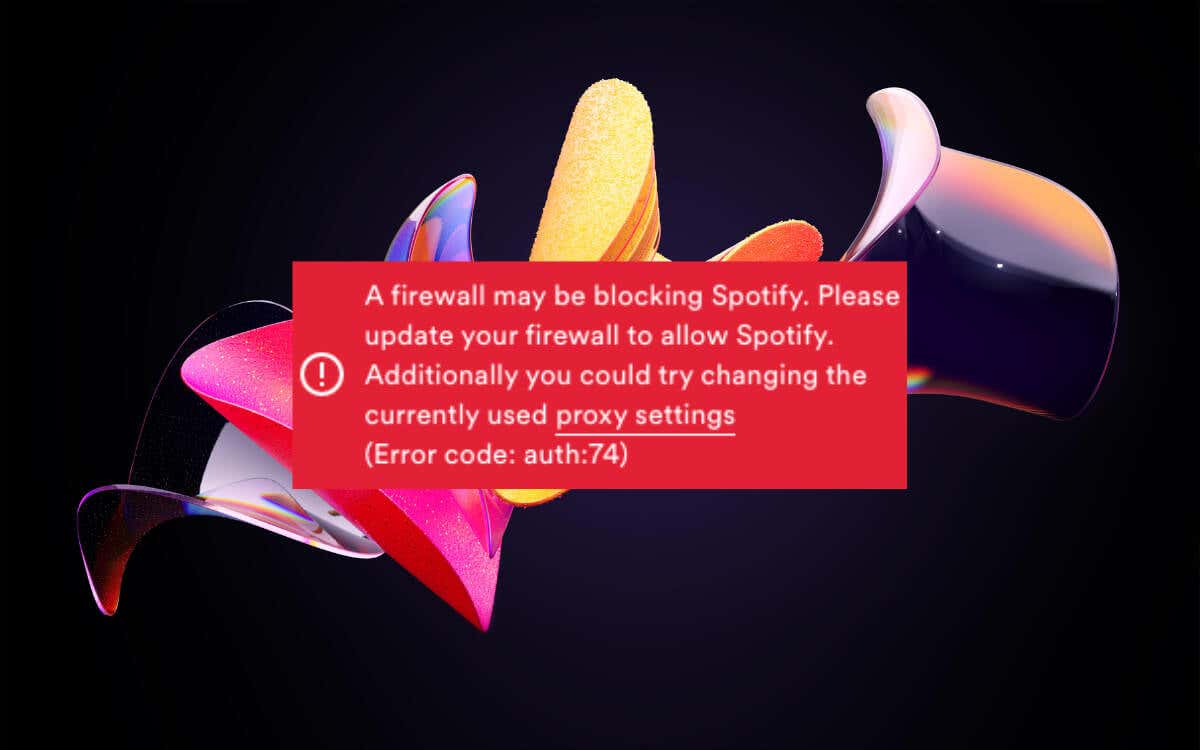
Do you keep running into “Error code: auth:74” while attempting to sign into the Spotify app on Windows? As the rest of the error message suggests, this happens when a firewall or incorrect proxy setup is blocking you from signing in.
However, Spotify’s auth:74 error can also pop up for several other reasons, such as a corrupt application cache or broken network settings.
This guide will provide multiple solutions to help you eliminate the auth:74 error so you can log back into Spotify on your Windows PC without issues.
Force-Quit and Restart Spotify
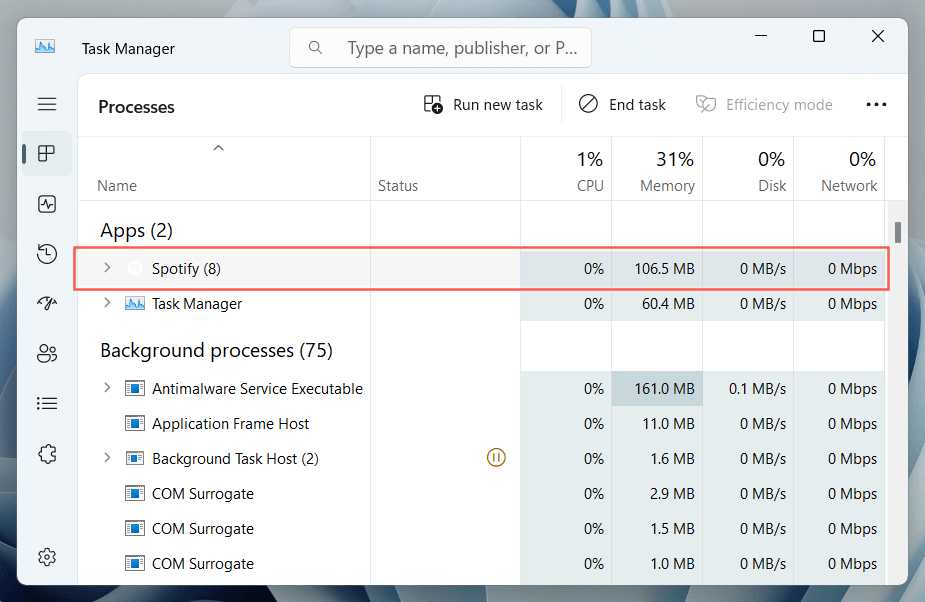
It’s a good idea to kick things off by force-quitting the Spotify app on your Windows computer. Usually, that helps clear temporary issues impacting the login process. Just:
- Right-click the Start button and select Task Manager.
- Highlight Spotify among the list of processes.
- Select the End task button.
After you do that, relaunch Spotify, attempt to sign back in, and check if the error recurs. If it does, continue with the rest of the instructions.
Restart Your Computer
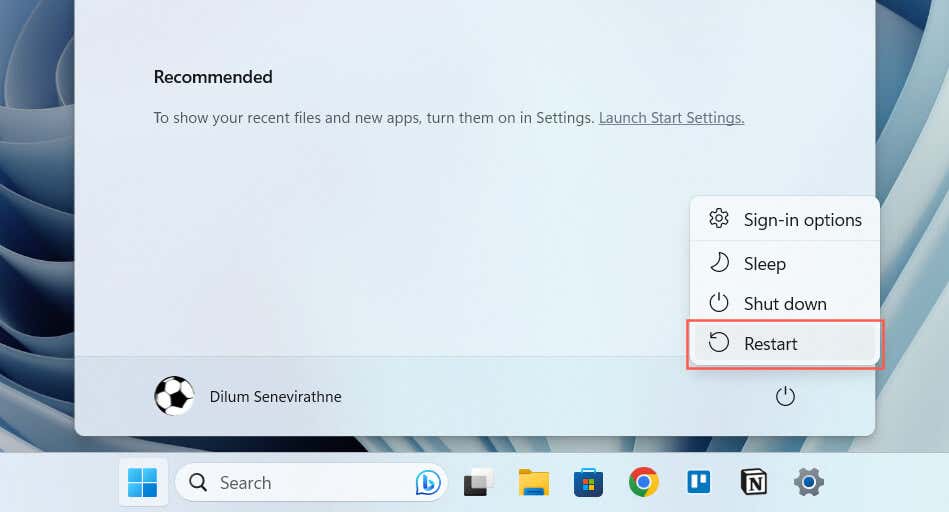
Rebooting your computer can resolve broader system-related issues preventing Spotify from signing you in. Just open the Start menu and select Power > Restart.
Run Spotify as Administrator
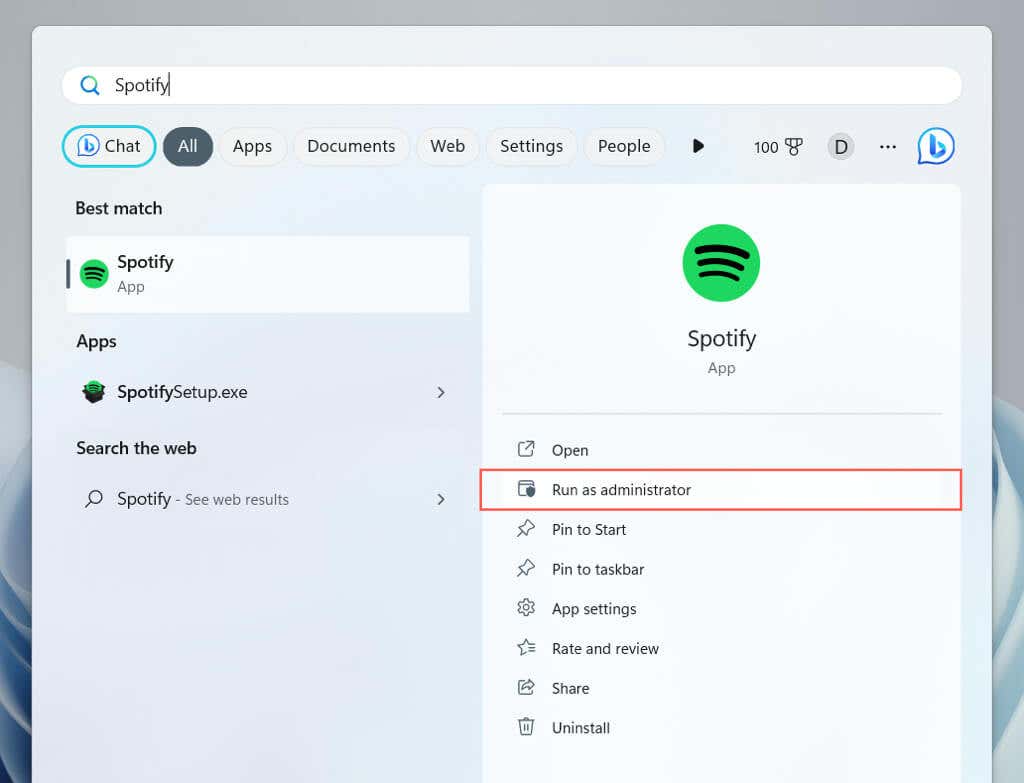
Running Spotify as an administrator gives the program more control over your computer, allowing it to bypass restrictions causing the auth:74 error. To do that:
- Force-quit Spotify via the Task Manager.
- Open the Start menu and search for Spotify.
- Select Run as administrator.
Check Your Firewall Settings
If restarting Spotify or launching it as an administrator failed to make the auth:74 error disappear, it’s time to shift your focus to your computer’s firewall settings. If you use third-party anti-malware software, check its firewall for a way to allow the Spotify app to communicate with the internet.
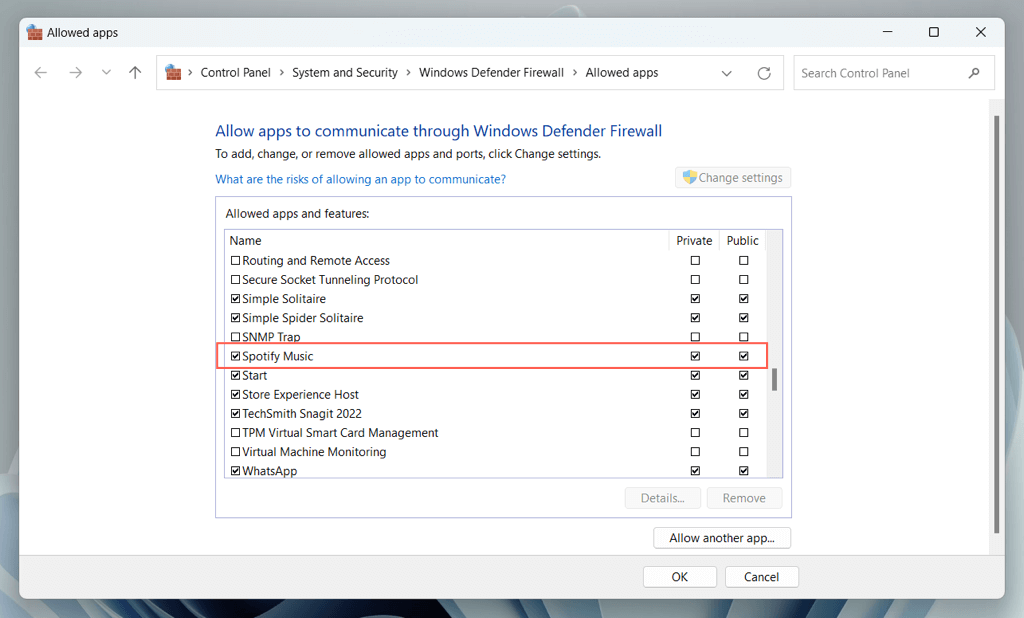
However, if you rely on the built-in Windows Firewall for network security, here’s what you must do to check if Spotify has unrestricted access to the internet:
- Press Windows + R, type control firewall.cpl into the Run box, and select OK.
- Select Allow an app or feature through Windows Defender Firewall on the left of the Windows Defender Firewall window.
- Select the Change settings button.
- Scroll down and make sure the box next to Spotify Music or spotify.exe is checked. Next, ensure both boxes under the Private and Public columns are active.
- Select OK if you made any modifications.
Check Your Proxy Settings
If you’re on a network using a proxy server, the Spotify app should automatically detect your proxy settings by default. However, if the error persists, you should manually set up the application with the relevant proxy information.
Alternatively, if you’re on a trusted network without a proxy, it’s a good idea to configure Spotify to stop looking for proxy settings.
To manage your proxy settings in Spotify:
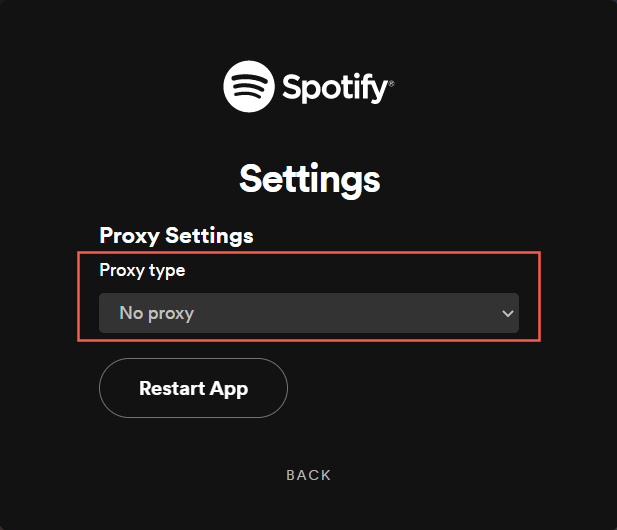
- Attempt to sign into Spotify and select Proxy Settings within the auto:74 error message.
- If you use a proxy server, switch from Auto-detect settings to HTTP, SOCKS4, or SOCKS5 option and fill in your proxy details. If you don’t use a proxy, select No proxy.
- Select Restart App.
Disable Virtual Private Network
VPNs (or virtual private networks) can cause regional mismatches when Spotify attempts to communicate with its servers during login. If you use a VPN, try deactivating it. Here’s how:
- Right-click the Start button and select Settings.
- Select Network & internet and choose VPN.
- Turn off the switch next to your VPN configuration.
Check the Hosts File
The auth:74 error code could also result from your system’s Hosts file blocking Spotify’s connection to its servers. This is usually the case if you’ve altered the Hosts file in Windows to prevent Spotify ads.
To inspect and remove any Spotify-related entries from the Hosts file:
- Launch Notepad via the Start menu.
- Open the File menu in Notepad and select Open.
- Navigate to the following location:
Local Disk C > Windows > System32 > drivers > etc
- Set document discovery to All files, highlight the Hosts file, and select Open.
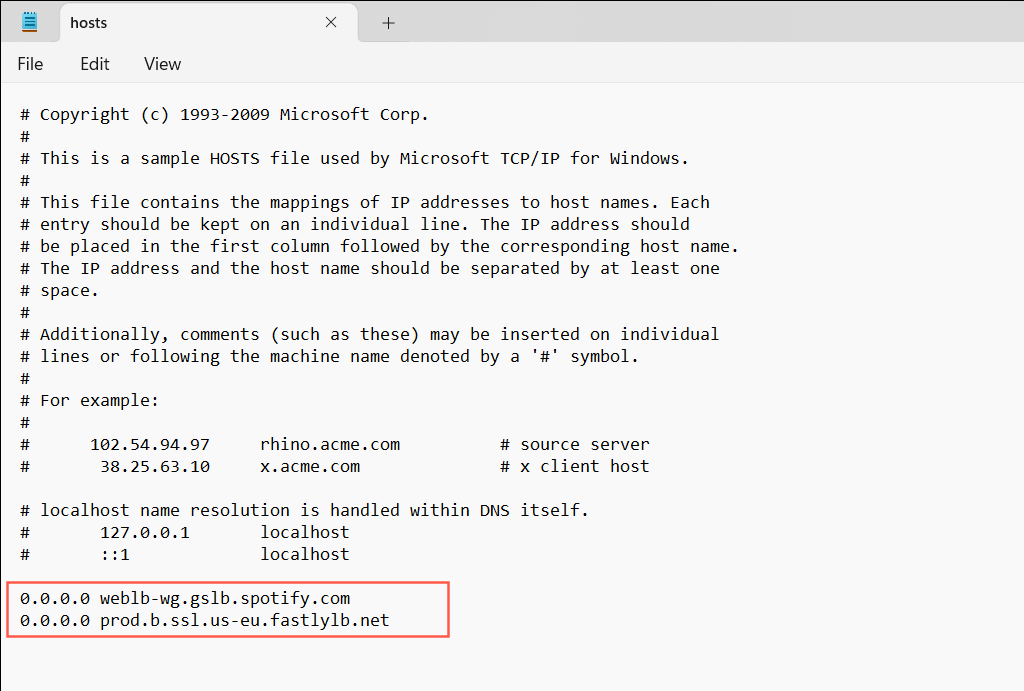
- Scan the file for lines that mention Spotify and Fastly (Spotify’s content delivery network) and delete them. Examples include:
- 0.0.0.0 weblb-wg.gslb.spotify.com
- 0.0.0.0 prod.b.ssl.us-eu.fastlylb.net
- Select File > Save As if you had to make any modifications.
- Save the modified Hosts file to your desktop.
- Right-click the Hosts file on your desktop and select Copy.
- Revisit the location of the original Hosts file via File Explorer—Local Disk C > Windows > System32 > drivers > etc.
- Right-click a vacant area and Paste. If you don’t see an overwrite prompt, right-click the original Hosts file and select Delete.
Clear the Spotify Cache
The Spotify cache stores temporary data to help the Spotify app run faster. However, over time, it can fill up with redundant data, leading to various errors. You can’t clear the Spotify cache via the application interface because you can’t log in, so you must rely on File Explorer instead.
If you use the standard version of Spotify from the Spotify website:
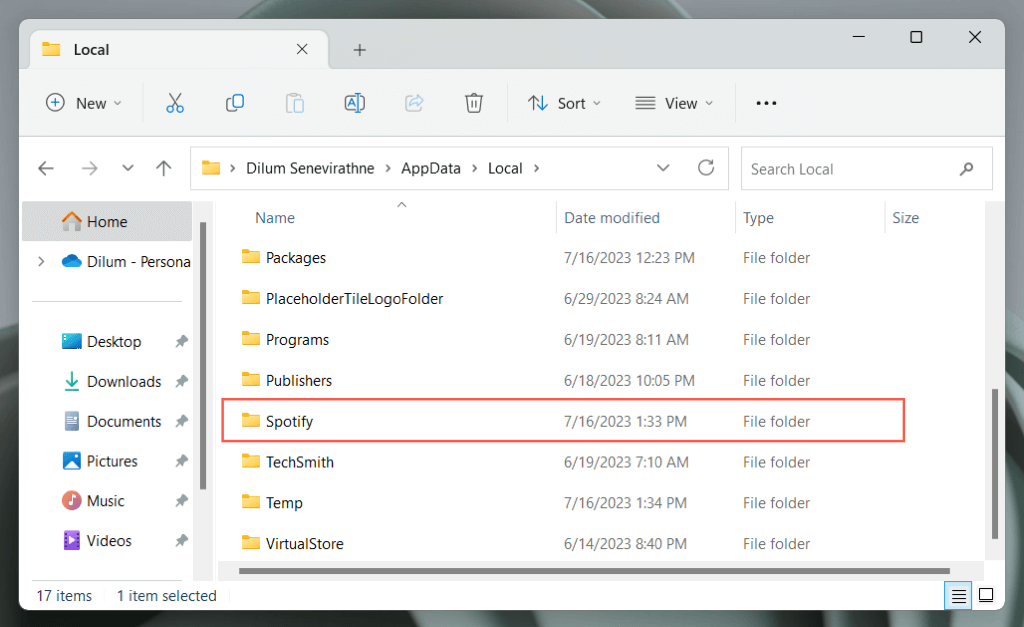
- Press Windows + R, type appdata, and select OK.
- Go to Local > Spotify.
- Right-click the Storage folder and choose Delete.
If you use the Microsoft Store version of Spotify:
- Press Windows + R, type appdata, and select OK.
- Go to Local > Packages > SpotifyAB.SpotifyMusic_zpdnekdrzrea0 > LocalCache.
- Delete the Spotify folder.
Reset Network Settings
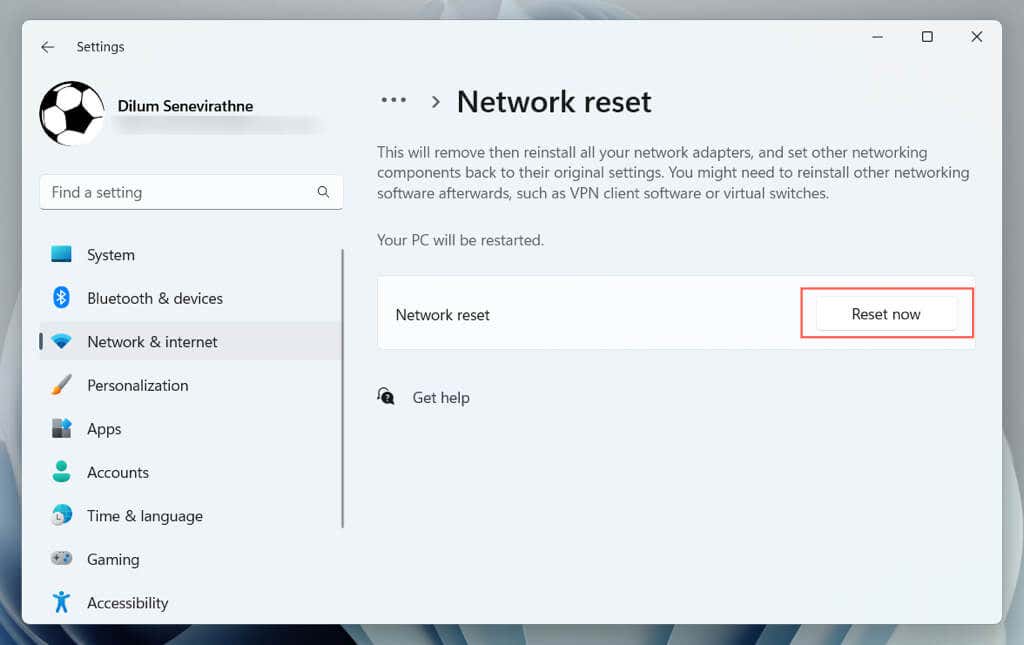
Resetting the network settings in Windows can resolve network-related issues from causing login errors in Spotify. The process erases saved Wi-Fi networks and passwords, including VPN configurations, so you must set them from scratch afterward.
To restore the network settings in Windows to factory defaults, you must:
- Right-click the Start button and select Settings.
- Select Network & internet.
- Select Advanced network settings.
- Select Network reset.
- Select Reset now.
Remove and Reinstall Spotify
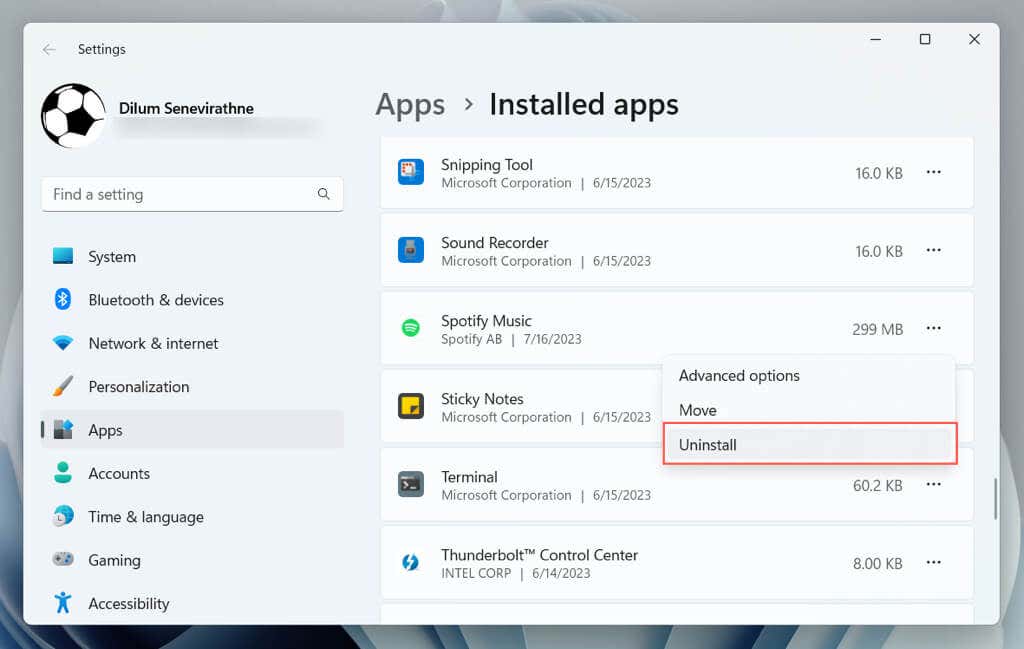
Reinstalling Spotify clears persistent errors by ensuring you have a fresh copy of the application on your system but at the cost of your music downloads.
To delete your current Spotify installation:
- Right-click the Start button and select Apps and Features/Installed apps.
- Select Spotify Music and choose Uninstall.
- Select Uninstall to confirm.
After uninstallation, reinstall Spotify via the Spotify website or the Microsoft Store and check if the error recurs.
Switch Spotify Versions
Switching between Spotify versions—from the Microsoft Store app to the standard desktop application or vice versa—is another fix that might resolve the auth:74 error. There are no feature differences between the versions, so try that out and check if you can sign in without trouble.
Log In and Start Chilling
Spotify’s “Error Code: Auth 74” on Windows is not unfixable. Through various methods like restarting your system, checking the firewall settings, or even reinstalling the application, you can tackle this issue head-on and log in to the app again. Reach out to Spotify Support if none of the fixes above work.
Related Posts
- How to Fix Spotify’s Local Files Not Showing on Windows
- Preparing for Windows 10 End of Support: Upgrading to Windows 11
- How to Fix a “This file does not have an app associated with it” Error on Windows
- How to Fix an Update Error 0x800705b4 on Windows
- How to Resolve “A JavaScript error occured in the main process” Error on Windows
