If you’re running iTunes on Windows 10, you may have come across a strange error that continually pops up and that prevents you from downloading any media onto your local computer.
In this case, I’m specifically talking about Windows 10 and most likely after you have recently updated Windows 10 to the latest version. I Googled and just about every site told me it was some kind of permissions issue with the iTunes media folder and that I had to reset the permissions or create a new library to get things working again.

However, from my tech background, I knew there had to be some other issue going on. After a lot of investigation, I found out it was a security setting in Windows 10 that was preventing iTunes from writing to the media folder.
The feature is called Controlled Folder Access and while I recommend keeping it enabled, it can cause all kinds of strange issues with programs in Windows. In this article, I’m going to walk you through the steps to fix the two errors below:
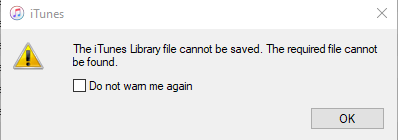
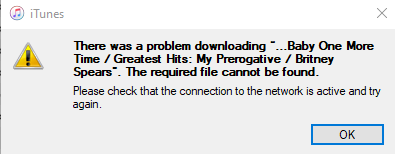
Also, when trying to download a song onto my computer from iCloud Music, I got a similar, but slight different error.
Windows 10 Controlled Folder Access
With Controlled Folder access enabled in Windows 10, you basically prevent any program from writing to default folders in Windows like Documents, Pictures, Videos, Music, etc. You manually have to give permission to each program that needs to write to these directories.
Luckily, once an application has tried to access a folder and has been blocked, it shows up in a recently blocked list and you can just select it to give it access.
First, click on Start and then Settings.

Next, click on Update and Security.
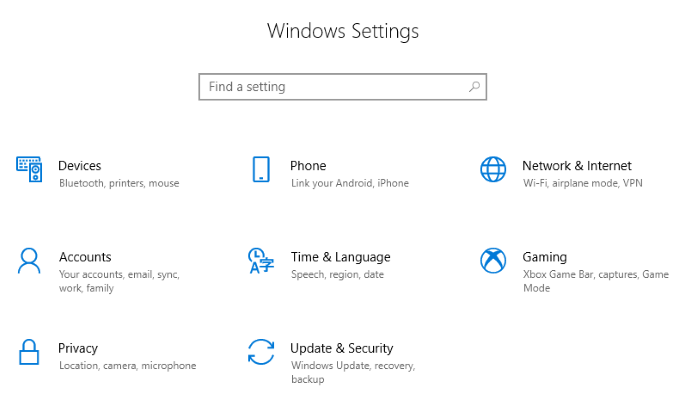
In the left-hand column, click on Windows Security. On the following right pane, click the Open Windows Security button.
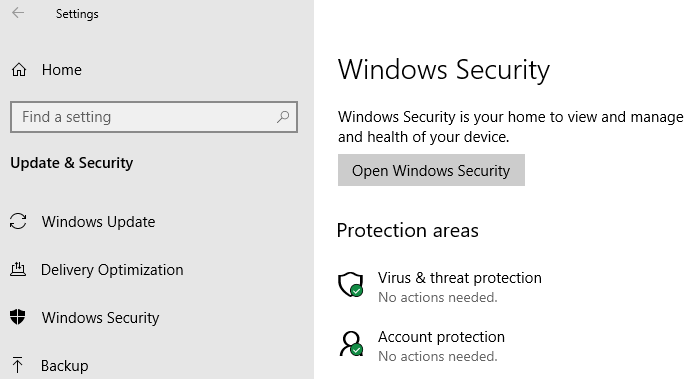
Now click on Virus and Threat protection in the right or left pane.
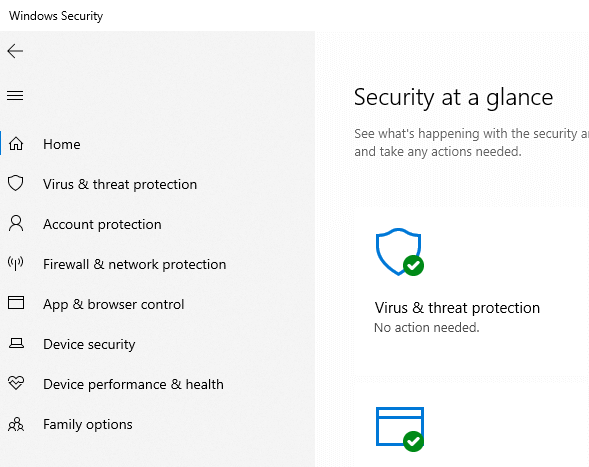
In the right pane, scroll down until you see the Manage Settings link under the Virus & threat protection settings header.
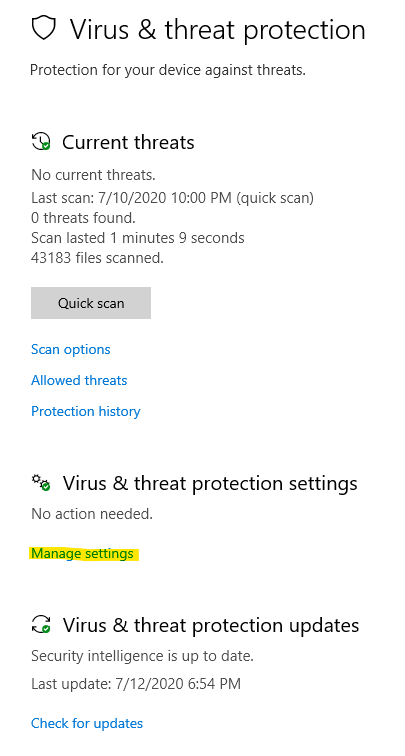
You’ll see a lot of different options here, but keep scrolling down until you reach Controlled folder access and click on the manage link.
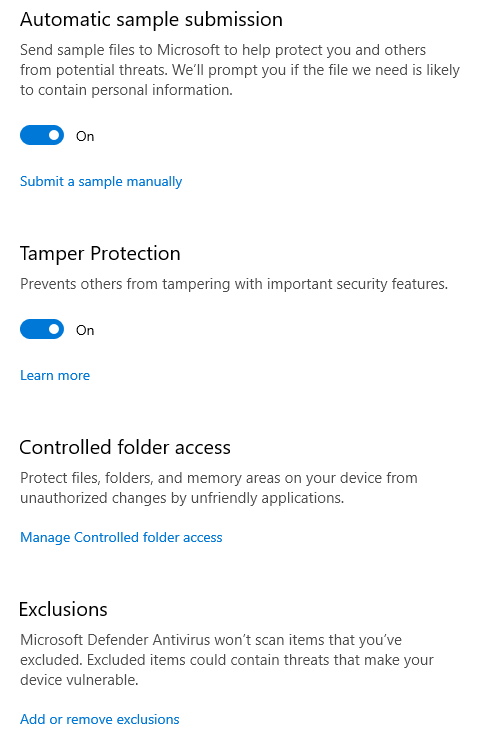
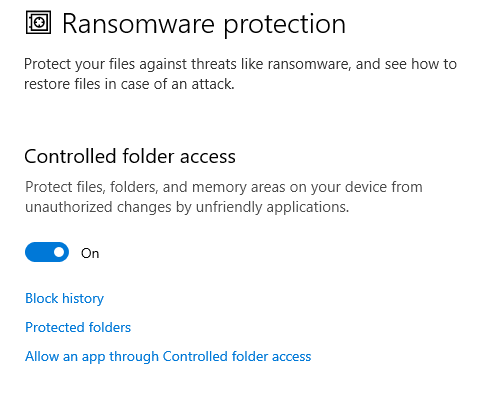
Click on the Allow an app through Controlled folder access link.
You’re going to get a security popup asking if you want to allow this app to make changes to your computer. Click Yes. Here you will see a list of apps and their paths that have been granted access.
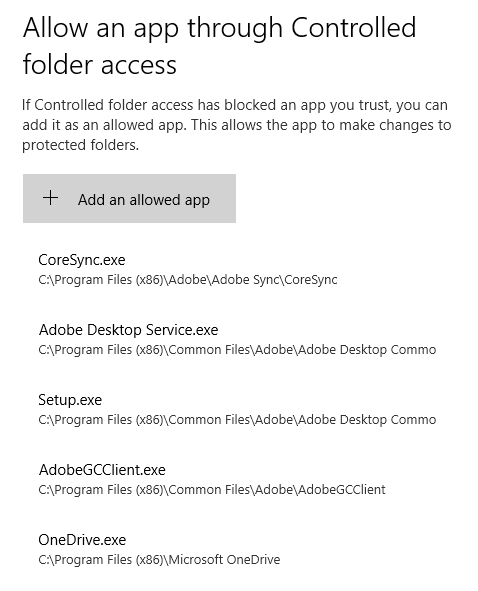
Go ahead and click on the Add an allowed app button at the top. When you click on it, you’ll see an option come up that it titled Recently Blocked Apps.
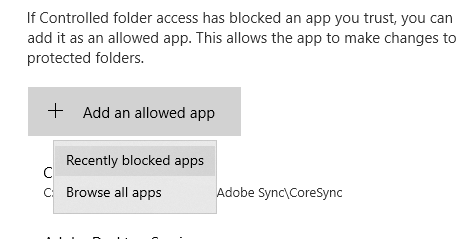
If you just closed iTunes, you should see that the top app is going to be the iTunes executable file (itunes.exe). If not, you can open iTunes again and let the error pop up and then come back to this window. Or you can just click Browse all apps and manually navigate to the EXE file.
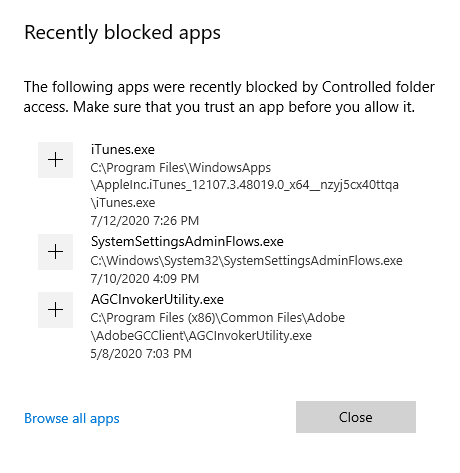
Just click the + button to add the app and then click Close. Now go ahead and open iTunes and your error will be gone! Whew! That was a lot of steps, but thankfully you only need to do this once.
It’s also a good idea to go through that recently blocked list and give access to any other app that you think is being blocked incorrectly. It tends to block a lot of Adobe software too. Hope this fixed your problem. If not, let us know in the comments.
Related Posts
- Preparing for Windows 10 End of Support: Upgrading to Windows 11
- How to Fix a “This file does not have an app associated with it” Error on Windows
- How to Fix an Update Error 0x800705b4 on Windows
- How to Resolve “A JavaScript error occured in the main process” Error on Windows
- How to Fix the Network Discovery Is Turned Off Error on Windows