Microsoft Stream is one of the many apps included in a subscription to Microsoft 365, but it’s far less well known than the standard Microsoft programs like Word or Excel. Stream lets users make, manage, and share videos. A new version of Stream was released recently, and it saves videos to Sharepoint, just like any other file you might create in Microsoft 365.
If you have access to Stream, then you can easily create screen recordings. We’ll walk you through all the steps for creating, managing, and sharing a screen recording with Stream.

How to Record Your Screen with Microsoft Stream
While there are many options when it comes to screen recording software, if you have Microsoft Stream, you don’t need to download any extra programs. Just follow these steps.
- In a web browser, navigate to stream.microsoft.com, logging into your Microsoft 365 account if you haven’t already.
- Select the Create button and then Record screen or video.
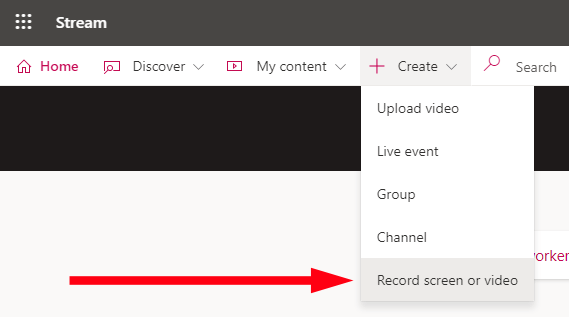
- Note the warning about rights and permissions.

- In the Record screen or video popup, select the webcam icon and choose OBS virtual camera if you have a PC. Mac users should select VirtualCam.
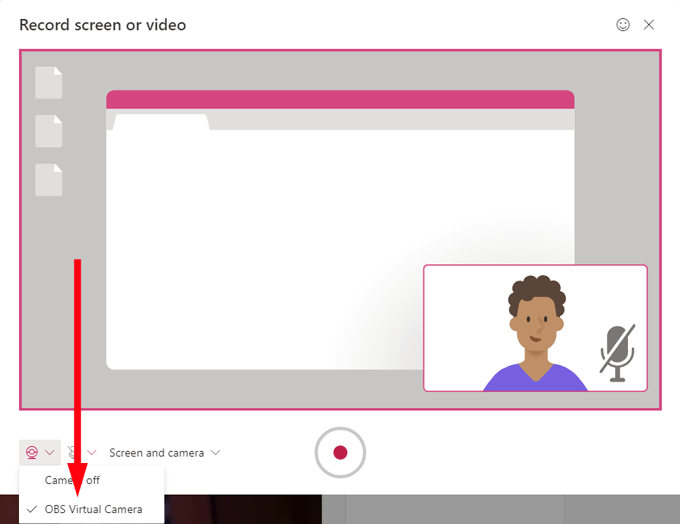
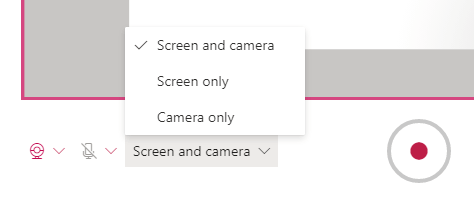
- If you only want to record your screen, choose Screen only in the Screen and camera dropdown. If you also want your webcam to record, choose Screen and camera. This option will allow you to create a screen recording with your webcam video appearing as an inset so you can narrate your screen recording as you go. If you only want to record using your webcam (i.e., you don’t want to record your screen), select Camera only.
- Press the record button.
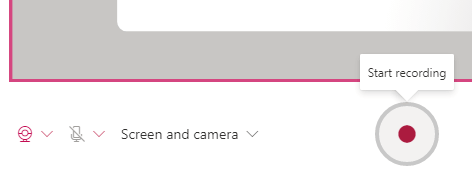
- Next, in the Share your screen popup, choose between sharing your entire screen (if you have multiple monitors, you can choose which one), a particular application window, or a specific browser tab.
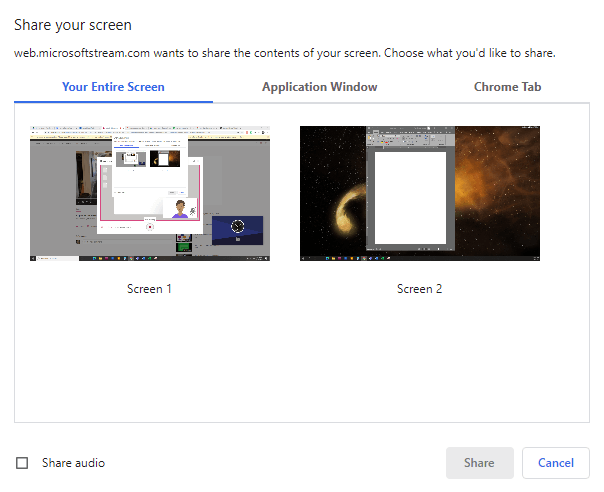
- If you want to record native audio as well as your screen, check the Share audio box.
- Select the Share button.
- Next you’ll get a 3-second countdown.
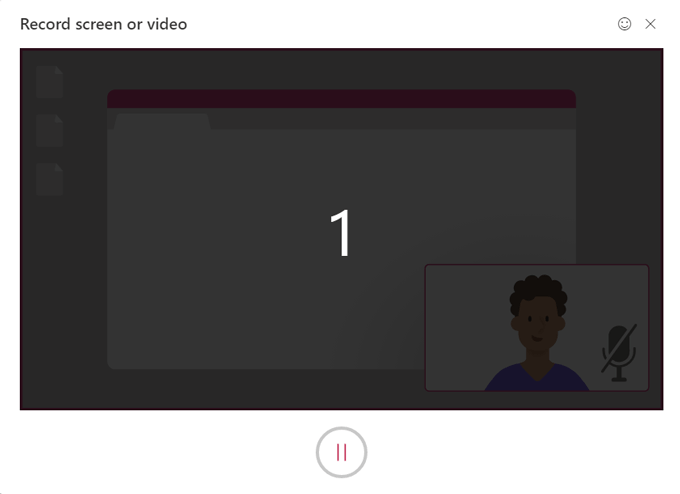
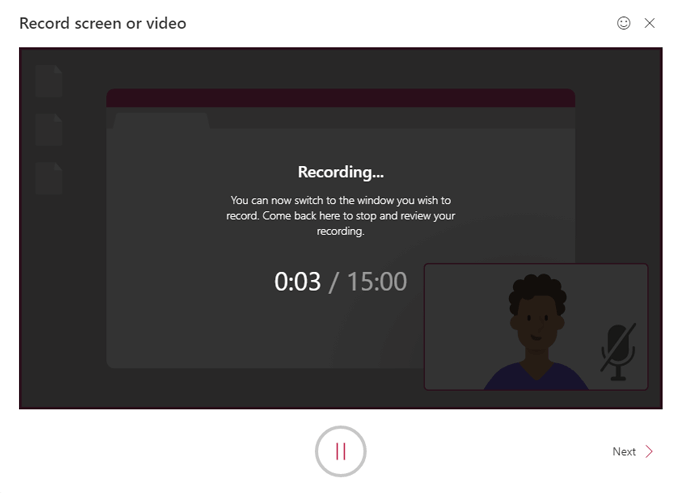
- Once screen recording has begun, you’ll see a confirmation message instructing you to switch to the window you want to record and do your thing!
Note: Remember, screen recordings in Microsoft Stream are limited to just fifteen minutes, so make sure you plan for that.
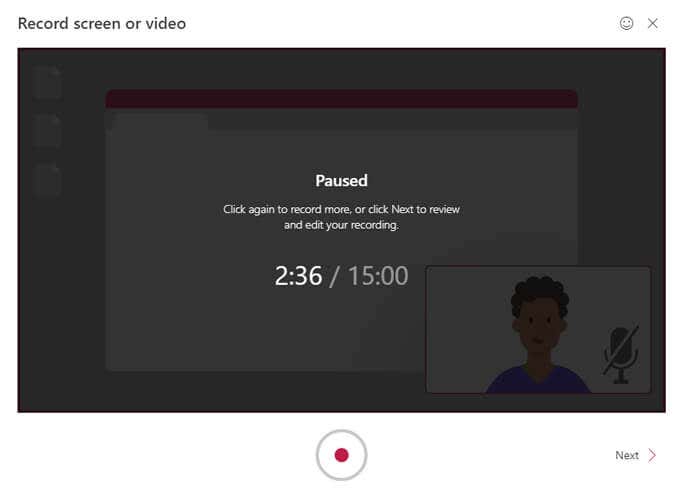
- At any time during recording, you can press the pause button. Each time you resume recording, you’ll get the 3-second countdown again. Resume recording by selecting the record button again or end the recording by clicking Next.
- Next you’ll see the Review recording popup. You can watch a preview of your recording by pressing Play. You should also take this opportunity to trim your video by sliding the handles on the timeline. You can only trim the beginning and the end of your recording.
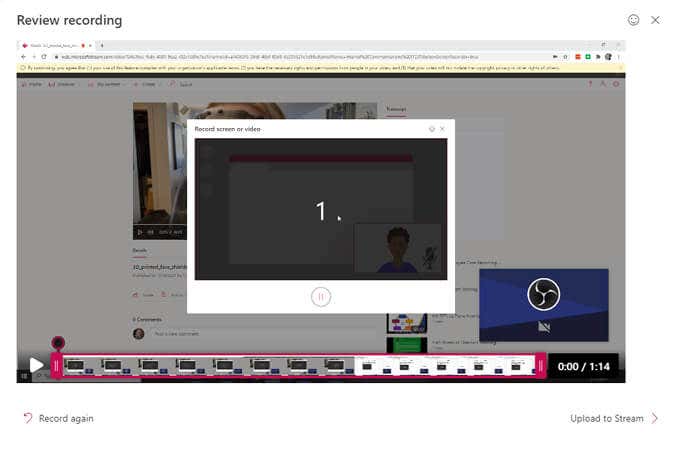
- When you’re satisfied with your recording, select Upload to Stream.
- In the Upload to Stream popup, give your recording a Name and Description and choose the Video language.
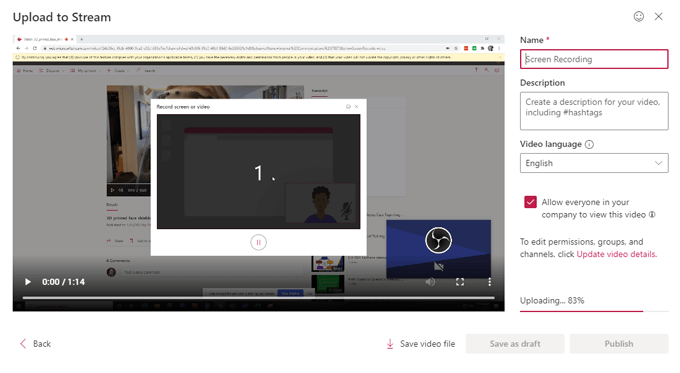
- If you want everyone in your company/organization to be able to view your video, check that box. Otherwise, you can set permissions by selecting Update video details. (You can always update the video details later. We’ll describe all the options below.)
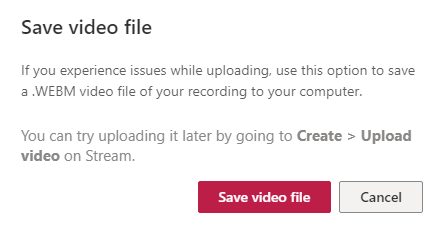
- From here, you can download the recording to your computer by selecting Save video file. This will save a .WEBM video file of your recording to the computer which you can always upload to Microsoft Stream later.
- Next, select Save as draft to return to this process later, or select Publish.
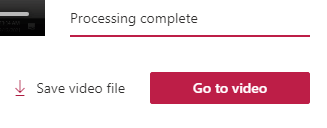
- Once Microsoft Stream has finished processing your recording, select Go to video to view it.
- That will take you to your recording’s page on Microsoft Stream, which is very similar to a video’s page on YouTube. All the options you would expect are here including Share (via direct link, email, or embed code), Add to watchlist, Like, and Comment.
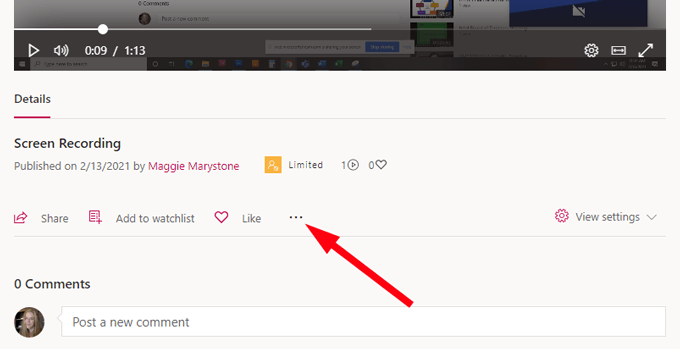
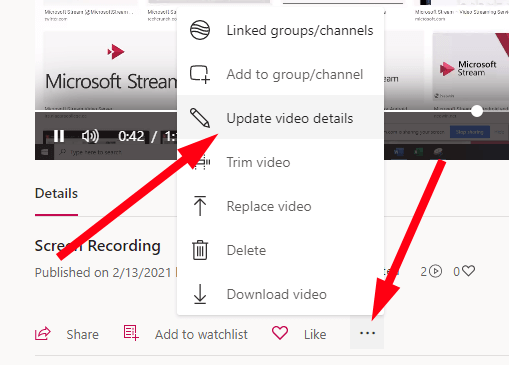
If you select the More icon, you’ll see more options including links to Update video details, Trim video, Replace video, Delete, and Download video.
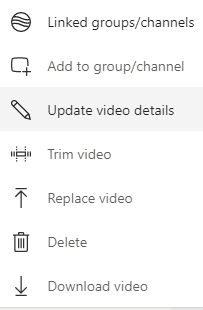
How to Update Video Details in Microsoft Stream
Once you have created your video, you can always go to the video’s page on Microsoft Stream, select the More icon, and then Update video details to access even more settings.
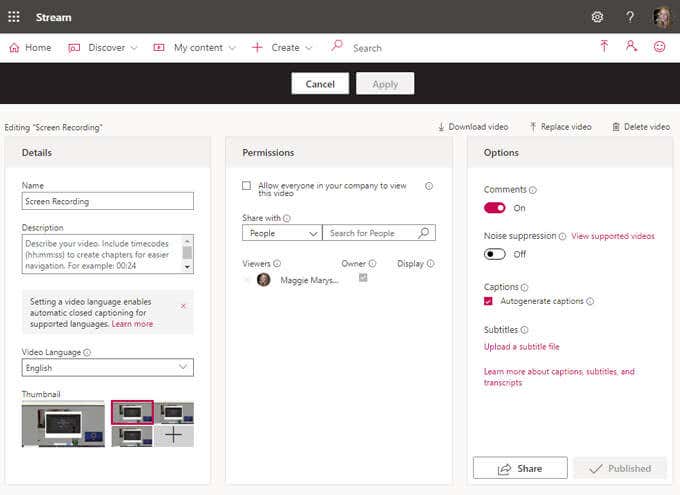
That will take you to a page where you can update all kinds of details for your video.
Under Details you can edit the information you supplied in step 15 (video name, description, and language). You can also choose a thumbnail image for your video. Under Permissions you can choose who has access to your video.
And under Options, you can turn comments on or off for your video and turn on noise suppression if your video supports it. Perhaps best of all, you can create captions for your video, either by checking the box next to Autogenerate captions or by uploading your own subtitle file.
Microsoft Stream allows a maximum of one subtitle file per language with support for dozens of languages. Stream will also index your captions so they’re searchable by other users.
Captions will appear in the Transcript panel on your video’s page, and as the video owner, you can edit the transcript.
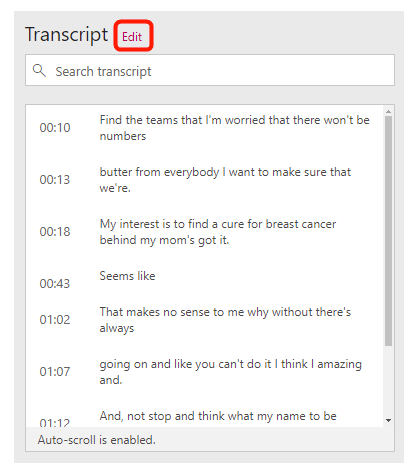
If you do add captions, viewers of your video will be able to configure the text size, color, and background transparency.
Don’t Let the Perfect Be the Enemy of the Good
Admittedly, Microsoft Stream isn’t the most robust app in the world. It’s not great for video or audio editing beyond trimming the ends of your recordings. Moreover, it doesn’t have the capacity for you to add B-roll, titles, or graphics to your videos. But it’s super easy to use, especially if all you want to do is record your screen. Give it a shot!
Related Posts
- How to Repair a Corrupted User Profile in Windows 11
- Preparing for Windows 10 End of Support: Upgrading to Windows 11
- How to Access and Change Your WiFi Router Settings (2025 Edition)
- How to Install the Latest Large Language Models (LLMs) Locally on Your Mac
- How to Find Circular References in Microsoft Excel