Most viruses are fairly easy to get rid of. Just open an antivirus scanner, wait for it to gather results, and then delete whatever it finds. Sometimes though, the virus just won’t go away and no regular antivirus solution seems to help.
So, what are you to do with pesky, hard-to-delete viruses? Within the scope of antivirus software is an entire category of tools that do the scanning before the operating system starts. Often called bootable antivirus programs, they scan files and remove viruses before they even have a chance to open.
Below are the best ways to remove viruses before the operating system starts. If you’re not familiar with this process, we’ll go over all the steps, including how to download the scanner and what to do next to have it run at startup instead of your operating system.
Tip: If you get viruses often, learn how you should be protecting your computer from hackers and malware.
How a Bootable Antivirus Works
There are two types of bootable antivirus software. One is a self-contained program that you have to install on a USB device or disc and then boot from it when your computer starts up. What happens is that the software on that device or disc is started instead of your operating system, and then you can run the scan and remove viruses from there.
The other kind is installed to your computer and functions like a normal antivirus solution, but within it is an option to also run boot-time scans. Just restart the computer and let the scan run its course. This is the easier method for most people, but it won’t work if the virus is so harmful that it’s not letting you start the operating system properly.
You’ll want to use one method over the other depending on your specific situation, so we’ll go over how to use both.

Use a Disc Or USB Device
The first type of bootable antivirus program is an ISO file that you download to your computer and then put on a separate device so that you can boot from it.
There are lots of options for this type, including Trend Micro Rescue Disk, Comodo Rescue Disk, Anvi Rescue Disk, Kaspersky Rescue Disk, and Windows Defender Offline. Some of these programs require a disc and others can be used with a flash drive.
We’ll use Adaware’s Rescue USB program as an example since it works with Windows 7 and newer Windows operating systems, can update its definitions before the scan, and supports custom scans.
- Visit the link above to download the ISO file. Pick the amd64 version if you have a 64-bit computer, otherwise use x86 for 32-bit. This software is over 1 GB in size, so it could take a while to download. Some of the other bootable AV programs listed above are much smaller if time is an issue.
- Also download Rufus, the program we’ll use to put the software on a flash drive. There’s a portable version on the download page if you’d rather not install it.
Note: This software can also be booted from a disc, so if you’d rather do that, you can burn the program to a CD with ImgBurn and then skip down to the BIOS step below.
- Plug your USB device into the computer. Make sure you’re okay with having the whole drive wiped clean. If you’re not, copy the contents elsewhere for the time being.
- Open Rufus and select that device from the first drop-down menu.
- Choose SELECT and then open the ISO file you just downloaded.
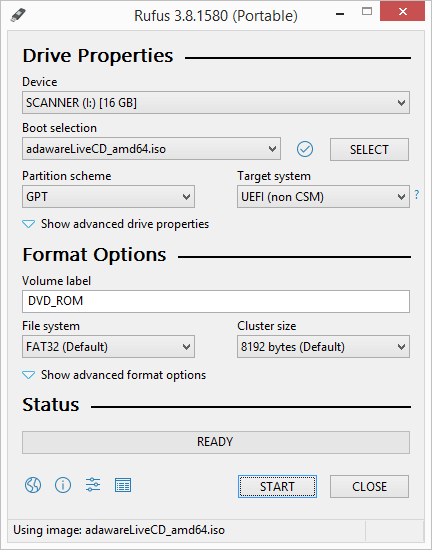
- Edit the other options if needed.
- Press START.
- Select OK on the format warning to start copying the bootable antivirus tool to the drive.
- Exit Rufus when the process completes.
- Restart your computer and access BIOS. Follow that link to learn how to change the startup order so that you can boot to the USB device instead of the OS.
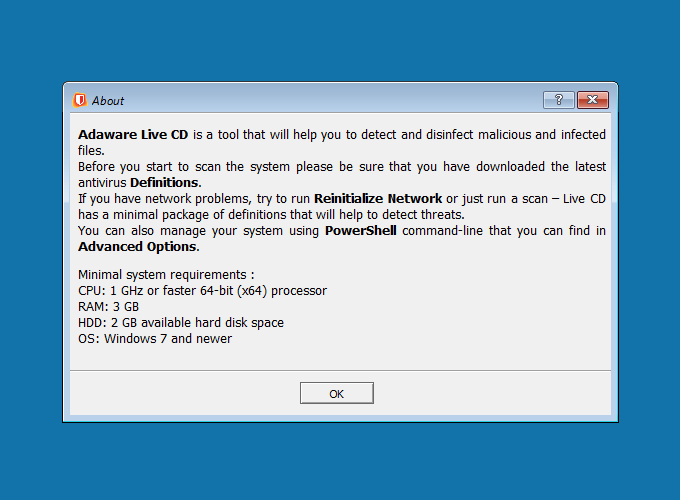
- Select OK on the Adaware Live CD prompt.
- Select UPDATE DEFINITIONS to ensure that you have the latest techniques necessary to find threats.
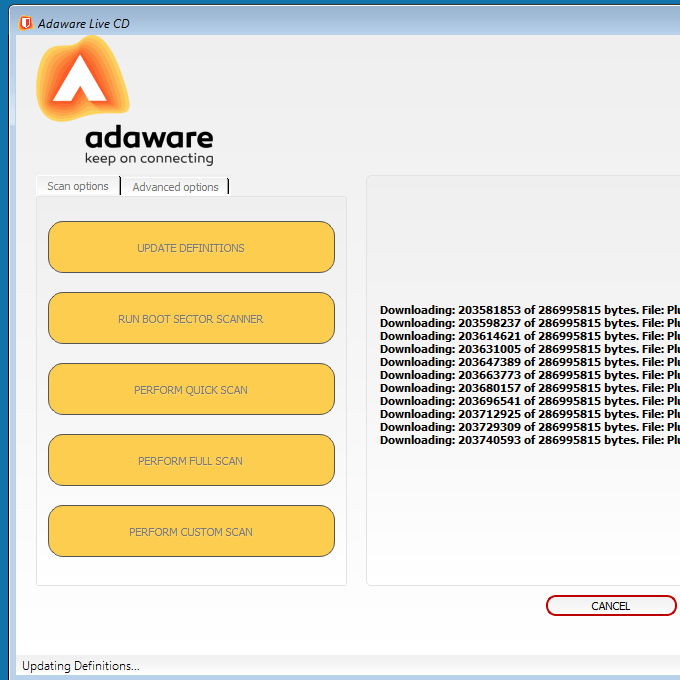
- Choose a scan type. The Adaware Live CD supports boot sector scans, quick scans, full scans, and custom scans. If you know which folders you want to check for viruses, use the custom scan option. Otherwise, a full scan is recommended to ensure that malware is found no matter where it’s hiding.
Use Normal Antivirus With a Bootable Option
If the procedure above will take too long or is too complicated, or you don’t have a disc drive or free flash drive, you still have another option.
Some normal, installable antivirus programs have an option to run a scan and remove viruses when the computer reboots. They work in much the same way as the bootable AV tools mentioned above, but are far easier to use and do all the scanning and deleting automatically.
Some free antivirus with boot-time scanning capabilities include Avast Free Antivirus, Adaware Antivirus, and AVG AntiVirus Free. All of these programs work a bit differently; Avast and AVG require you to specifically turn this feature on, while Adaware will run a boot-time virus scan automatically.
Let’s look at how to use Avast’s free scanner to remove viruses before the operating system starts:
- Download the program through the link above, and then install it. Watch out for any extra offers you might see during setup, like to install unrelated programs. All you really need to perform virus-cleaning functions is Avast.
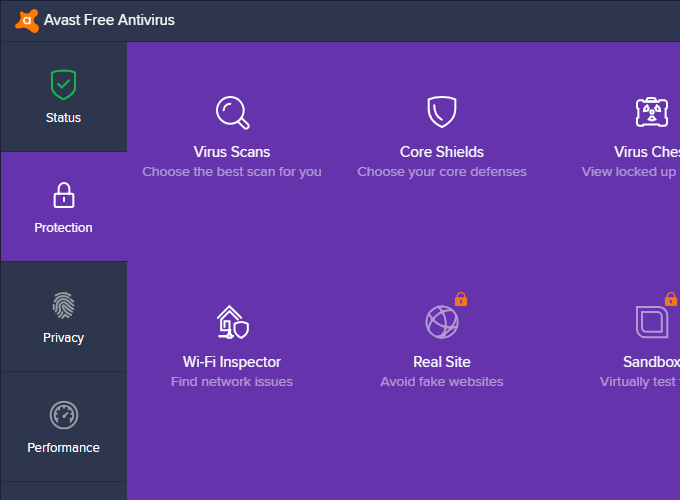
- Select Protection from the left panel.
- Choose Virus Scans.
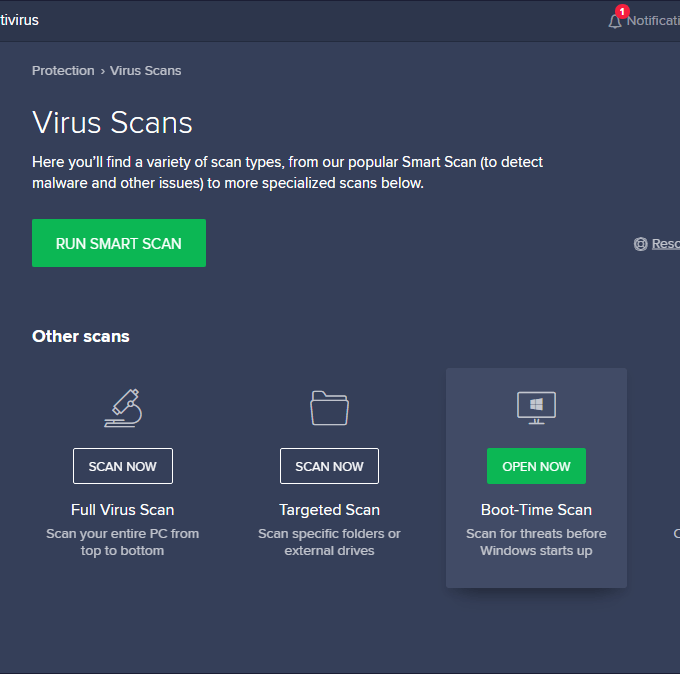
- Select OPEN NOW in the Boot-Time Scan section.
- Select the settings/gear icon at the top right to open Avast’s boot-time scan settings.
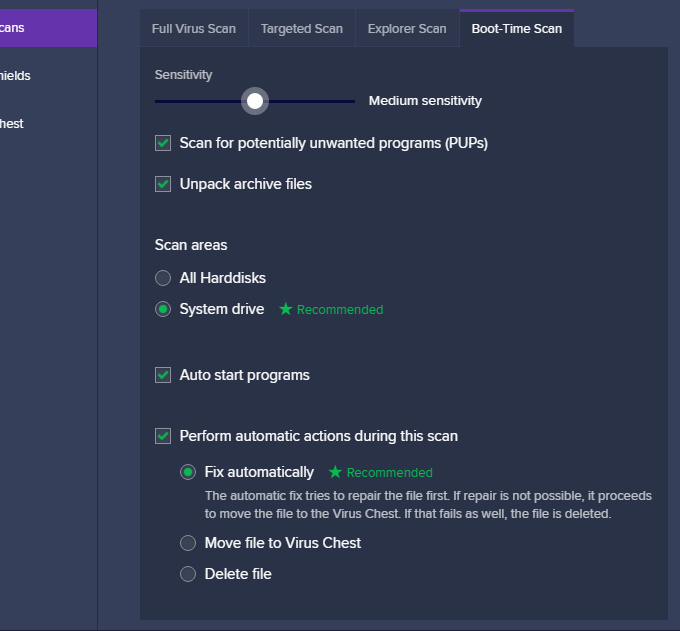
- Modify any settings as you wish. As you can see in this screenshot, you can adjust the sensitivity of the scanner, scan for potentially unwanted programs, open archives to scan inside of those, scan all the hard drives plugged in to your computer or just the system drive, and check for viruses in the programs that normally auto-start with the operating system.
You can also choose what happens when a threat is found: Avast can try fixing it without deleting the file or you can choose to have the file moved into a quarantined area or simply removed.
- Press the exit button on the top left of the settings to return to the boot-time scan screen.
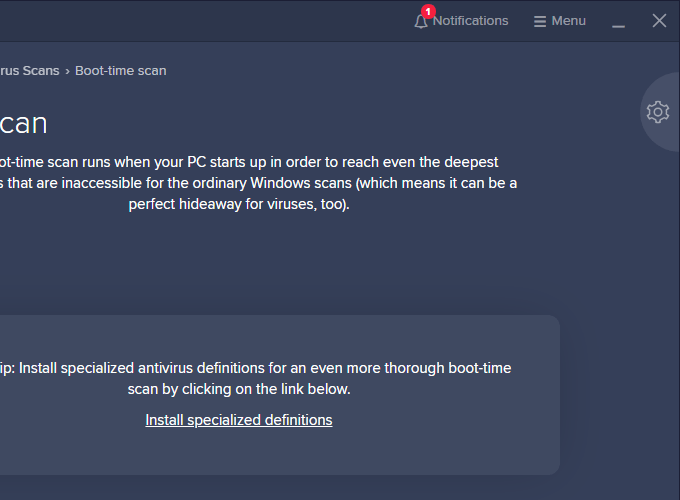
- Select RUN ON NEXT PC REBOOT. Also on this screen is an Install specialized definitions link that you can click to download more definitions that are supposed to help find viruses during the bootup process.
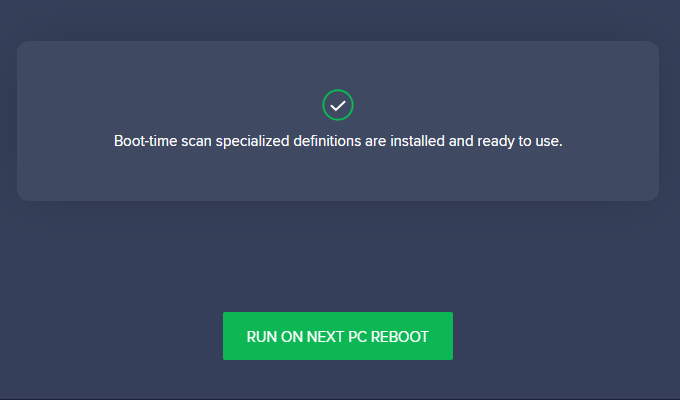
- The next time you restart your computer, Avast will scan for viruses before the operating system starts and will deal with the threats in whatever way you specified in the settings. Take note that only on the next reboot will it scan for viruses; to have it run a boot-time scan again during another reboot, just repeat these steps.
This is what it looks like during an Avast boot-time virus scan. It could take a few hours to complete depending on how many files it has to check.
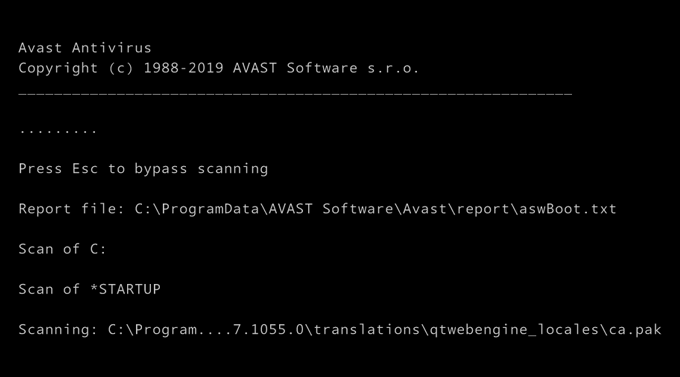
Take special note of the TXT file mentioned in the Report file line. This should be the same for every computer; it’s where you can go after the OS starts to see what Avast Free Antivirus found and removed.
You can stop this scan at any time by pressing the Esc key. It will briefly tell you how many files were scanned and if any infections were found, and then your computer will reboot normally into the operating system.
Related Posts
- How to Stop Mac Malware Before It Steals Your Private Data
- How to Add Custom Fonts to PowerPoint: A Quick Windows & Mac Guide
- How to Clear Windows Update Cache On Windows 11?
- How To Fix GeForce Experience Error Code 0x0003 on Windows 11?
- How to Stop Laptop Battery Drain: 10 Pro Tips to Save Your Power
Founder of Help Desk Geek and managing editor. He began blogging in 2007 and quit his job in 2010 to blog full-time. He has over 15 years of industry experience in IT and holds several technical certifications. Read Aseem’s Full Bio
