If you’re a privacy lover in search of a nice alternative to popular web-mail providers like Gmail, Outlook and Yahoo, you’re in luck. You can learn how to set up your own email server and escape the routine scanning of emails these providers perform on millions of users, and enjoy a safe and private environment for your emails.
Personal or private email servers live in your own space, unlike the usual Apple, Google and Microsoft server farms. This way, you can set up your own disk drive and fully control how your emails are accessed, managed and stored.

For small and mid-sized businesses (SMBs) that want to cut costs, administrating mails may seem expensive. Similarly, running their mail servers seems difficult because of the incessant spamming. They probably also don’t have the in-house tech personnel or tools to properly configure and run one, while managing the threats.
This is why many SMBs outsource to external providers. However, this comes with hidden risks like loss of control over your mail security, privacy intrusion and confidentiality risks, delivery problems from sharing a server, and more.
Thankfully, you can run a secure, spam-filtered mail server for your personal or small-business use. In this guide, we’ll walk you through how to create and set up your own email server right on your PC.
What You’ll Need To Set Up a Personal Email Server
- A separate computer with enough hard drive capacity, which will act as the email server.
- Domain name for the email server that you’ll use to set up email addresses.
- Reliable, high-speed internet connection.
- An operating system like Windows or Linux to run the server.
- Software programs like MailEnable that can sort and route emails, antivirus protection and spam filter like SpamAssassin (the software you’ll use depends on the operating system you settle on).
- A system to streamline the setup process.
How To Set Up The Email Server
The easier shortcut to setting up your email server is hiring an IT person to do it for you. Once the initial setup is ready, you can change the preferences to your liking.
If you can’t afford paying someone to do it for you, it’s still possible to set it up yourself.
For the purposes of this guide, we’ll walk you through a tutorial on how to set up your email server based on the Windows operating system. We’ll use hMailServer, a free and flexible email server for Windows that lets you handle all your emails without relying on your ISP to manage them for you.
It’s one of the most popular email servers for Windows that’s easy to use and install, and offers basic features like security and built-in spam protection by SpamAssassin.
Follow the steps below to complete the setup.
- Download and run the hMailServer installer.
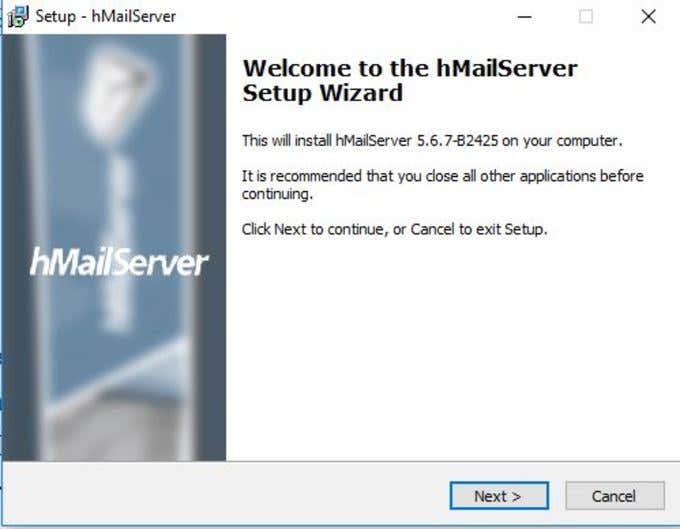
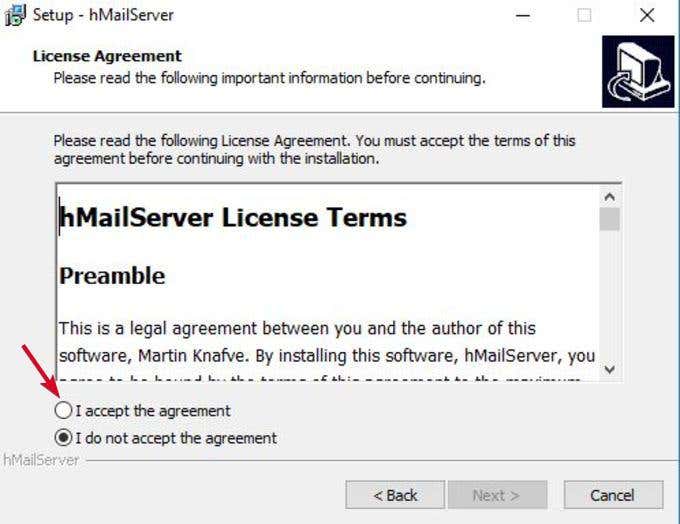
- Click Next, and agree to the licensing terms.
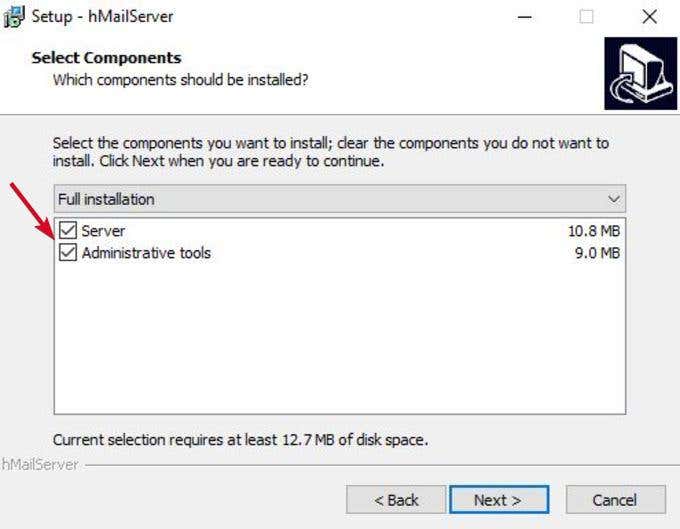
- Select Server in the next screen if you want your local computer to act as the server, or Administrative tools to manage the server remotely.
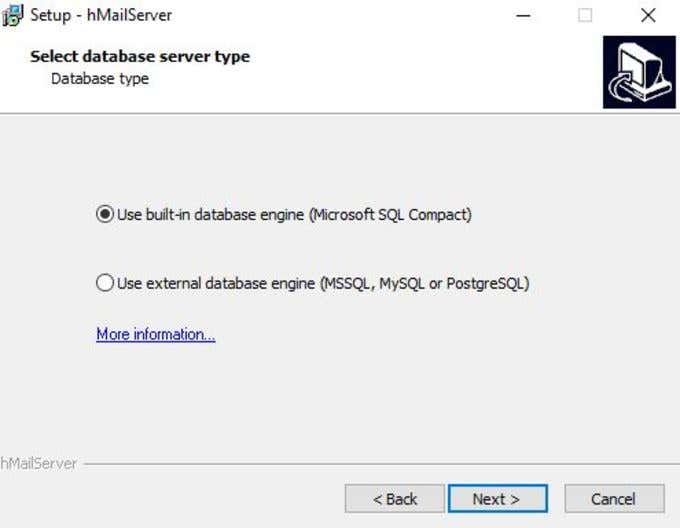
- Next, select the database you’ll use. The built-in database is checked by default and is ideal to use if you want something quick and simple.
- Click Next and choose the folder location where the program’s shortcuts will be saved to.
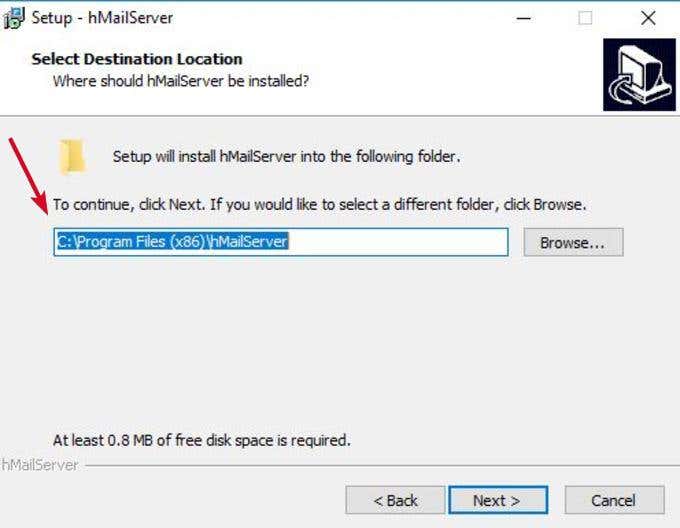
- Specify the main password that you’ll use to manage your hMailServer installation (write it down somewhere as you’ll need to use it often).
- Click Next and then click Install to add hMailServer on your computer.
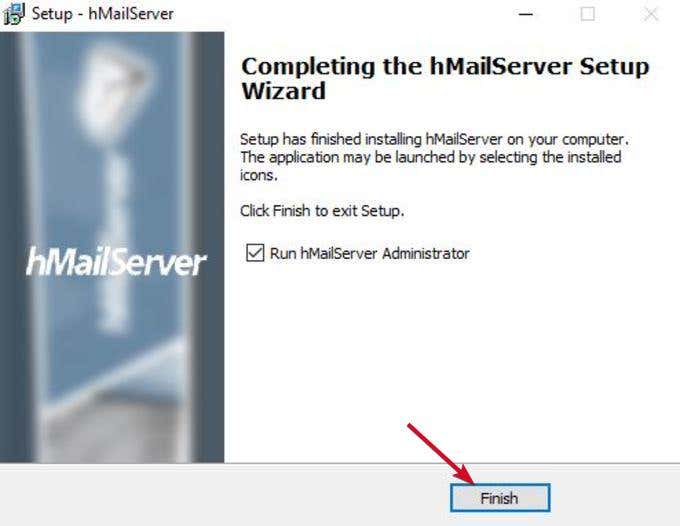
- When complete, ensure the Run hMailServer Administrator box is checked and click Finish.
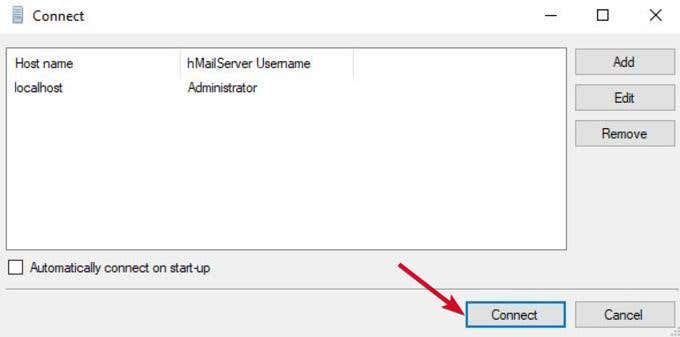
- The hMailServer Admin window will launch. Click Connect.
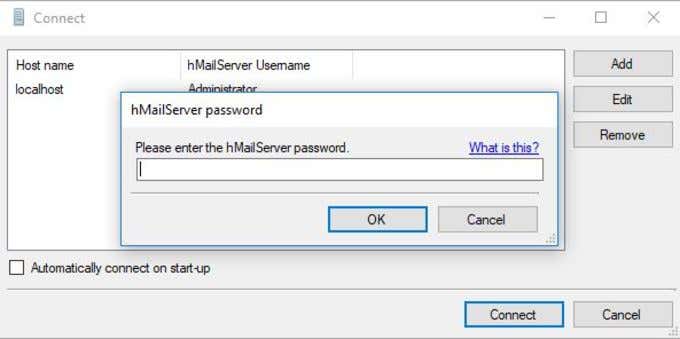
- Enter the password you created during installation.
- You’re now ready to configure your SMTP server. In the new window, click Add domain.
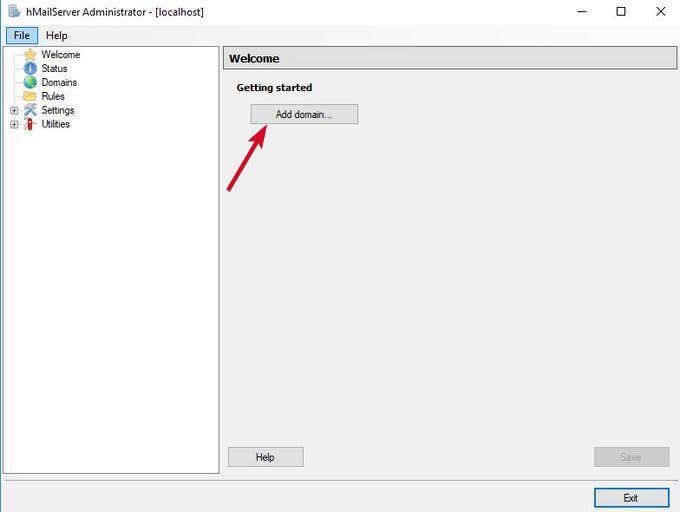
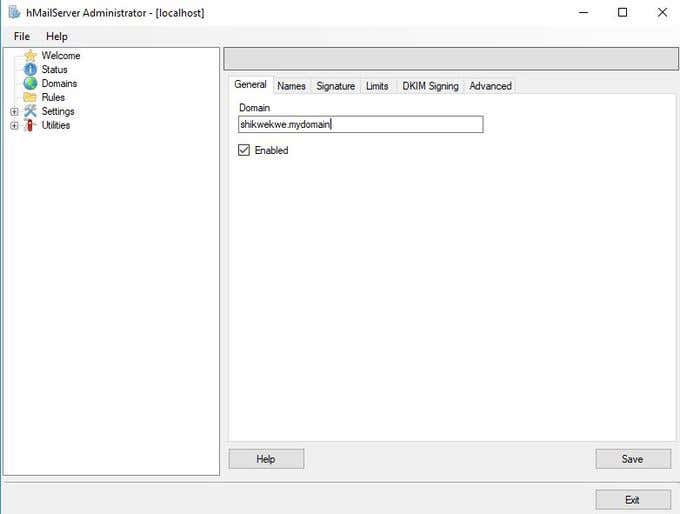
- Under General tab, type in your domain name and click Save.
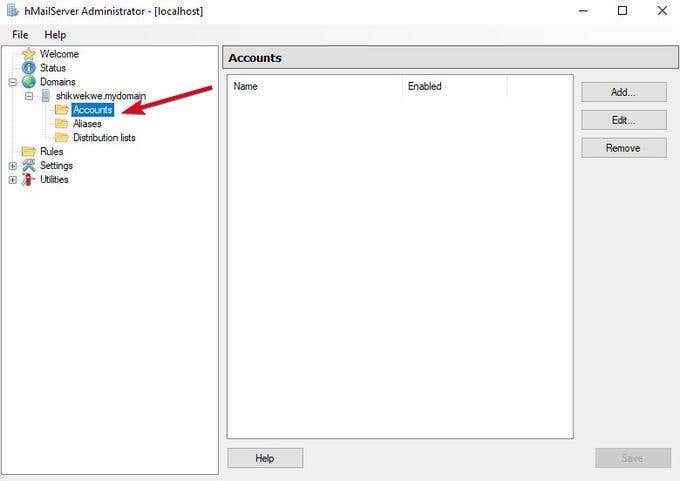
- In the left pane, click Domains>Accounts.
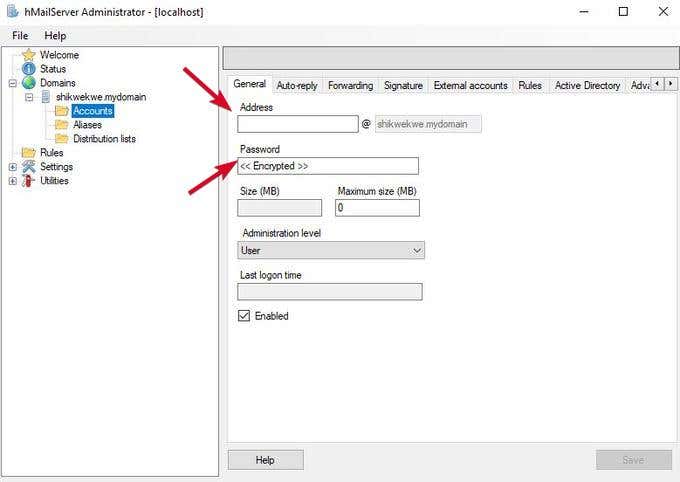
- Click Add and type in a name in the address field, a password and then click Save.
- Go to Settings>Protocols and choose SMTP (uncheck the POP and IMAP boxes).
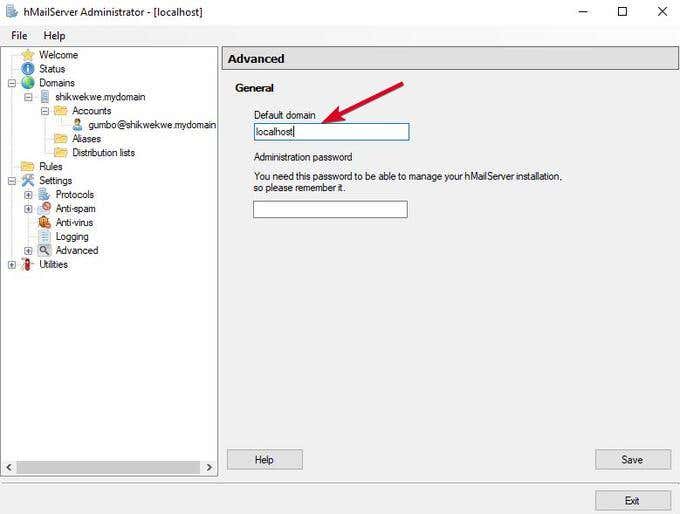
- Click Advanced and type in localhost under Default domain. Click Save.
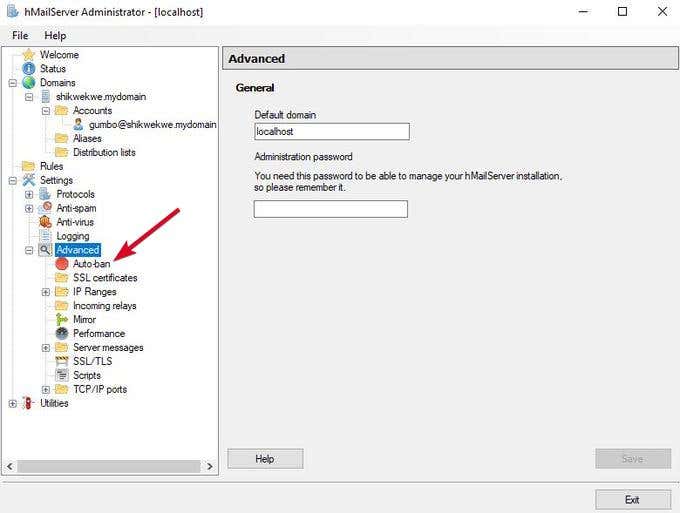
- Click the + next to Advanced to expand the list and then click Auto ban. This feature blocks IP addresses after several failed login attempts.
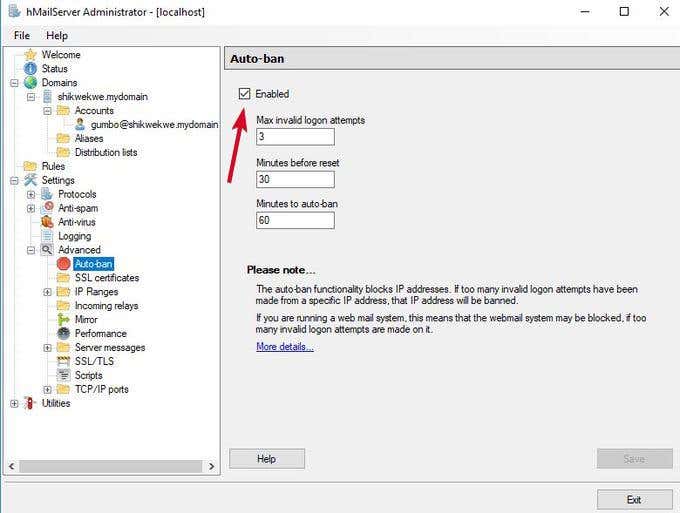
- Uncheck the Enabled box and click Save.
- Click IP ranges and click TCP/IP ports to see ports configured for SMTP, IMAP and POP such as 25 and 110 for SMTP and POP, and 143 for IMAP. Opening these ports ensures the mail server can receive and send mail.
- Enable different options like forwarding, auto-reply, DNS blacklists and others in hMailServer.
- Finally, click the + next to Utilities to expand the list and click on Diagnostics to test your configuration.
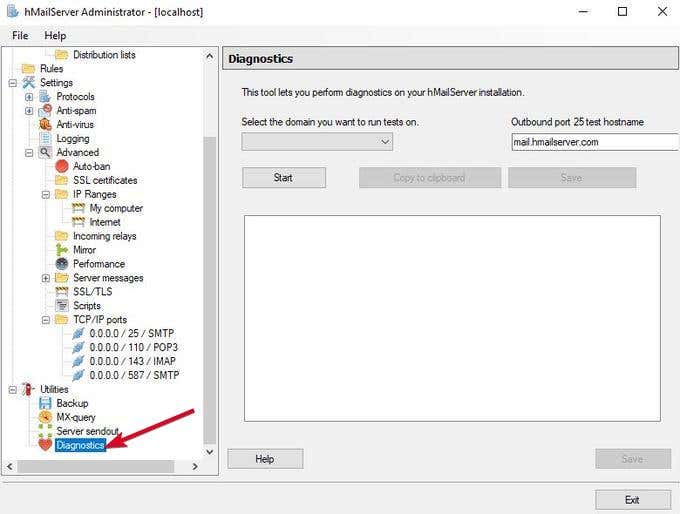
- Under Select (the domain you want to run tests on), type the domain you entered earlier and click Start.
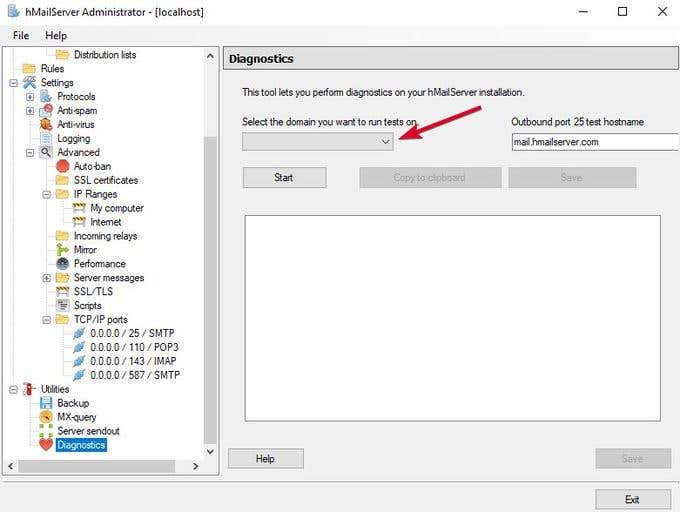
Your hMailServer is configured with basic options.
- Check for the Collect server details to see your hMailServer version and database type.
- Test the outbound port – an error here means your SMTP server won’t be able to communicate, in which case some troubleshooting needs to be done.
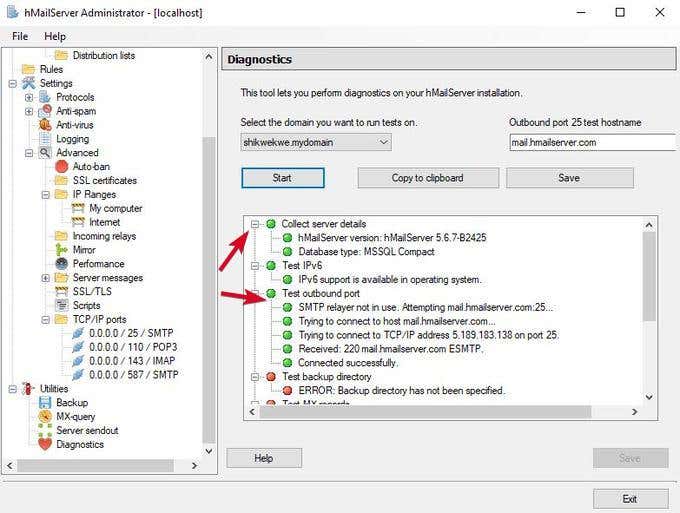
Congratulations, you’ve just set up your own email server.
In order to read or write your emails, get a webmail client like Outlook or Thunderbird. If you want to use a computer application instead, type your email address as your username, and authentication type is the password.
While hosting your own email server requires some effort and precaution from you, it’s worth having if you don’t want the hassles and insecurities of popular web-mail providers.
Remember to keep your server IP and domain in check, always looking to see if there are any issues like public blacklisting as some providers can do this for incoming emails, due to incorrect DNS settings.
Related Posts
- How to Stop Mac Malware Before It Steals Your Private Data
- How to Add Custom Fonts to PowerPoint: A Quick Windows & Mac Guide
- How to Clear Windows Update Cache On Windows 11?
- How To Fix GeForce Experience Error Code 0x0003 on Windows 11?
- How to Stop Laptop Battery Drain: 10 Pro Tips to Save Your Power
Elsie is a technology writer and editor with a special focus on Windows, Android and iOS. She writes about software, electronics and other tech subjects, her ultimate goal being to help people out with useful solutions to their daily tech issues in a simple, straightforward and unbiased style. She has a BCom degree in Marketing and currently pursuing her Masters in Communications and New Media. Read Elsie’s Full Bio
