VLC is a media player you can use on your computer, but it’s also a handy way to send videos and music to your Chromecast. Using VLC with Chromecast lets you share nearly any media file with your TV in seconds.
Maybe you want to play iTunes on your TV, send some home videos to the living room big screen, or stream something live through VLC and forward it to your HDTV. No matter the reason, VLC makes connecting your computer to your Chromecast very easy.

Cast VLC Media Files to Chromecast
Step 1: Download and install VLC. If you have it already, make sure it’s version 3 or newer because that’s when Chromecast functionality was added.
Tip: You can check the version you have through the Help > About menu.
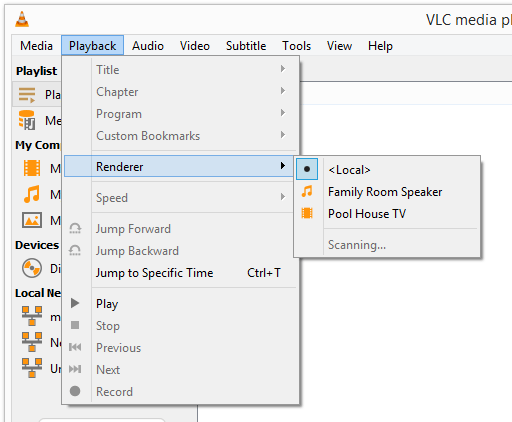
Step 2: Open the Playback > Renderer menu, and then select your Chromecast from the list.

If your Chromecast isn’t listed, double-check that it’s powered on either through a USB port on the TV or a wall outlet. Also make sure the Chromecast and your computer are on the same network.
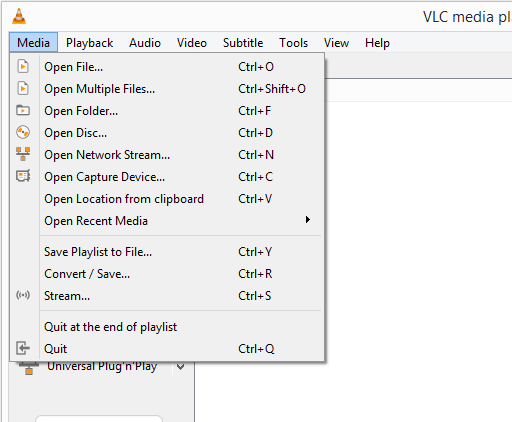
Step 3: Use the Media menu to import the file you want to play on your Chromecast. There’s an option to select just one file or a whole folder. You can even cast a network stream or disc from your disc drive.

VLC accepts lots of file formats, including popular ones like MKV, MP4, FLV, MP3, and WMA.
Note: If a “Performance warning” notification shows up and nothing is playing on the Chromecast, click OK to convert the file to a format VLC can use.
That’s it! Your TV should now be playing whatever you’ve told VLC to play.
You can also play other things through Chromecast, like Netflix, YouTube, a Chrome tab, or even your entire desktop, but none of those things require VLC.
Things to Remember
- The video or audio file should begin to play immediately after VLC connects to the Chromecast, but you might have to wait a several seconds depending on the speed of your computer and network. If the file doesn’t start, click play in VLC.
- Another way to cast media files from your computer to your TV via Chromecast is to first open the file in VLC and then connect to the Chromecast as described in Step 2 above. From there, you might have to hit the play button to start the video/audio.
- Conversions might take a long time, especially if you’re trying to cast a long video. If you know VLC won’t handle the file unless it’s been converted, consider converting the file to something compatible before adding it to VLC.
- Hit the stop button in VLC to quit playing the video or audio file on both the TV and your computer. Or, to just stop playback from the Chromecast and watch or listen on your computer only, return to Step 2 above but choose <Local>.