There are a lot of products out there that claim to be quick-acting in giving you pearly white teeth. With our smiles being what most people look to first in a photo, a lot of people want to have a nice one. Yet there’s nothing faster to achieve this than simply photoshopping pictures of yourself or others. And it’s extremely easy to do so.
In this article you’ll find steps to whiten teeth in portrait photographs, as well as making it look natural. Too white of teeth can make a picture look fake, so it’s good to know the techniques available to whiten teeth in Photoshop.
Whiten Teeth in Photoshop With Hue & Saturation
The best way to whiten teeth in Photoshop is through using the Hue & Saturation adjustment layer on your image. This makes it easy to whiten teeth not only for one person, but multiple people if need be. You’ll want to select and whiten multiple people’s teeth separately, as one person may need different adjustments than another.
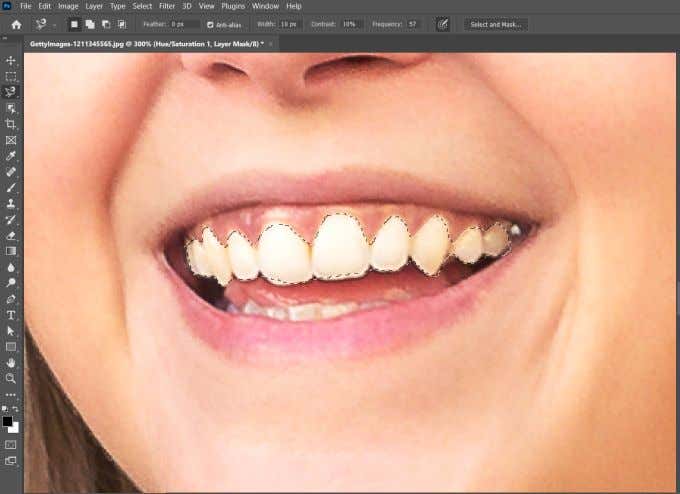
- Open your image in Photoshop and zoom in on the teeth you want to whiten. Then, select the Lasso tool from the tool bar. Using this, you’ll want to make a selection around only the teeth of your subject, like so:
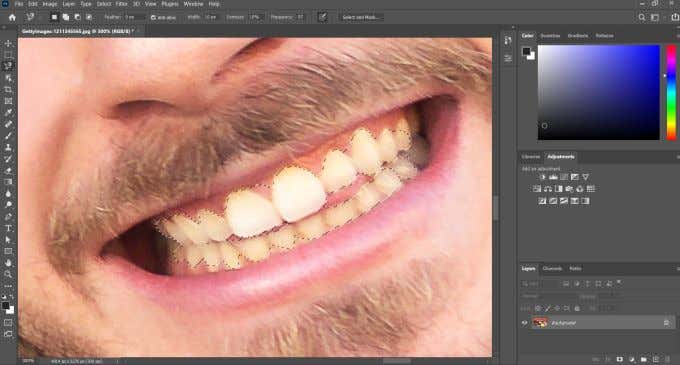
If you’re finding it difficult to make a clean selection, don’t worry too much as you can clean it up later on.
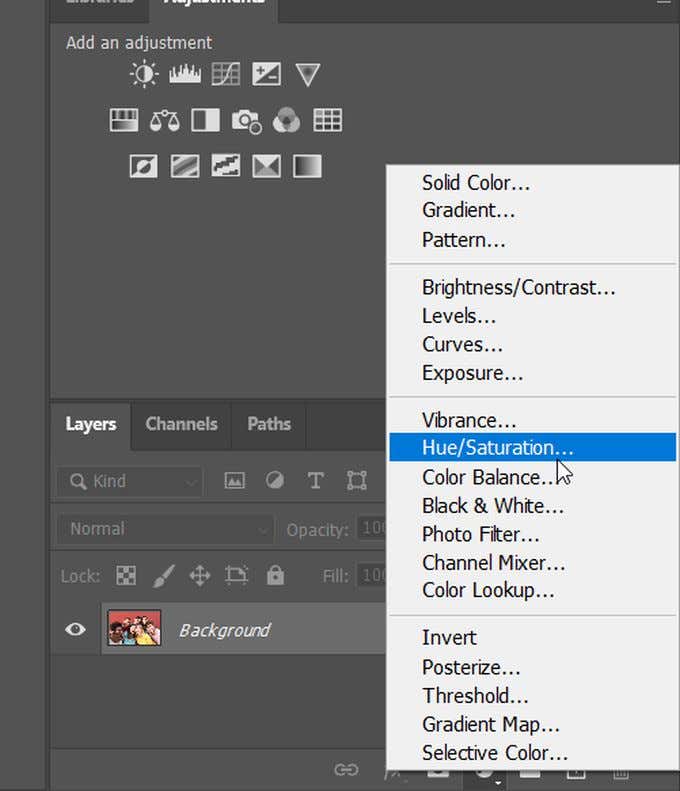
- At the bottom of the layer panel, find the circle icon that appears half light and half dark. This is the Create a new fill or adjustment option. Select the Hue & Saturation adjustment. You’ll see a new adjustment layer appear in the layer panel.
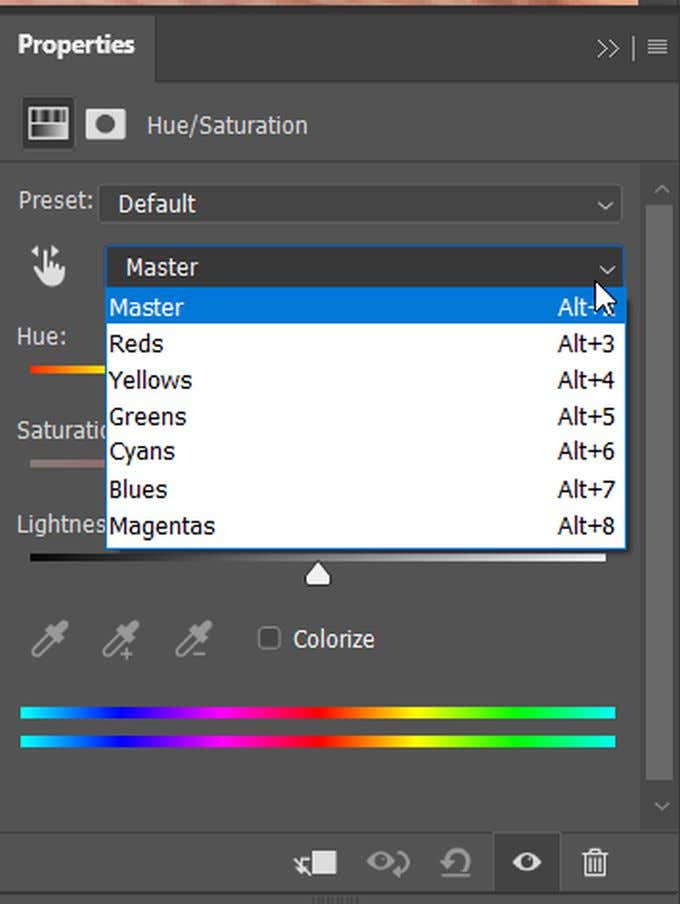
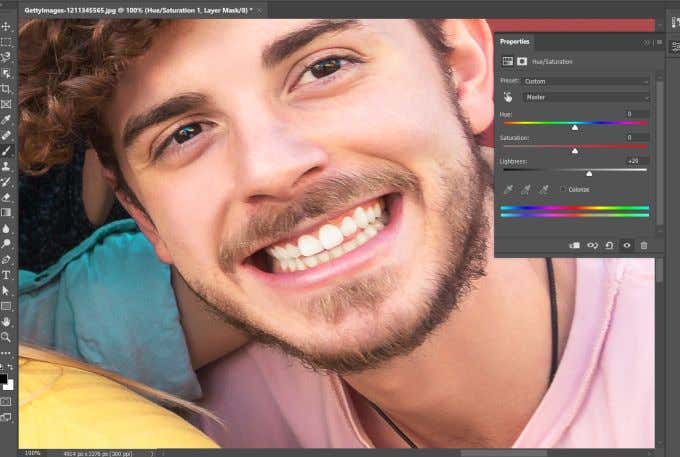
- In the Hue & Saturation properties panel, find the dropdown that is selected as Master. This dropdown chooses what color channel in your selection you’ll be manipulating. In this case, you’ll want to choose the Yellow channel. Next you’ll want to look at the Saturation slider, and turn it down until there isn’t as much yellow visible.
- You’ll also probably want to brighten the whitened teeth at this point, as this can help the smile in your photograph stand out even more. Change the color channel dropdown back to Master. Then, use the Lightness slider and turn it up in order to make the teeth appear more bright.
Clean Up Edges
You may find it difficult to precisely make a selection of the teeth. This is because some of the adjustment layer changes also affect areas around the teeth. However, you can clean this up easily.
Choose the brush tool, and make sure that your foreground brush color is set to black. This is because with Photoshop’s adjustment layers, you can also use layer masking to hide or show parts of the adjustment. By using the brush, you can paint black to erase any part of the adjustment, and white to paint it back.
So, in this case, you’ll want to use black to paint over the areas you don’t want affected by the adjustment layer. If you make a mistake, you can always swap your foreground color to white to re-paint an area.
Whitening Teeth in Photoshop for Multiple Subjects
In some photos you may have more than one person whose teeth you want to whiten. The best thing to do in this case to create another, separate adjustment layer for this person.
- Before creating the second (or more) adjustment layer, you’ll want to select the Lasso tool again and make sure you have the background image layer selected. Then, you can make a selection around the next person’s teeth like you did the first time.
- Once the selection has been made, you can go to the Create a new fill or adjustment icon like before, and select Hue & Saturation. Then, you can whiten this person’s teeth the same way as earlier. You can add as many adjustment layers as you wish if you need to whiten the teeth of multiple people.
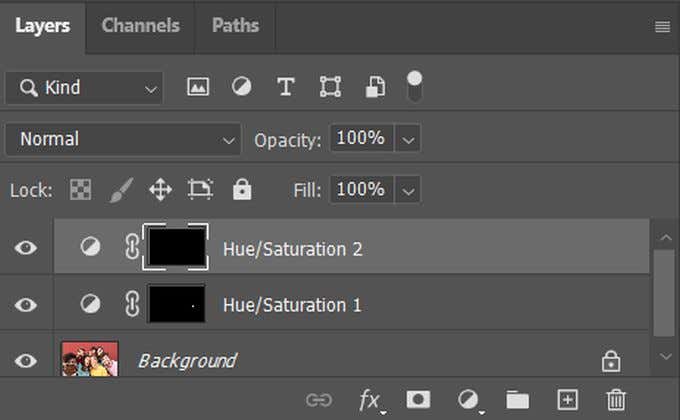
If you want to look at the original image before you added the adjustments, you can select on the eye icon on the left side of the adjustment layers in the layer panel in order to look at the original.
Making Teeth Look Naturally White
When using Hue & Saturation to whiten teeth in Photoshop, you’ll want to keep a few things in mind in order to not over-do the whitening and brightening. Doing so can make a picture look too unnatural.
While removing the yellow hues from the teeth with the saturation slider, you’ll want to remember that all teeth are naturally a little bit yellow. Removing all traces of yellow can cause a smile to look a little odd. So, go for a more subtle effect so as to not make it obvious that touch-ups have been made.
The same goes when you’re brightening teeth. You don’t want them to look blindingly white (unless that’s what you’re going for), so again, stick to a more subtle level when changing the lightness slider.
Related Posts
- How to Fix App Notifications in Windows?
- Using an Old Device? 5 Account Security Settings You Should Enable
- How to Find Features Moved from Control Panel to Settings in Windows 11?
- How to Back Up Your Android Downloads Automatically?
- Camera Not Working in Zoom or Teams? Quick Fixes for Windows and macOS
Since she was a child, Kayla has had a fascination with technology, video games, and filmmaking. Growing up she wrote on multiple personal blogs about these topics, enjoying the process of breaking down technical concepts. Most recently her focus has shifted to writing, and Kayla now reviews and writes technology, video editing, and gaming related articles. Read Kayla’s Full Bio
