Check Disk (chkdsk) is a tool used to verify file system integrity and is also used to locate bad sectors on hard drives. It also helps in recovering corrupted data whenever a system failure occurs that involves data integrity (i.e. power failure).
Check Disk can examine FAT16, FAT32 and NTFS drives and automatically repair errors. Below are the steps in Windows 7, Windows 8 and Windows 10 for running chkdsk on your system.
Run GUI chkdsk on Windows
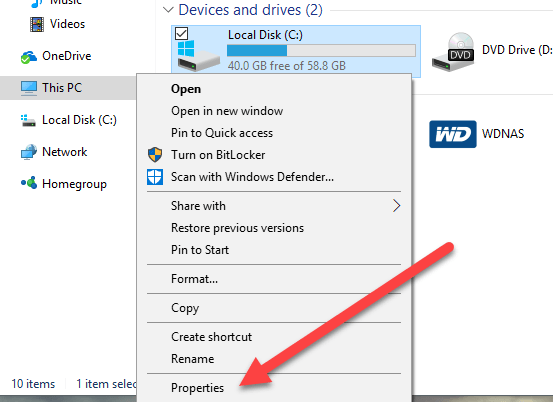
Open Windows Explorer and right-click on the drive that you want to check. At the bottom, go ahead and click on Properties.
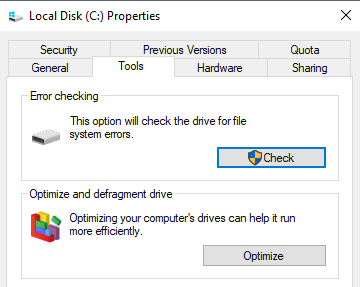
Click on the Tools tab and you’ll see a Check button in the Error checking section. In Windows 7, the button is Check Now.
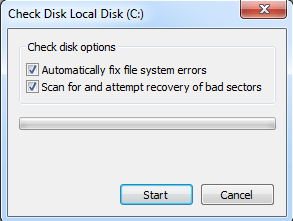
Windows 7 users will get popup that gives you the options to automatically fix errors and to scan for bad sectors. It’s a good idea to check both if you want chkdsk to try and repair the problems when they are found.
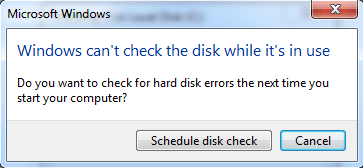
For Win 7 users, if you check both the boxes and click Start, you will get another dialog asking if you want to schedule the scan when the system restarts. You’ll only see this message if you are trying to scan the system partition where Windows is installed.
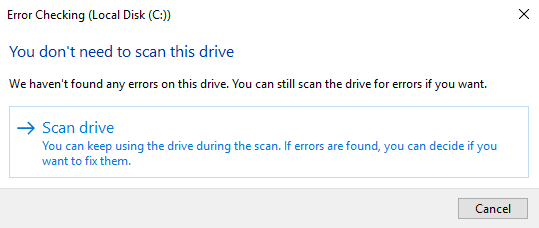
For Windows 10 users, none of those options are available. Instead, a popup dialog will appear and it may say that you don’t need to scan the drive because Windows hasn’t found any errors. However, if you want to perform a scan, go ahead and click on Scan drive.
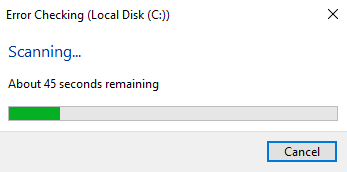
The scanning process will begin and it shouldn’t take very long. Note that this method via the GUI interface isn’t as thorough as the command line version (which is what runs in Windows 7 when you schedule the scan). I’ll talk about that in the next section below.
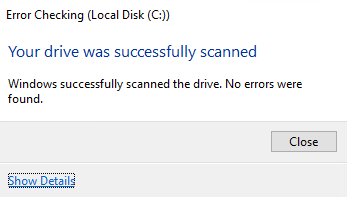
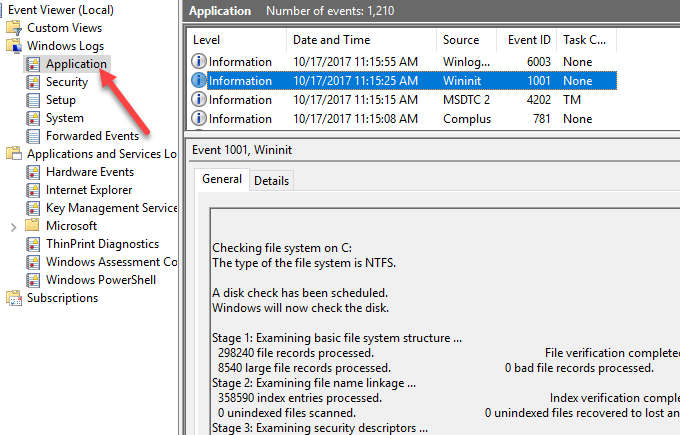
When the scan is complete, you’ll get a message on whether or not there were any errors on the drive. You can click Show Details, which will take you to the Event Viewer program and load up the Application log.
If any errors were detected, Windows would give you a couple of options, one of which would be to try and repair the disk. The second way to run chkdsk in Windows 10 and the better way, in my opinion, is to use the command prompt. For Windows 7 users, the scheduled scan on reboot will be the better scan.
Run chkdsk via Command Prompt
In order to run chkdsk from the command line, you need to open an administrator command prompt. Just click on Start, type in cmd and then right-click on it and choose Run as administrator.
At the prompt, go ahead and type in the following command:
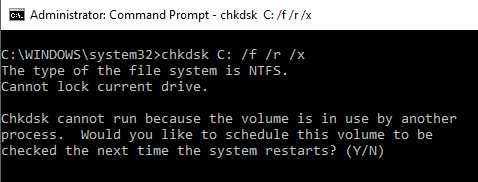
chkdsk c: /f /r /x
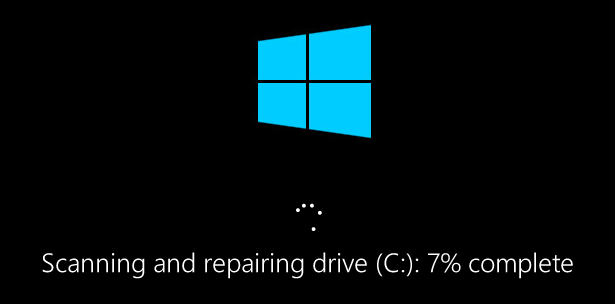
If you are scanning the drive that Windows is currently running from, you’ll get a message that Chkdsk cannot run because the volume is in use by another process. Type in Y to schedule the volume to be checked the next time the system restarts.
Restart your computer and you’ll see a message to press any key to skip disk checking. Obviously, don’t press anything, otherwise the scan will be cancelled.
This scan will take much longer than the scan from within Windows and there’s a much better chance that it will find errors on the disk, if any exist. If there are no errors, it will simply exit out and boot up Windows normally. If there are errors, you’ll see a summary of the errors and whether they were repaired or not.
If you don’t see the summary, log into Windows and open the Event Viewer. Go to Application log and scroll down till you see an event with Source as Wininit and Event ID 1001.
It will give you all the details about the scan here. If your drive does have errors on it, you need to make sure you copy any critical data off as quickly as possible. Even if the errors are fixed, it doesn’t mean your drive is working properly. It could fail at any moment and you shouldn’t take any risks with your data. Backup as much data as you can as soon as possible. If you have any questions, feel free to comment. Enjoy!
