
An “Access Denied” or “No Permission” error usually means the program needs to run with administrator rights, and Windows isn’t granting them automatically. Here are six ways to fix that, from a one-click method to permanently elevating a specific program every time it opens.
⚠️ Security note: Only elevate programs you trust. A program running as administrator has full access to your system: files, registry, settings, everything.
Method #1: Right-click and select “Run as administrator”
This is the fastest way to open any program with admin rights for that one session.
On Windows 10
- Find the program’s shortcut on your desktop or its .exe file in File Explorer.
- Right-click it.
- Select Run as administrator from the context menu.
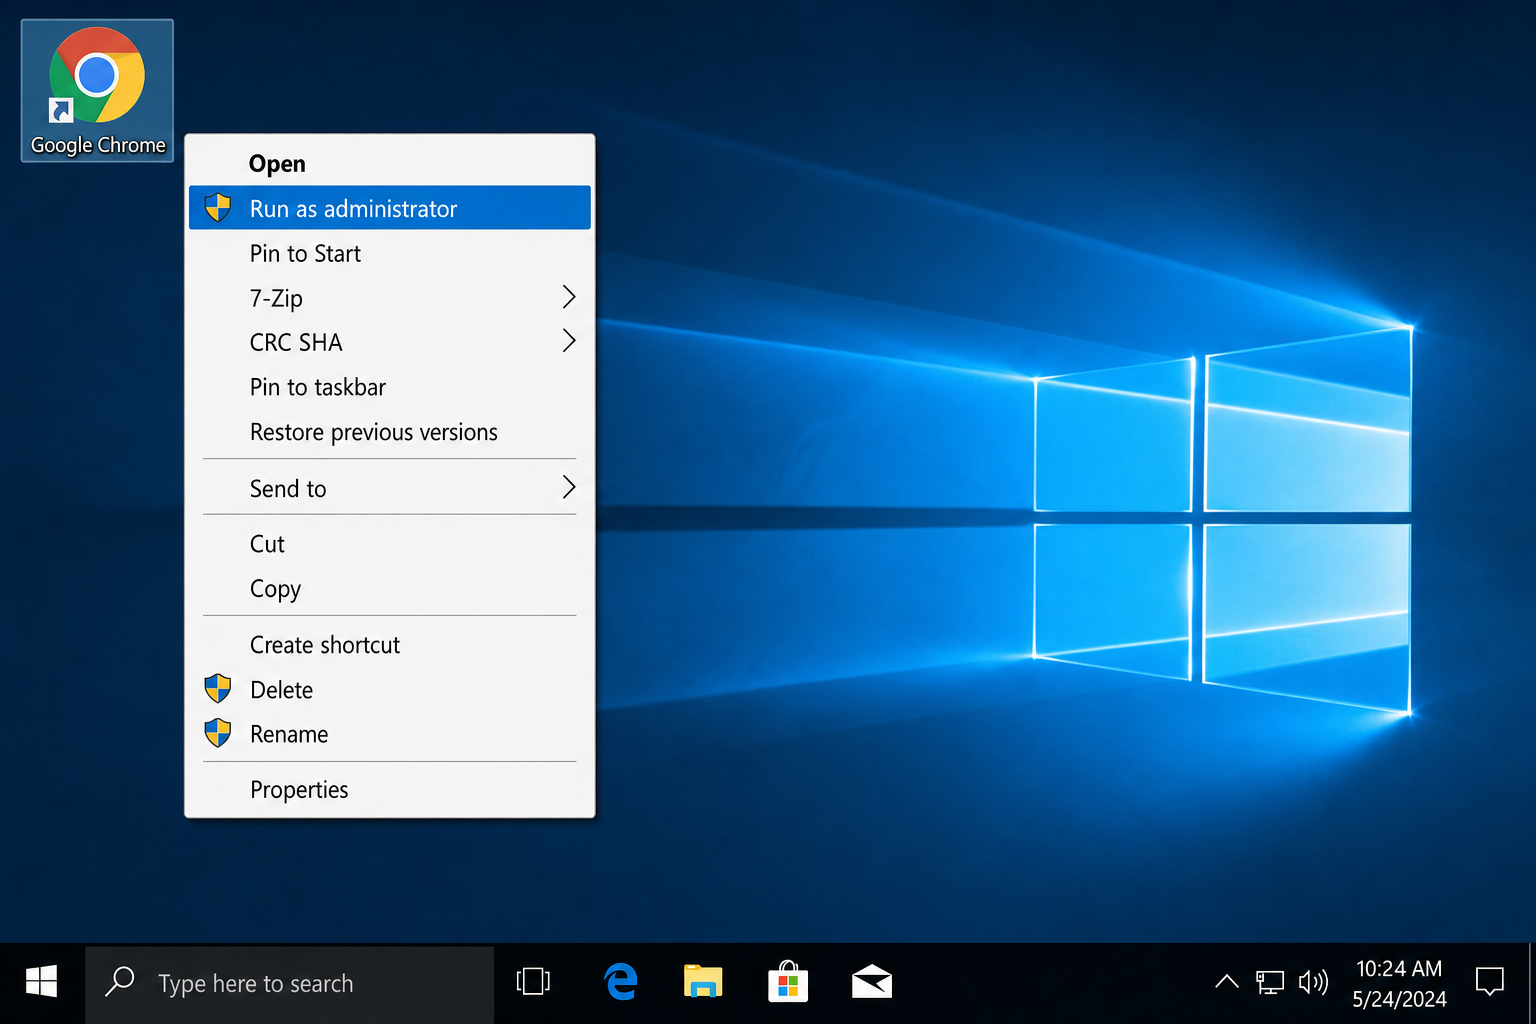
- If a User Account Control (UAC) prompt appears, click Yes.
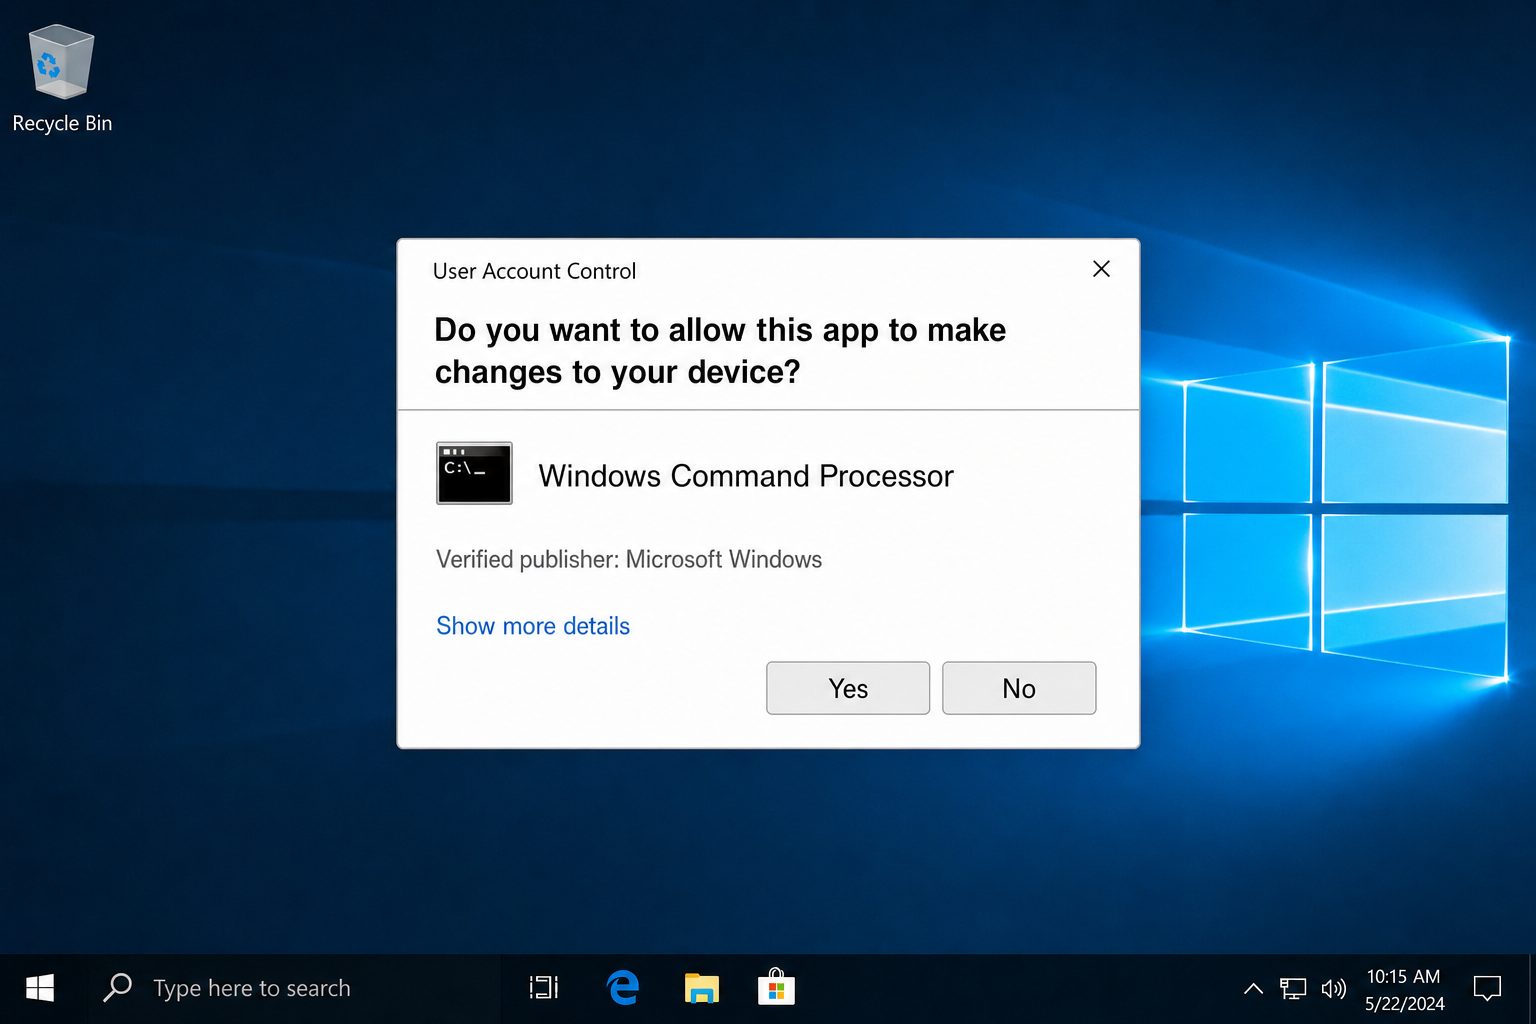
On Windows 11
Windows 11 uses a compact right-click menu that hides some options by default.
- Right-click the program shortcut or .exe.
- Look for the Run as administrator shield icon at the top of the compact menu. If you see it, click it.
- If you don’t see it, click Show more options at the bottom of the menu to open the classic context menu, then click Run as administrator.
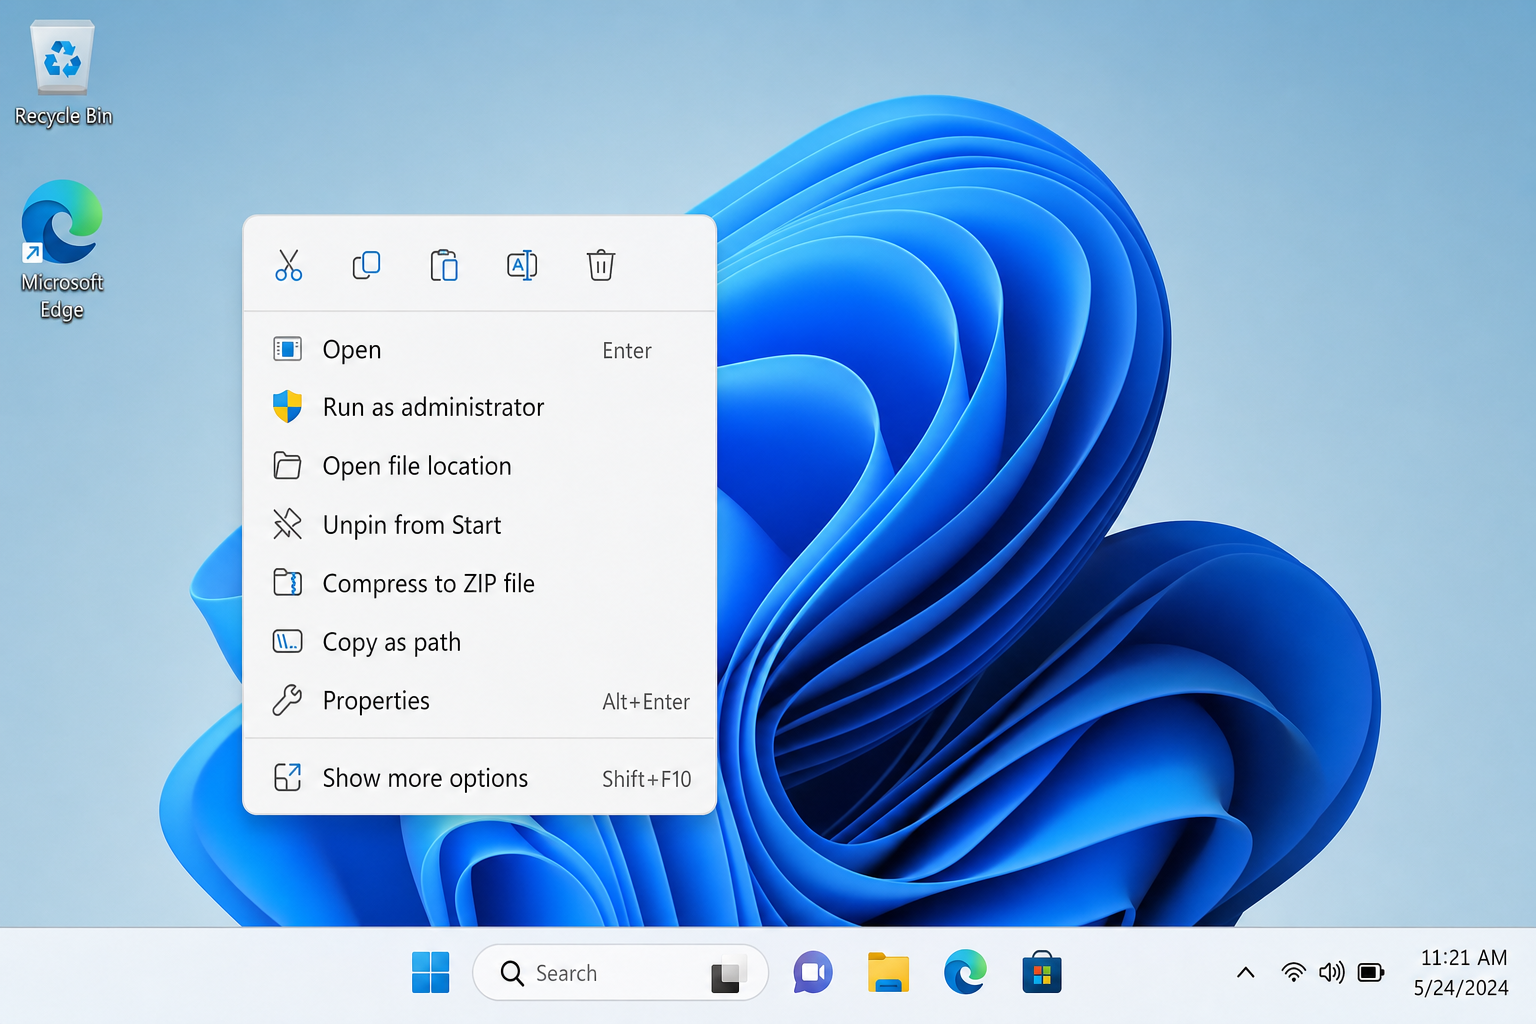
- Click Yes on the UAC prompt if it appears.
Note: This only elevates the program for the current session. Close it and reopen it normally, and it runs without admin rights again.
Method #2: Use the Start menu or Search
This works especially well for built-in Windows tools like Command Prompt, PowerShell, or Registry Editor.
- Press the Windows key and start typing the app name (e.g.,
cmdornotepad). - In the search results, you’ll see the app listed at the top.
- On the right-side panel (or by right-clicking the result), click Run as administrator.
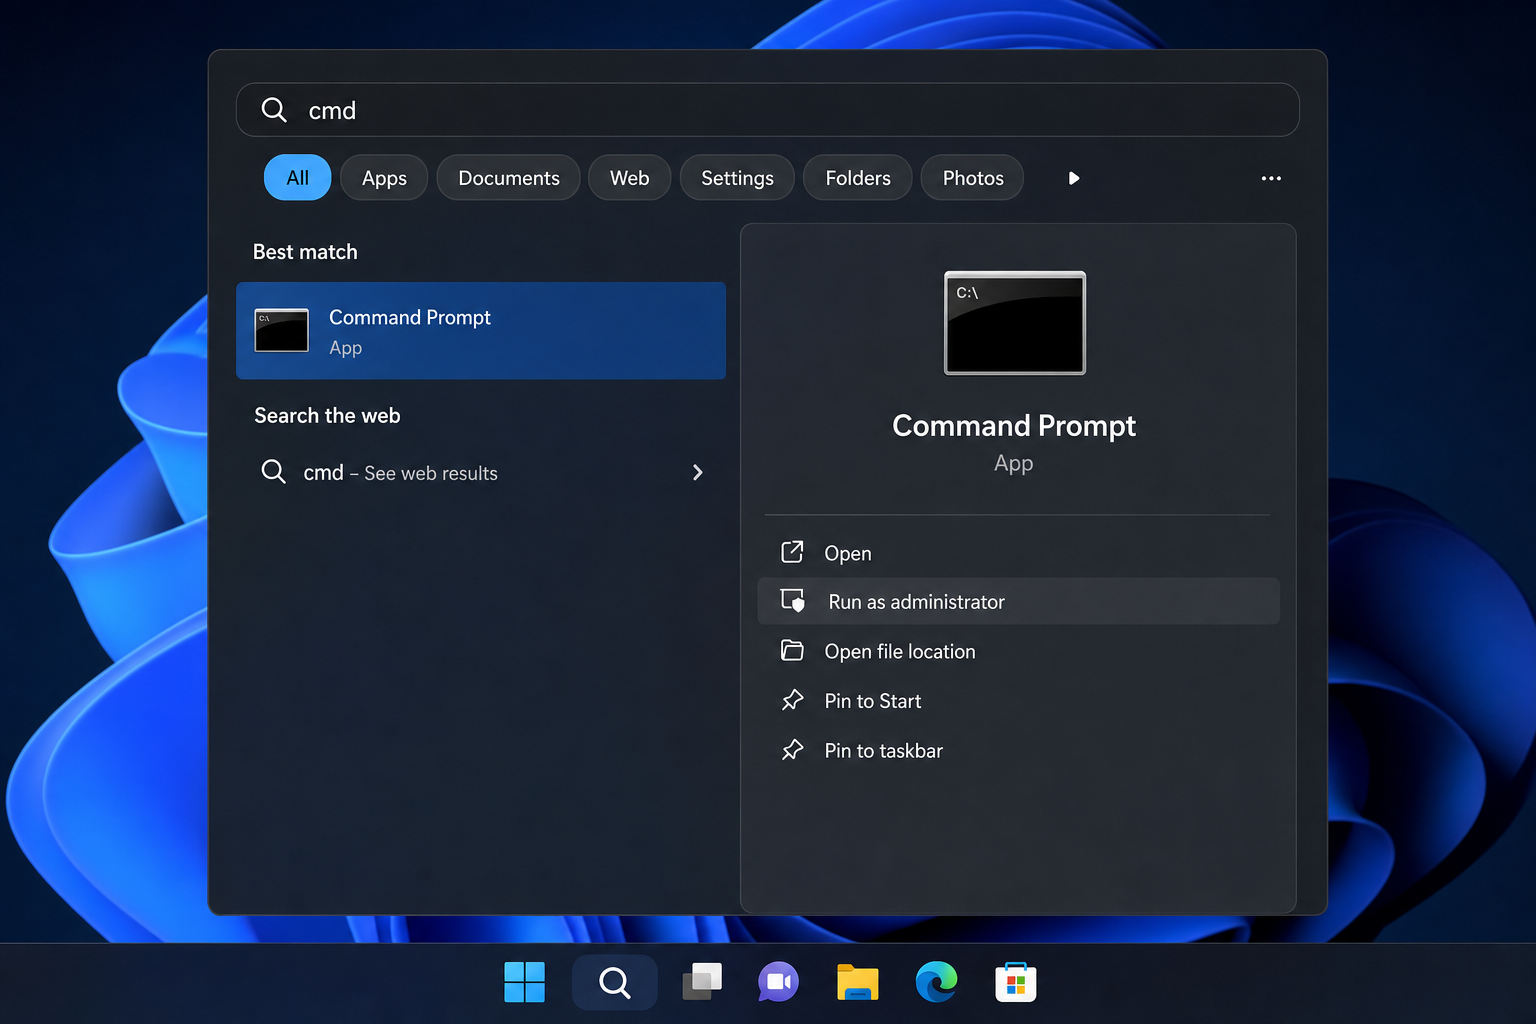
- Click Yes on the UAC prompt if it appears.
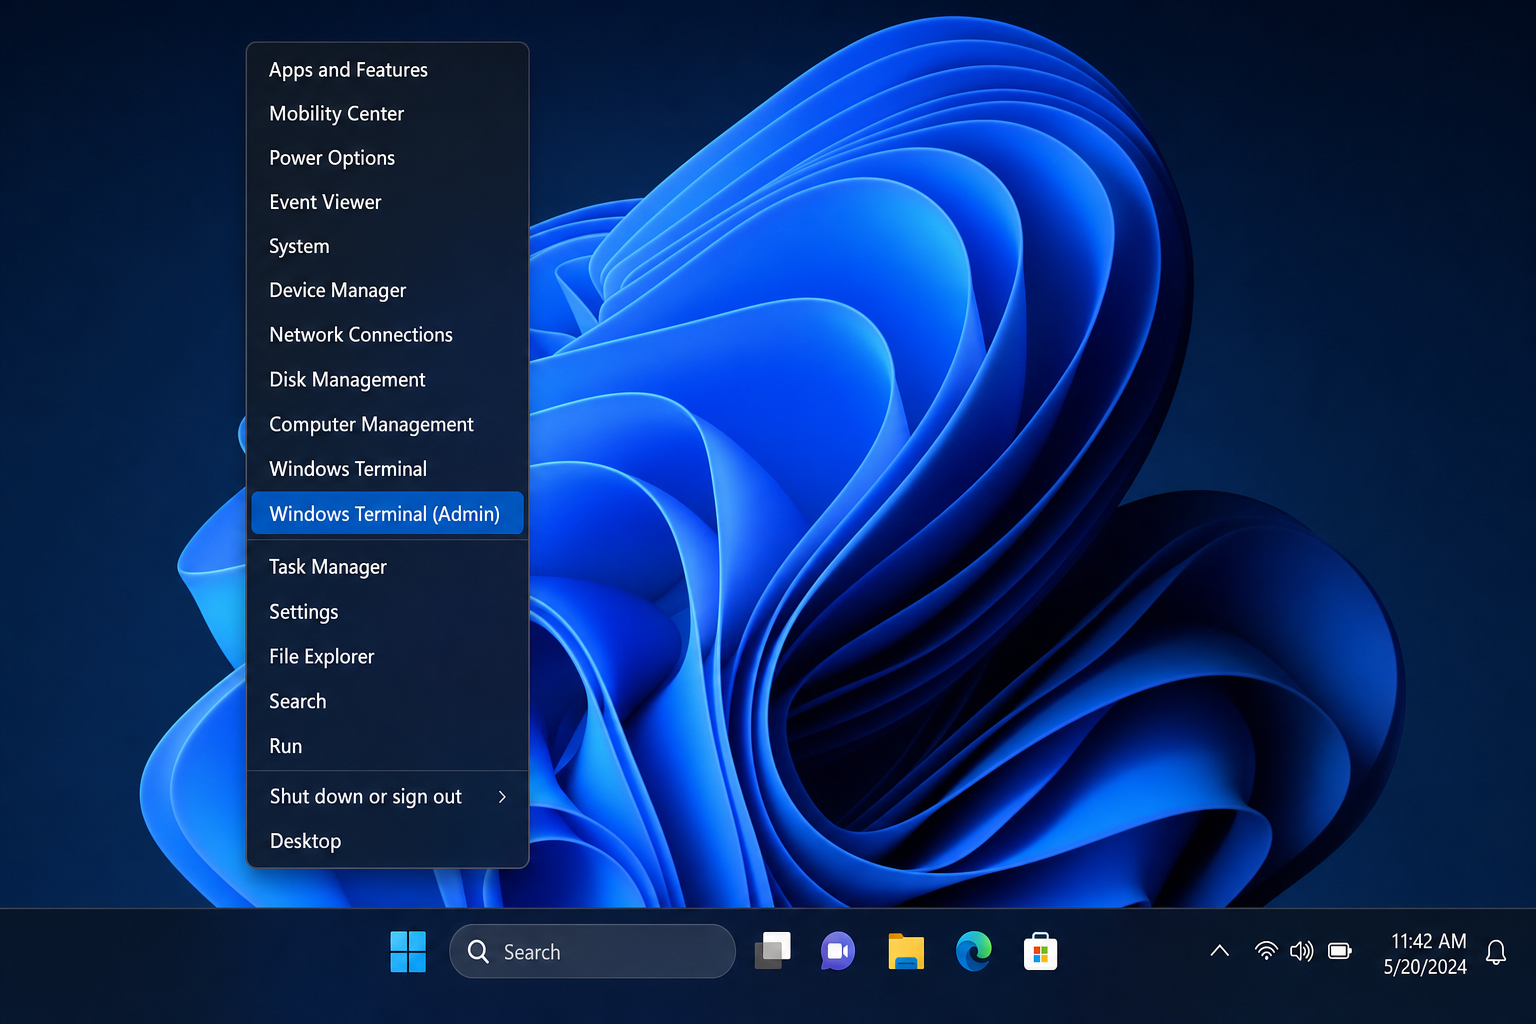
Tip: For Command Prompt and PowerShell, you can also press Win+X and select Windows Terminal (Admin), Command Prompt (Admin), or Windows PowerShell (Admin) depending on your Windows version and settings.
Method #3: Use Task Manager to launch an elevated program
This method works even when your taskbar or Start menu is misbehaving.
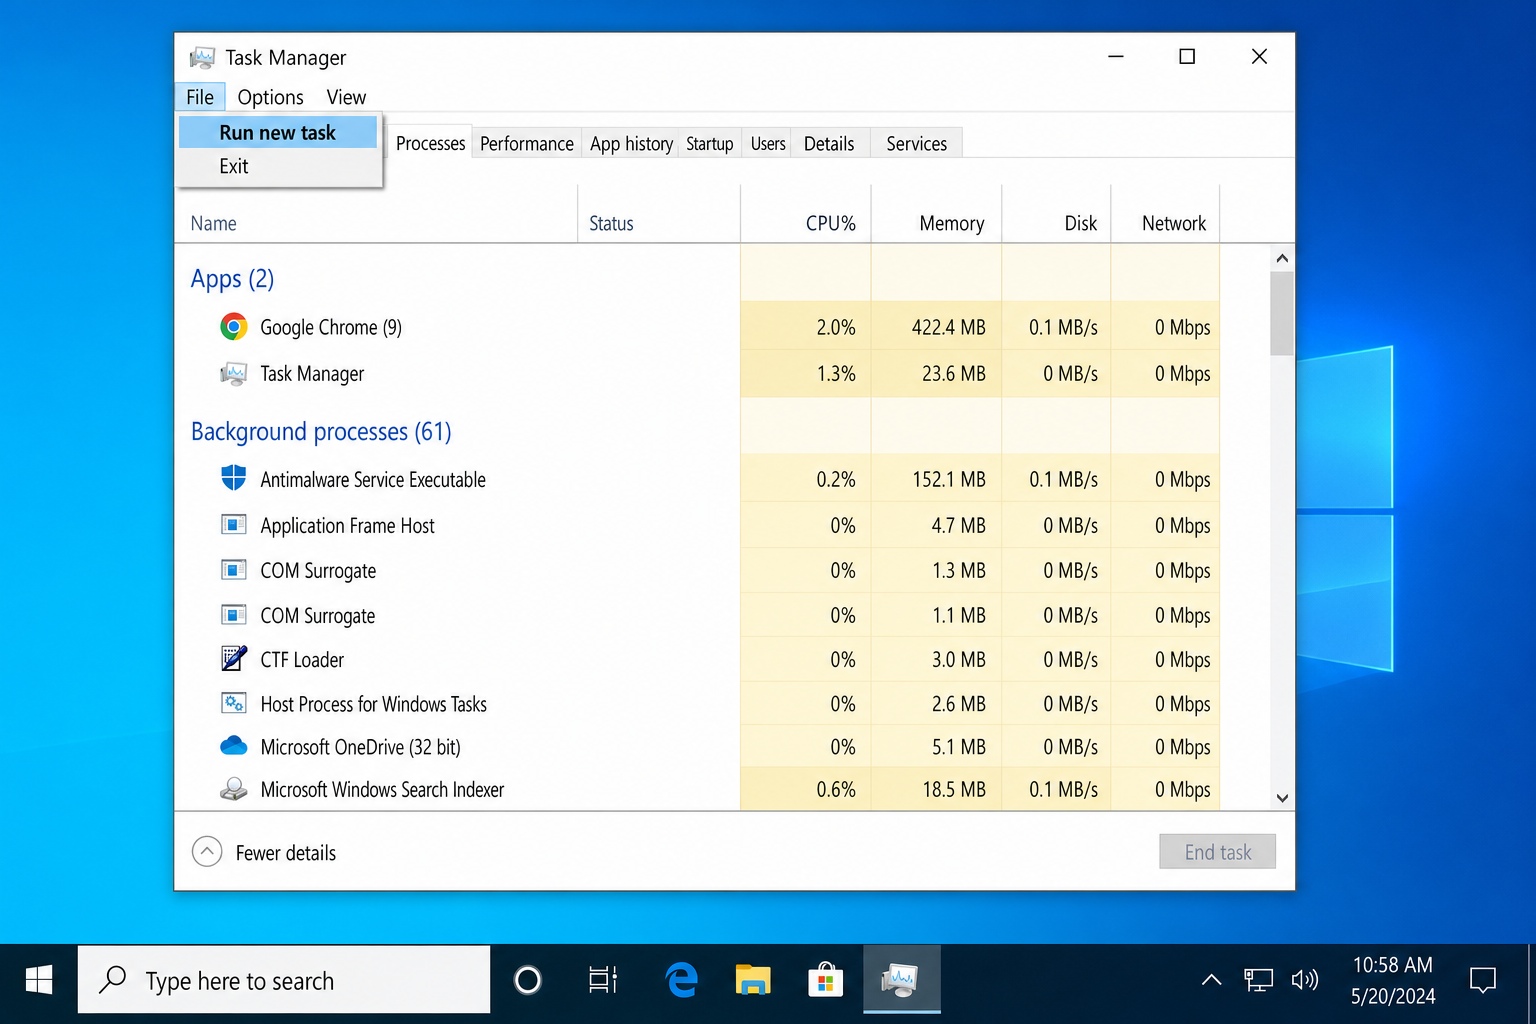
- Press
Ctrl + Shift + Escto open Task Manager. - In Windows 11, click More details if Task Manager opened in compact view.
- Click the File menu (top-left) and select Run new task.
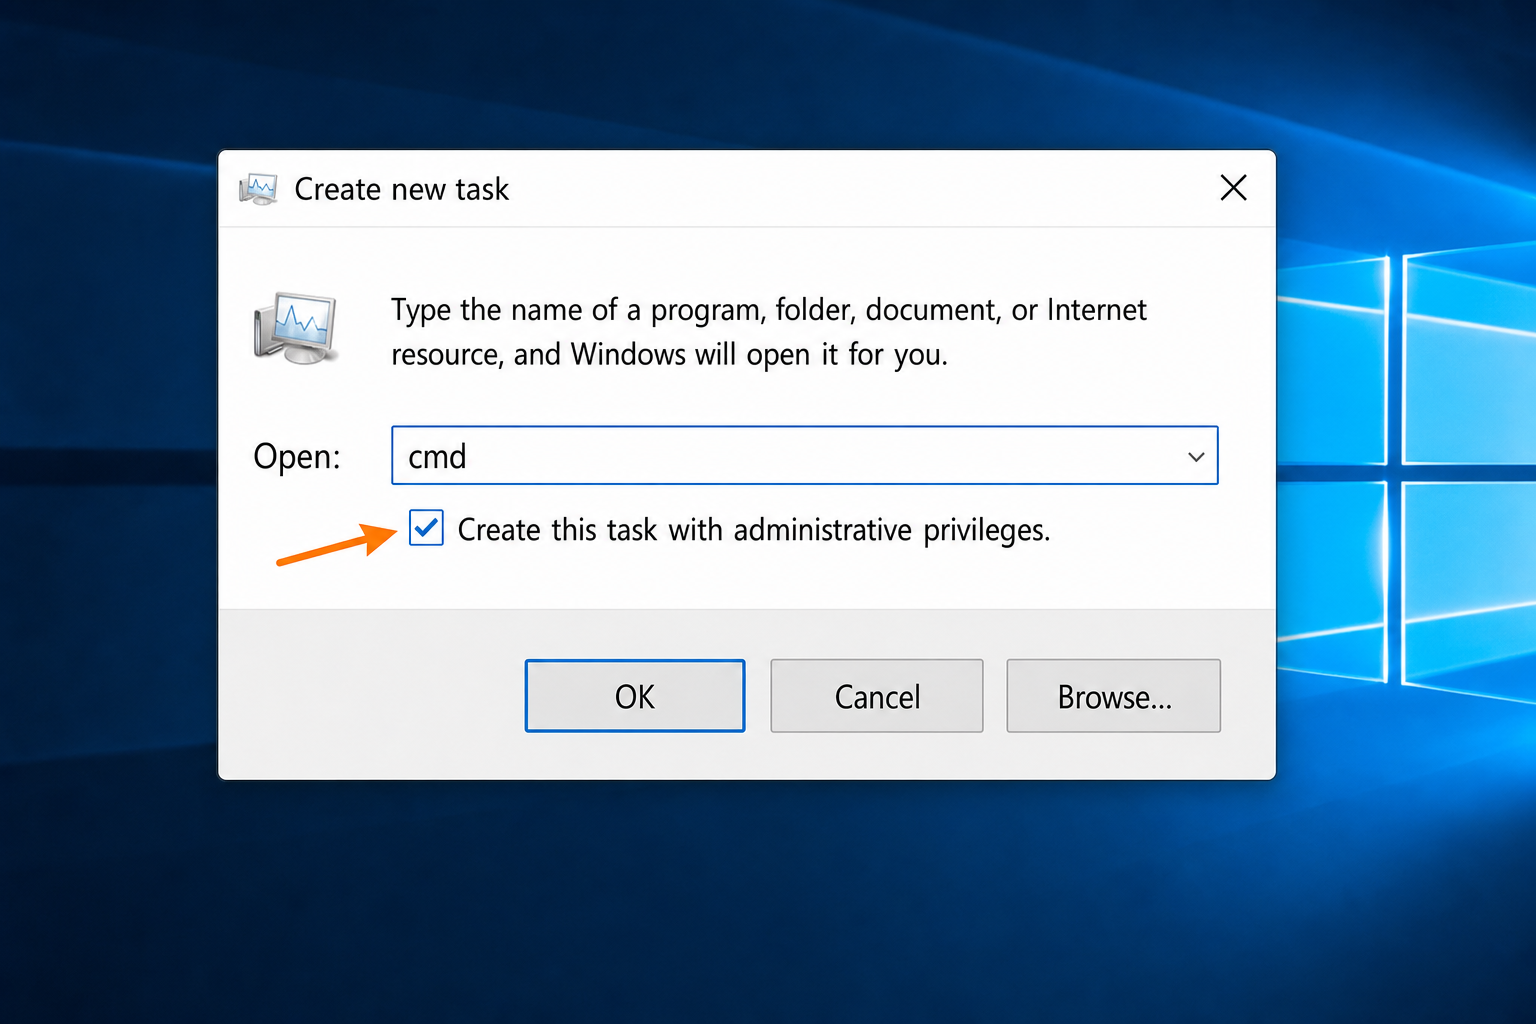
- Type the program name or full path (e.g.,
cmd,powershell, orC:\Path\To\Program.exe). - Check the box labeled Create this task with administrative privileges.
- Click OK.
Method #4: Always run a specific program as administrator (Compatibility tab)
If a program needs admin rights every time you open it, such as a legacy installer or a system utility, you can set it to always elevate automatically.
- Right-click the program’s shortcut or its main .exe file.
- Select Properties.
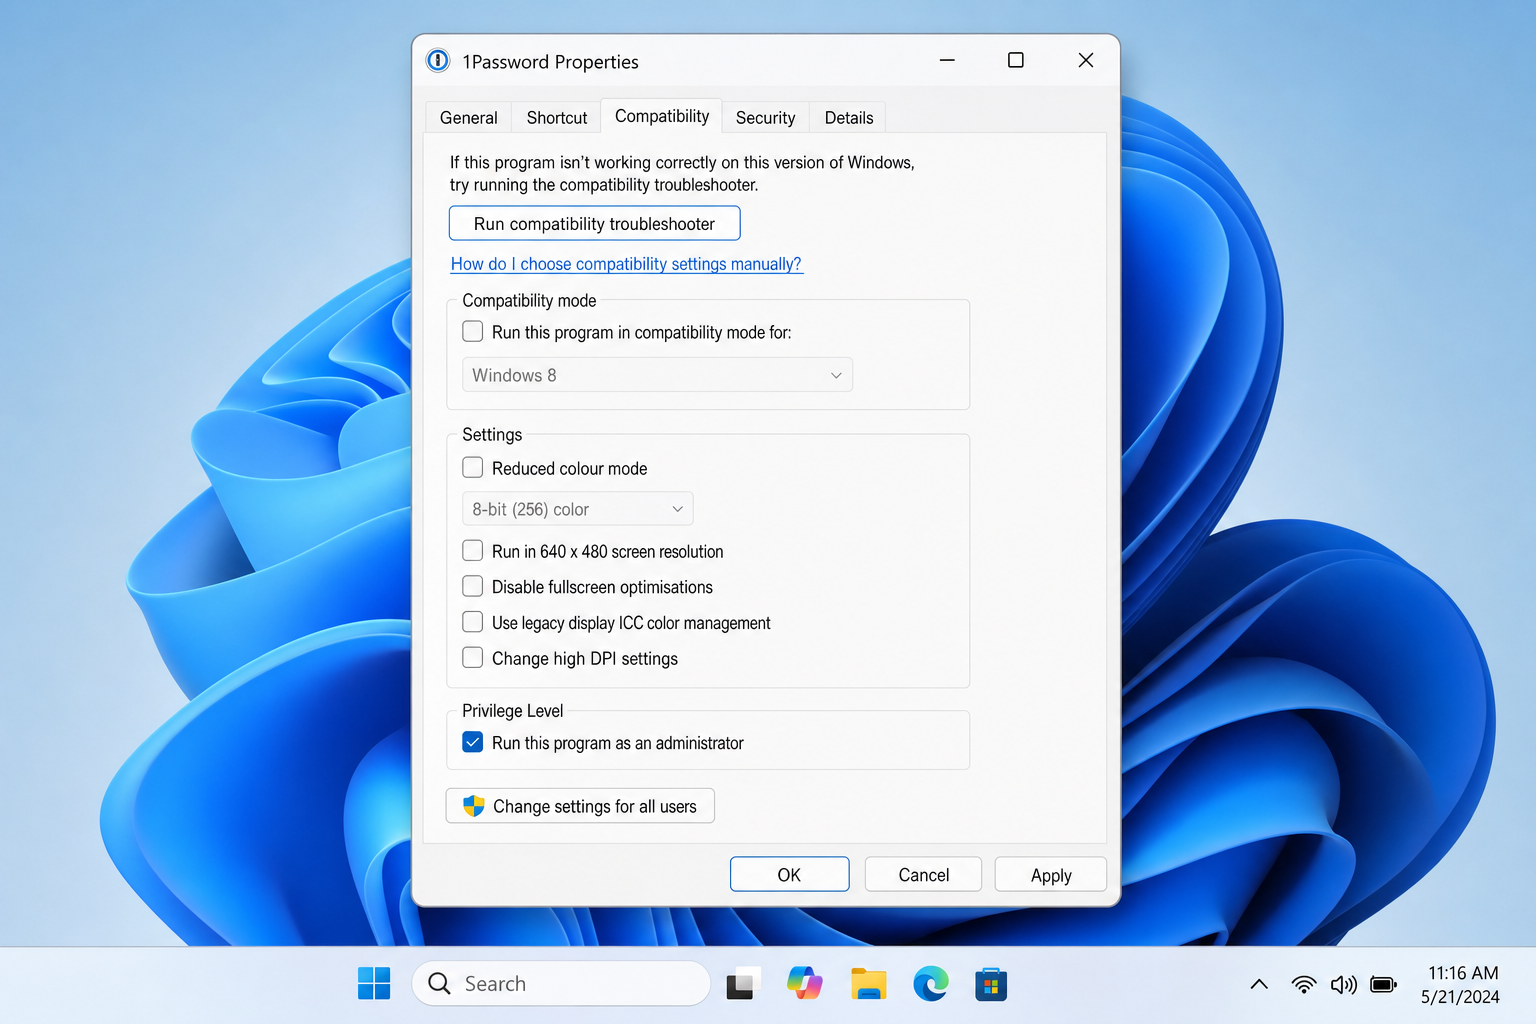
- Click the Compatibility tab.
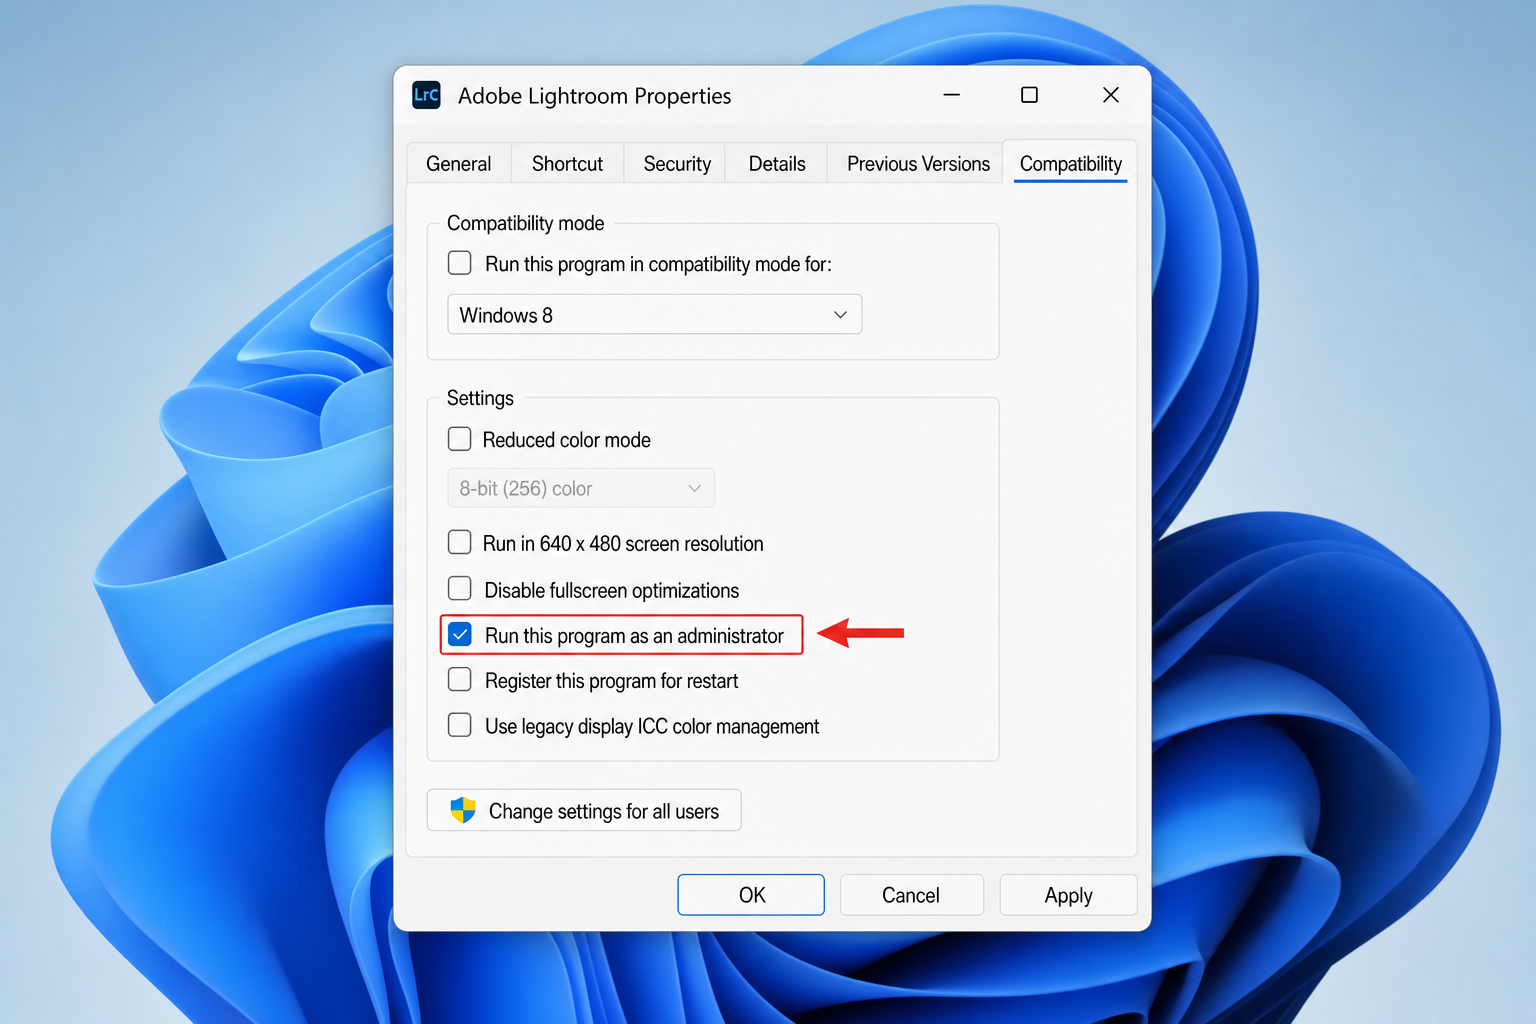
- Under Settings, check the box for Run this program as an administrator.
- Click Apply, then OK.
If you’re logged in as a standard user and the checkbox is grayed out, click Change settings for all users. This opens a separate dialog where the same checkbox is available and applies to every user account on the PC.
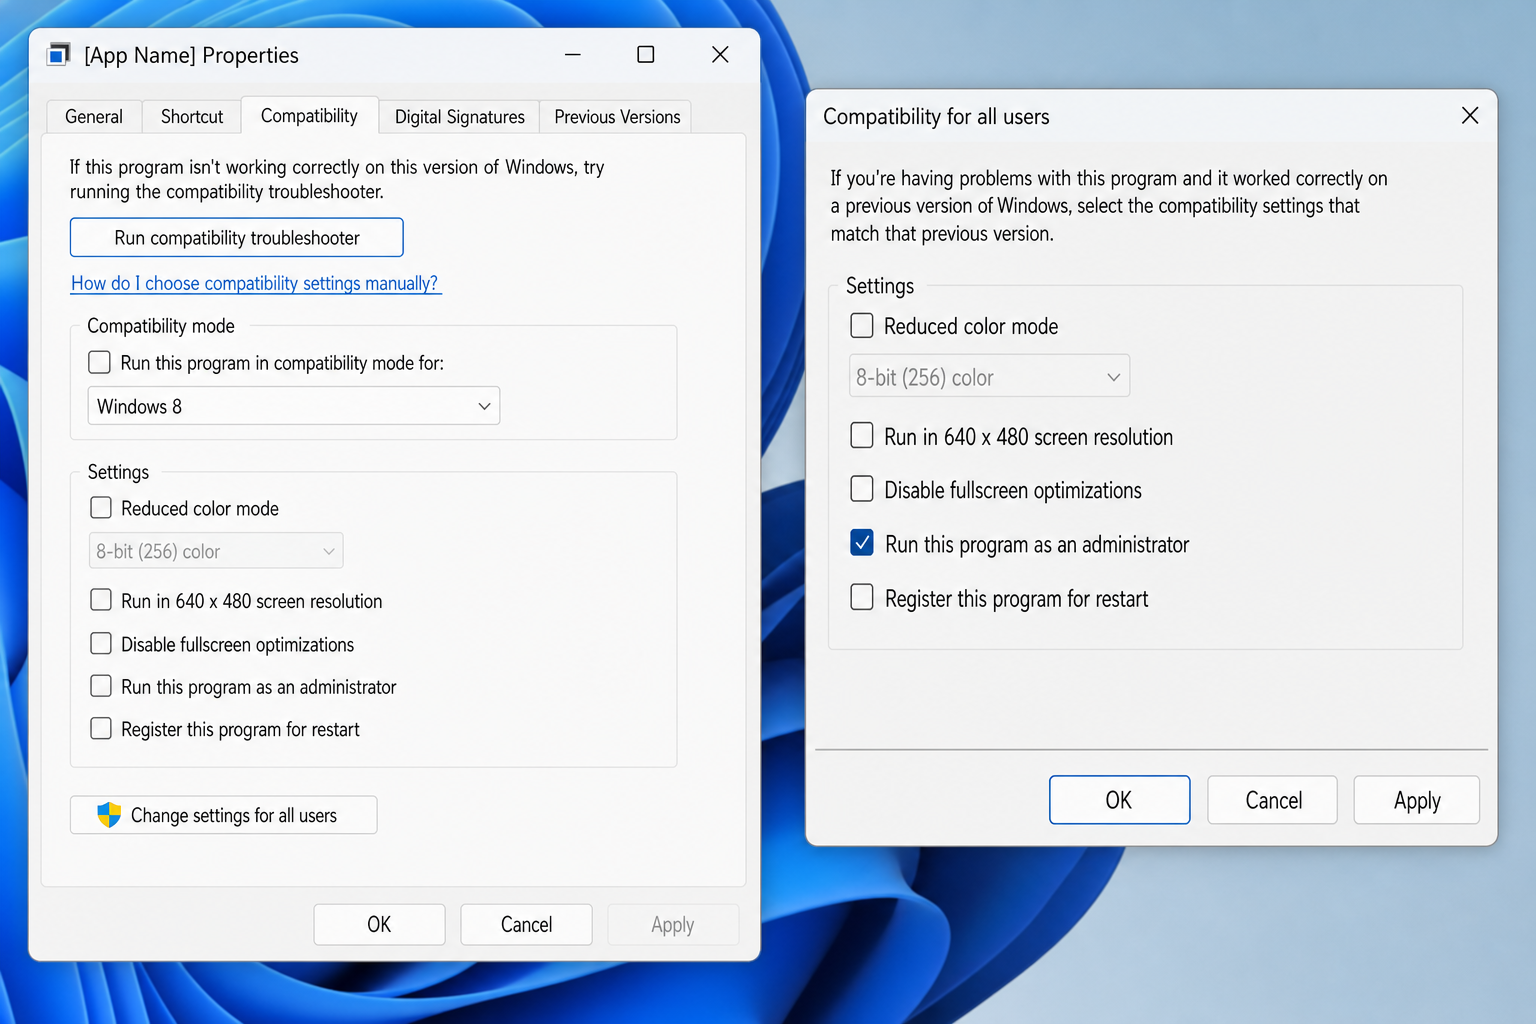
Note: From now on, every time you open this program, Windows will show a UAC prompt. That’s expected, the program is requesting elevation each launch.
Method #5: Always run a shortcut as administrator (Advanced shortcut properties)
This method applies only to a specific shortcut, not the underlying .exe, which is useful if you want one shortcut to always elevate while another opens the same app normally.
- Right-click the program’s shortcut (not the .exe) and select Properties.
- Make sure the Shortcut tab is active.
- Click the Advanced button near the bottom.
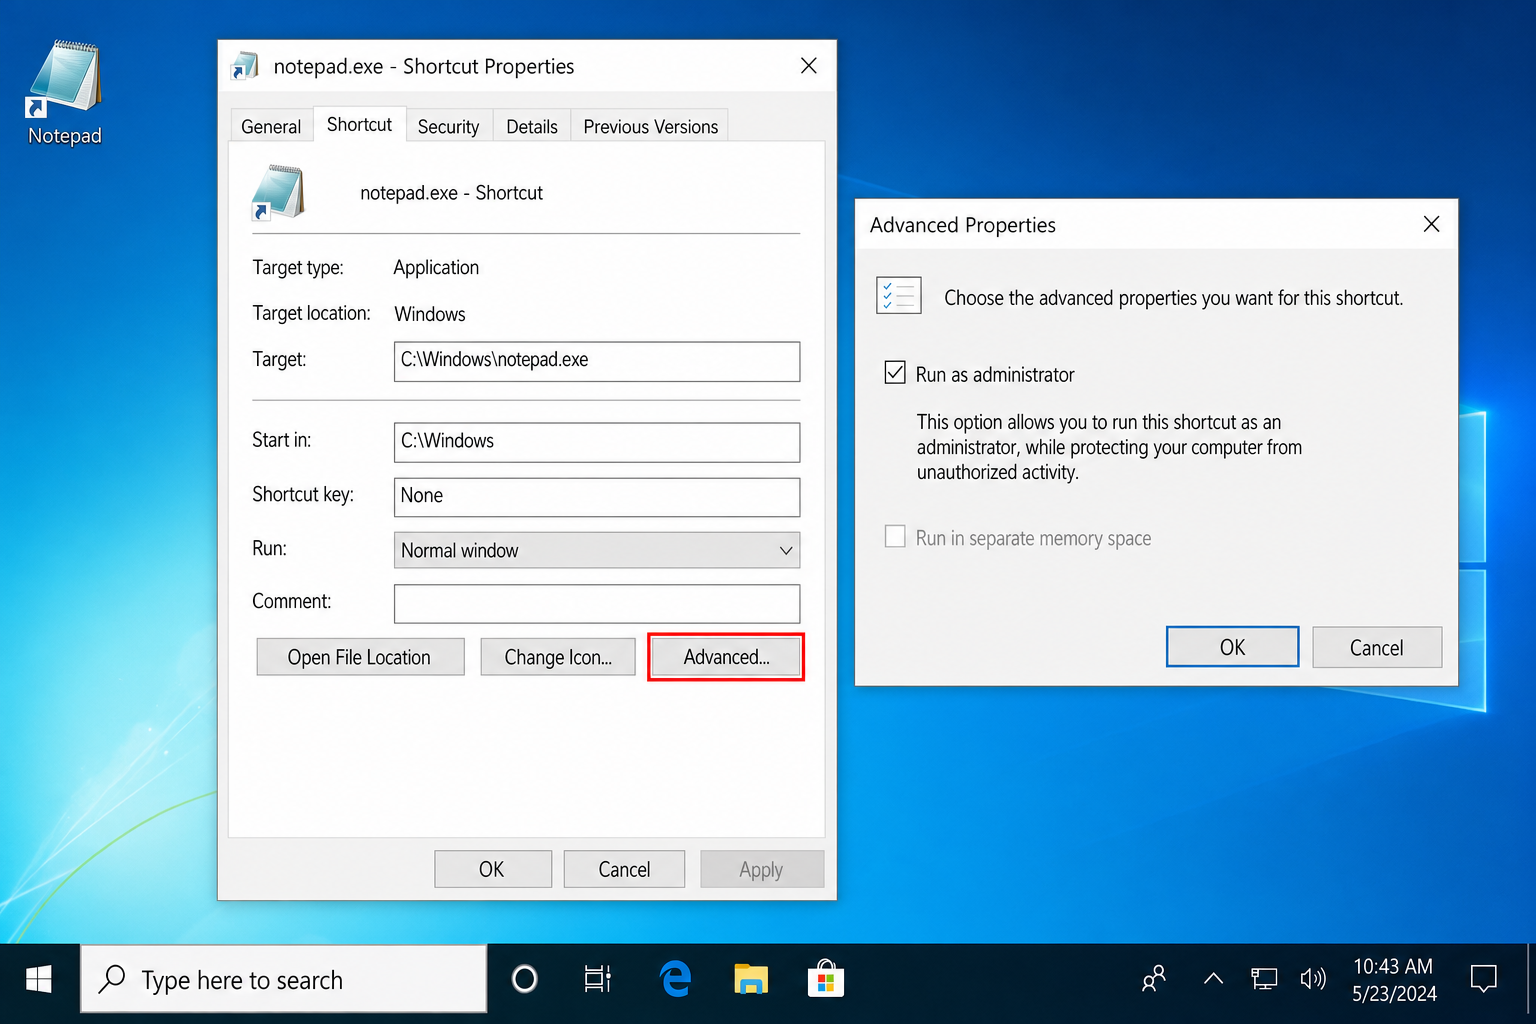
- In the Advanced Properties dialog, check Run as administrator.
- Click OK, then OK again to close Properties.
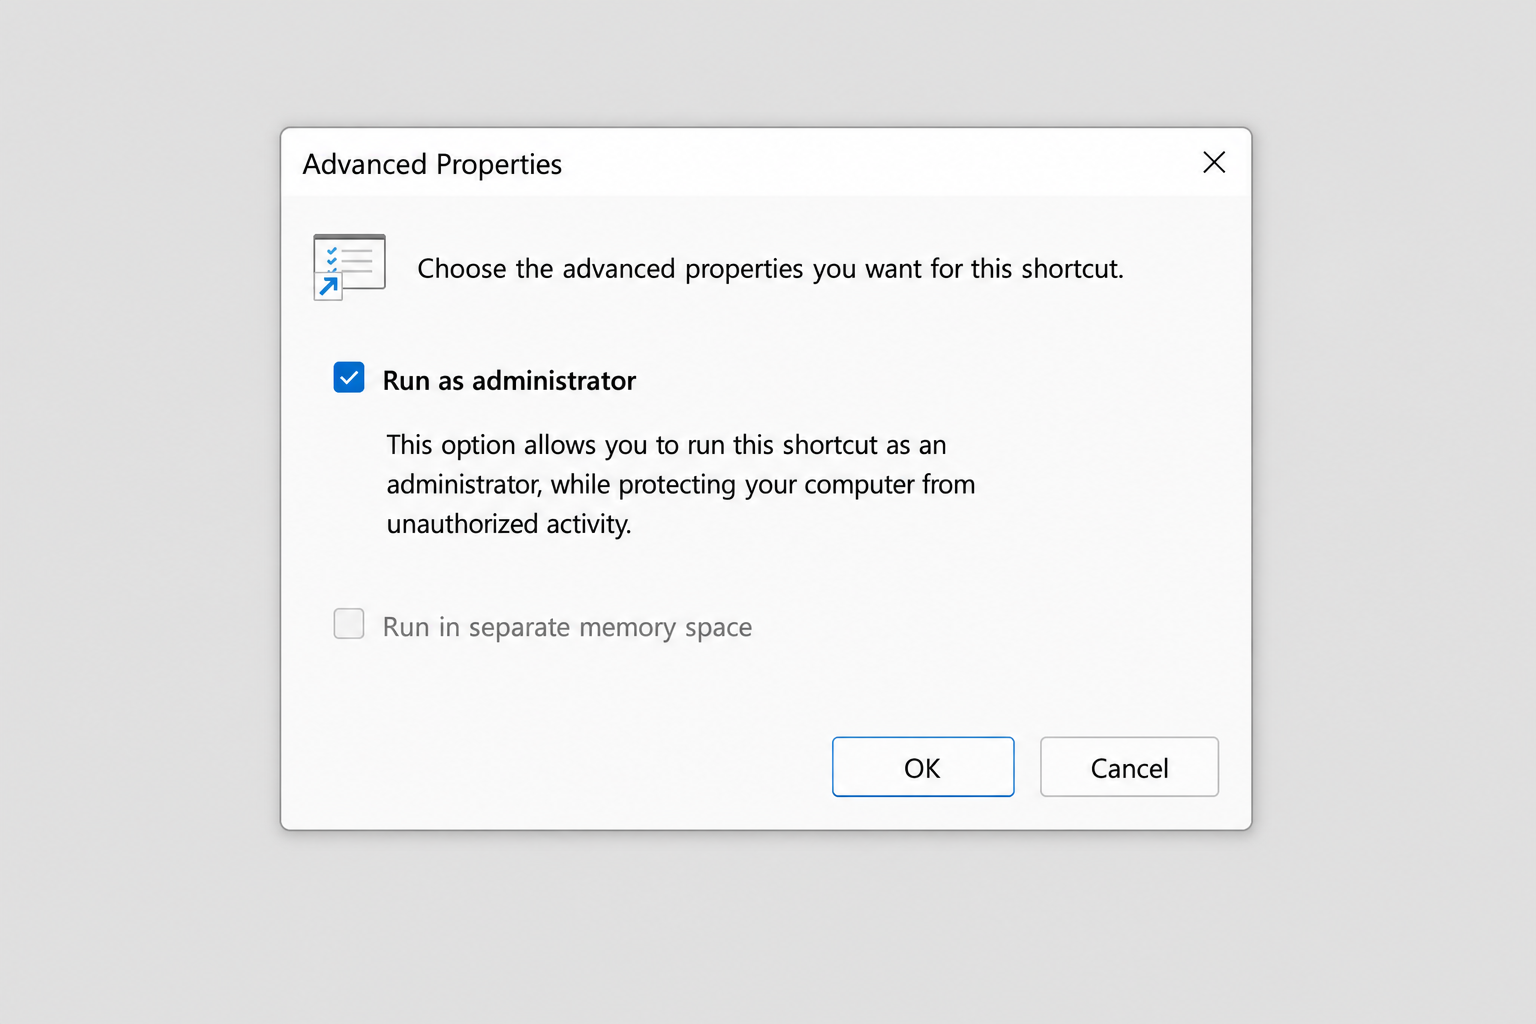
The shortcut’s icon will not change visually, but the program will now request elevation every time you open it via that shortcut.
Method #6: Use the keyboard shortcut Ctrl + Shift + click
If you’re in a hurry, hold Ctrl + Shift while clicking a program’s icon in the Start menu, taskbar, or desktop. Windows will launch it with administrator rights immediately and show the UAC prompt.
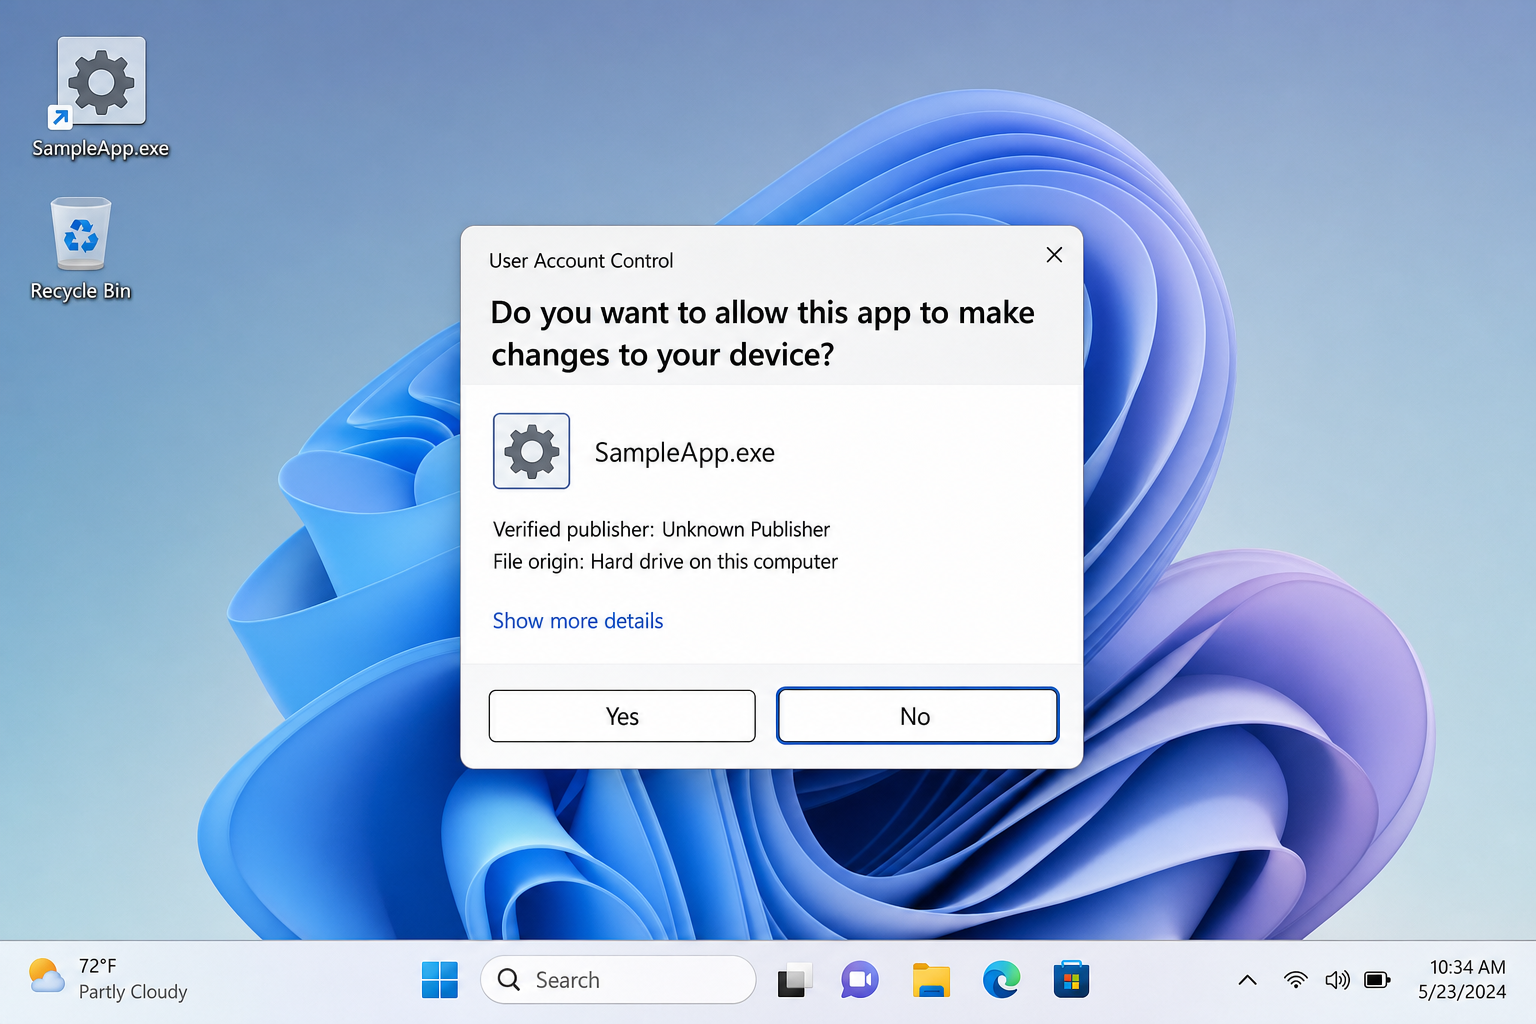
This is a one-time elevation, the same as right-clicking and choosing Run as administrator, just faster once you know the shortcut.
Troubleshooting: “Run as administrator” is missing or doesn’t work
Windows 11: Option hidden in the compact menu
The most common reason the option seems missing in Windows 11 is the new compact right-click menu. Click Show more options at the bottom of the menu to reveal the full classic context menu, which includes Run as administrator.
Still getting “Access Denied” even as administrator
Running as admin doesn’t automatically override every permission on your system. A few things that can still block you:
- Files owned by SYSTEM or TrustedInstaller, even admins can be blocked by NTFS permissions. You may need to take ownership of the file or folder first. Do this carefully, changing ownership on system files can break Windows.
- Controlled Folder Access (ransomware protection), if Windows Security’s Controlled Folder Access is enabled, it can block apps from writing to protected folders even when elevated. Open Windows Security > Virus & threat protection > Manage ransomware protection and whitelist the app if needed.
- Third-party security software, antivirus tools like Avast or AVG sometimes intercept process creation in ways that interfere with elevation. Try temporarily disabling the security software to test.
- Known Windows 11 24H2 bugs, some 24H2 issues have caused “Access Denied” errors on the C: drive. Check Microsoft’s resolved issues page for Windows 11 24H2 to see if your problem matches a known bug with a documented fix.
UAC prompt never appears (or appears constantly)
UAC behavior is controlled by a slider in Control Panel > User Accounts > Change User Account Control settings. If someone turned it all the way down, elevation happens silently, which means less security, not more convenience. If you’re on a corporate PC and UAC behaves unexpectedly, a Group Policy set by your IT department may be overriding it.
“Run as administrator” does nothing when clicked
This is sometimes caused by a broken or malicious shell extension interfering with the right-click menu. Try scanning for malware first. If the problem persists, test with a different user account. If it works there, your user profile may be corrupted.
Conclusion
For a one-off elevation, right-clicking and choosing Run as administrator (Method #1) is the fastest approach for most people. If a specific tool always needs admin rights, the Compatibility tab method (Method #4) saves you from repeating those steps every time. If you’re still hitting “Access Denied” after elevating, the problem is usually Controlled Folder Access, file ownership, or a known Windows 11 24H2 bug, not the elevation method itself.