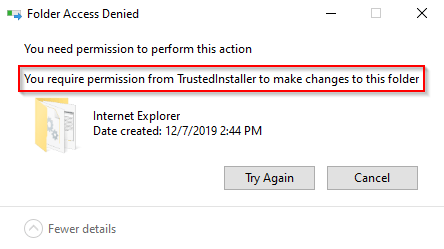
It’s not uncommon for a Windows user to come across an error that requires special permissions. For example, if you’ve ever tried to delete core system files, you likely came across a Folder Access Denied prompt that reads, “You require permission from TrustedInstaller to make changes to this folder.”
This might make you feel like you’re not in total control, but Microsoft has added the NT SERVICETrustedInstaller account to protect your system.
What is TrustedInstaller?
TrustedInstaller is a core component of Windows Resource Protection that Microsoft introduced with Windows Vista. In addition, the Windows Modules Installer service uses the TrustedInstaller account to add, remove, or modify Windows updates and other components.
Deleting or modifying files or folders owned by TrustedInstaller may prevent your Windows installation from running properly. Think of it as another safeguard that prevents even an administrator account from deleting core Windows files. However, sometimes you may need to fix or modify corrupt system files, for which you’ll require TrustedInstaller permission.
If you’re confident that what you’re doing is safe, you can take ownership of these files from TrustedInstaller. Nevertheless, it’s always a good practice to create a system restore point, just in case.
Take Ownership from TrustedInstaller
There are two methods of taking ownership from TrustedInstaller.
Using the Advanced Security Settings
This is a long, but user-friendly way to gain ownership of a folder.
- Navigate to the folder using file explorer.
- Right-click on the folder and select Properties.
- Navigate to the Security tab and select Advanced at the bottom-right corner.
- A new window will open where you’ll see TrustedInstaller as the owner of the folder. Select Change to change the owner.
- Now, Windows will ask you to Enter the object name to select. Enter the user name you want to transfer the ownership to.
- Click Check Names to complete the full object name and select OK.
- When you return to the Advanced Security Settings window, you’ll see a new checkbox right below the Owner name that reads Replace owner on subcontainers and objects. Check this box to transfer the ownership of all subfolders and files.
- Click OK to close the window. Then, open the window again by selecting Advanced.
- Select Change permissions from the bottom left of the window.
- Select Add. This will open a new window.
- Click on Select a principal from the top and repeat steps 5 and 6.
- Check the box beside Full control under Basic permission, and select OK.
- Apply the changes and press OK.
Performing these steps will give you ownership of the folder, and you will no longer require permission from TrustedInstaller to make changes to it.
Using Command Prompt
If you know how to use the Command Prompt, you can transfer ownership much faster than the previous method.
- Start by opening an elevated command prompt following the steps below.
- Search for cmd in the Start Menu.
- Right-click on Command Prompt
- Select Run as administrator.
- Run the following command:
TAKEOWN /F “C:Program FilesInternet Explorer”
Of course, change the path to the folder you want to transfer ownership for.
- If all goes well, you’ll see a message telling you that you’ve successfully transferred ownership.
You can now go ahead and modify or remove Windows folders as you please. But always ensure that you don’t remove any critical components that will prevent Windows from functioning properly.
Related Posts
- How to Recover Lost Files After Windows Update?
- Microsoft Is Shutting Down NTLM After 30 Years: Here’s Why Kerberos Replaced It
- Protect Office from Actively Exploited Zero-Day (CVE-2026-21509): Step-by-step Guide
- How to Fix Windows 11 Boot Loops After Jan 2026 Update
- How to Remove Copilot AI in Window 11? New Update Available in Beta
Arjun is a freelance writer based in India. After working as an equity research analyst, Arjun decided to do something that he has been passionate about – tech. He gets excited talking about and explaining how to solve everyday tech problems. His area of expertise is Windows and is a go-to for all things Excel. Read Arjun’s Full Bio


