If you’re into photography, you’re probably always looking for ways to add new, dynamic, and unique effects to your finished pieces. An easy way to do this is by adding overlays when editing your photos in Photoshop.
Overlays are like adding effects without having to do more work when you’re taking the photo. You can load the effects into your editing project and manipulate them as you wish until you’re happy with the result. This is a time saving perk of editing photos in Photoshop.
There are lots of overlays available online, so here’s a guide to using them and creating a stunning photo.
Where to Find Overlays for Photoshop
If you search for Photoshop overlays online, you’ll be bombarded with lots of overlay packs and designs. Some of them will be free, and a good many of them you’ll have to pay for. It all depends on what exactly you want.
If you’re trying to decide whether to buy overlays or not, you can always try to find something similar for free. There are plenty of options out there. Some popular types of overlays are:
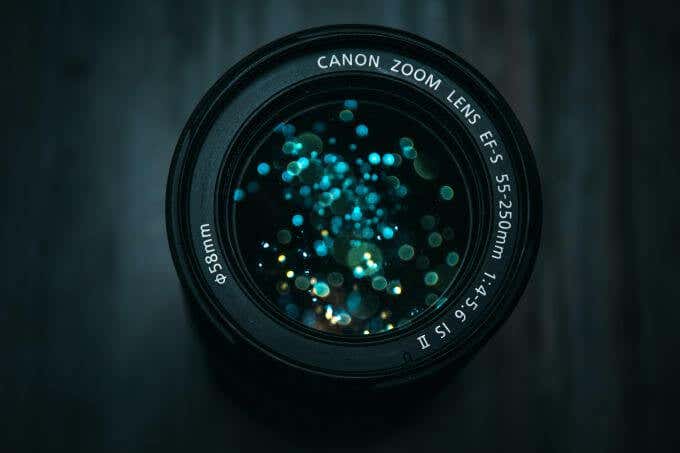
- Bokeh: These are those blurry spots of light that can add a cozy feeling to photos.
- Color: If you want a quick way to edit the colors of your picture, overlays for this can be helpful.
- Texture: Trying to emulate the old, grainy film feel? Texture overlays will be your friend. You can use these to add all kinds of vintage, worn textures, or any kind of pattern.
- Weather: These overlays are good for bringing your outdoor photography to the next level. You can add effects like fog, snow, or rain.
These are just a few types of Photoshop overlays you can find online. You can find both free and paid overlays. Just be careful where you download them from, especially if they’re free, to avoid downloading any malicious software.
Alternatively, you can also make your own overlays in Photoshop for future use.
How to Use Photoshop Overlays
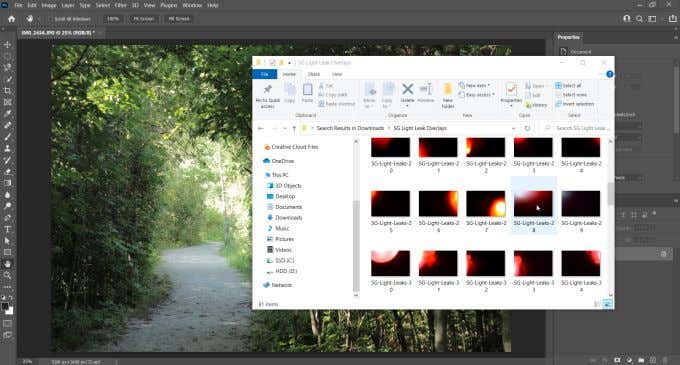
Once you’ve found an overlay you want to use and have downloaded it to your computer, you’ll be able to edit your photo with it. Here’s how to do it.
- Open Photoshop and the photo you want to add your overlay onto.
- Drag the overlay file into Photoshop onto your photo.
- It should load as a new layer in your project. From here you can position it to fit your photo, then press Enter to set the overlay onto your photo.
- Now you can edit the overlay against your photo. To do this, you can change the blend mode, which changes how the overlay is applied to your photo. You can also try altering the opacity if you want the overlay to be more or less subtle. If you want to remove the overlay in certain spots, you can edit this by using the mask function. This will allow you to erase parts of the overlay using a brush.
Editing the Overlay With Your Photo
After you add the overlay, you’ll probably want to edit it a little bit to make it fit better with your photo and the look you’re going for. Besides some of the editing suggestions above, there are more ways you can change the overlay to suit your taste.
Change the Overlay Color
Sometimes, the original color of the overlay may not exactly fit with the color scheme of your photo. You can easily fix this by doing some color editing to your overlay.
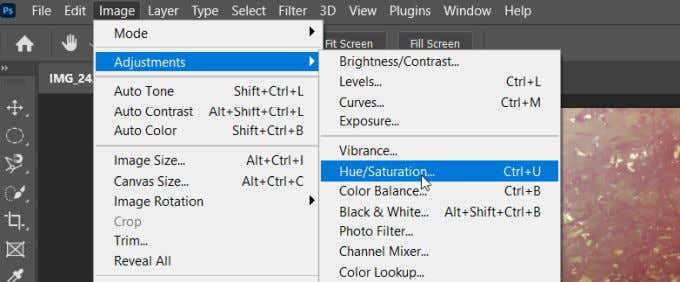
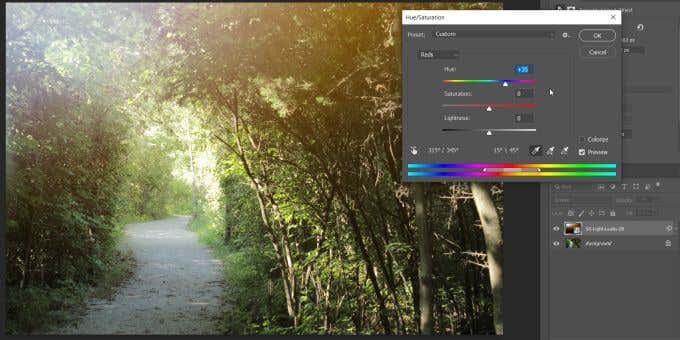
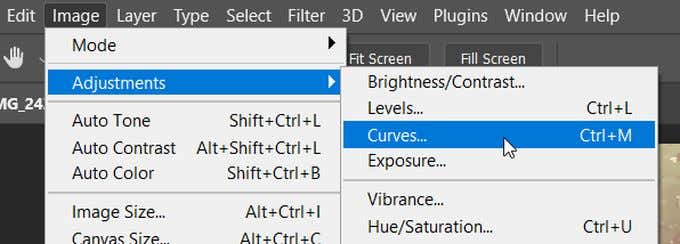
You’ll first want to select your overlay layer, then go to Image > Adjustments > Hue/Saturation. This will create an adjustment layer for your overlay. A window should appear where you can adjust the color of the layer using the Hue slider.
You can also adjust Saturation or Lightness to achieve more effects.
If you want to work with different color channels of the overlay, select the dropdown where the default is Master. You can select another color channel here to edit just those.
Using Blend Modes
As mentioned above, blend modes affect how your overlay is applied to the underlying photo. For most overlays and textures, you’ll want to choose the Screen blend mode.
However, you can also experiment with different modes to see which ones work best for your project. You can also edit the blend modes to get even more unique effects.
Lighten or Darken
If you notice that your overlay is too light or too dark in certain spots, you can change this by using adjustment layers. You can add a Curves adjustment layer, and pull down the center of the curve to darken the photo. Then, you can use the paint tool in black to erase areas of the layer you don’t want.
On the other hand, if you want to lighten parts of the image, use the same Curves adjustment and then go to Filters and Adjustments > Invert. Then use a white brush to lighten parts of the overlay.
Using Photoshop Overlays
Photoshop overlays are a quick and easy way to add something extra to your photos and make them more unique. Keep in mind, though, that you don’t want to add too many overlays at once or else you may pull attention away from what you photographed.
You also will want to try and make sure the overlay doesn’t clash too much with the photo. But how you use overlays for your creative purposes is up to you, and will depend on what kind of look you’re going for.
Overall, Photoshop overlays are a great tool for any photographer or photo editor to add to their photo editing arsenal.
Related Posts
- How to Fix App Notifications in Windows?
- Using an Old Device? 5 Account Security Settings You Should Enable
- How to Find Features Moved from Control Panel to Settings in Windows 11?
- How to Back Up Your Android Downloads Automatically?
- Camera Not Working in Zoom or Teams? Quick Fixes for Windows and macOS
Since she was a child, Kayla has had a fascination with technology, video games, and filmmaking. Growing up she wrote on multiple personal blogs about these topics, enjoying the process of breaking down technical concepts. Most recently her focus has shifted to writing, and Kayla now reviews and writes technology, video editing, and gaming related articles. Read Kayla’s Full Bio
