Now that we have setup Windows Server 2003 on our virtual machine, patched it with SP2, installed an anti-virus and setup DNS, it is now time to setup Active Directory using dcpromo.
Setting up Active Directory using the run command dcpromo is a straightforward procedure. To begin, from your Windows 2003 Server desktop, go to Start, click on Run, type dcpromo and hit Enter.
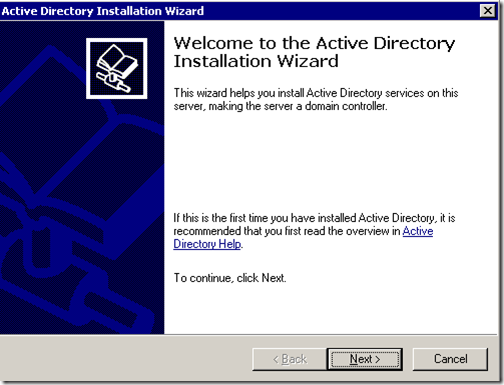
The “Welcome to the Active Directory Installation Wizard” should come up:
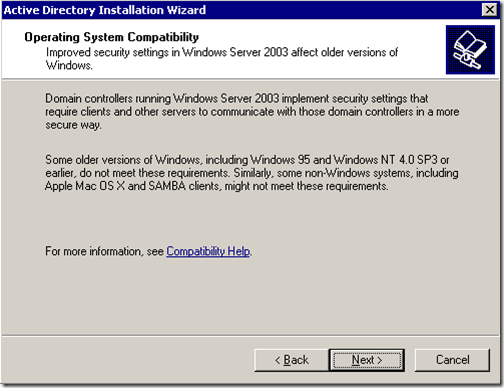
Click on Next. In the following window, you will get a warning about comparability issues with older operating systems. Improved security settings in Windows Server 2003 affect older versions of windows like Windows 95 and Windows NT 4.0 SP3 and earlier.
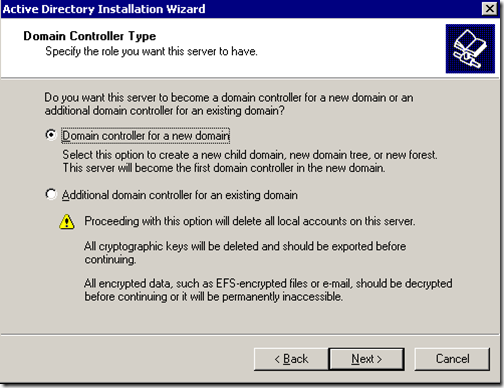
After reading and thinking about consequences, click Next. On the next screen, you will get two options. The first option asks you if you want the server to become a domain controller for a new domain or if you want the server to be an additional domain controller for for an existing domain:
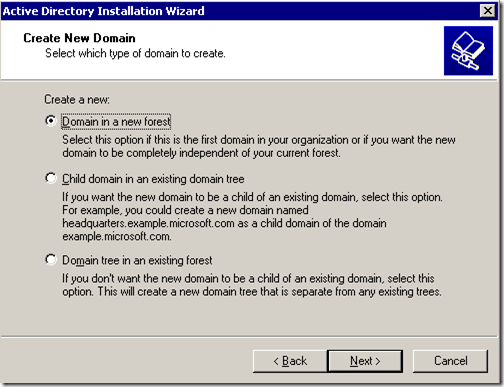
Select the first option and click Next. On the next window, you will get three options. The first option is to setup the domain in a new forest. Select this option if it’s the first domain controller in your organization or if you want it to be totally independent from any forest.
Option two: Child domain in an existing domain tree. Select this option if you want the domain to be a child domain from an existing domain. Option three: Domain tree in an existing forest. If you don’t want any of the above, select this option.
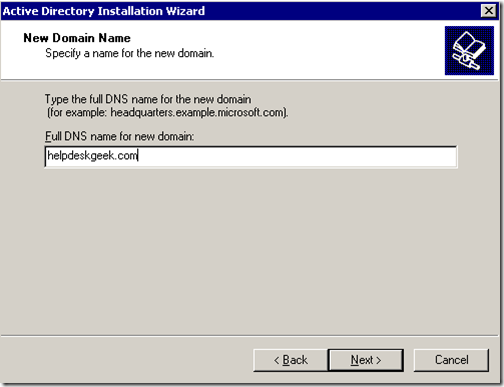
In our case, choose the first option, and click Next. On the next screen, we need to type the full DNS name for the new domain:
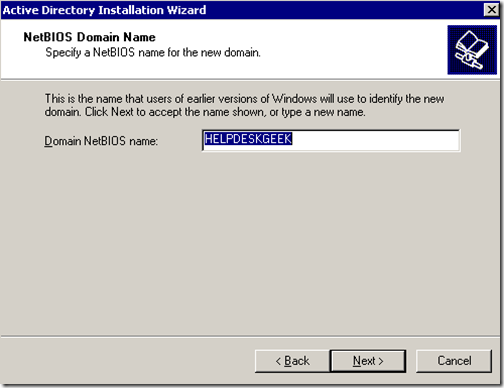
Type the full DNS name like helpdeskgeek.com, and click on Next. On the next screen, we need to choose the NETBIOS name. This is the name earlier versions of Windows will be using to identify the new domain.
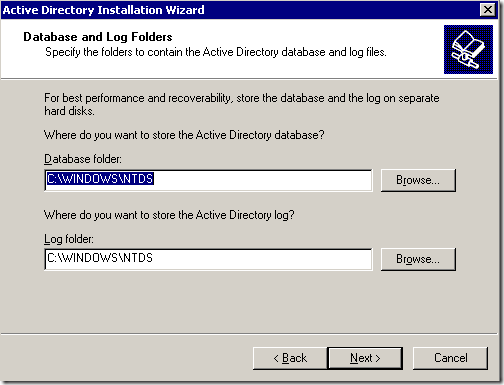
Choose the name, and click Next. On the next screen, you need to select the location of where you want to store the database and log files. For best performance, store them on separate disks.
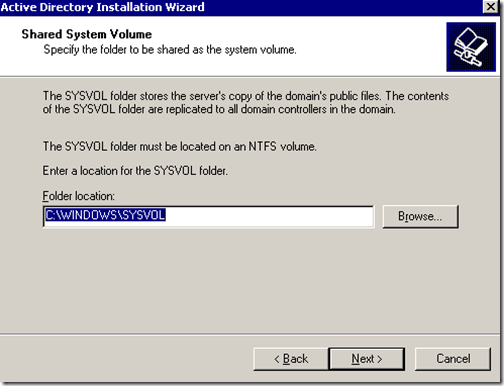
Next, the Shared System Volume window will come up. Here, you need to choose the location of where you want to store the SYSVOL files. This folder contains the domain’s public files and are replicated to all the domain controllers in the domain.
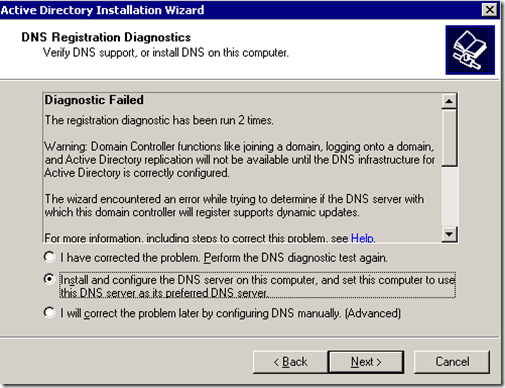
Choose the folder location, and click Next. On the next window, the DNS registration diagnostic will show up. Here most likely you will get ” Diagnostic failed” and it will give you three options. The first option will allow you to perform the DNS diagnostic again, if you have corrected the problem.
The second option will allow the Active Directory wizard to install and configure DNS for you, and use this DNS as the primary DNS for this server. The third option allows you to bypass this window if you plan to correct the problem later on.
Even though we have already installed DNS on this server, we have not configure any of its services, so we will choose the option to Install and configure DNS server on this computer and set this computer to use this DNS server as its preferred DNS server.
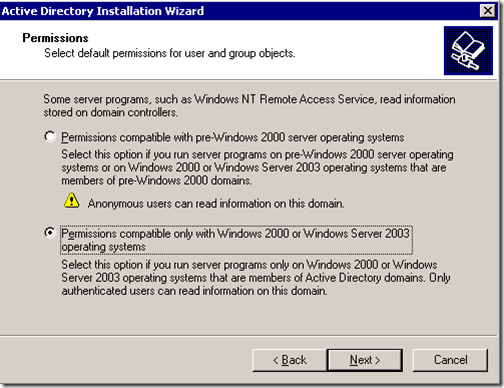
On the next window, you need to choose what type or permissions you want for users and group objects. Here you will get two options. The first options should be selected if you run server programs on pre-Windows 2000 servers. Select option two if you only run Windows Server 2000 and Windows Server 2003 in your domain.
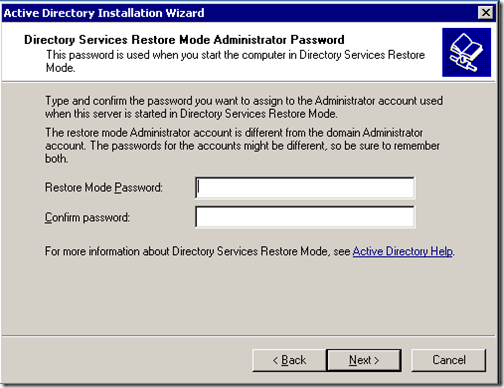
On the next window, you need to enter the Directory services restore mode administrator password. This password is used when you start the computer in directory services restore mode. This account is different from the domain administrator account.
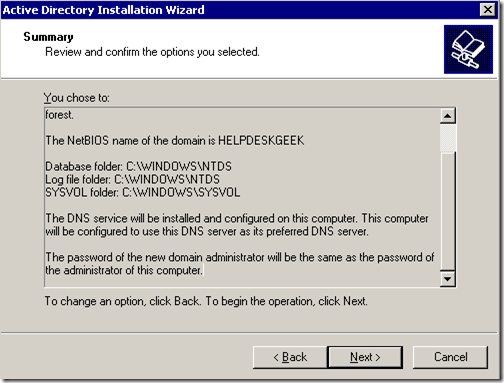
Type your chosen password, and click Next. Next, you will get the summary of all the options you have chosen during the Active Directory wizard. Remember, the domain administrator account password is the same as the current local administrator password.
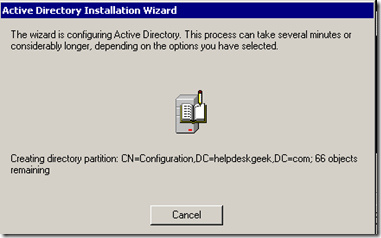
Click Next. The Active Directory installation should begin.
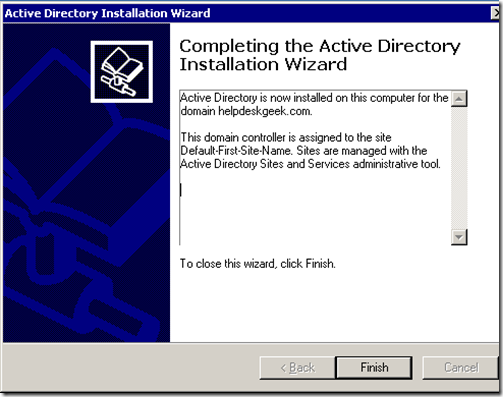
After a few minutes, Active Directory should be installed.
Click on Finish and restart the server. Active Directory installation should now be complete.
Related Posts
- How to Repair a Corrupted User Profile in Windows 11
- Preparing for Windows 10 End of Support: Upgrading to Windows 11
- How to Access and Change Your WiFi Router Settings (2025 Edition)
- How to Install the Latest Large Language Models (LLMs) Locally on Your Mac
- How to Find Circular References in Microsoft Excel
