
Too many installed fonts can make font menus in Word, InDesign, or any design app nearly unusable, and in extreme cases, slow down app launch times noticeably. Windows manages your font library system-wide, so every app on your PC loads from the same list.
Why Too Many Fonts Causes Problems in 2026
The issue isn’t usually raw system slowdown anymore, as modern hardware handles that fine. The real pain points are:
- Font picker dropdowns in Word, InDesign, SketchUp, and similar apps become painfully slow to scroll
- Apps that enumerate fonts at launch (like Adobe apps) take longer to open
- Finding the font you actually want means scrolling past hundreds you never use
- After Windows updates, apps can occasionally show unexpected font substitutes – most often due to stale app caches or changed font metrics rather than fonts being removed outright
The good news is Windows 10 and 11 give you several ways to clean this up, from hiding fonts you don’t need to doing a full reset back to defaults.
How to View Your Installed Fonts
Before cleaning anything up, see what you’re working with.
Method 1: Settings app (Windows 10 and 11)
- Press
Windows + Ito open Settings. - Go to Personalization > Fonts.
- You’ll see a grid of every installed font family with a live preview. Use the search box at the top to find specific fonts.
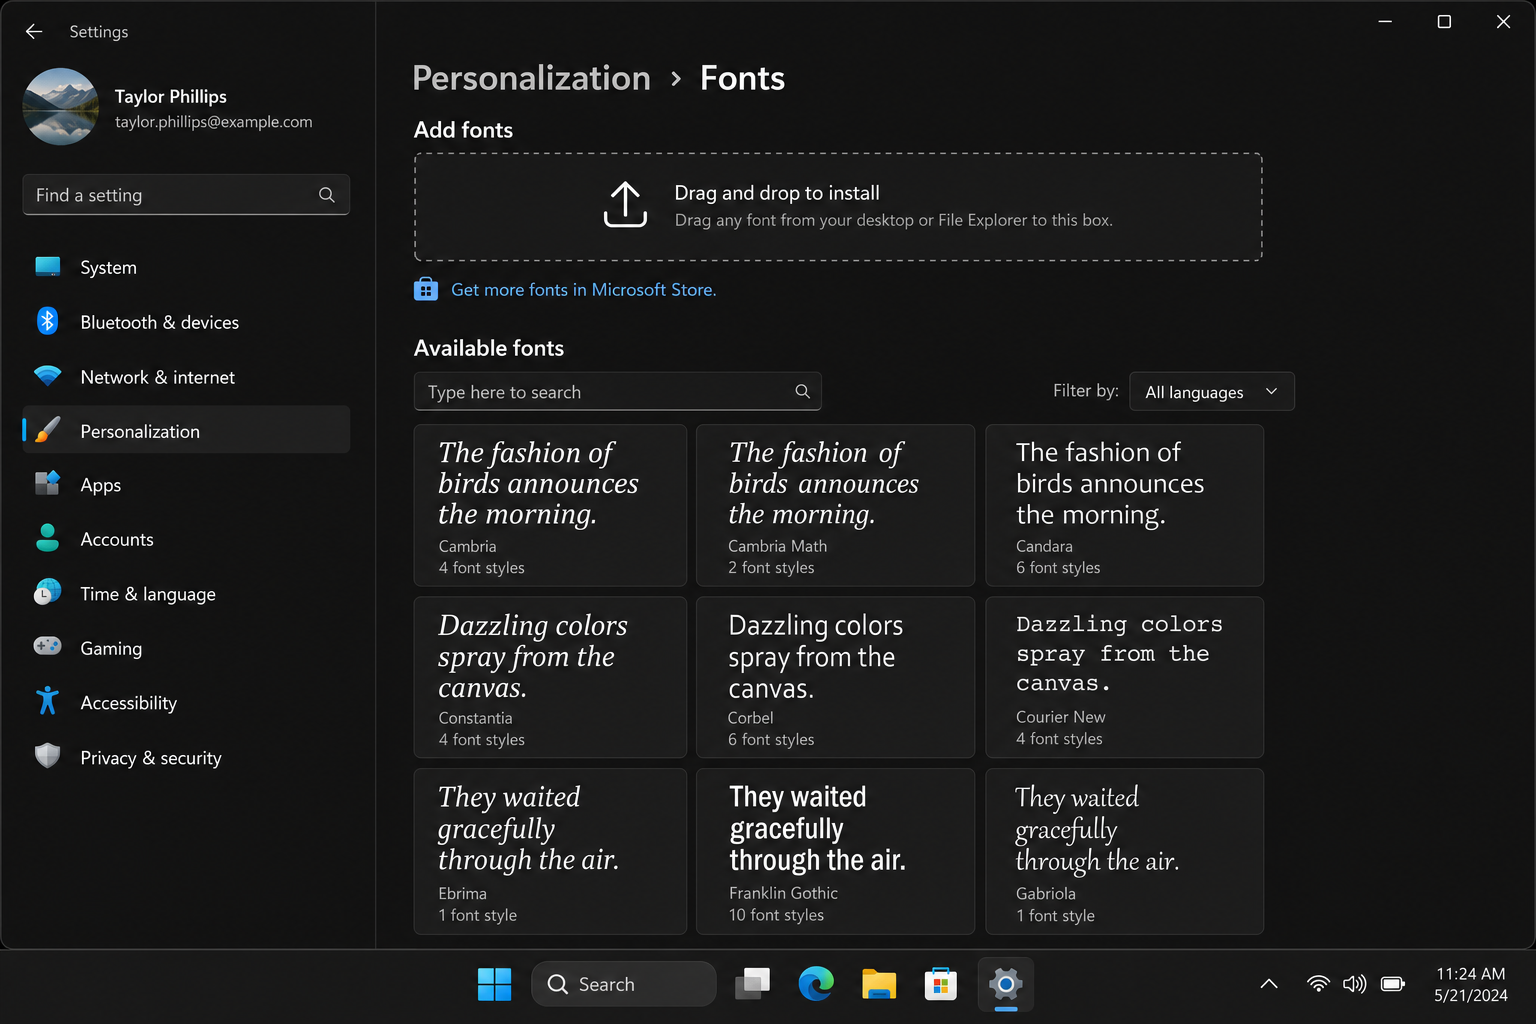
Click any font tile to see all its styles (Regular, Bold, Italic, etc.) and an Uninstall button if the font can be removed.
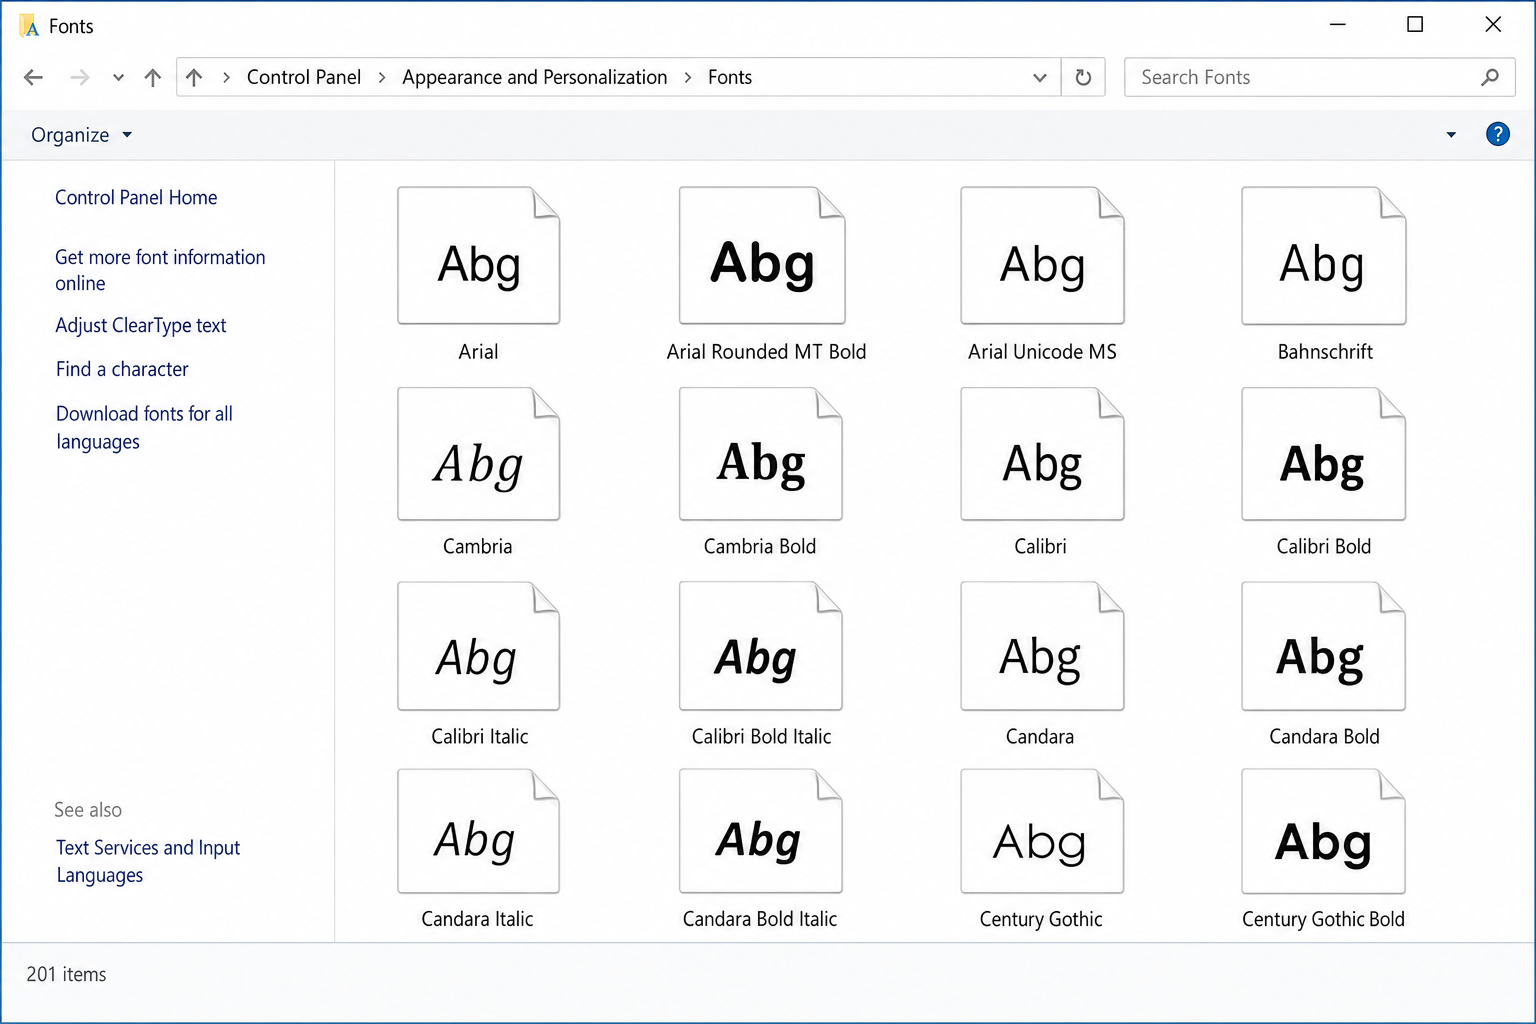
Method 2: Control Panel Fonts folder
- Press
Windows + R, typecontrol fonts, and press Enter. - The classic Fonts folder opens, showing every font file installed in
C:\Windows\Fonts. - Check the status bar at the bottom of the window, it shows the total number of fonts installed.
How to Remove Fonts You Don’t Need
Fix #1: Uninstall fonts via Settings
This is the cleanest method on Windows 10 and 11.
- Open Settings > Personalization > Fonts.
- Scroll or search for the font family you want to remove.
- Click the font tile to open its detail page.
- Click Uninstall, then confirm.
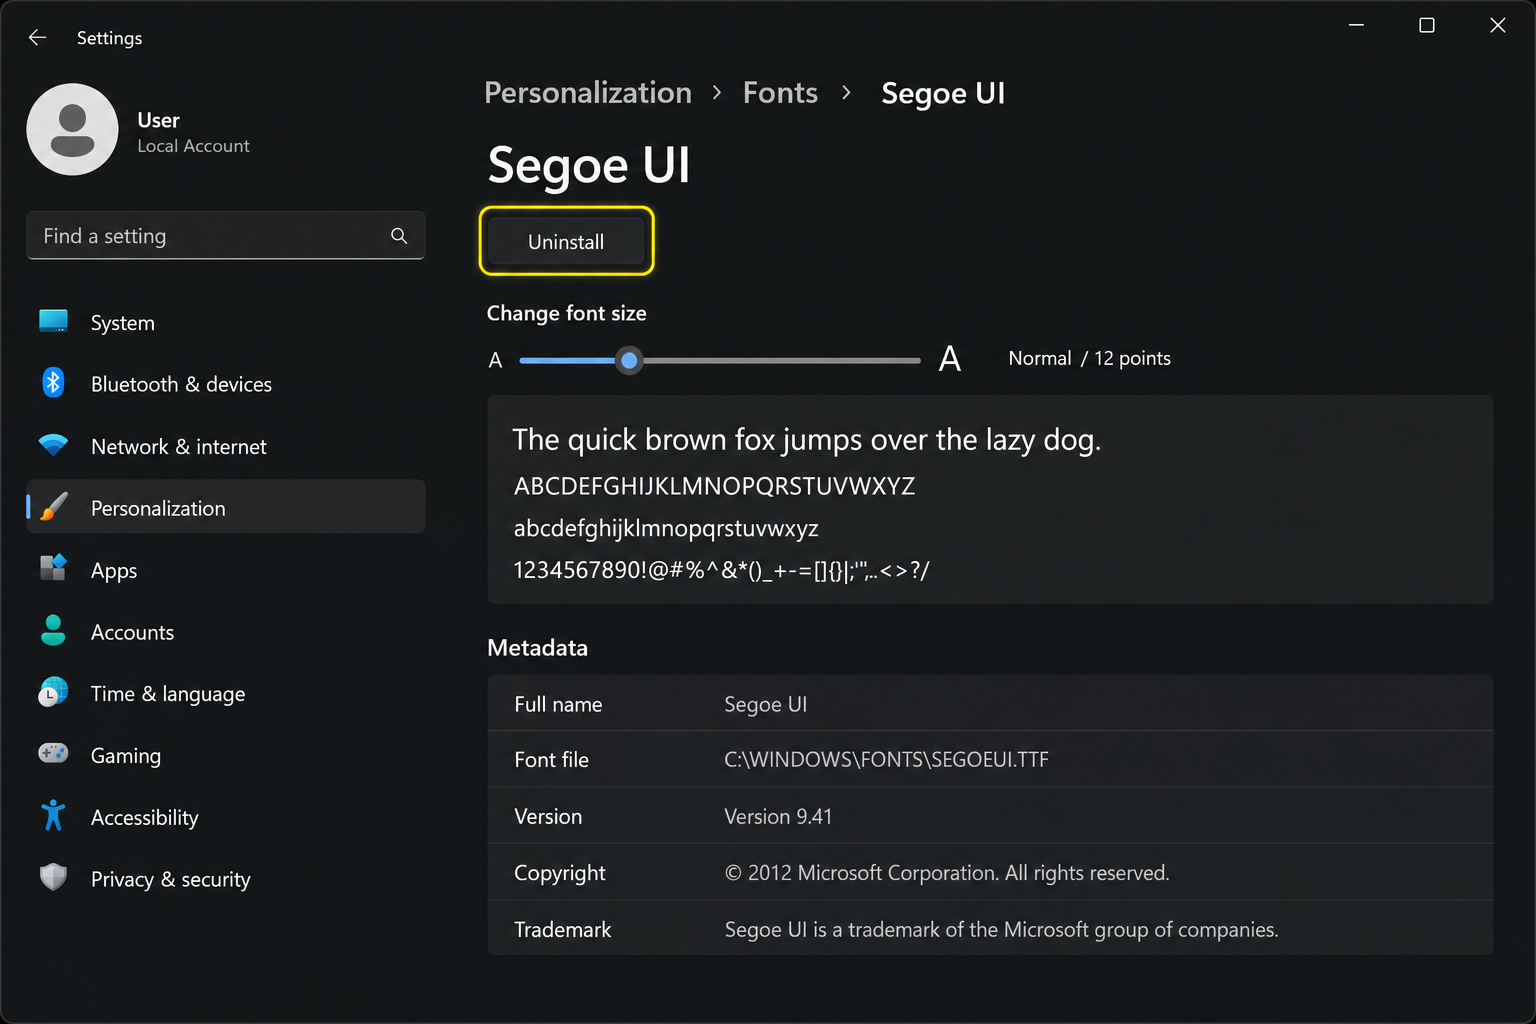
If the Uninstall button is greyed out, the font is a protected system font that Windows needs. Don’t force-delete those.
Fix #2: Delete fonts via Control Panel
- Press
Windows + R, typecontrol fonts, and press Enter. - Select the font(s) you want to remove. Hold
Ctrland click to select multiple fonts. - Press
Deleteon your keyboard, or right-click and choose Delete. - Confirm the deletion when prompted.
You’ll need admin rights to delete fonts from C:\Windows\Fonts. Per-user fonts (installed without admin rights) live in C:\Users\<YourName>\AppData\Local\Microsoft\Windows\Fonts and can be deleted without elevation.
Back up before you delete. Copy any fonts you’re unsure about to a folder like
D:\FontBackup\before removing them. Reinstalling a font you deleted by mistake can be a hunt if you don’t have the original file.
How to Hide Fonts Without Deleting Them
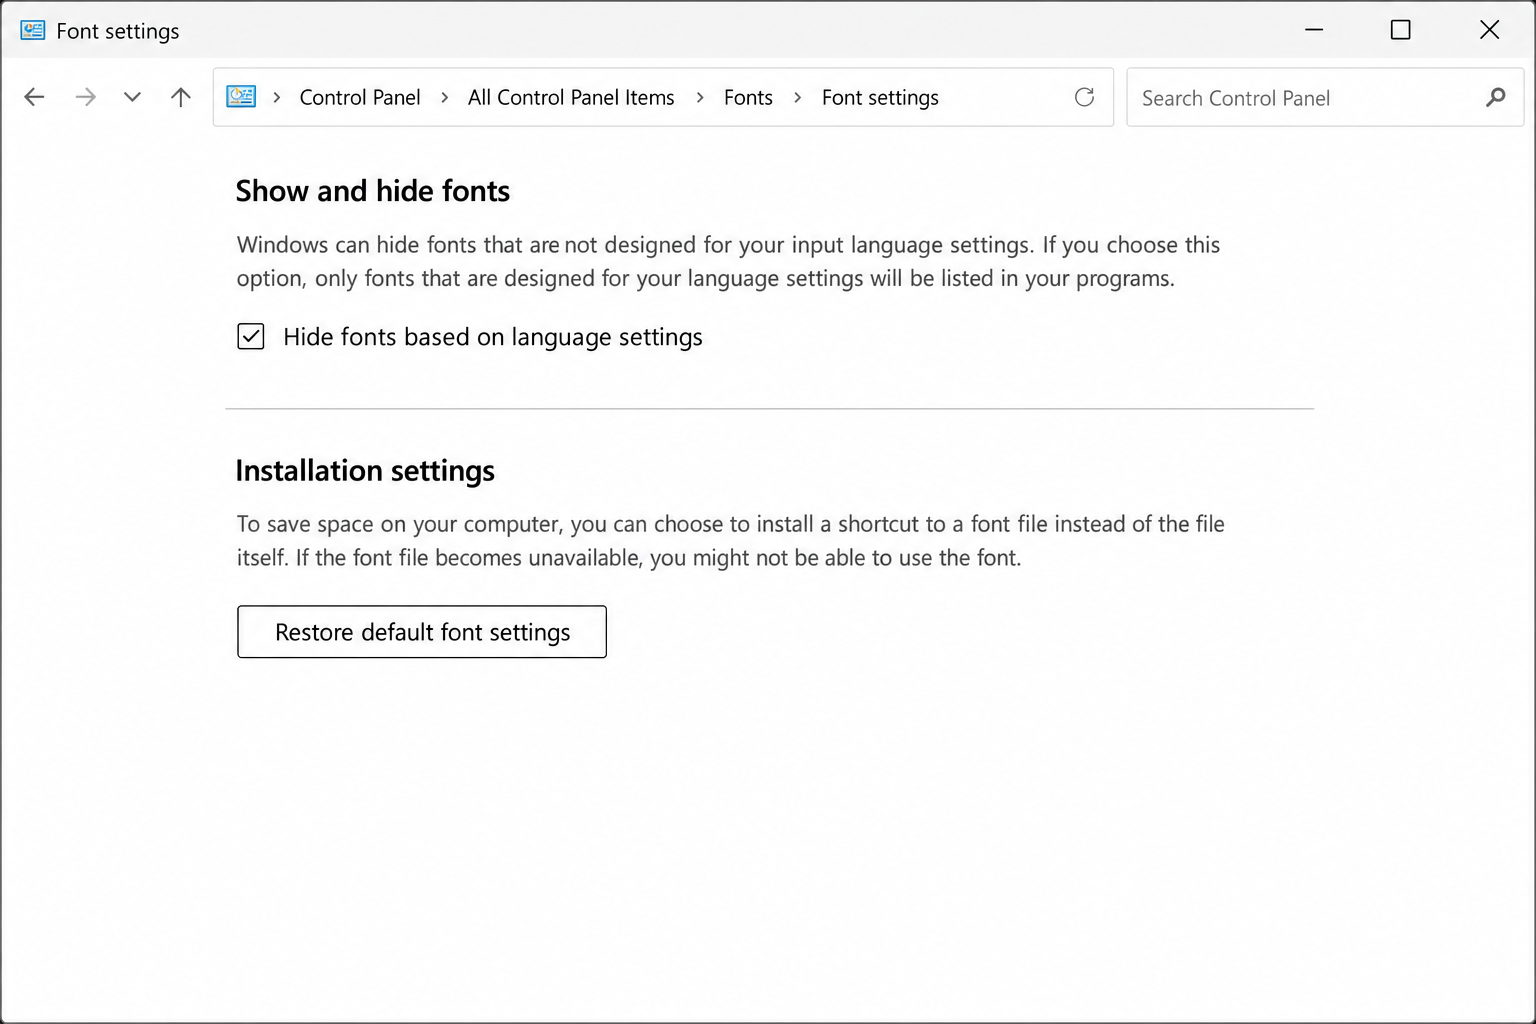
Fix #3: Hide fonts based on language settings
If your font list is bloated mainly by languages you don’t use (CJK, Indic, Arabic, etc.), Windows can hide those automatically without uninstalling anything.
- Press
Windows + R, typecontrol fonts, and press Enter. - In the left pane, click Font settings.
- Check the box labeled Hide fonts based on language settings.
- Click OK.
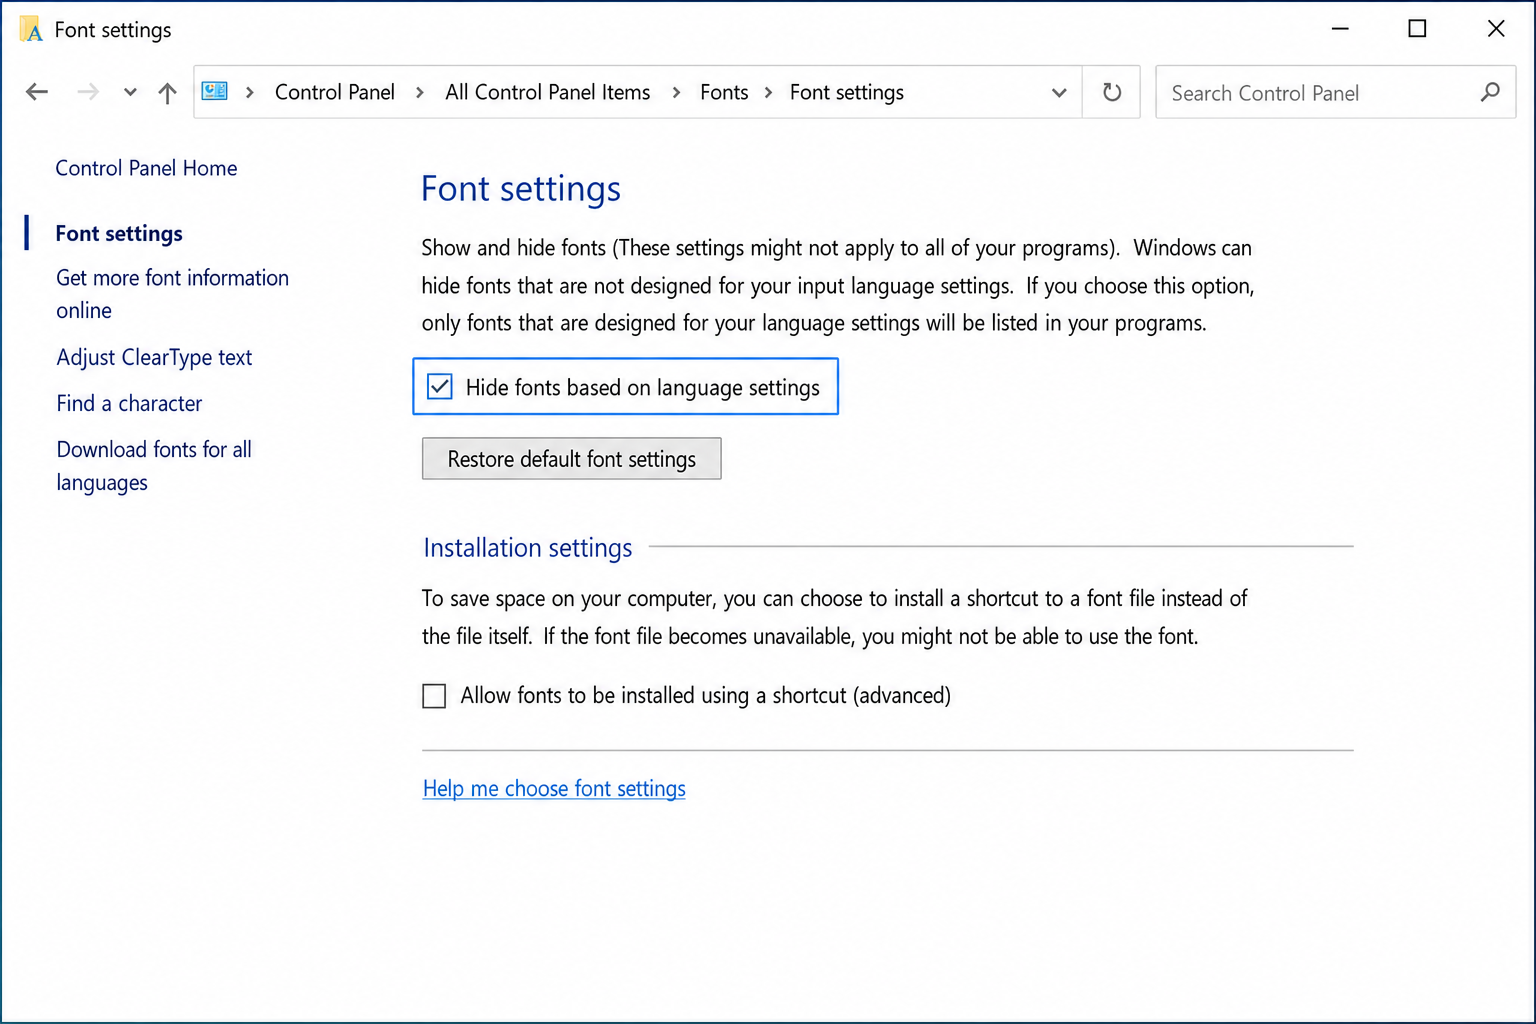
Apps that respect this setting will show a significantly shorter font list. The fonts are still installed, they’re just hidden from pickers.
How to Reset Fonts to Windows Defaults
Fix #4: Use Restore Default Font Settings
If your font list is a mess and you want to start fresh, Windows has a built-in reset option.
- Press
Windows + R, typecontrol fonts, and press Enter. - In the left pane, click Font settings.
- Click Restore default font settings.
- Click OK to confirm.
This restores Windows’ default font visibility and language-hiding settings. It does not reinstall fonts you’ve already deleted from disk, it only resets which fonts are shown or hidden. If you’ve permanently deleted system fonts and things look broken, move on to Fix #5.
Fix #5: Restore missing or corrupted protected system fonts with SFC
If a Windows update removed or corrupted a protected Windows system font, System File Checker can restore it.
- Click Start, type
cmd, right-click Command Prompt, and select Run as administrator. - Type the following and press Enter:
sfc /scannow - Wait for the scan to complete. It can take 10–15 minutes.
- Restart your PC when prompted.

SFC checks all protected Windows system files, including core system fonts, and replaces anything that’s been corrupted or removed. Important limitation: SFC only covers fonts that ship with Windows as protected system files. If the missing font was a custom, third-party, or app-bundled font (such as a typeface installed by Adobe Creative Cloud or a purchased font), SFC will not restore it. You’ll need to reinstall those from their original source: the font vendor, your Creative Cloud app, or your Office installer.
For Designers: Use a Font Manager Instead
If you have hundreds or thousands of fonts for client work and don’t want to permanently uninstall any of them, a font manager is the right tool. These apps let you keep fonts off the Windows system list until you actually need them, then activate them per project.
- NexusFont (free), lightweight, lets you create sets and enable/disable fonts without installing them system-wide
- FontBase (freemium), actively developed, supports tagging and collections; keep it updated to benefit from the latest bug fixes
- MainType (commercial), full-featured with OpenType support and diagnostics
- Suitcase Fusion / Connect Fonts (commercial), designed for Adobe workflow auto-activation
Using a font manager means your font picker in Word or InDesign only shows the fonts you’ve activated for the current project, which makes it dramatically more usable.
Common Font Problems in Windows 10 and 11
“My fonts changed after a Windows update”
Post-update font problems almost always fall into one of three categories. Identify your symptom first, then follow only that fix path, jumping straight to SFC is the wrong move if the real culprit is a stale app cache or a changed font variant.
Symptom 1: The font is completely missing from Settings > Personalization > Fonts
- If it was a protected Windows system font (e.g., Segoe UI, Arial, Courier New): run
sfc /scannowfrom an elevated Command Prompt as described in Fix #5. SFC will restore it automatically. - If it was a third-party, purchased, or app-bundled font (e.g., installed by Adobe Creative Cloud or a font vendor): SFC will not help. Reinstall the font from its original source: your Creative Cloud app, the font vendor’s site, or your Office installer.
Symptom 2: The font is present in the font list but looks wrong or renders differently
- This is usually font substitution — a specific weight, style, or format variant changed after the update. Open the font’s detail page in Settings > Personalization > Fonts and check whether all expected styles (Regular, Bold, Italic, etc.) are still listed.
- If a style is missing, reinstall the font from its original source to restore the full family.
- Do not run SFC for this symptom, the font file itself is present and SFC won’t fix metric or variant changes.
Symptom 3: The font looks wrong only in one specific app (e.g., Photoshop, Illustrator, Word)
- This is almost always a stale font cache in that app, not a Windows-level problem. Do not run SFC.
- Adobe apps: Quit all Creative Cloud applications, then delete the font cache files in
C:\Users\<YourName>\AppData\Roaming\Adobe\<AppName>\CT Font Cache, and relaunch the app. - Office apps: Go to Settings > Apps, find your Office installation, and choose Modify > Quick Repair. This clears the Office font cache without a full reinstall.
- If clearing the cache doesn’t help, check whether the font was installed per-user while the app runs elevated — see the next section.
“A font I installed isn’t showing up in my app”
This usually comes down to one of three things:
- The font was installed per user but the app is running as a different user or with elevated privileges. Reinstall it using Install for all users (right-click the font file in File Explorer)
- The app needs to be restarted after font installation to refresh its font list
- The font name in the app doesn’t match what you expect. Search for it in Settings > Personalization > Fonts to confirm the exact family name
Conclusion
For most people, Fix #3 (hiding fonts by language) or Fix #4 (restoring default font settings) clears up the clutter without any permanent deletions. If you’re a designer managing hundreds of project fonts, the built-in Windows tools aren’t the right fit — that’s when a dedicated font manager like NexusFont or FontBase makes sense, because it lets you activate fonts only when a project needs them rather than keeping everything registered system-wide at all times. If protected Windows system fonts went missing after an update, sfc /scannow is the fastest path to getting them back, just remember it won’t recover custom or third-party fonts, which need to be reinstalled from their original source.