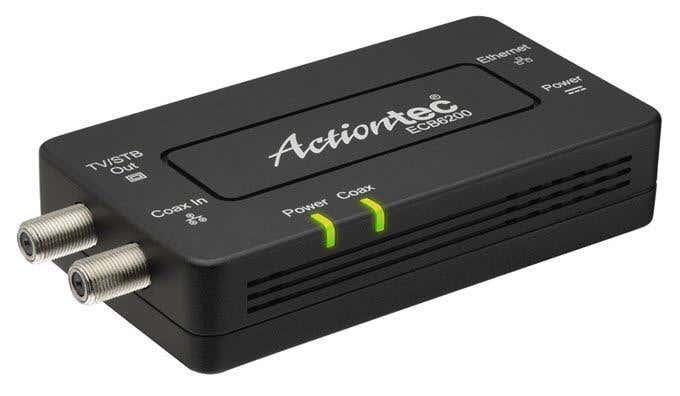
I recently purchased the Actiontec MoCA 2.0 Ethernet to Coax adapter because my entire house is wired for coax and I recently upgraded to the FIOS Quantum Gateway that also supports MoCA 2.0.
Using this adapter, I could increase the local data transfer rate on my LAN to somewhere around 400 Mbps or 50 MB/s as compared to the previous speed I was getting with MoCA 1.1, which was around 100 Mbps or 12.5 MB/s.
I also recently wrote a post on my other site explaining how upgrading to the new Quantum Gateway is a good move if you have FIOS for your Internet.
Even though this is a great adapter and one of the very few out there to support MoCA 2.0, it also has some issues. If you read the reviews on Amazon, it’s either fabulous or it drops frequently and has to be restarted.
Luckily, Actiontec has been on top of this with new firmware updates. Unfortunately, I could not find one site that could tell me how to update the firmware on the adapter! Finally, I got in touch with the customer service reps at Actiontec and learned the procedure.
In this article, I’m going to walk you through the process of connecting to the web interface on the Actiontec ECB6200 adapter and updating the firmware. In addition, I’ll also provide a download link for the latest firmware that they provided me. This procedure may or may not work on the ECB6000.
Upgrade ECB6200 Firmware
To get started, you have to disconnect the coax cable from the adapter. Once you do that, go ahead and plug one end of an Ethernet cable into the adapter and the other end into a Windows PC.
Now on your Windows PC, we have to change some network settings so that you can connect to the web interface on the adapter. To do this, open Control Panel and click on Network and Sharing Center. Make sure you change from Category view to Small or Large icons.
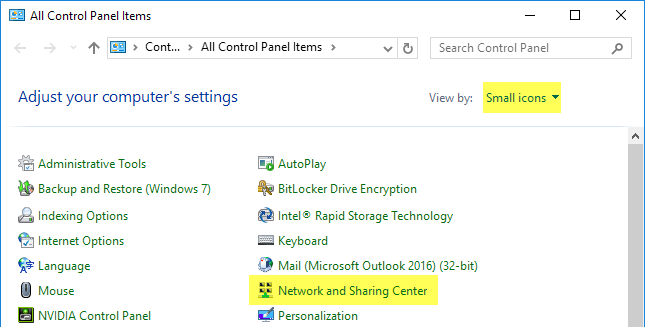
Now go ahead and click on Change Adapter Settings in the left hand side menu.
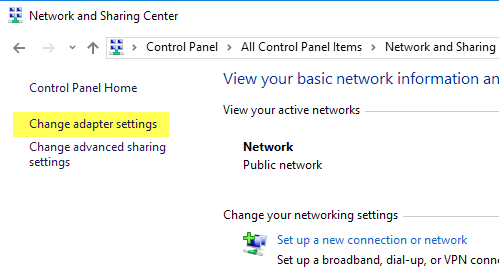
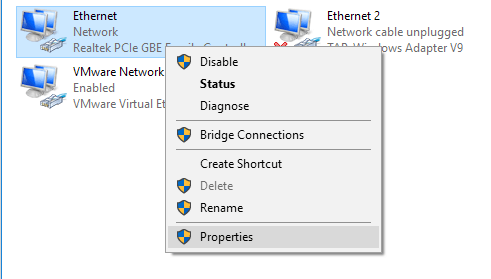
Right-click on Ethernet or Local Area Connection and choose Properties.
Select Internet Protocol Version 4 (TCP/IPv4) from the list and then click on the Properties button.
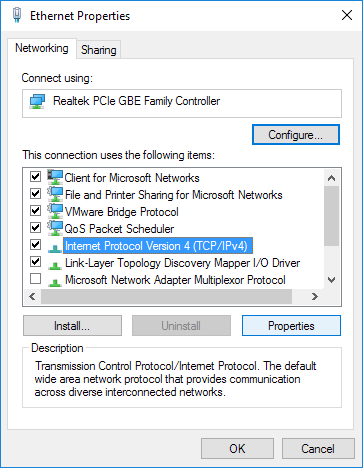
Go ahead and select the Use the following IP address radio button and type in the following numbers as shown below. For the IP address, I chose 192.168.144.5, but you can choose anything for the last number as long as it does not end with .30 or .1.
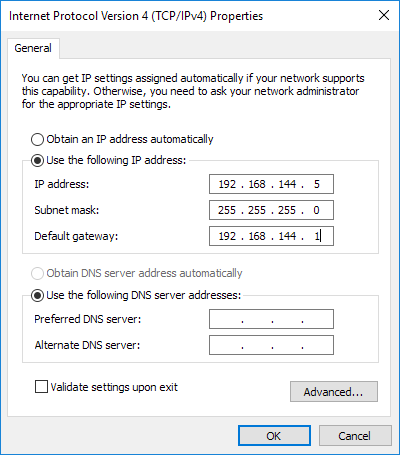
Make sure to set the default gateway to 192.168.144.1. You do not have to enter any numbers for the DNS servers. Click OK and then OK again to get back to the Control Panel. Now open a web browser and type in the following IP address: 192.168.144.30.
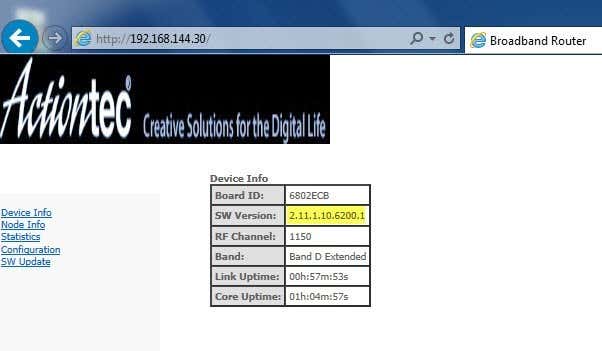
If everything is configured properly, you should see a simple Actiontec webpage with info about the adapter. Where it says SW Version is the current firmware version for the Actiontec adapter. The latest version as of this writing is 2.11.1.10.6200.1.
ecb_flashimage_2_11_1_10_6200_1
You can download the latest flash version from the link above. This was sent directly to me by Actiontec and I also made sure to scan it using VirusTotal to make sure it was clean. Now click on SW Update and click the Browse button to select the .BIN file. You obviously have to unzip the contents first before trying to upload the file.
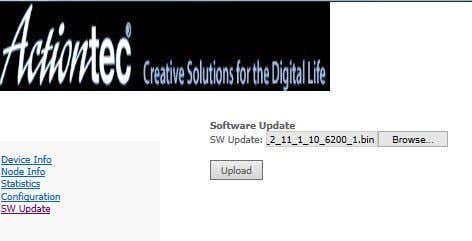
Click the Upload button and it will start uploading. You’ll see the percent uploaded and once it reaches 100%, it should say Done and Rebooting. Note that it doesn’t actually refresh the screen at this point. You should wait a minute or so and then simply try to refresh the webpage again.
For me, I had to update a couple of these and ran into a few issues. Firstly, it would sometimes get stuck at a certain percentage when uploading. The first time I tried, it got to 87% and then just sat there. Eventually, I unplugged it, plugged it back in and then tried again. It did eventually work.
On another one, the update went fine, but when I connected it back in the location where I used it in my house, it would continuously power cycle. The power light would come up, then the coax light would come on and then the coax light would go out about two seconds later. The power light would then go out and back on again and then the same thing with the coax light. On that one, I had to press and hold the reset button for about 10 seconds after disconnecting all cables and that fixed the problem.
If you’re reading this post several months after the date it was written, be sure to contact them directly at 888-436-0657 or fill out this online technical support form to get the latest firmware version emailed to you. If you have any questions, feel free to comment. Enjoy!