There may come a time when you need to write a script or remotely connect to a PC and run a command to enable or disable the Windows firewall. For most IT environments, using Group Policy is the easiest way to configure the Windows Firewall on client computers.
It’s also the easiest way to add port exceptions for services such as HTTP, file sharing, software applications, and more. However, it’s also good to know how to configure the Windows Firewall from the command prompt just in case you have computers and servers that are not in Active Directory.
Manage Windows Firewall from Command Prompt
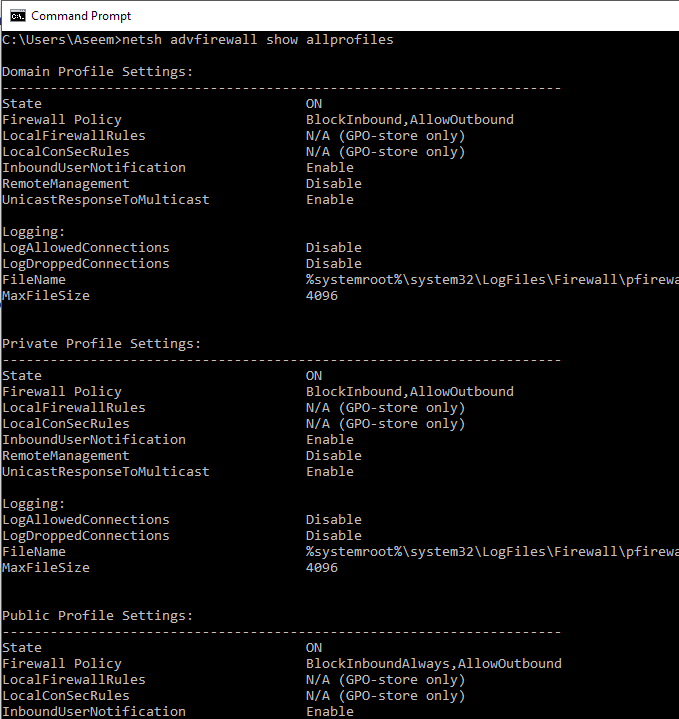
First, to see whether the Windows Firewall is enabled on a server or computer, type this command at the command prompt:
netsh advfirewall show allprofiles
Make sure you open an administrator command prompt (click on Start, type in CMD and then right-click on Command Prompt and choose Run as Administrator). You should get something similar to what is shown below:
By default, you should see three separate listings here: Domain profile settings, private profile settings and public profile settings. These three correspond to the three states you can place each network connection on your computer into. If you are connected to your home network and you chose the Home Network option, the Private profile settings will be applied.
State means if the firewall is turned on or off. The Firewall Policy tells you what inbound and outbound policies are being applied to each profile.
To disable the firewall for a specific profile, you would use the following command:
netsh advfirewall set privateprofile state off
The other options are currentprofile, publicprofile, domainprofile, and allprofiles. So if you wanted to disable the firewall completely, you would use allprofiles instead of privateprofile. To enable again, just put on at the end instead of off.
Open Port in Firewall using Command Line
Now what if you want to open a port in the firewall using the command line? That’s simple too!
Let’s say you want to open port 3389, which is for remote desktop in Windows. You would simply run this command:
netsh advfirewall firewall add rule name="Open Remote Desktop" protocol=TCP dir=in localport=3389 action=allow
The command is quite long, but it’s fairly easy to break down. You add a rule, give it a name, choose the protocol (TCP or UDP), choose the direction (In or Out), give it the port number and choose the action (Allow or Deny).
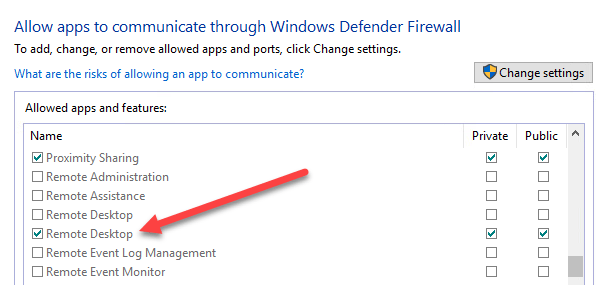
If you were to run this command, then go view the allowed apps in Windows Firewall, you would see that the Remote Desktop item is now checked:
If you need to open up a range of ports, just use a simple dash. For example, here I am opening ports 600o to 7000 for UDP outbound traffic:
netsh advfirewall firewall add rule name="UDP ports" protocol=UDP dir=out localport=6000-7000 action=allow
There are many more advanced commands you can use to manage all aspects of the Windows Firewall, so make sure to use the /? characters at the end of any command to see all the options and examples.
Related Posts
- Preparing for Windows 10 End of Support: Upgrading to Windows 11
- How to Fix a “This file does not have an app associated with it” Error on Windows
- How to Fix an Update Error 0x800705b4 on Windows
- How to Resolve “A JavaScript error occured in the main process” Error on Windows
- How to Fix the Network Discovery Is Turned Off Error on Windows

