As a professional blogger, I take a lot of screenshots on a daily basis. Most I use and then simply delete, but there are occasions when I need to save a screenshot for some future purpose. My main note taking app these days is OneNote and naturally I like to save my screenshots in a separate notebook there.
Depending on your version of OneNote and Windows, there are a couple of different ways you can get screenshots into your OneNote page. In this article, I’ll go through the different methods that I know of.
Add Screenshots to OneNote
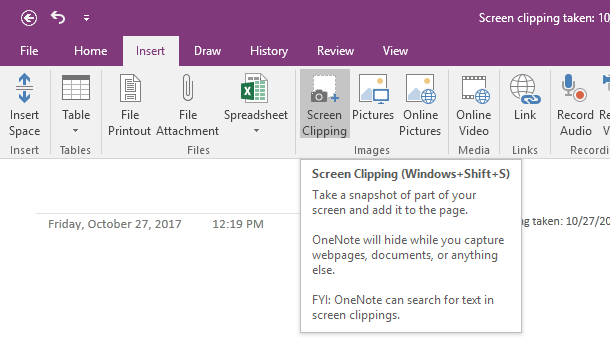
The first method and the one that is located in the ribbon interface is Insert Screen Clipping option. Click on the Insert tab and you’ll see a button called Screen Clipping.
When you click on the button, OneNote will disappear and you can capture any area on the screen by using the rectangular tool. When you let go of the mouse, the screenshot will appear on the page where your cursor was located.

You’ll also notice that it says you can use the keyboard shortcut WINDOWS KEY + SHIFT + S. This will work exactly the same as pressing the screen clipping button on all versions of Windows up to the Windows 10 Fall Creators update.
In the Fall Creators Update for Windows 10, the keyboard shortcut will let you take a screenshot, but it will automatically be added to the clipboard rather than being put into your OneNote page directly. So, you’ll have to manually do a CTRL + V to paste it in.
However, there is another keyboard shortcut for Windows 10 users, which is ALT + N + R. This shortcut will take your screenshot, add it to OneNote and also add the date and time the screen capture was taken.
Another way to take a screenshot and paste it into OneNote is to use the taskbar icon that shows up in the system tray. Firstly, it’s probably hidden in the extra icons section, which you can access by clicking on the up arrow.
![]()
Drag the purple icon with the scissors out from there and onto the main taskbar area. Once there, right-click on it, expand OneNote icon defaults and choose Take screen clipping.

Now all you have to do to take a screen clipping is click on the icon once. After you capture the screenshot, it will ask you where you want to save it.

Luckily, you can check the Don’t ask me again and always do the following option if you want your screenshots to go to the same place every time. If not, it might be better to choose Copy to Clipboard and then paste the screenshot into whichever page you want.
If the OneNote icon is missing from the taskbar altogether, you have to re-enable it. You can do that by right-clicking on the taskbar and choosing Taskbar settings. Then scroll down to Notification Area and click on the Select which icons appear on the taskbar link.
![]()
Scroll down till you find the Send to OneNote Tool option and turn it on.

Note that you can always take a screenshot of the entire screen by simply pressing the Print Screen button on your keyboard. The screenshot will be copied to the clipboard, which you can then paste into OneNote. That’s about all the ways you can get a screenshot into OneNote, so hopefully these tips will make you more productive. Enjoy!