If you’re creating a Word document and wish to add a gutter margin, you might be scratching your head. What’s a gutter margin? Where’s the gutter margin position? Do I really need a gutter margin? You have questions, we have answers.
We’ll walk you through everything you need to know about gutter margins in Microsoft Word.
What Is a Gutter Margin in Word?
A gutter margin is the space outside of the page margin on the left, top, or inside of the document. Its purpose is to provide extra space for binding documents such as physical books, manuals, or similar printed materials.
This added space ensures that your content remains intact with enough room for the binding.
Gutter Margin Size and Position
To determine the size for the gutter margin, check with the service that will bind the document as it may vary by company or the number of pages. If you’re doing it yourself, 0.5 inches is the average gutter margin.
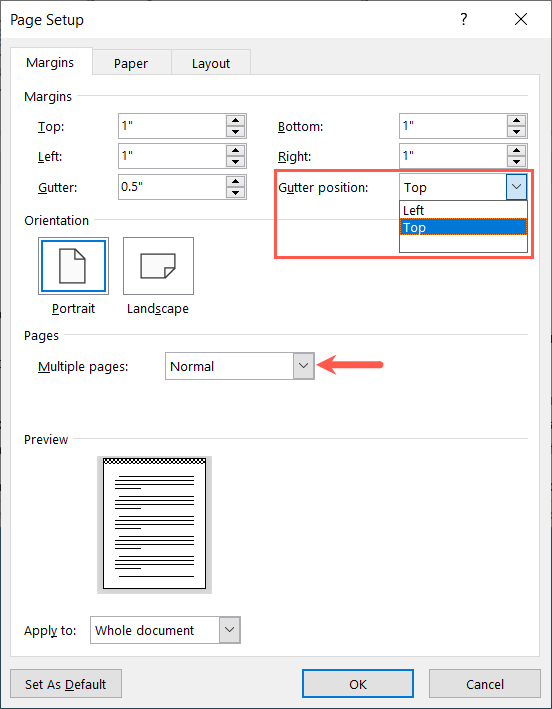
While you can set the gutter margin size you need in Word, you can only choose its position when you use the Normal page setting. This allows you to pick the left or top for the gutter margin.
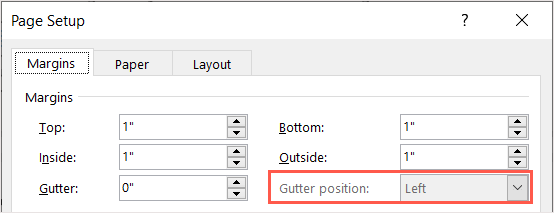
If you use the Mirror Margins, 2 Pages per Sheet, or Book Fold setting, you can still add the gutter margin size, but the position is on the left or inside by default. You’ll also notice that the Gutter position setting is grayed out for these document types.
Gutter Margin Feature
The gutter margin feature is available in the Word desktop application on Windows and Mac. While Word on the web and the Word mobile apps support the feature if you add it on the desktop, they do not provide the ability to add or adjust gutter margins.
When Do You Need a Gutter Margin?
As mentioned, you should use a gutter margin for printed items that are bound like books, manuals, booklets, catalogs, and related materials.
You may also add a gutter margin if you plan to print and bind the document using a ring, spiral, comb, or similar binding method. You typically see items such as training materials, study resources, portfolios, and legal documents bound this way.
The bottom line is that for any document you plan to bind, you should add a gutter margin.
How to Add a Gutter Margin in Word
You can add a gutter margin in the Word desktop application on Windows and Mac the same way.
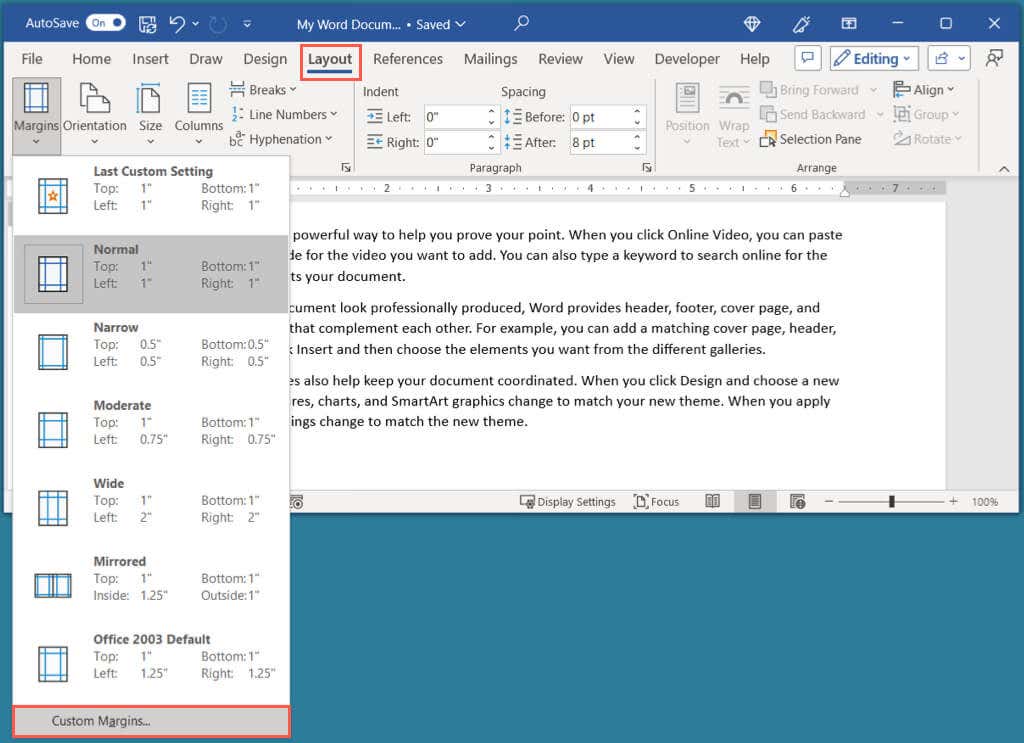
- With your document open in Word, go to the Layout tab.
- Select the Margins drop-down menu in the Page Setup group and choose Custom Margins at the bottom.
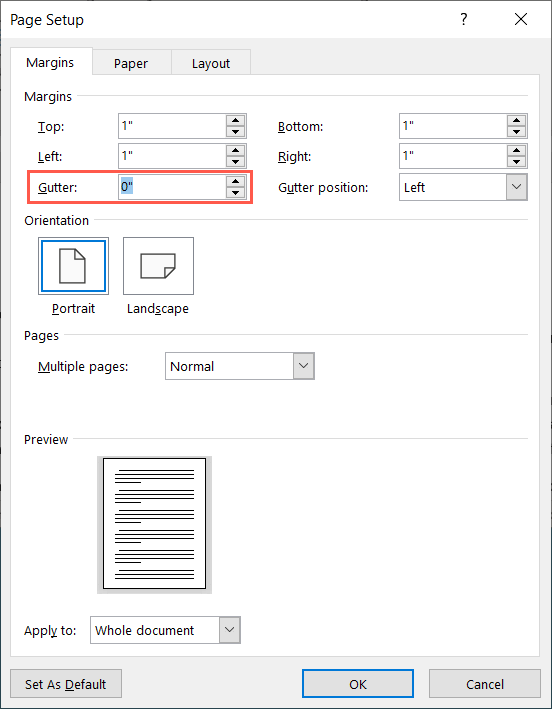
- In the Page Setup dialog box, confirm you’re on the Margins tab.
- Use the Gutter setting in the Margins section to set the size for the gutter margin.
- If you’re using Normal in the Multiple Pages drop-down menu, you can also choose the Gutter position. Pick from Left or Top.
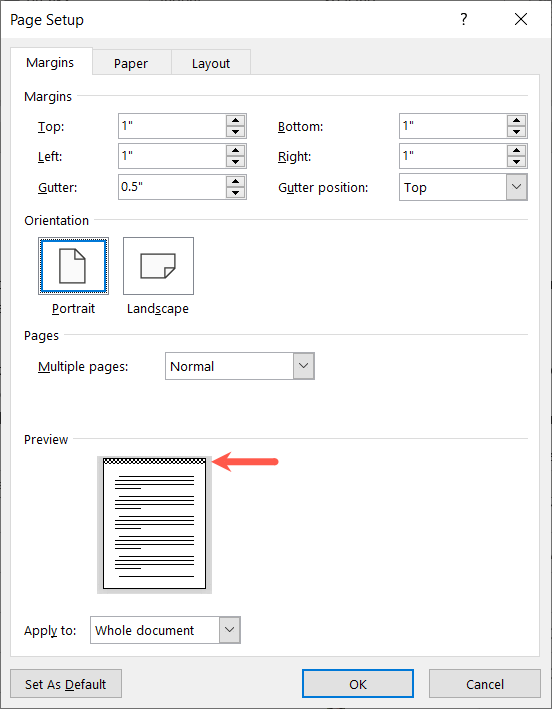
- As you make your adjustments, you’ll see the Preview near the bottom on Windows and the right side on Mac. The gutter margin displays in a black and white checkered pattern.
- Select OK when you finish.
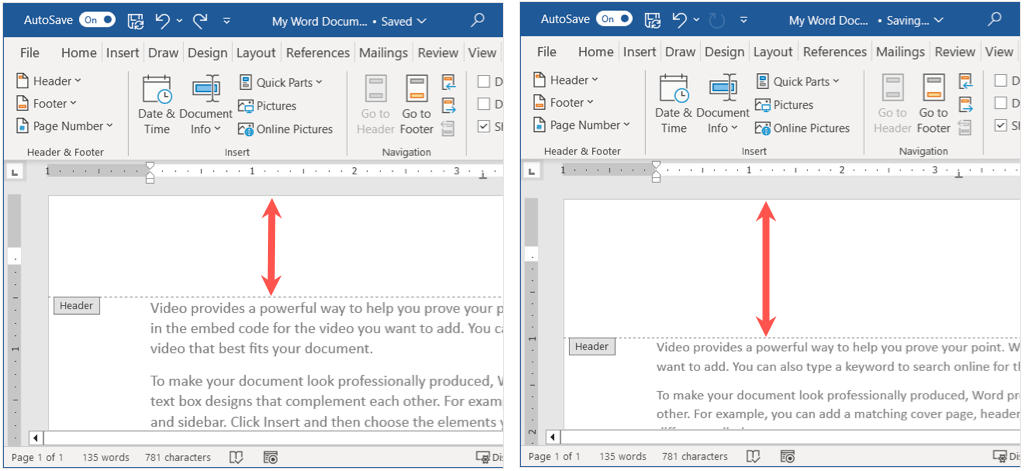
When you return to your document, you’ll notice the addition of the gutter margin outside the margin.
In the screenshot below, you can see our document before (left) and after (right) adding a top gutter margin. You’ll notice extra space above the Header section, or top margin.
Remove a Gutter Margin Word
If you need to remove the gutter margin after you add it, this is easy by returning to the margin settings.
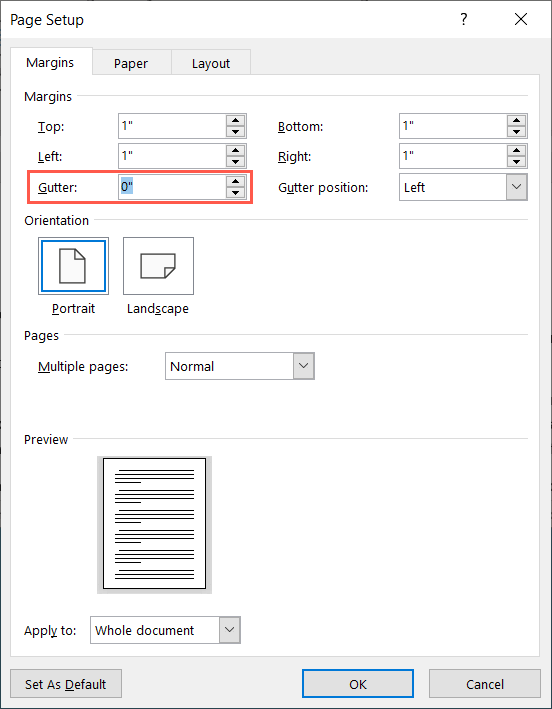
Head back to the Layout tab, open the Margins drop-down menu, and pick Custom Margins. In the Page Setup box, set the Gutter size to “0” and select OK to save the change.
To make sure your printed document is easy to read and the words aren’t too close to the binding, simply add a gutter margin in Word. For more help with your document, look at how to insert page numbers in Word as well as in Google Docs.
