Microsoft Word lets you include signatures in your documents, providing an element of authenticity and professionalism. Adding your signature can make your work stand out and leave a memorable mark on the reader. Or it can even be used to sign a legal document.
Word offers various ways to insert signatures into your documents, making the process relatively straightforward. Word also allows you to add a signature line to the document, giving it a more professional touch.
Add a Signature Line
A signature line is a placeholder where you or others can insert a signature. Word makes it simple to create a dedicated signature line. Here’s how.
- Open Word and place your cursor on the location of the document where you’d like to add the signature line.
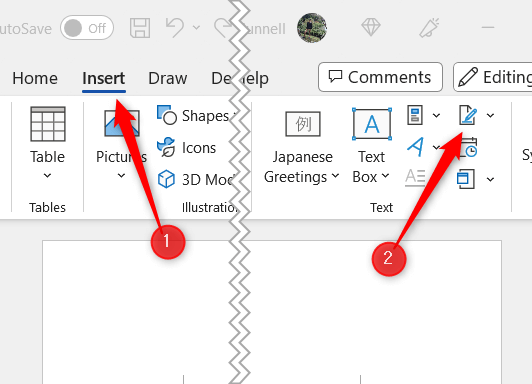
- Click the Insert tab in the ribbon.
- In the Text group, click Signature Line.
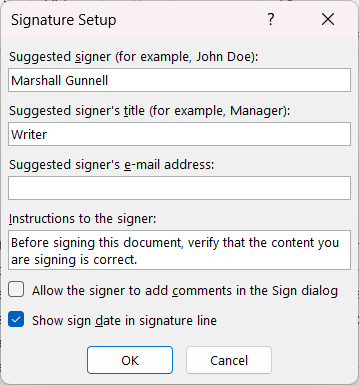
- The Signature Setup dialog box will appear.
- Fill in the required fields, such as the signer’s name, title, and email address. You can also choose to add optional instructions for the signer by checking the Allow the signer to add comments in the Sign dialog box.
- Click OK to insert the signature line into your document.
The signature line will appear at your cursor’s current location.
Upload a Hand-Written or Digital Signature
Word allows you to add a hand-written or digital signature to the document. This option is ideal for those who prefer the authenticity of a traditional signature or have a stylized digital signature they’d like to use.
- First, save a clear image file of your hand-written or digital signature on your computer. They should be in a supported format, like PNG, JPG, or BMP.
- Open Word and place your cursor on the location of the document where you’d like to add the signature.
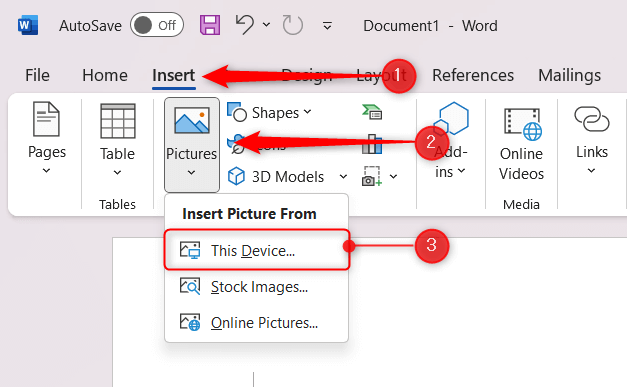
- Click the Insert tab in the ribbon, and then in the Illustrations group, click Pictures.
- Choose This Device from the drop-down menu.
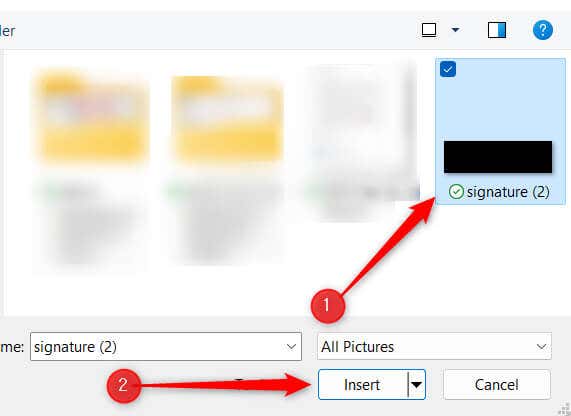
- Navigate to the location of the signature file on your computer, select it, and then click Insert.
The signature is now added to the document.
Add an Encrypted Digital Signature
Word also supports the use of encrypted digital signatures, which provide an additional layer of security and authenticity to your documents. These signatures utilize a unique digital ID to verify the signer’s identity and help protect the document’s integrity by ensuring that it hasn’t been tampered with after signing. You’ll need to acquire a digital certificate from a Microsoft Partner such as GlobalSign, or just create one yourself.
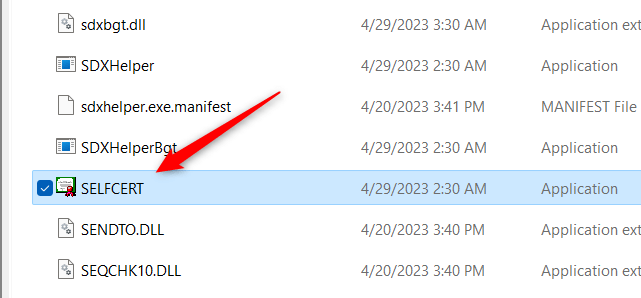
- On your computer, navigate to the location where Office was installed. That generally (but not always) looks something like this: C:Program FilesMicrosoft OfficerootOffice16
- Double-click the SELFCERT.EXE application to open it.
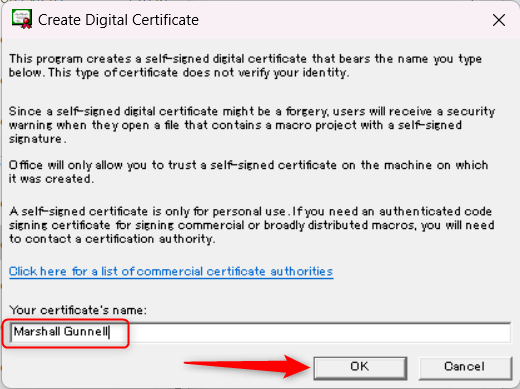
- The Create Digital Certificate window will appear. Enter your name in the box under Your Certificate’s Name and click OK.
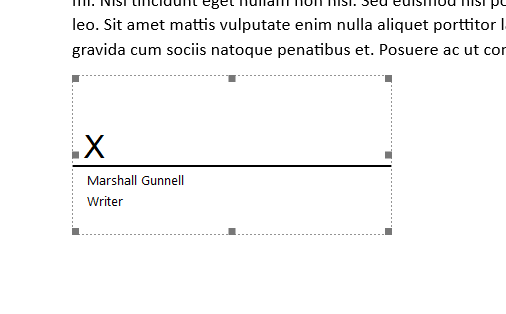
- You’ll get a success message. Return to your work document and double-click the signature line.
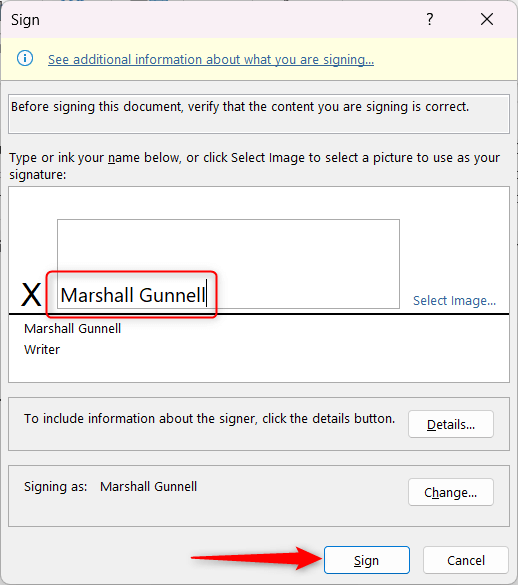
- The Sign window will appear. Type, draw, or add an image of your signature in the signature box, and then click Sign.
Your signature is now added to the signature line in the document. If the document is edited in any way, the signature will become invalid.
Write Your Signature Directly in Word
If you have a touchscreen, you can use a Stylus to sign your name directly in Word. If you don’t have a touchscreen, you can just use your mouse or touchpad.
- Open Word and place your cursor on the location of the document where you’d like to add the signature.
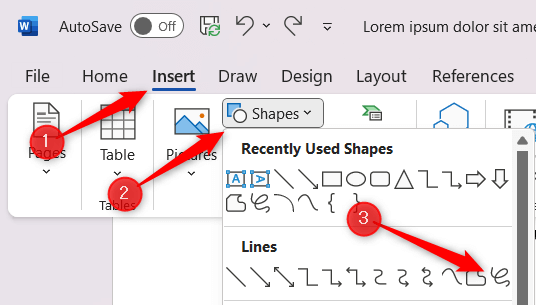
- Click the Insert tab in the ribbon.
- In the Illustrations group, click Shapes.
- Select the Freeform: Scribble tool, which is located under the Lines section, from the drop-down menu. Your cursor will change to a small pencil icon.
- Click and hold your left mouse button, or use the Stylus on your touch screen to draw your signature.
Once you’ve completed your signature, release the mouse button or lift your Stylus from the touch screen. Your signature will appear as a shape in the document.
