One of the best ways to display your data with emphasis or clarity is to add borders in Excel. You can apply and customize borders in a variety of ways in Microsoft Excel to suit your needs and your data.
You have a few easy ways to add borders in Excel and then customize the line weight, color, and position. Let’s look at how to use each one.
Use the Borders Button and Menu
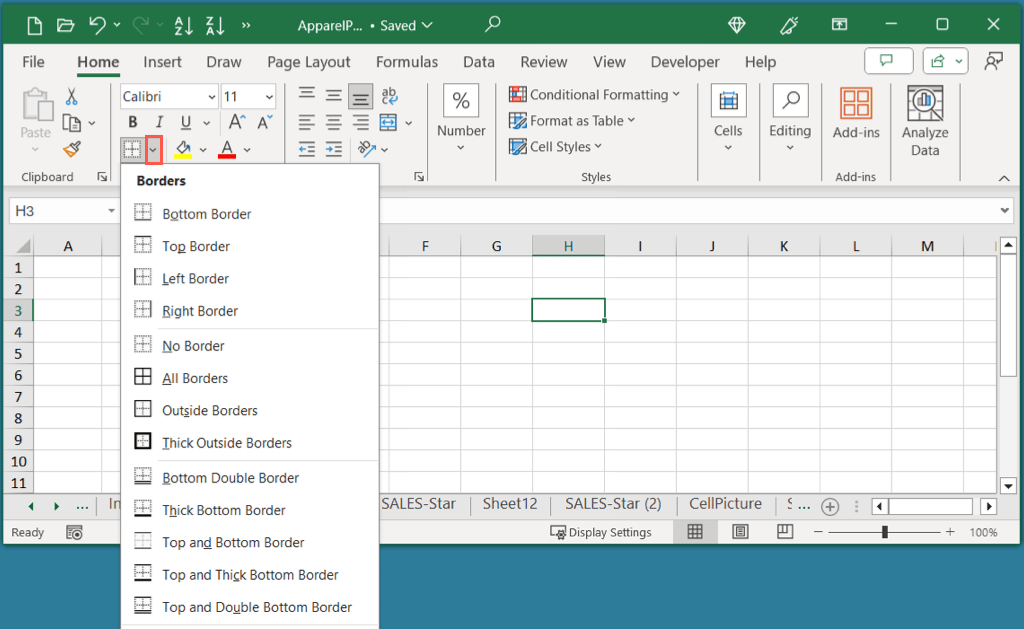
Probably the simplest way to add cell borders is using the Borders button. This option lets you quickly apply a top, bottom, outside, or double border using the default line style and color.
- Select the cells by dragging your cursor through them. For the entire sheet, use the Select All button (triangle) on the top left of the worksheet.
- Go to the Home tab, use the down arrow next to the Borders button to see your available options, and choose the one you want.
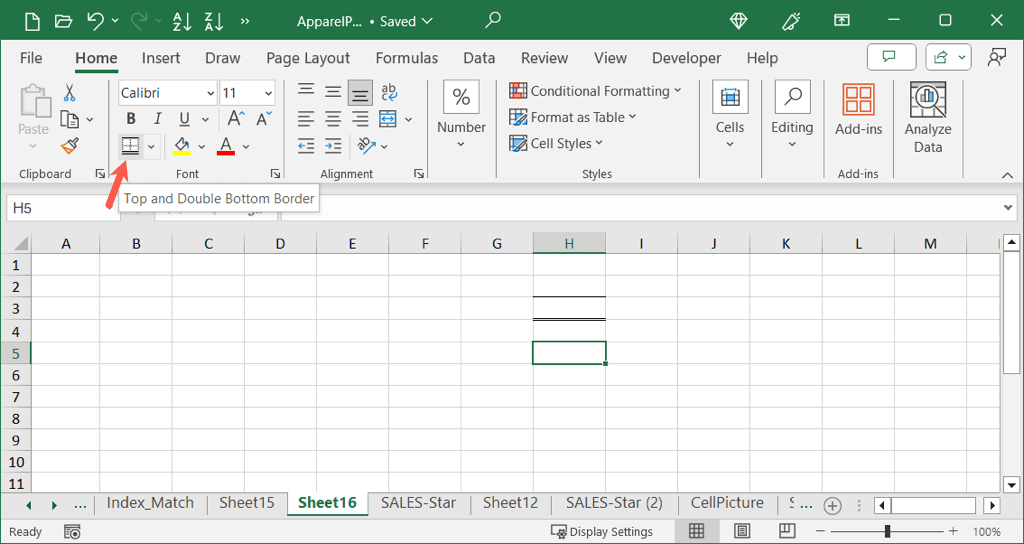
The nice thing about the Borders button is that it retains your previous selection. This means you can select another cell or range and just use the button to apply the same border as before.
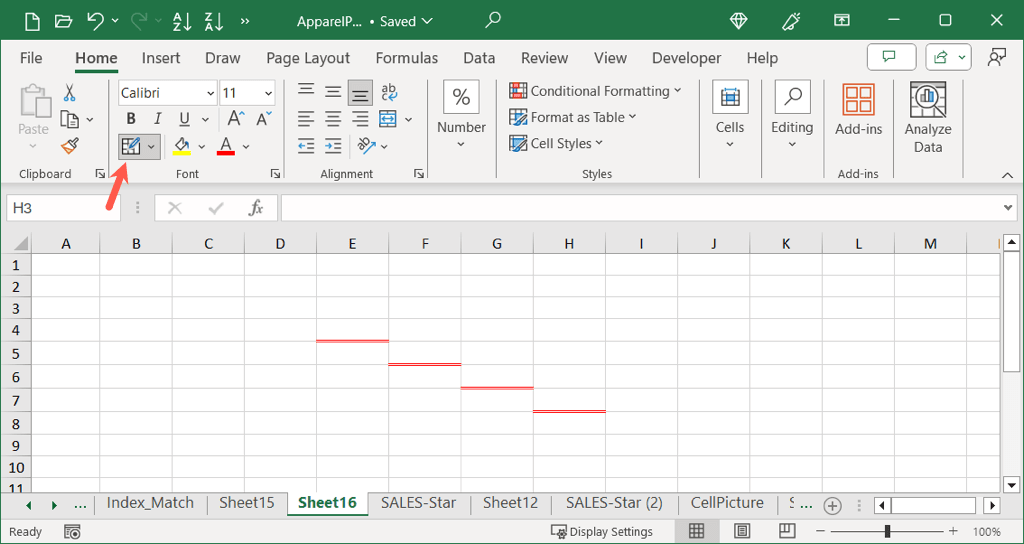
For example, here we applied the Top and Double Bottom Border. You can see that the same border style is available on the Borders button for reuse.
Draw Borders and Border Grids
Another way to add borders in Excel is by drawing them. With this method, you can insert borders without selecting the cell or range of cells first. Plus, you can place the border anywhere in the sheet you want.
Customize the Border Line
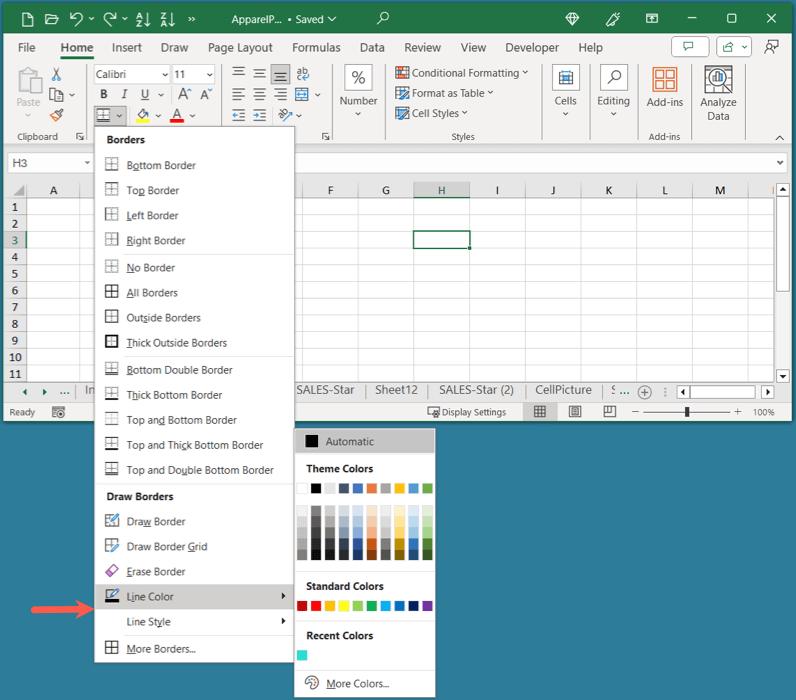
It’s best to choose the line color and style before you choose the Draw option you want to use. Otherwise, you’ll have to redo the steps and redraw the border.
- Go to the Home tab and use the arrow next to the Borders button to view the menu.
- In the Draw Borders section, use the pop-out menus for Line Color and Line Style to make your selections. For instance, you can choose a dotted line in red or a double line in blue.
Draw the Border
Once you customize the line, you can then draw your borders.
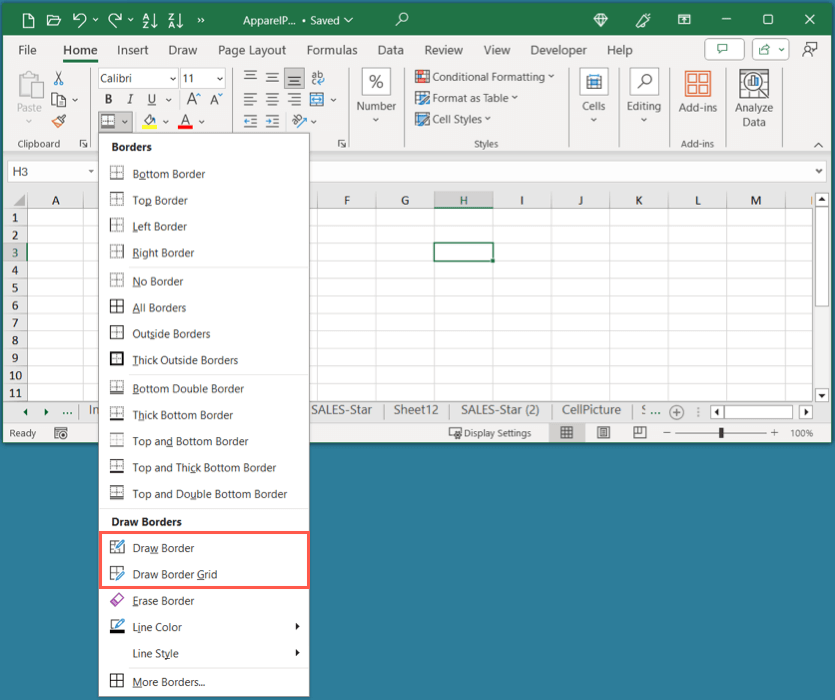
- Go to the Home tab and use the arrow next to the Borders button to view the Draw Border options in the menu.
- You’ll see Draw and Draw Grid which each work a bit differently.
- Draw: Add a single border line on any side of a cell.
- Draw Grid: Add inside and outside borders to a range of cells.
- Once you pick the Draw option you want to use, you’ll see your cursor change to a pencil icon. Simply select a cell edge (Draw) or the group of cells (Draw Grid) where you want the border.
- Continue this process until you have added all the borders you want.
- When you finish, do one of the following to turn off the Draw tool:
- Use your Escape key.
- Deselect the Borders button.
- Deselect the Draw option in the Borders menu.
Use the Format Cells Feature
One more way to add borders in Excel is by using the Format Cells feature. With this option, you can mix and match line colors and styles as well as add diagonal lines inside cells.
- Select the cell, range, or sheet where you want to apply the border.
- Do one of the following to open the Format Cells dialog box:
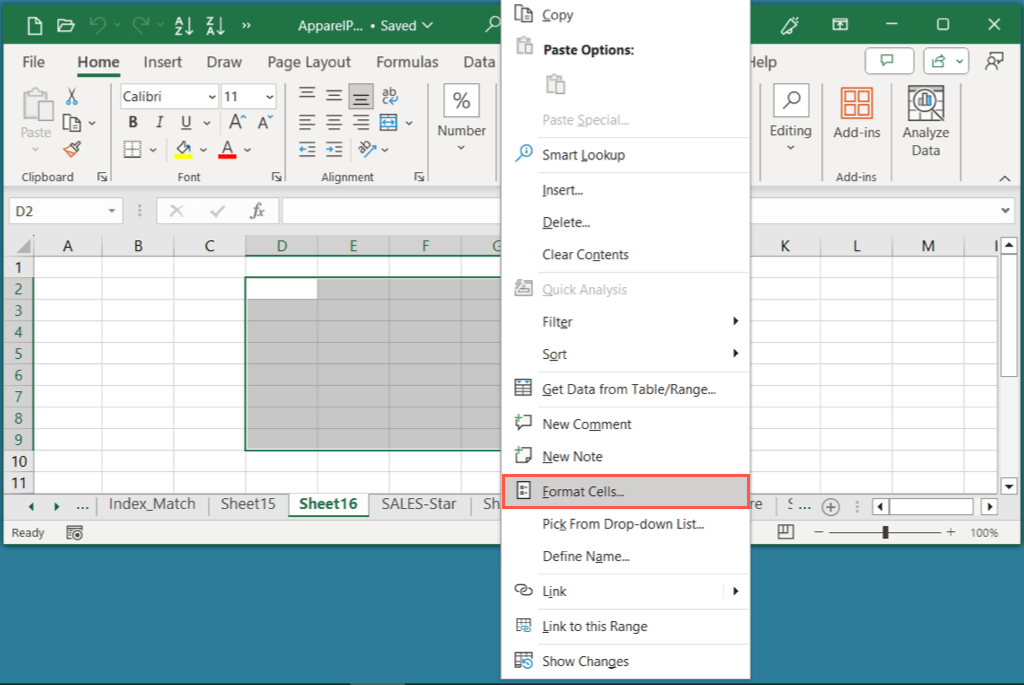
- Right-click and pick Format Cells.
- Go to the Home tab, open the Borders menu, and choose More Borders.
- Go to the Home tab and open the Font Settings using the tiny arrow in the lower right corner of the Font group.
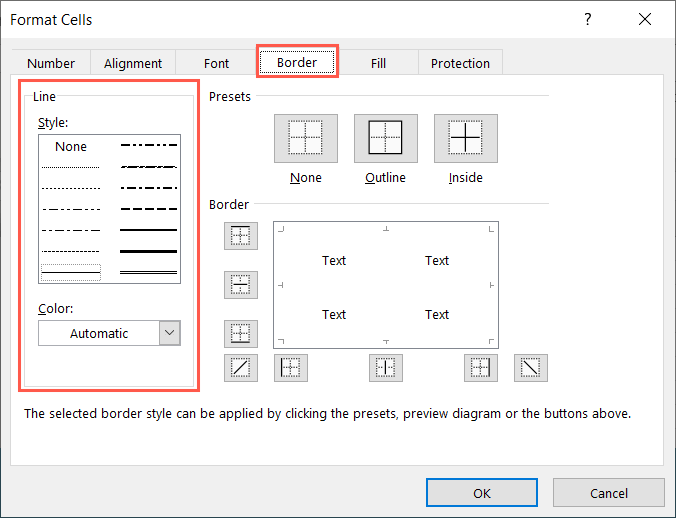
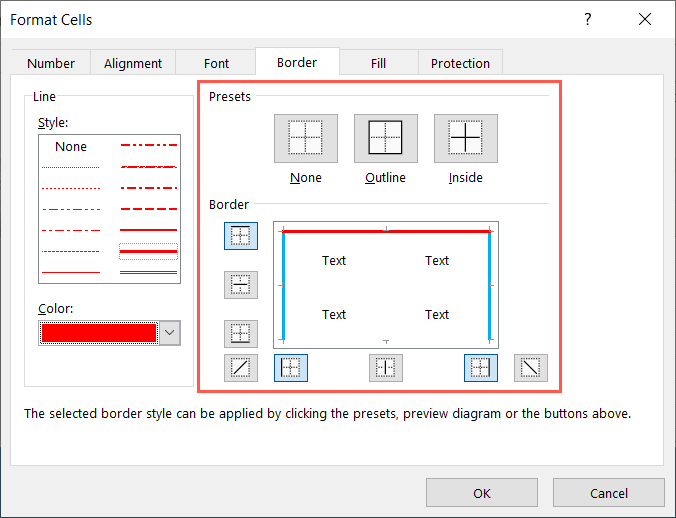
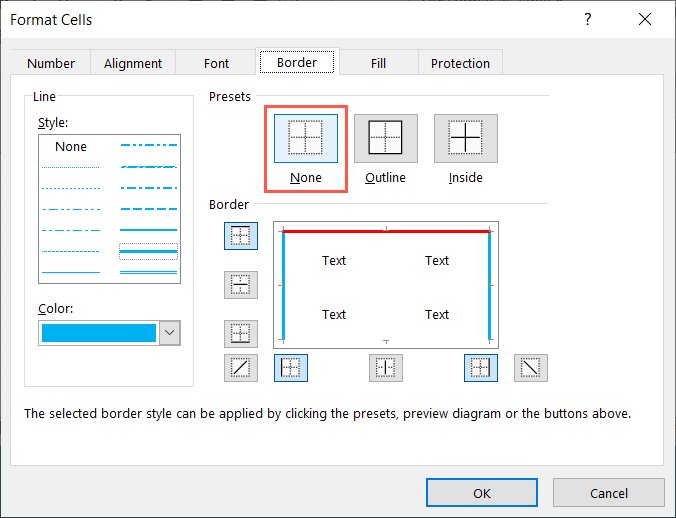
- When the Format Cells box opens, go to the Border tab. Then, use the options on the left to customize the line Style and Color.
- On the right, choose a preset at the top, or the position buttons beneath to add the borders where you want them. You’ll see your selections in the preview.
- When you finish, choose OK to apply the border to your selected cells.
Remove Borders in Excel
Just like adding borders in Excel using a variety of methods, you can remove borders in a few different ways. Because of the flexibility offered by Excel, you can mix and match options here too.
For example, if you draw a border, you can then remove it using the Format Cells feature or if you add a border with the Borders button, you can remove it with the eraser.
Do one of the following to remove a border in Excel:
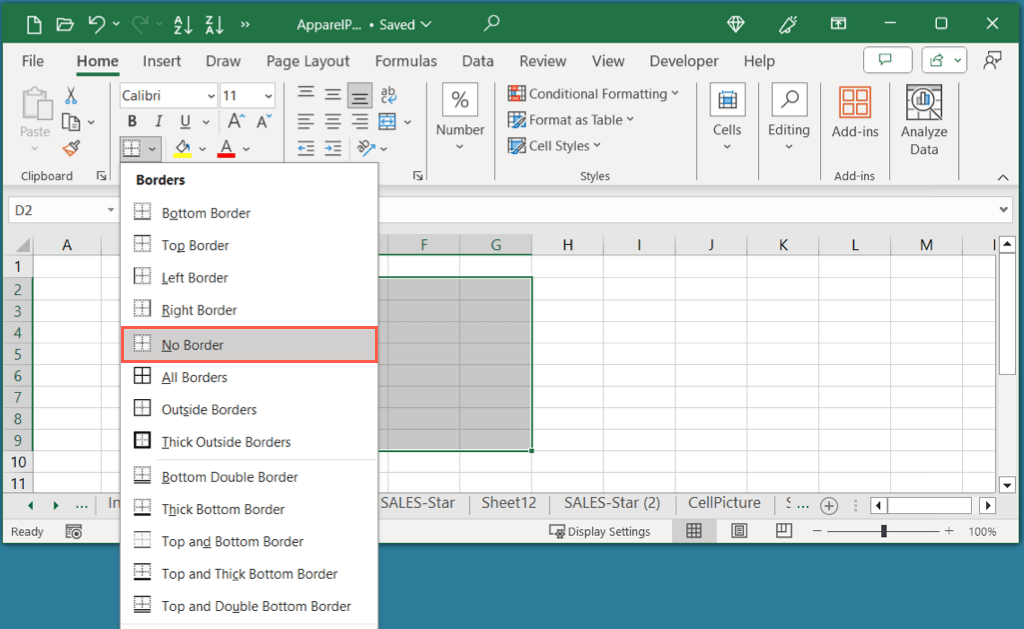
- Select the cell or range, go to the Home tab to open the Borders menu, and choose No Border.
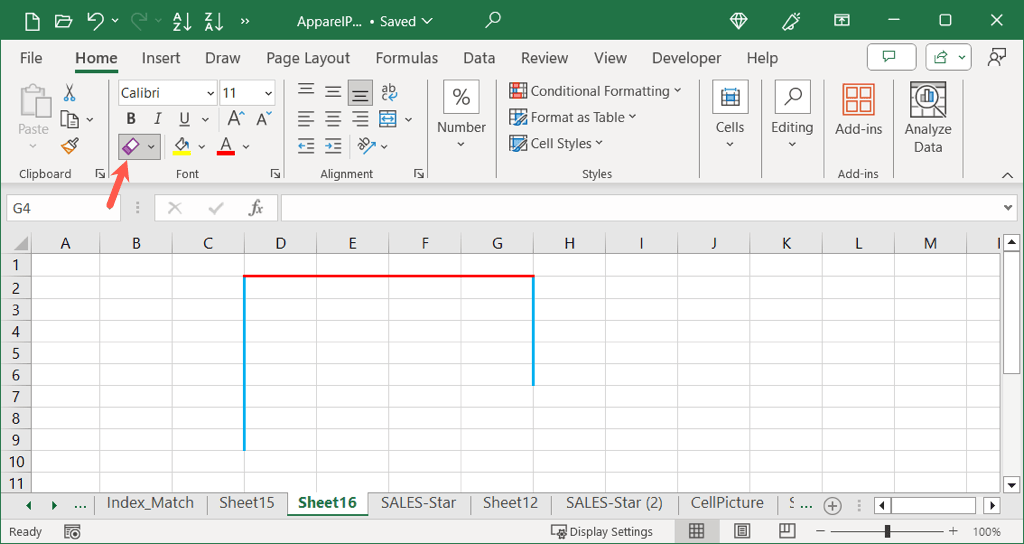
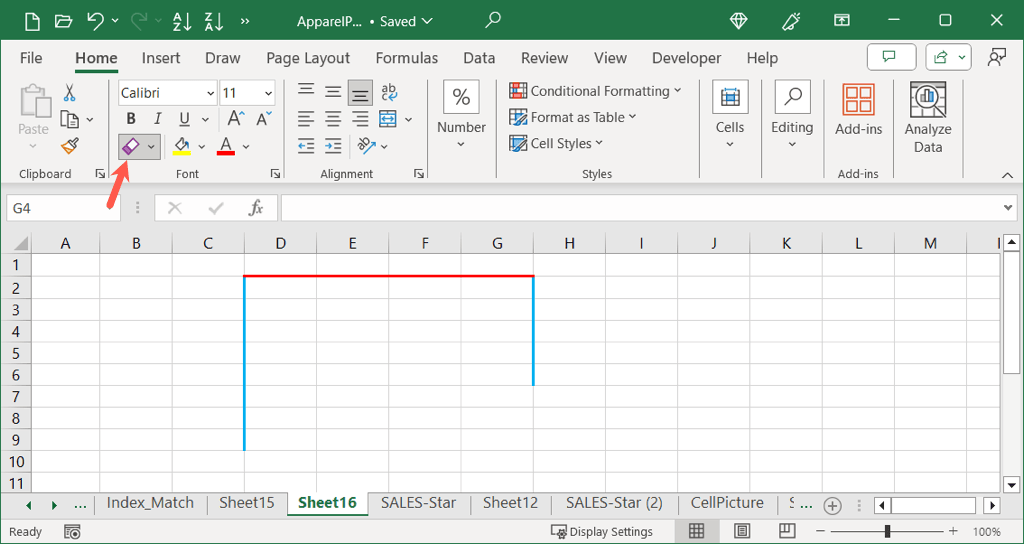
- Go to the Home tab, open the Borders menu, and choose Erase Border. Then, select each line on the cell(s) you want to remove. Turn off the eraser by deselecting it on the Borders button.
- Select the cell or range, right-click, and choose Format Cells. On the Border tab, choose None below presets at the top or remove the lines using the position buttons or directly on the preview. Choose OK to save your change.
By adding borders in Excel, you can make your data easier to read, apply organization, and create attractive sheets, especially when printing. Experiment with different types of border styles and colors that complement your dataset and your brand.
Now that you know how to add borders in Excel, take a look at our tutorial for using conditional formatting to automatically apply borders or colors to your spreadsheet.
Related Posts
Sandy Writtenhouse is a freelance technology writer and former Project, Department, and Program Manager. She turned her education, job experience, and love of technology into a full-time writing career. With all sorts of gadgets in her home and her hands, she seeks to help others make life easier through technology. Read Sandy’s Full Bio

