When you use dates in your Microsoft Excel workbooks, there may be a time when you want the serial numbers for those dates instead. You might use them in formulas or for calculations rather than the dates themselves.
We’ll show you how to convert dates to numbers, specifically serial numbers, in Excel. The method you use depends on how Excel stores dates in your worksheet; basically, how they are formatted.
Determine How Your Dates Are Formatted
Before you use one of the methods below to convert your date to a serial number, you need to determine how the date is formatted. By default, when you enter a date in Excel, it’s formatted as a date which is technically a number value. However, there may be instances where you enter, convert, or import dates that end up formatted as text values.
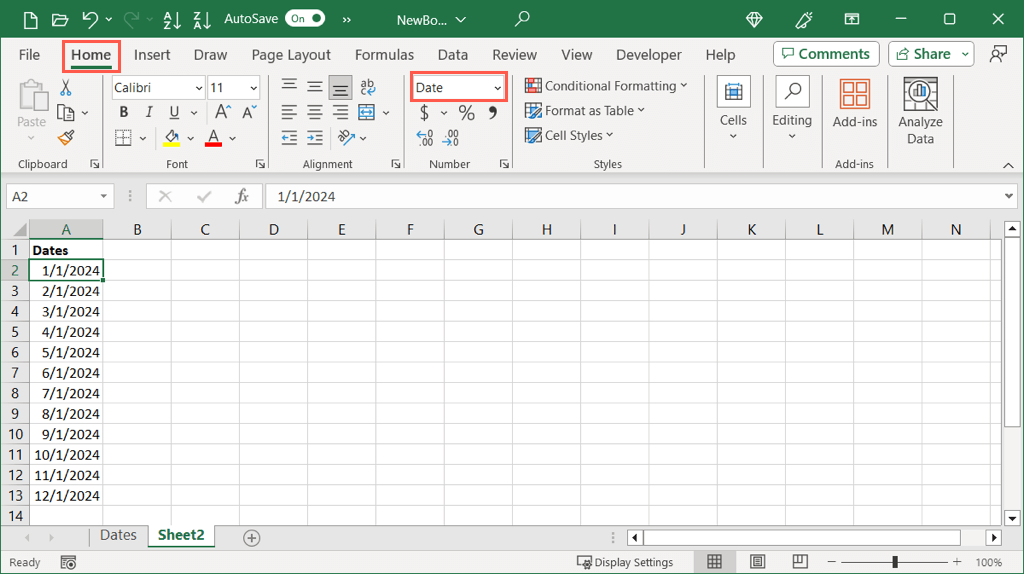
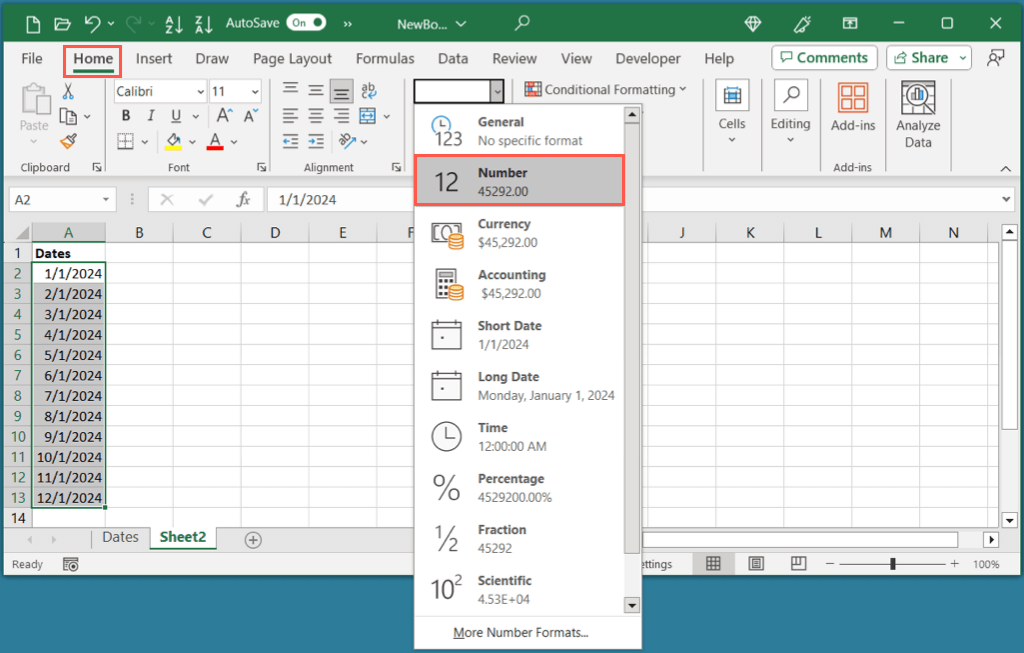
You can easily select the cell containing the date, head to the Home tab, and look at the Number Format drop-down box to see the current format of the cell. As you can see here, our date is formatted as a Date (number).
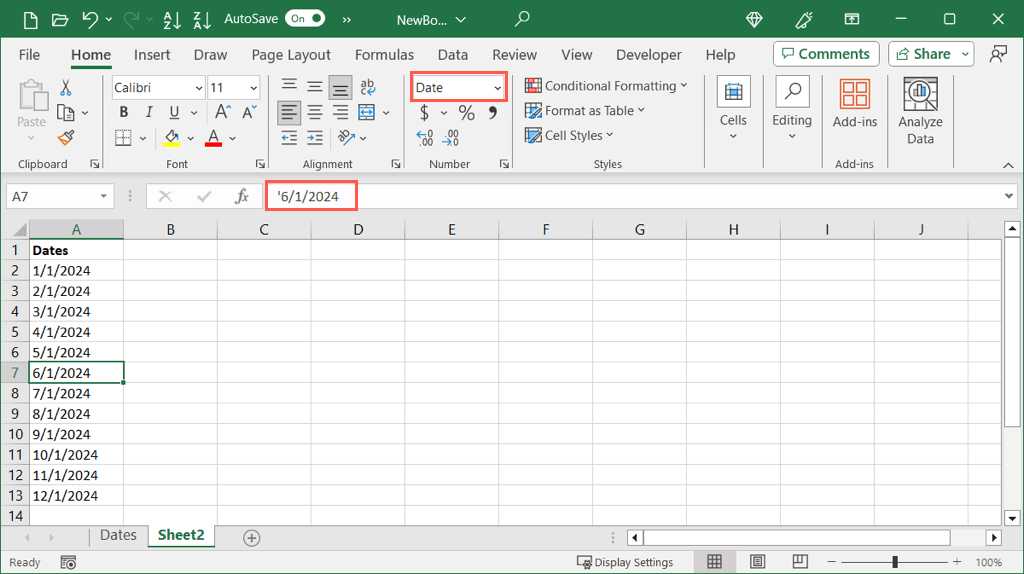
However, if you have many dates that you plan to convert, the above method can be tedious. Plus, if you have something random, for example, an apostrophe in front of the date, it may display in the Date format but be considered text when you try to convert it.
Instead, two simple Excel functions can help you.
Using the ISNUMBER Function
The ISNUMBER function lets you know if your data is formatted as a number and ISTEXT lets you know if it’s formatted as text. Depending on which you want to use, you’ll receive a True or False result.
To see if the dates in cells A2 through A13 are formatted as numbers, you’d use the following formula:
=ISNUMBER(A2:A13)
You can see here we receive a True result for those dates that are formatted as numbers and False for the one that is not.
Using the ISTEXT Function
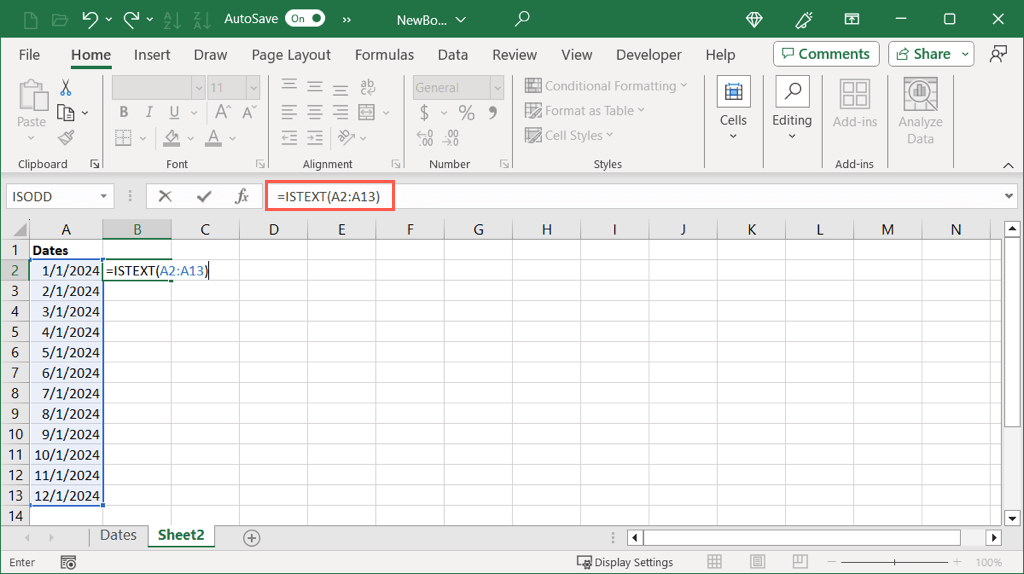
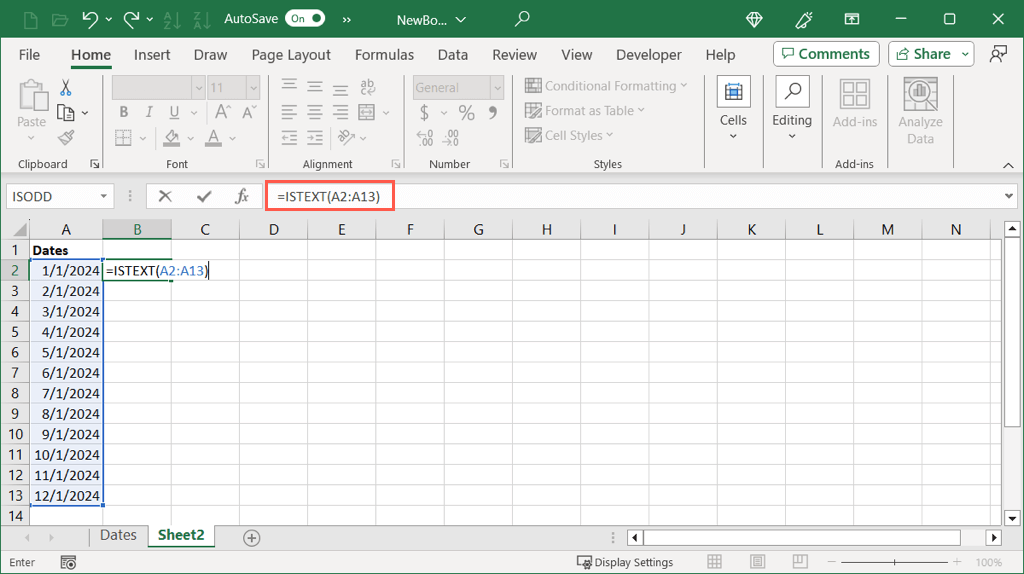
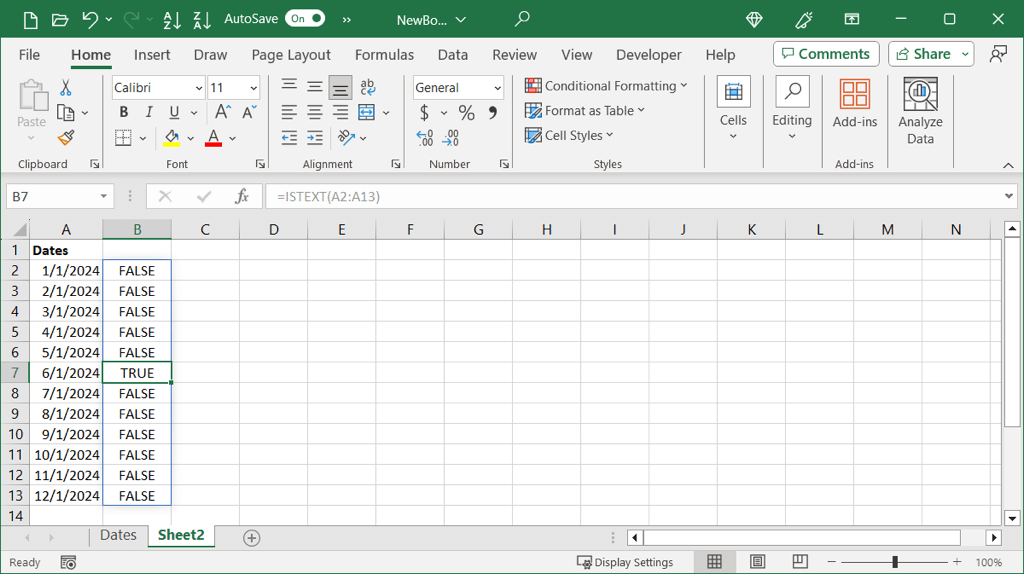
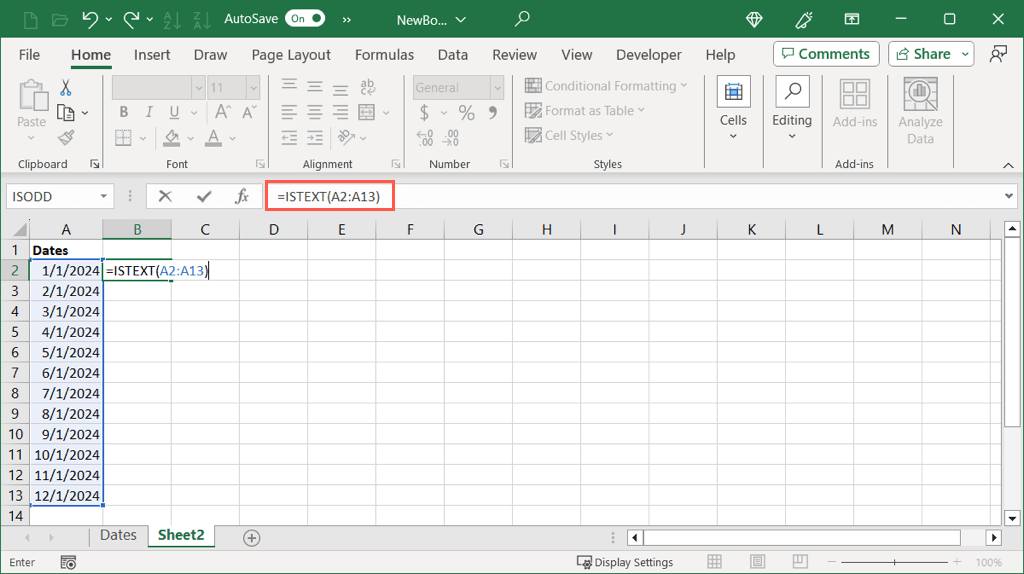
If you prefer to see if your dates are formatted as text, use this formula:
=ISTEXT(A2:A13)
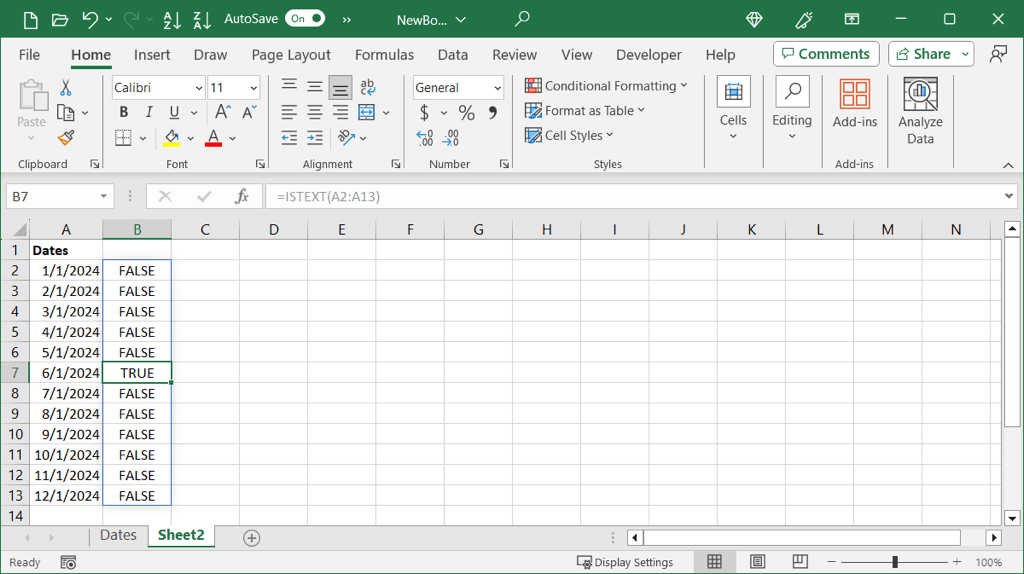
Like the other function, here we can see True for those dates formatted as text and False for the one that is not.
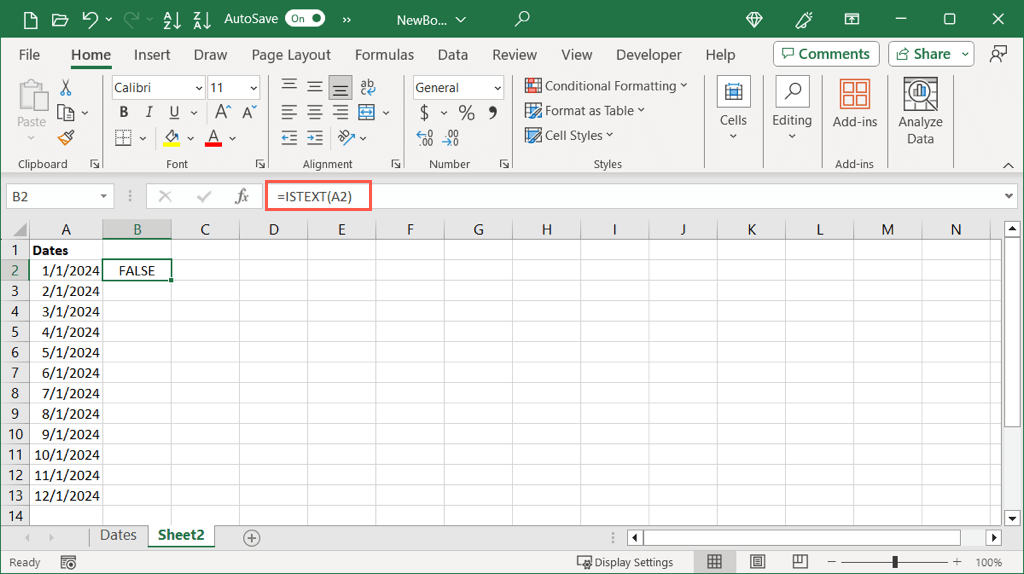
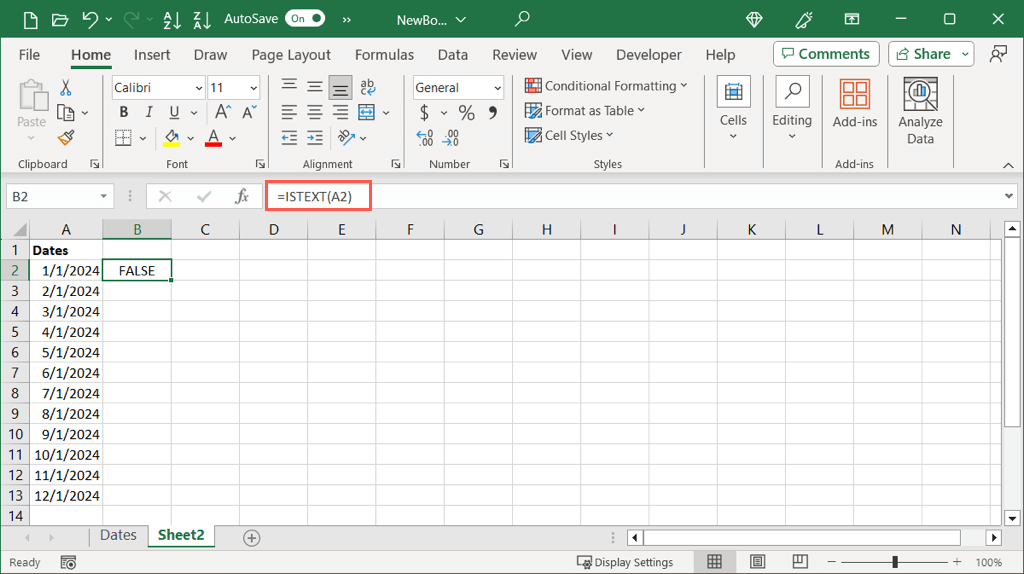
You can also use these functions to check a single cell with this formula if you like:
=ISTEXT(A2)
Once you determine the formatting for your date, you can use the corresponding method below to convert it to a serial number.
Convert a Numeric Date to a Serial Number
If you find that your date is formatted as a numeric value, you can simply change the format to display the serial number.
- Select the cell or cell range and go to the Home tab.
- Open the Number Format drop-down list and pick Number.
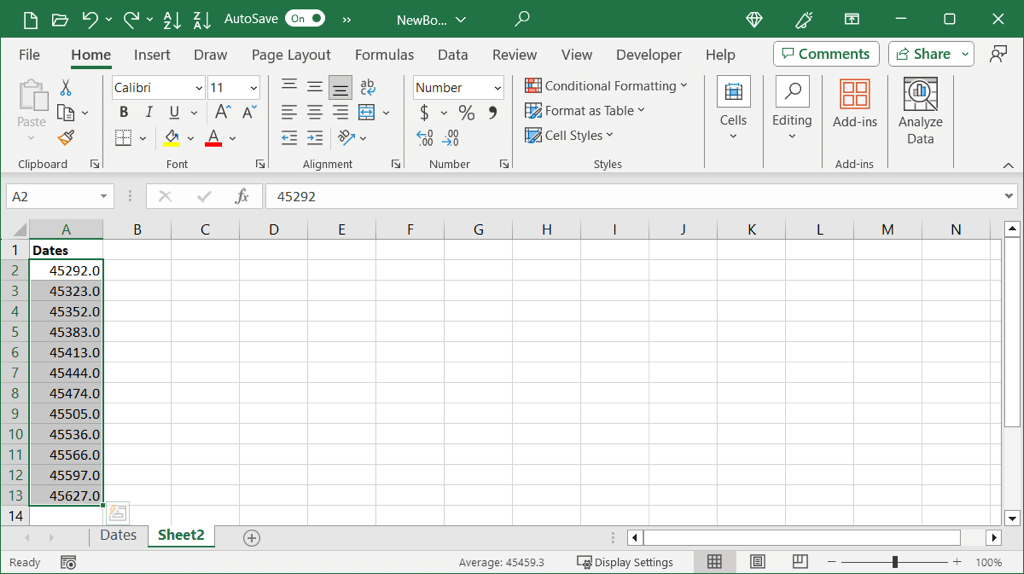
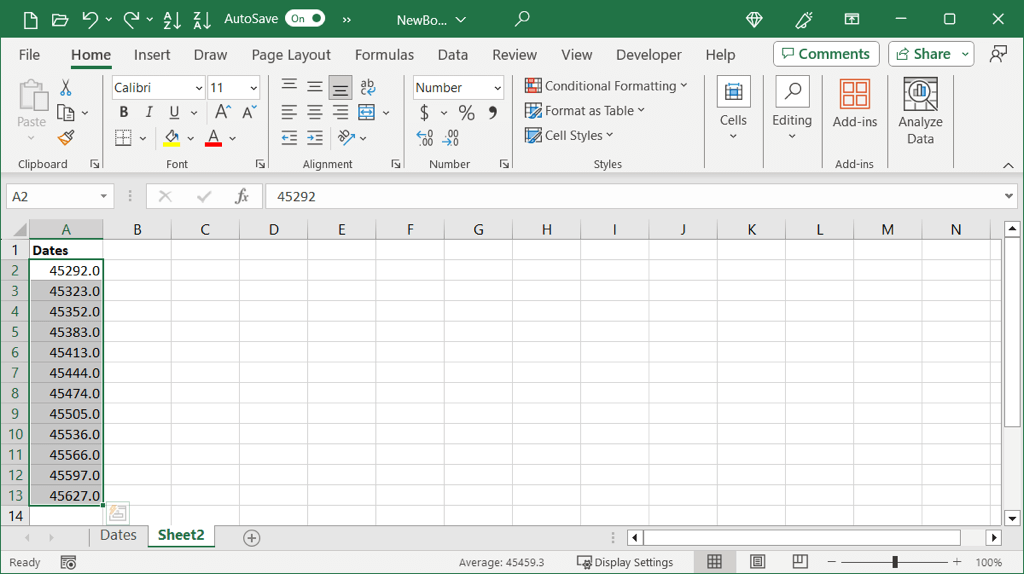
- You should see the dates in your selected cells as the serial numbers.
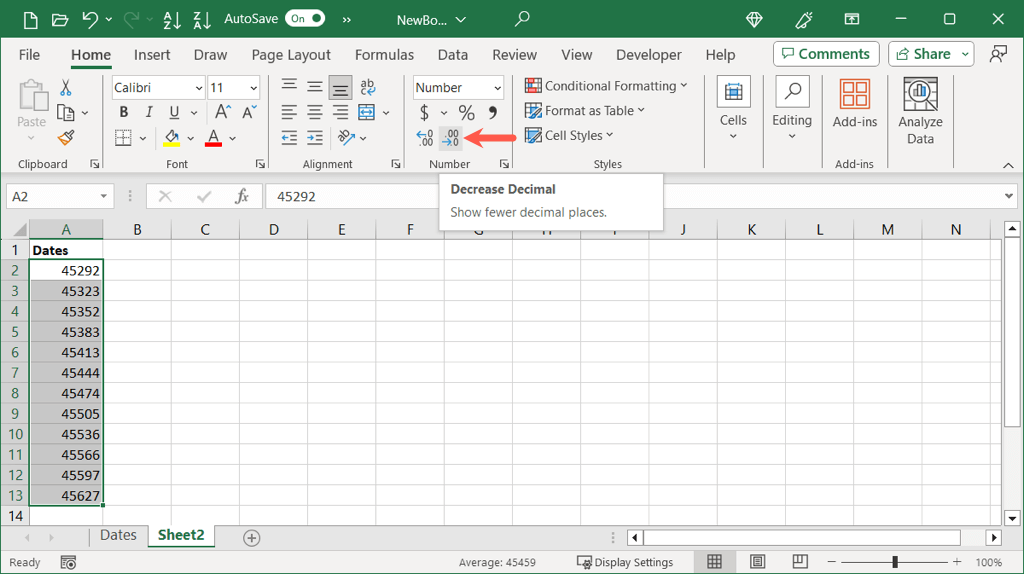
- You can then keep the cells selected and use the Decrease Decimal button in the Number section of the Home tab to remove the decimals.
Convert Dates to Numbers Without Decimals
If you prefer, you can convert the dates and remove the decimals in one fell swoop.
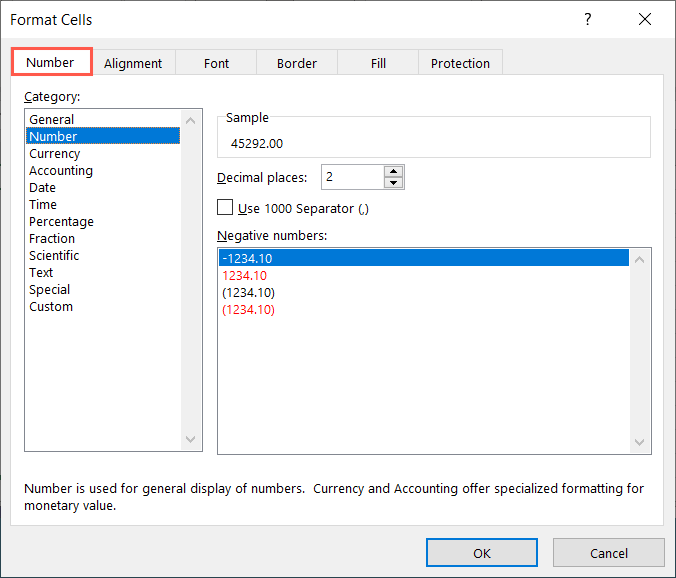
- Select the cells containing the dates, right-click, and pick Format Cells. Alternatively, use the keyboard shortcut Ctrl + 1 on Windows or Command + 1 on Mac.
- In the Format Cells dialog box, go to the Number tab and choose Number on the left.
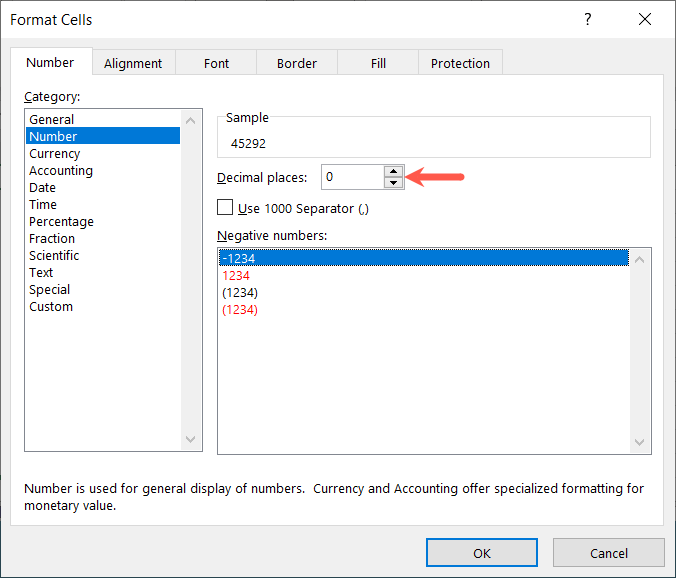
- You’ll see a preview of the serial number at the top. Change the Decimal Places setting to 0 and select OK to save the change.
- You’ll then see your dates changed to serial numbers without decimals.
Convert a Text Date to a Serial Number
If you determine your date is using a text format, you can use a handy Excel date function. With the DATEVALUE function, you can quickly convert text dates to serial numbers.
The syntax is DATEVALUE(text) where you can use a cell reference, range, or exact date as the argument.
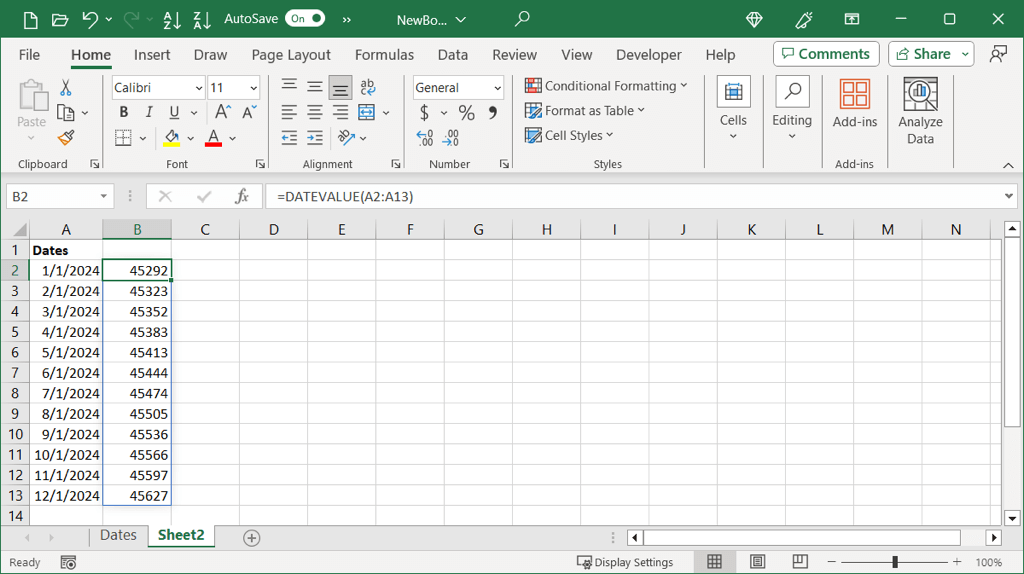
In this example, we’ll convert the cell range A2 through A13 from text dates to numbers with this formula:
=DATEVALUE(A2:A13)
As you can see, we have serial numbers for each date in our cell range. You may then want to remove the original dates or replace them by dragging the serial number range over them, per your preference.
To convert a single cell, use this formula replacing the cell reference with your own:
=DATEVALUE(A2)
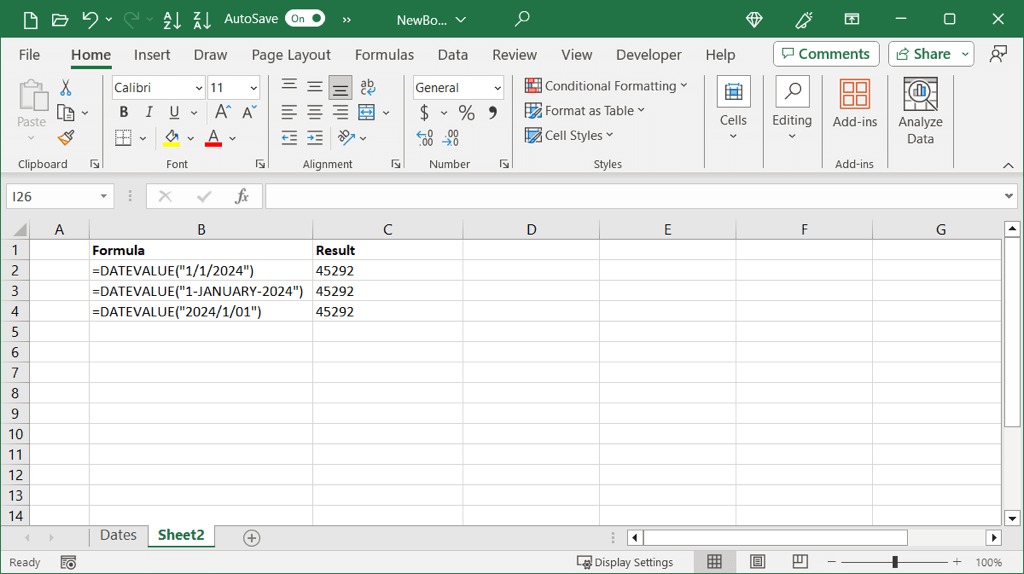
To convert a specific date using the function, place the date within quotation marks as in these formulas:
=DATEVALUE(“1/1/2024”)
=DATEVALUE(“1-JANUARY-2024”)
=DATEVALUE(“2024/01/01”)
If you have trouble with your Excel formula, check out the possible causes and solutions.
In Excel, converting dates to numbers, specifically serial numbers, takes only a few minutes using these methods. For related tutorials, look at how to sort by date in Excel.
