One-on-one and group chats in Microsoft Teams make engaging in direct and focused conversations a breeze and help amp up teamwork and boost productivity. In this tutorial, we’ll show you how to create these chats so that you can connect with colleagues, share ideas, and collaborate more effectively.
Create One on One Chats in Microsoft Teams
The one-on-one chat feature in Microsoft Teams offers a seamless and effective way to communicate with team members privately, allowing you to discuss projects, send files, and catch up on important topics.
Initiate a One-on-One Chat in Microsoft Teams
To initiate a one-on-one chat in Microsoft Teams, you must:
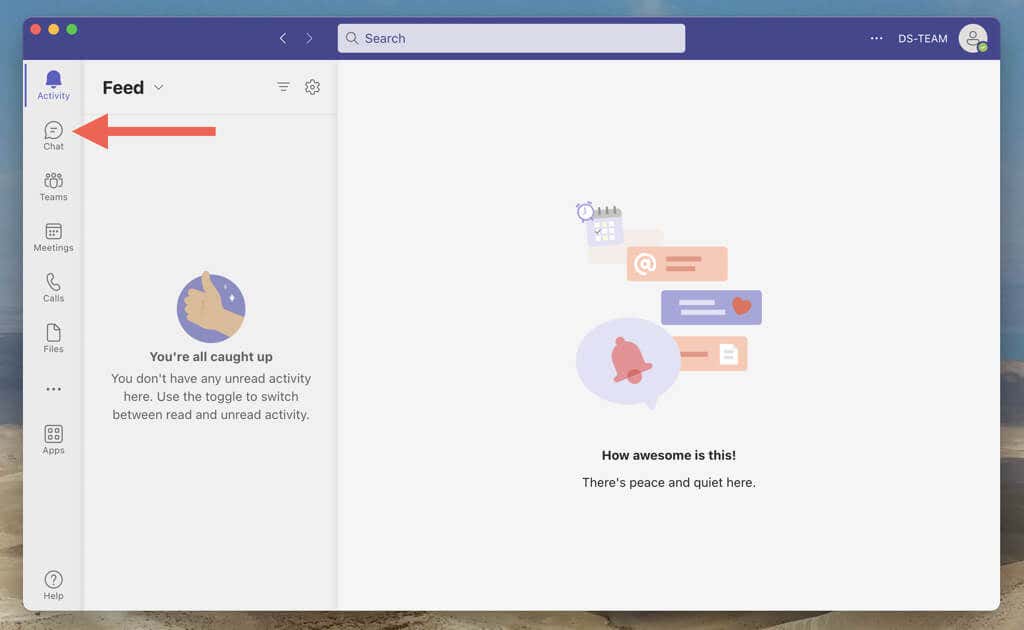
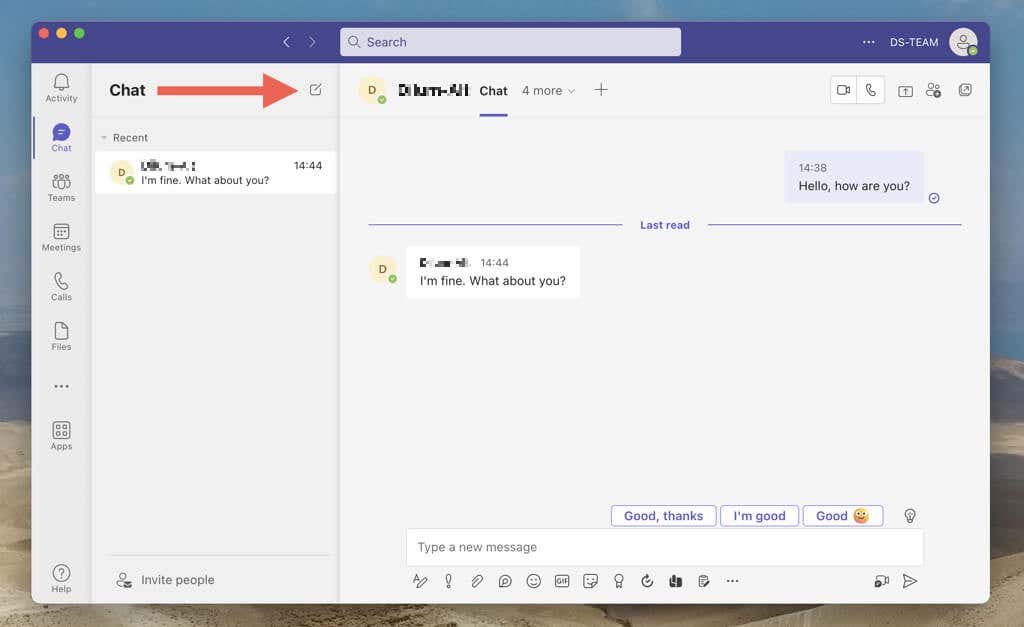
- Open Microsoft Teams and select Chat.
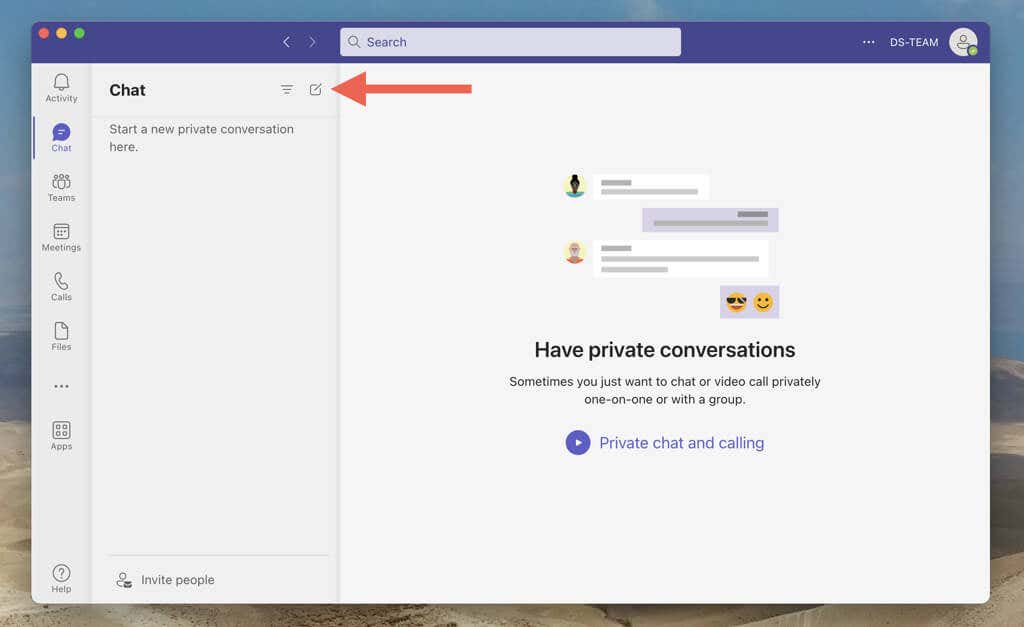
- Select the New Chat icon.
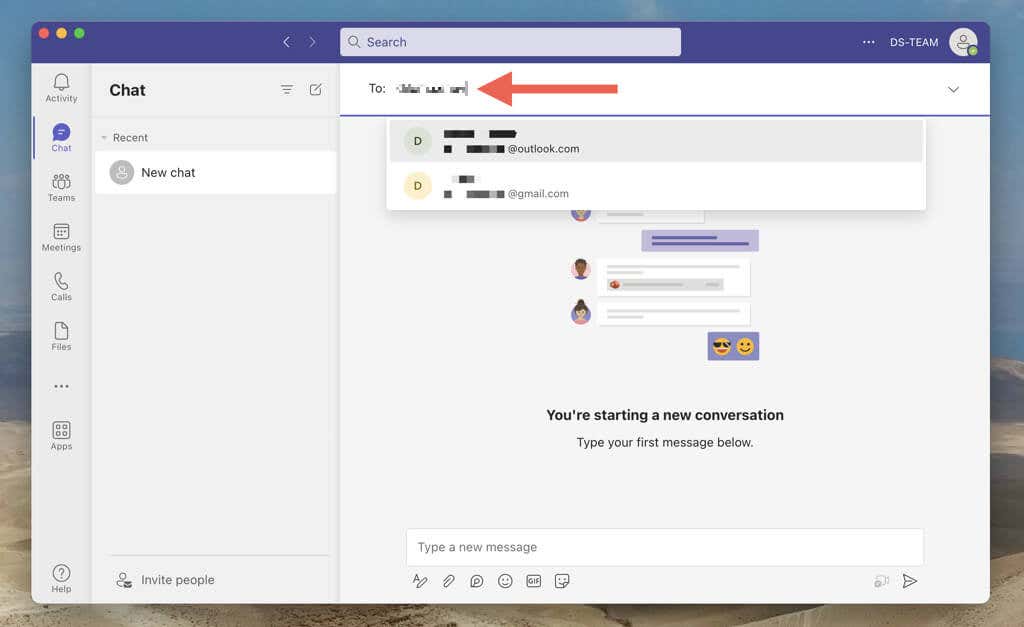
- Enter the name, phone number, or email address of a team member into the To field. You can type it out fully or select the matching entry on the drop-down menu.
Note: You can’t add a person if they aren’t a part of the Teams workspace.
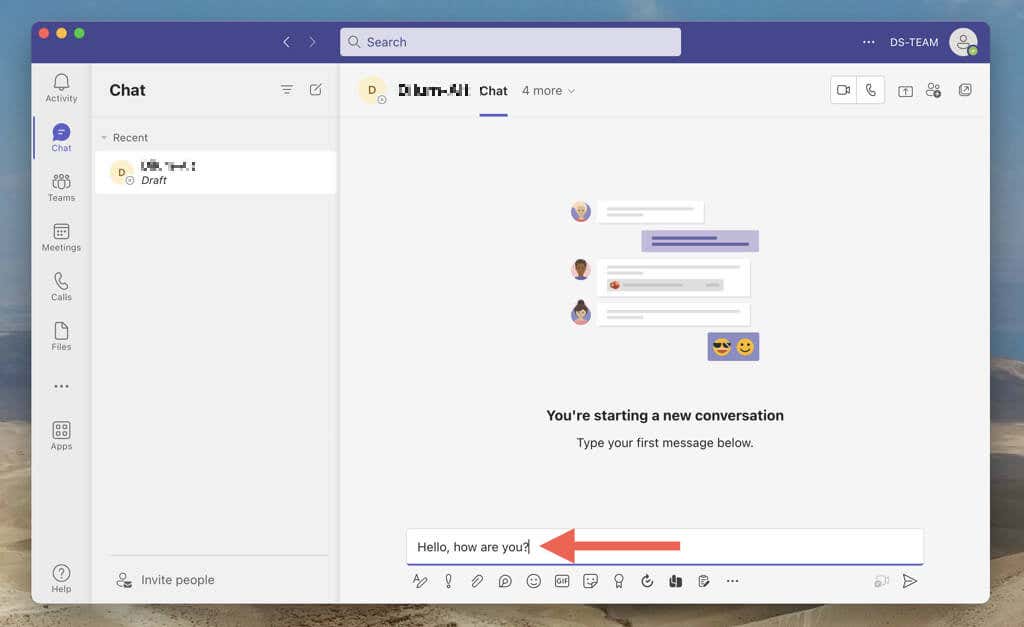
- Type a new message into the text field.
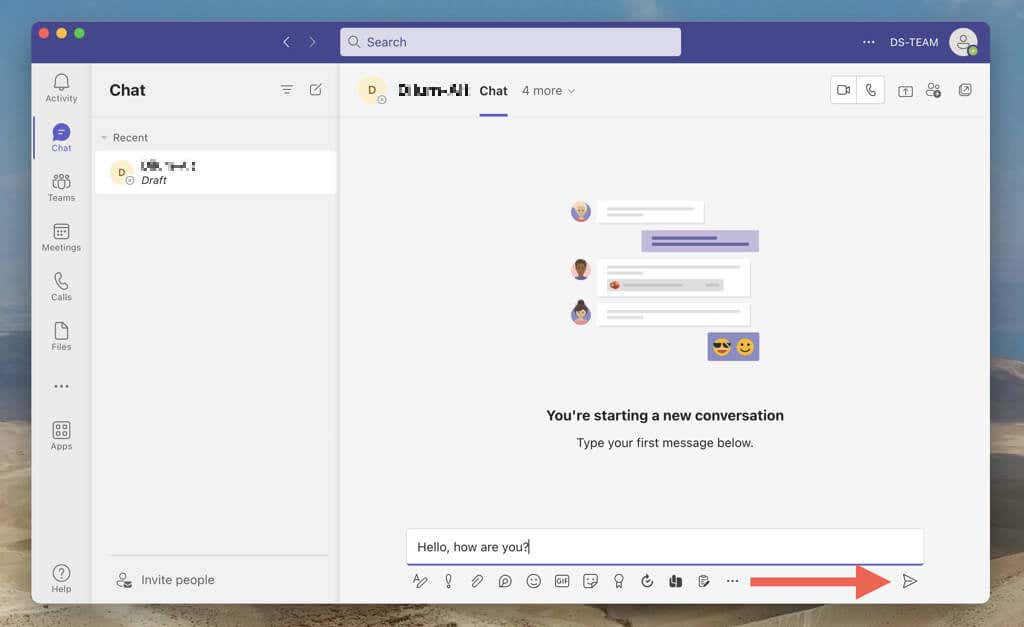
- Press Enter or select Send.
Alternatively, you can initiate a new conversation by interacting with a person’s profile through a Teams channel or Teams meeting. Just select the profile picture, choose the Chat icon, and compose and send a message.
Carry Out a One-on-One Teams Conversation
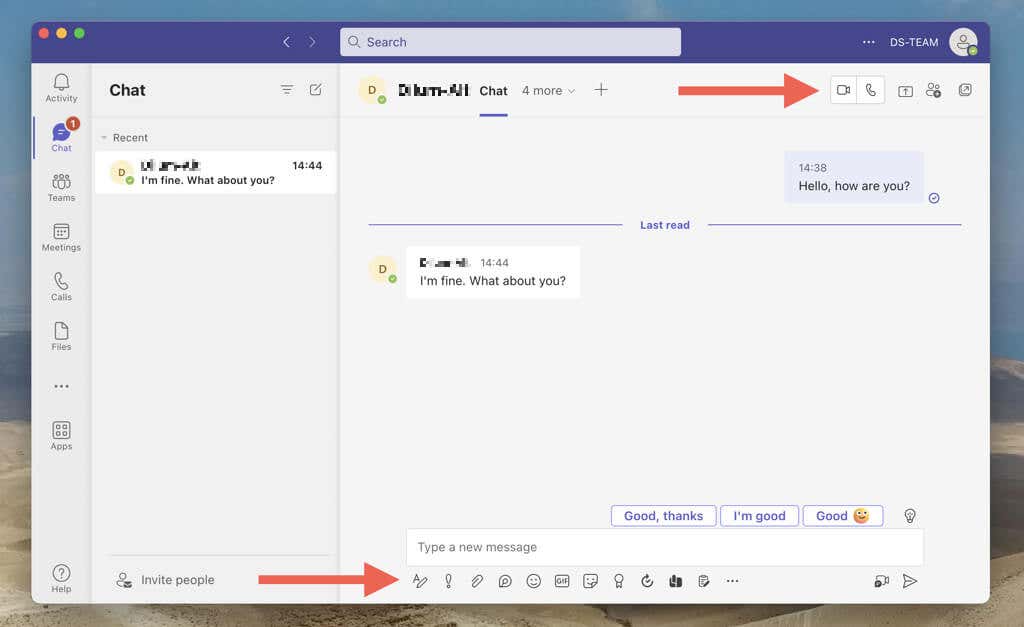
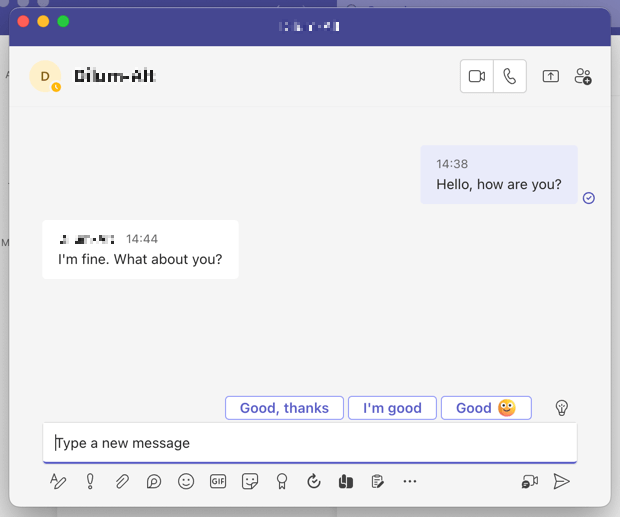
The other person should now see your message, and both of you can reply back and forth. You can send emojis, stickers, and GIFs and use the formatting options to add personality to your messages. You can also find options to initiate a video or audio call or begin screen sharing with the other person.
Note: Microsoft Teams sends notifications whenever the other person in a one-on-one chat responds. If that distracts you, right-click or long-press the conversation on the Chat list and select Mute. On mobile devices, swipe to the left and tap More > Mute.
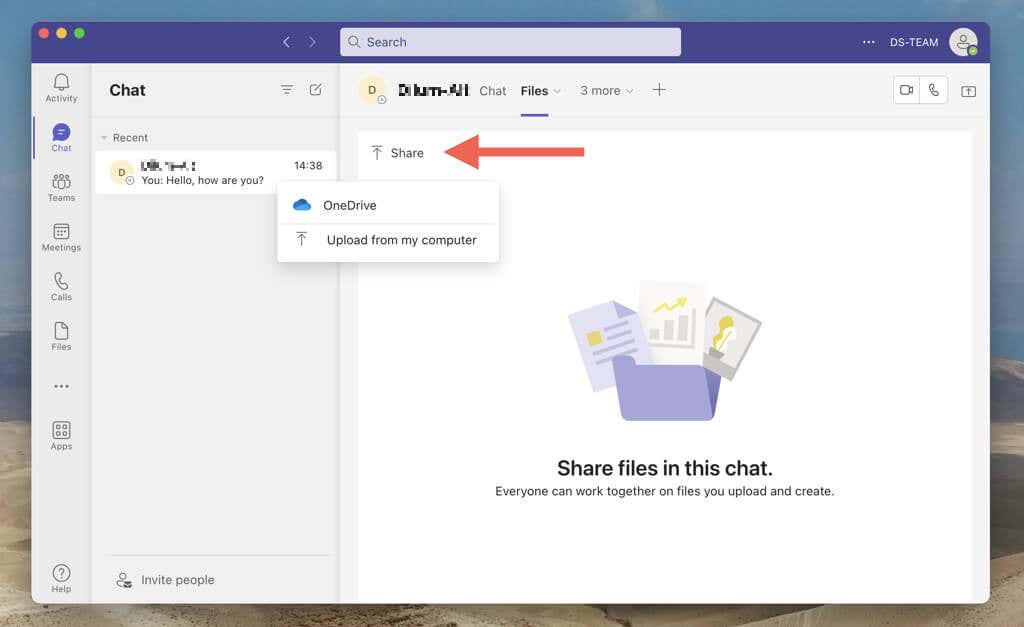
Team’s one-on-one chats also allow you to upload and share files with the other person. To do that, select the Files tab and add the files from the local storage or through OneDrive. Or, choose the items that the other person has uploaded to download them.
If you prefer multi-tasking while chatting with the person, it’s possible to pop out the conversation pane and turn it into a mini window on desktop devices. Just select the Pop-Out icon on the top-right corner.
Each conversation you create appears as an entry on your Teams Chat list. If you have multiple chats, use the search bar at the top to filter conversations by messages, people, or files.
Disable Read Receipts in Teams Chats
Microsoft Teams uses read receipts to notify you if the other person has seen your messages and vice versa. You can turn them off if you want to preserve your privacy or stop feeling the pressure to respond quickly. To do that:
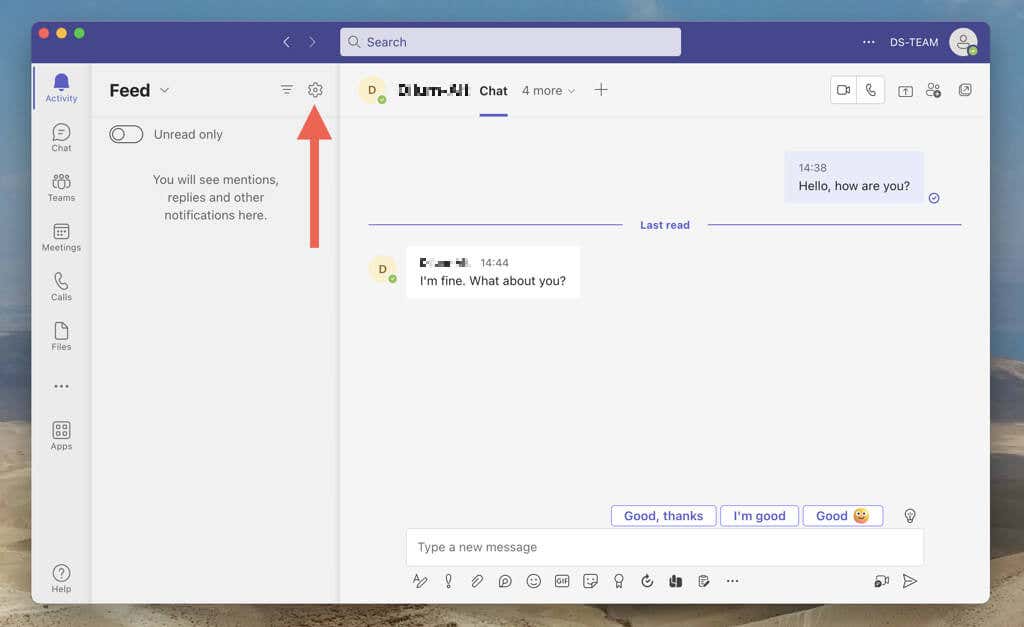
- Select the Activity tab (or tap your profile icon if you’re on a mobile device) and choose Settings.
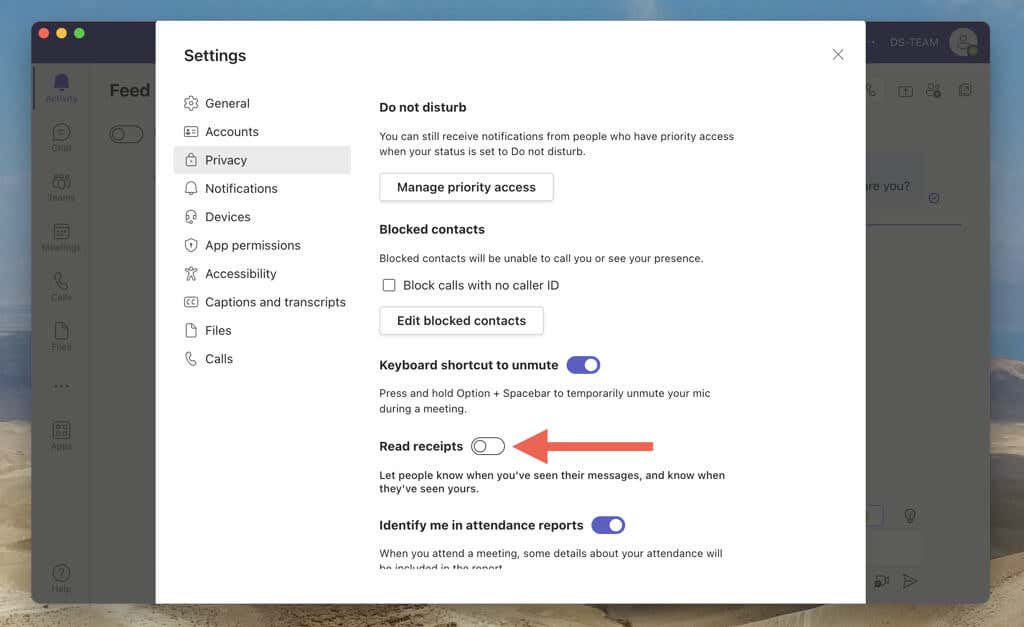
- Select Privacy and disable the switch next to Read receipts.
Note: If the Read receipts option appears grayed out, it’s because your workspace has a restriction that prevents you from disabling the functionality.
Create a Group Chat in Microsoft Teams
Creating a group chat in Microsoft Teams is the best approach to keeping multiple team members in the loop without sending individual messages to each person. You do not need to be a Teams owner or require workspace permissions to set up a group conversation.
Initiate a Group Chat in Microsoft Teams
With Microsoft Teams, you can easily create a group chat, add members, and get everyone on the same page. The process is practically similar to initiating a one-on-one chat.
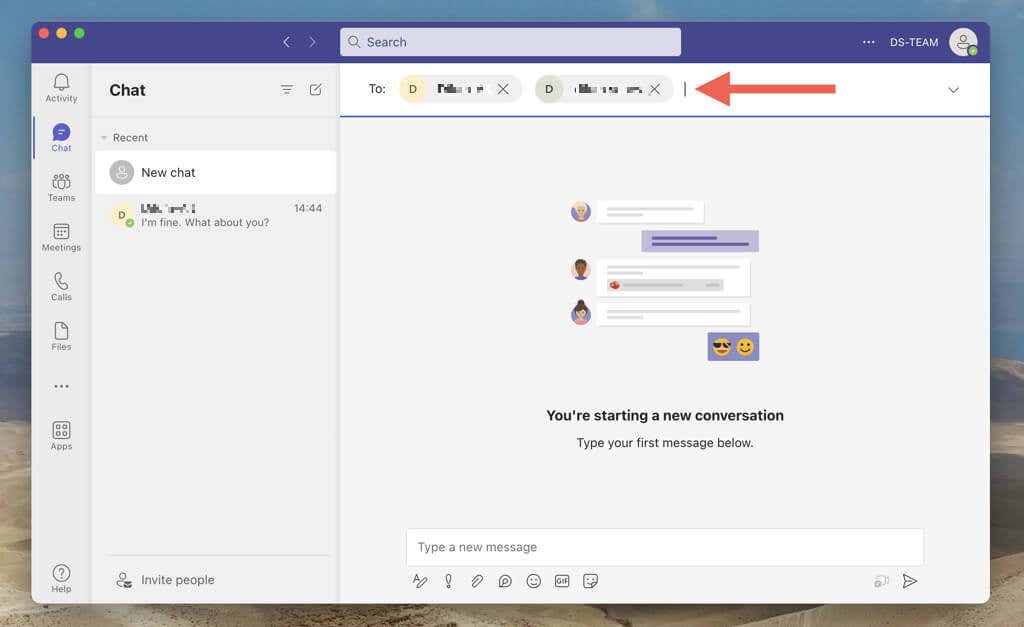
- Go to the Microsoft Teams Chat list and select New Chat.
- Enter the names, email addresses, or phone numbers of people you want to include within the chat one after the other.
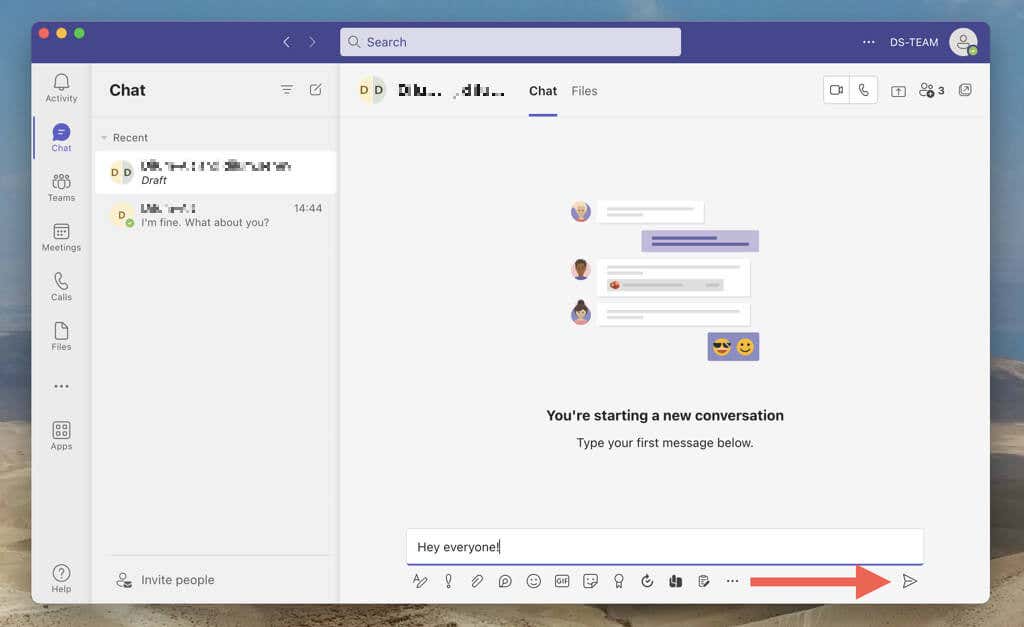
- Type a message and press Enter or select Send.
Group chats work similar to one-on-one chats. You can send links, emojis, share files, etc. If there’s a lot of activity within a group chat, use in-line replies to respond to specific messages. To do that, right-click or long-press a message and select Reply.
Add Participants to a Group Chat Later
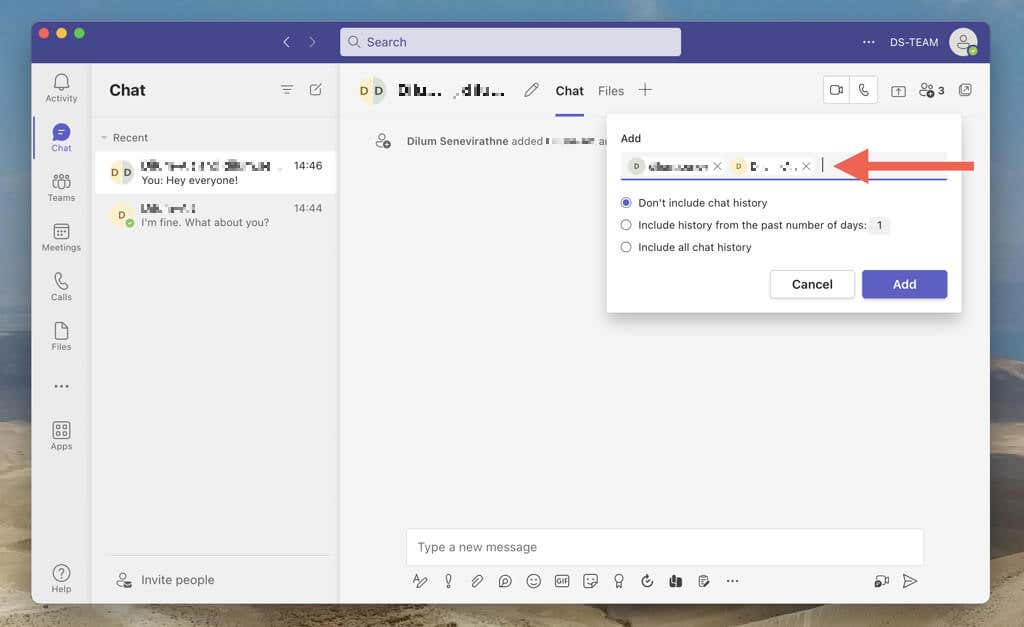
If you forget to add someone while creating a Teams group chat, don’t worry. You can add more people later, and even specify if they should have access to the chat history or not.
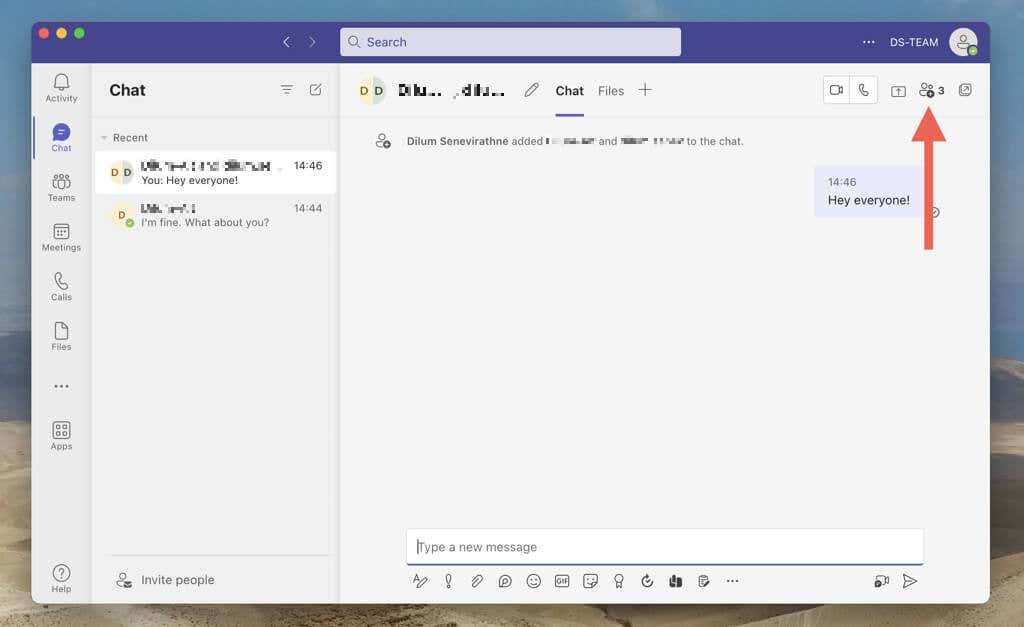
- Select the Add people icon on the top-right of the screen. On mobile, tap the group of participants at the top of the screen.
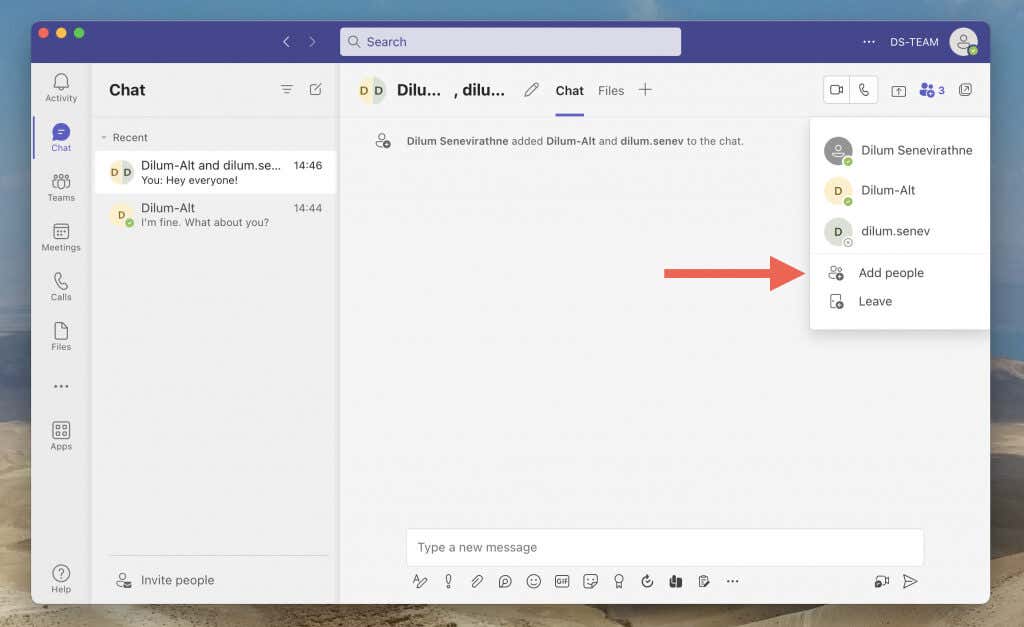
- Select the Add people option.
- Add the people you want, choose between the Don’t include chat history, Include history from the past number of days x, or Include all chat history options, and choose Add.
Change the Name of a Group Conversation
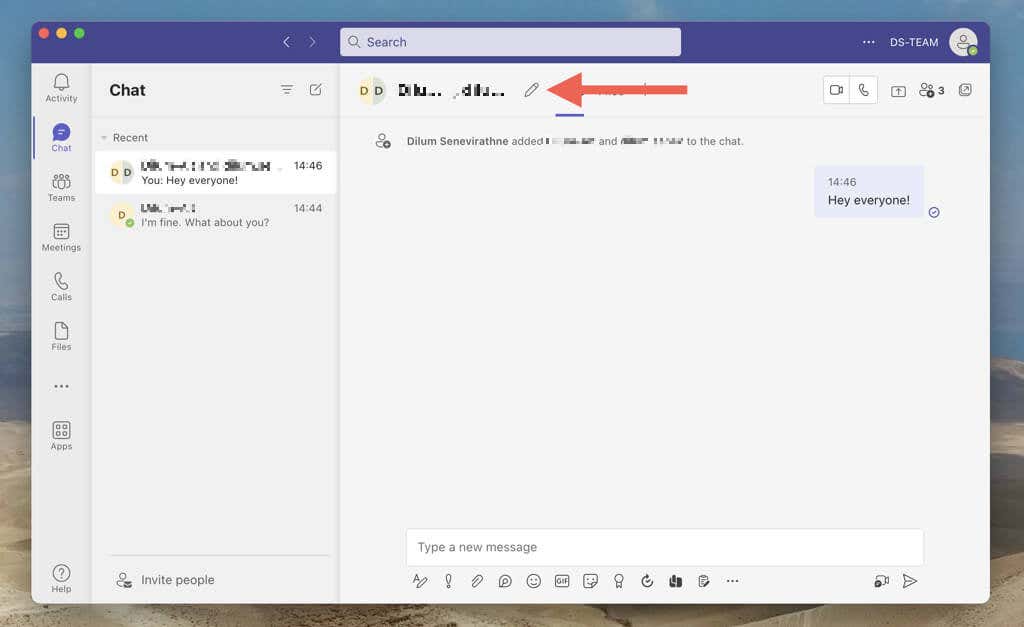
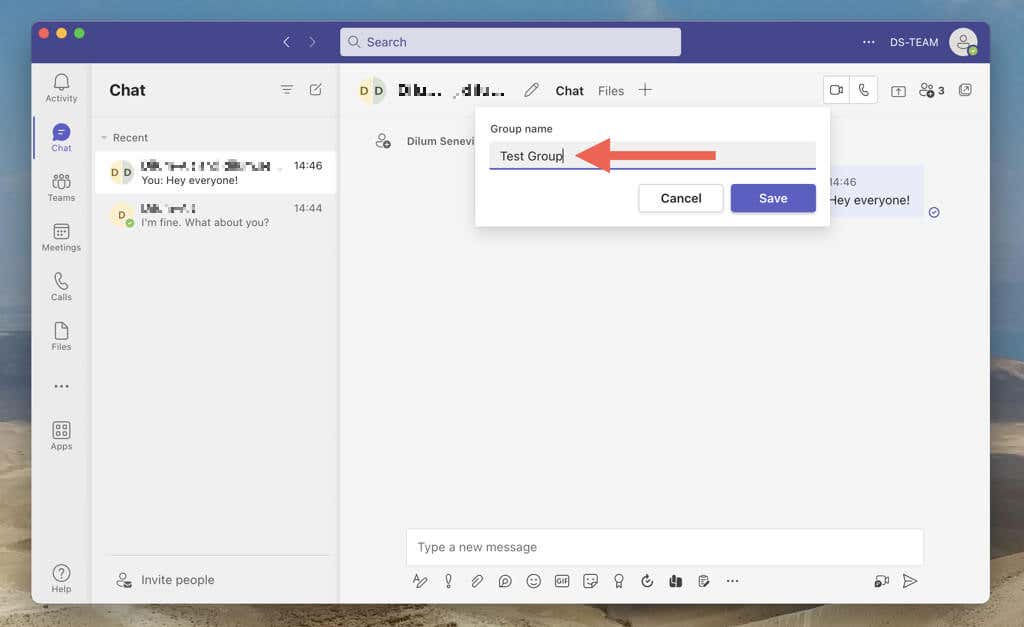
Teams allows you to distinguish between group chats with custom chat names. Here’s how:
- Select the Edit icon on the top of the screen. On the Teams app for mobile, tap the group of people on the top of the screen to reveal the icon.
- Enter a name into the Group name field.
- Select Save to save the group conversation name.
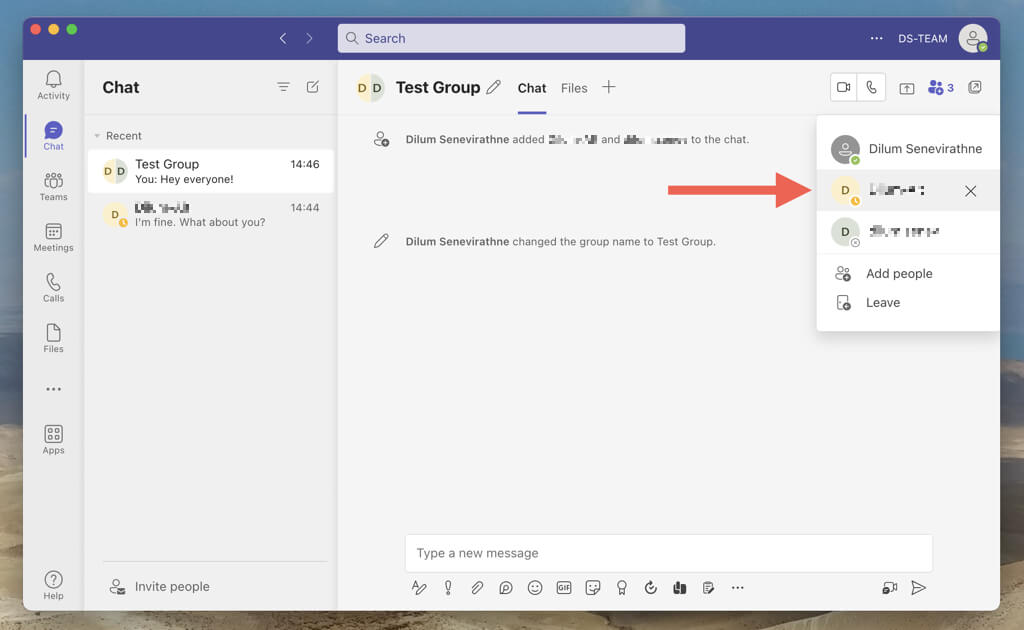
Remove Participants From a Group Conversation
To remove a participant from a group chat, select the Add people icon (or choose the group name on mobile) and choose the X icon next to the name of the person.
Leave a Group Conversation in Microsoft Teams
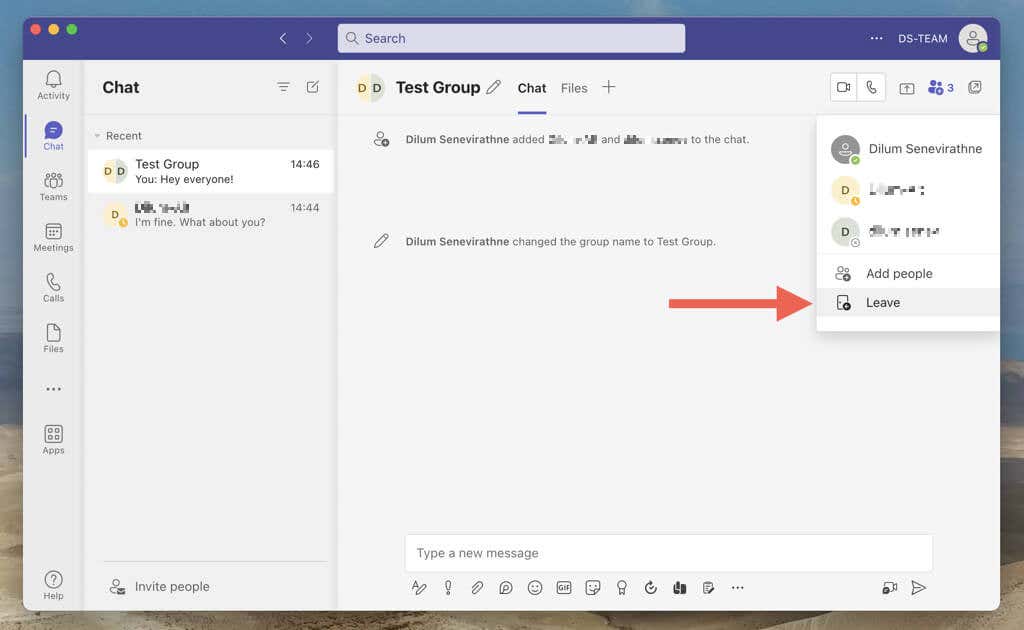
If you don’t want to remain in a group chat, you can leave it whenever you want. Just select the Add people icon (or the group name on mobile) and choose Leave.
Learn what happens if you leave or delete a one-on-one or group chat in Teams.
Stay Engaged With People in Microsoft Teams
Microsoft Teams’ one-on-one and group chats are easy to set up and intuitive to use. By following the steps outlined in this guide, you can quickly create and customize both types of conversations to stay connected and productive in your workspace. Check out other exciting ways to get the most out of Microsoft Teams.
