Rules in Microsoft Outlook are ideal for automatically performing actions on emails. You can do things like move, flag, or respond to certain messages without manual work. To help you keep up with your growing inbox, we’ll show you how to create rules in Outlook.
Because you can create Outlook rules on Windows, Mac, and the web, we’ll cover setting them up on each platform. Just note that the available conditions and actions vary.
How to Create Rules in Outlook on Windows
The healthiest set of conditions and actions for rules are in Outlook on Windows. To most effectively explain how to create a rule, let’s walk through setting up a few commonly used rules.
Setting up a blank rule from scratch gives you the most flexibility because you can choose more than one condition and action. Plus, the Rules Wizard prompts you along the way.
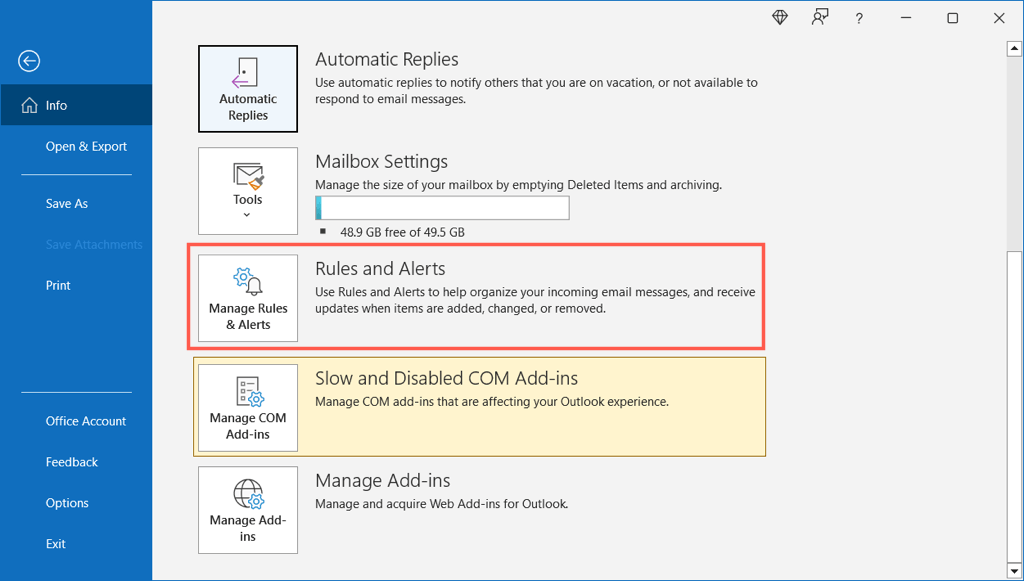
Open Outlook, go to the File tab, and select Manage Rules & Alerts in the Info section.
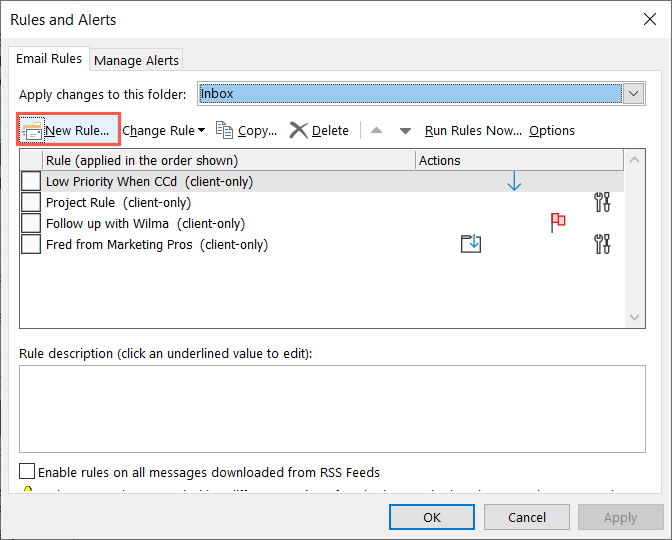
When the Rules and Alerts dialog box appears, open the Email Rules tab and choose an account at the top if you have more than one. Then, choose New Rule.
You can then set up your rule with the instructions below to move emails to a folder, flag them for follow-up, or send automated replies. You can instead try your hand at a different rule you’ll find useful like automatically forwarding emails.
Move Emails to a Folder
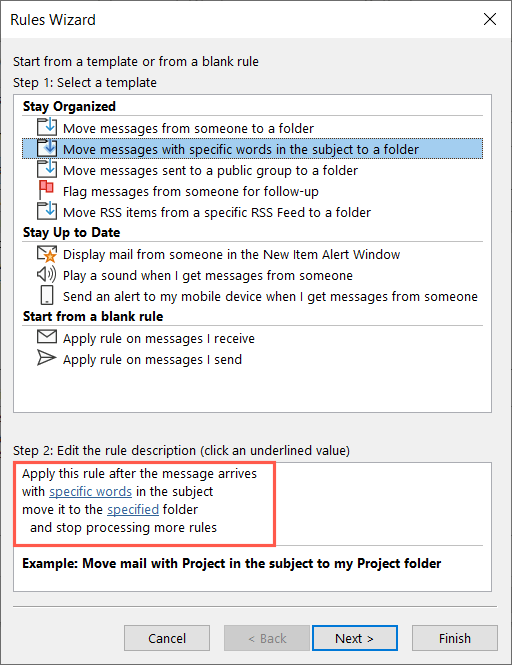
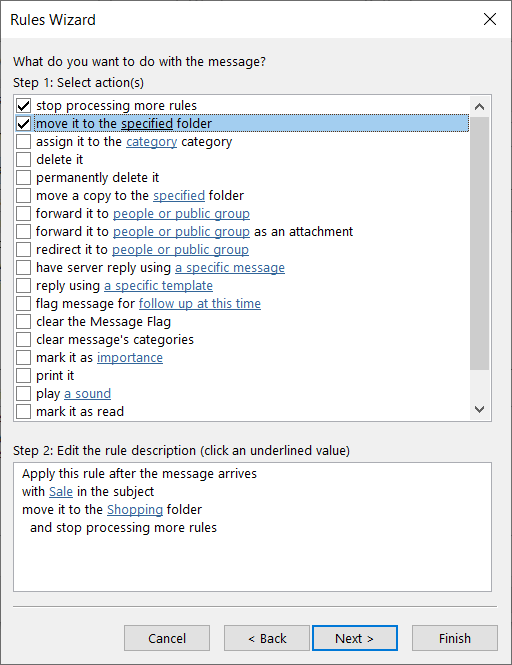
In the Rules Wizard, select one of the move options at the top. You can move messages to a specific folder based on sender, included words, or for emails you send rather than receive.
- As an example, we’ll choose Move messages with specific words in the subject to a folder.
- At the bottom, select the items underlined and blue to specify the condition and action.
- Pick Specific Words and enter the words to look for in the subject line.
- Pick Specified to pick the folder you want to move the messages to.
- Then, select Next.
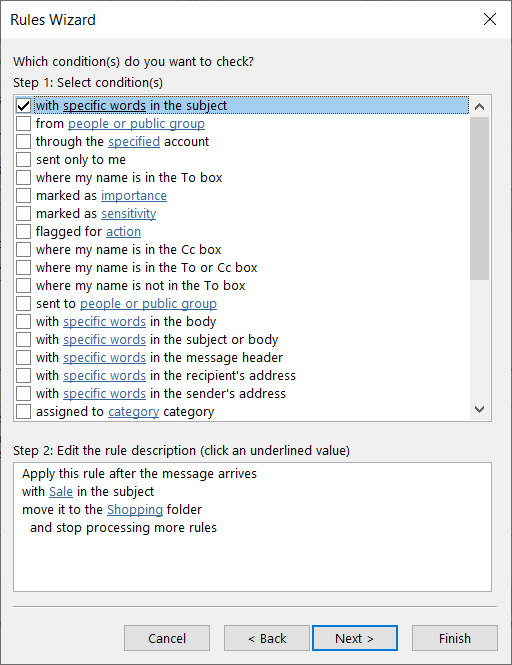
- You’ll see a list of conditions with the one you just picked automatically marked. You can choose additional criteria for the emails if you like. For instance, you may also want to apply the rule to messages sent only to you. Select Next.
- You’ll then see a list of actions with the one you picked marked for you. Like the conditions above, you can choose additional actions if you wish. For example, you may also want to mark the message as read when it’s moved. Select Next.
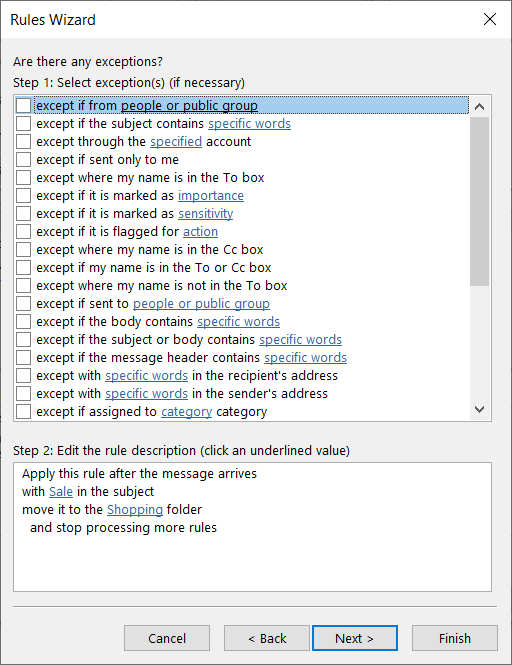
- You’ll next see a list of exceptions. You can optionally exclude certain emails from the rule. For instance, you may not want emails with attachments sent to the folder. Select Next.
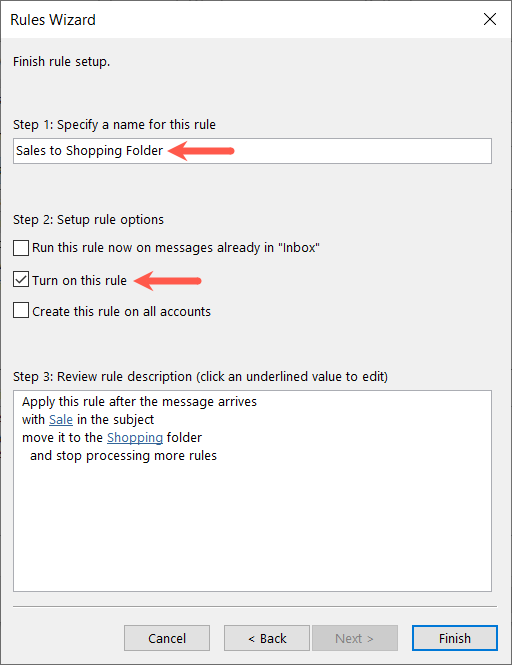
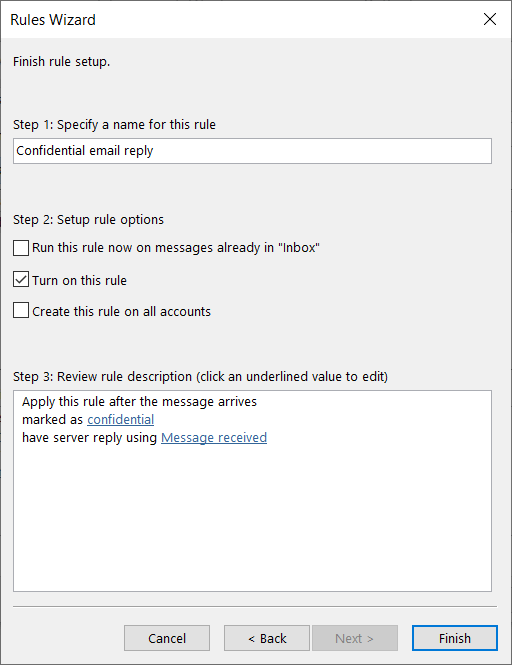
- On the final screen for the rule, you’ll first give it a name at the top and then mark the checkbox for Turn on this rule. Optionally, you can check the boxes to run this rule now on your inbox or use the rule for all email accounts.
- When you finish, confirm the rule setup in the box at the bottom which shows you the condition(s) and action(s). Select Finish to save and enable the rule.
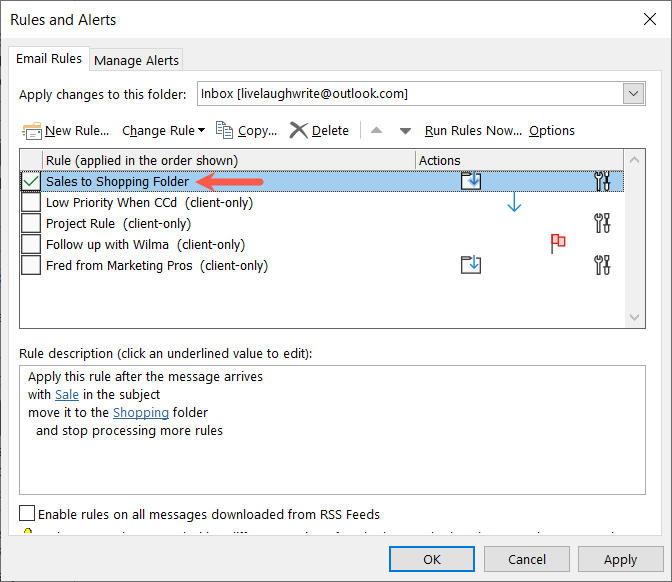
- Confirm a checkmark next to your new rule in the Rules and Alerts box and select OK.
Flag Emails for Follow-Up
Another helpful Outlook rule is for flagging emails for follow-up. You get to choose the flag and timing for the follow-up.
- Follow the same process above to create a New Rule and open the Rules Wizard.
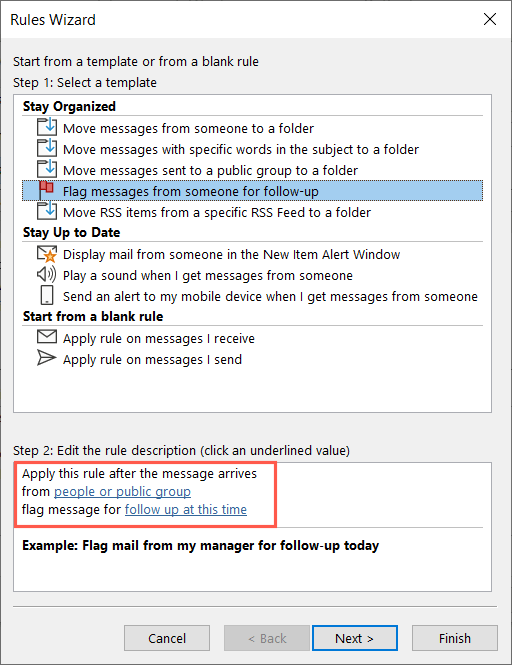
- Then, choose Flag messages from someone for follow-up.
- At the bottom, select the item underlined and blue to specify the condition and action.
- Pick People or public group to choose the contact.
- Pick Follow up at this time to choose the flag and timing.
- Then, select Next.
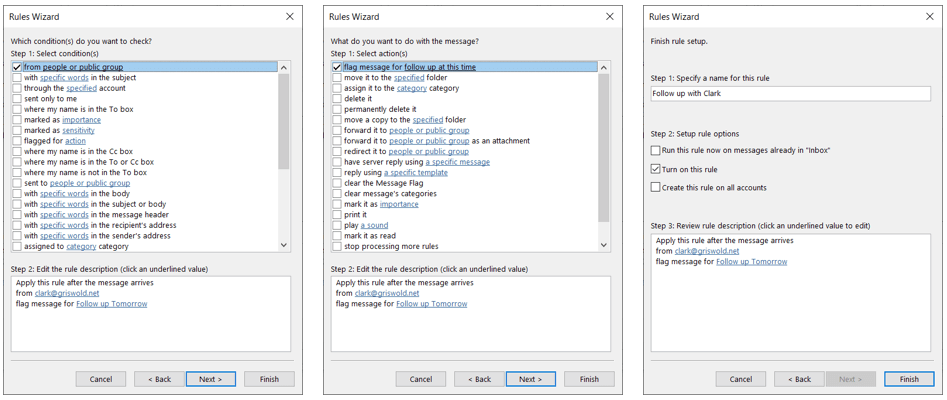
- Just like the rule above, the Rules Wizard walks you through the conditions, actions, and exceptions you can confirm and add to for your rule. Then, name, enable, and finish.
Automatically Reply to Emails
One more rule you may find helpful is an automatic reply, which is similar to an out of office message but with more flexibility. You can use a particular Outlook template or create a reply message for specific emails.
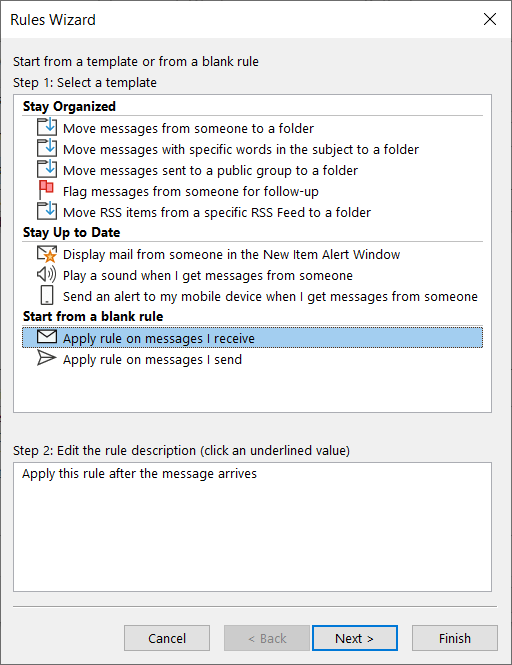
- Follow the same process above to create a New Rule and open the Rules Wizard. Then, choose Apply rule on messages I receive and select Next.
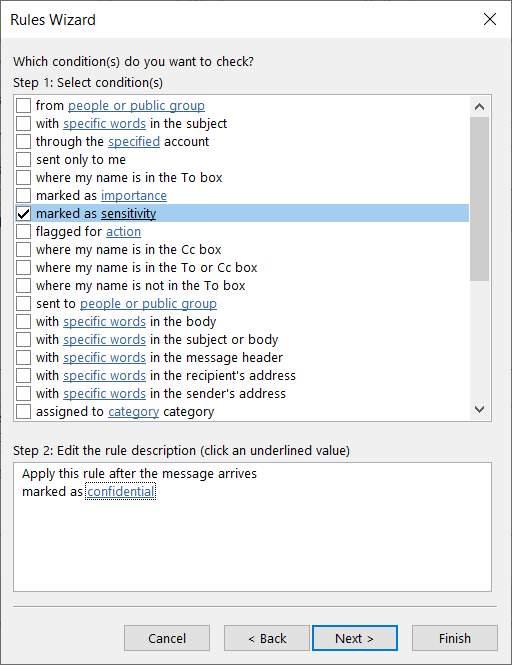
- Choose the conditions you want to use for the received email messages. You can apply the rule to certain senders, with specific words, when received in a date span, or any other condition you want. Select Next.
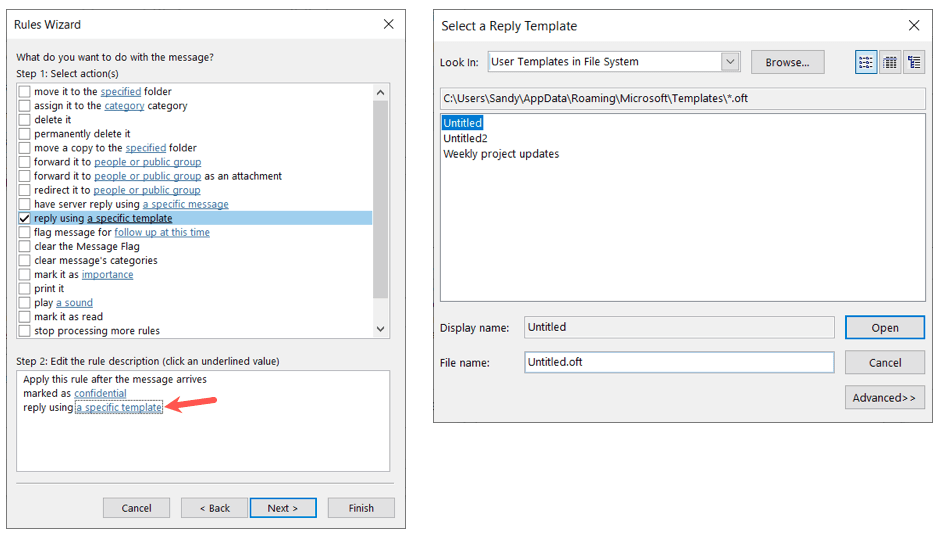
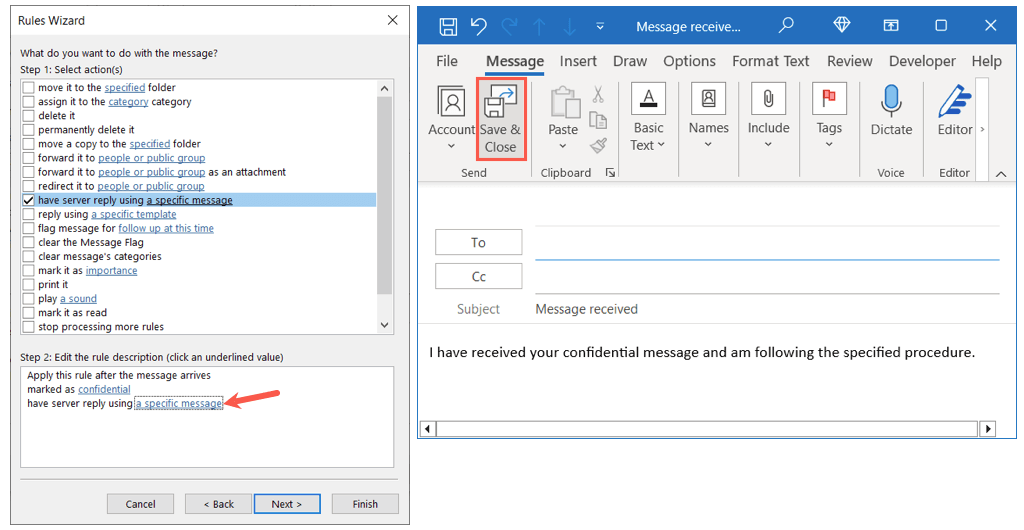
- Choose either the Reply using a specific template or Have server reply using a specific message per your preference. Then, select the underlined, blue text at the bottom per the option you pick and select Next when you finish.
- Reply using a specific template: Pick a specific template to choose the one you want.
- Have server reply using a specific message: Pick a specific message, enter the message in the box that appears, and select Save & Close.
- Mark any exceptions you want to include, select Next, and finish the rule by naming, enabling, and saving it with the Finish button.
How to Create Rules in Outlook on Mac
If you use Outlook on your Mac, you can set up inbox rules there easily although the conditions and actions are a bit more limited than on Windows.
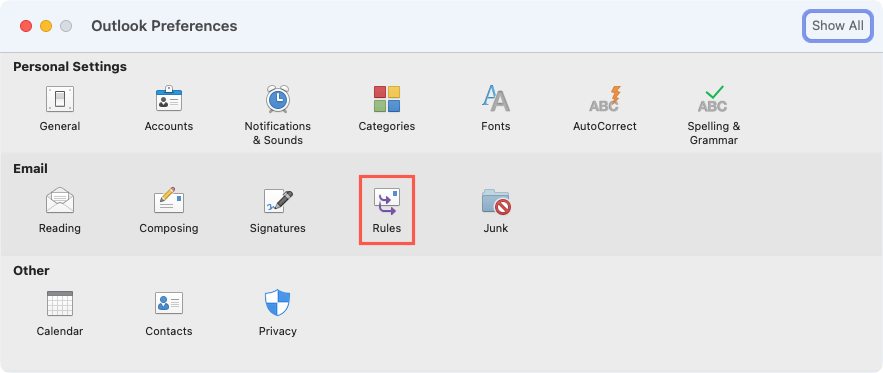
- Open Outlook and select Outlook > Settings in the menu bar.
- Choose Rules in the pop-up window.
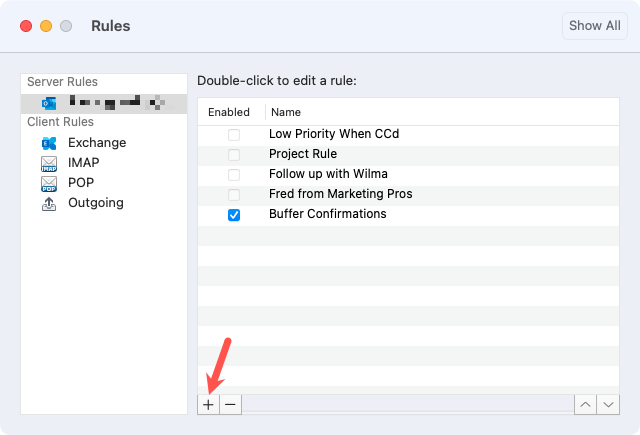
- Pick an account on the left if you have more than one and select the plus sign button on the right.
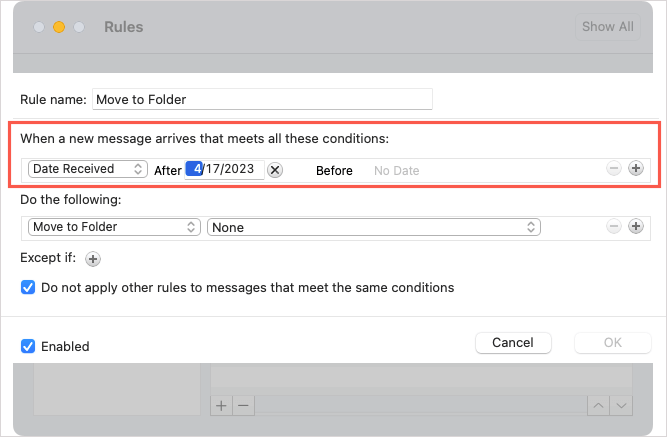
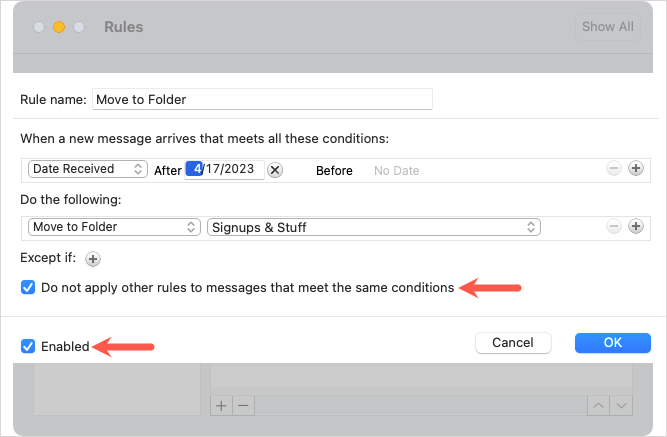
- Enter a Rule name at the top.
- Then, set up the first condition using the drop-down boxes. Depending on what you choose, you may need to add to the condition. For example, if you pick Date Received, you’ll enter the date(s).
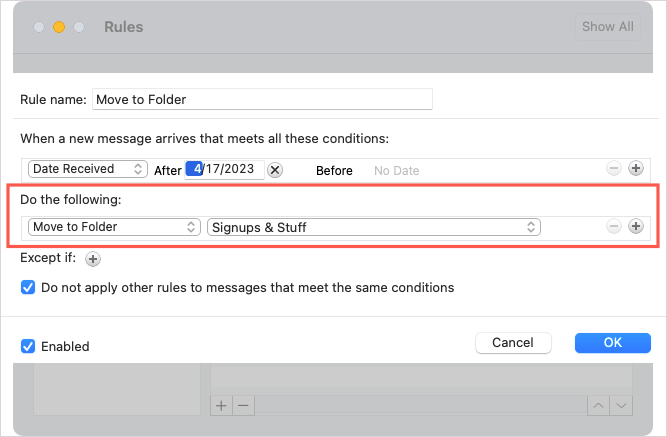
- Next, choose the action using those drop-down boxes. Again, you may need to add to the action. For instance, if you pick Move to Folder, you’ll select the folder.
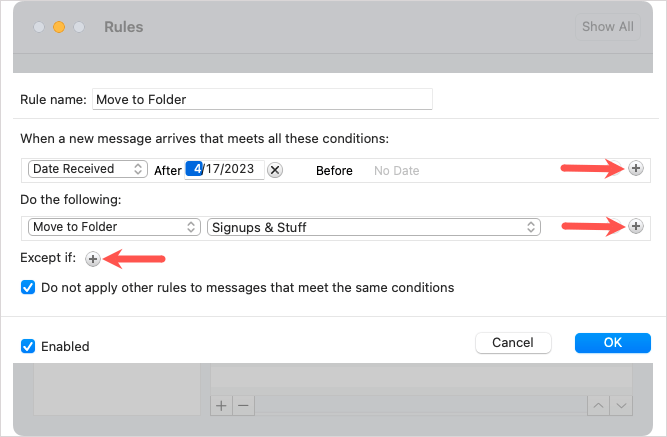
- To add another condition or action, select the plus sign to the right or to add an exception, select the plus sign next to Except if.
- Optionally, check the box to not apply other rules that meet the same conditions. Confirm that the Enabled box is checked on the bottom left and pick OK to save the rule.
How to Create Rules in Outlook on the Web
To create a rule in Outlook on the web, head to the website and sign in. You’ll see similar conditions and actions to those in Outlook on Mac.
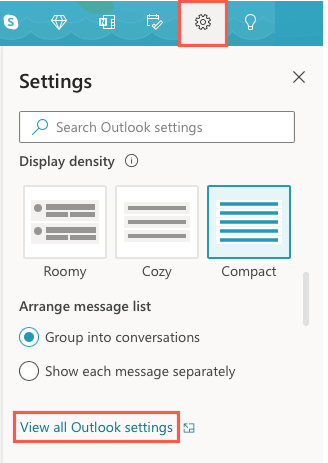
- Select the Settings icon (gear) on the top right and pick View all Outlook settings in the sidebar that appears.
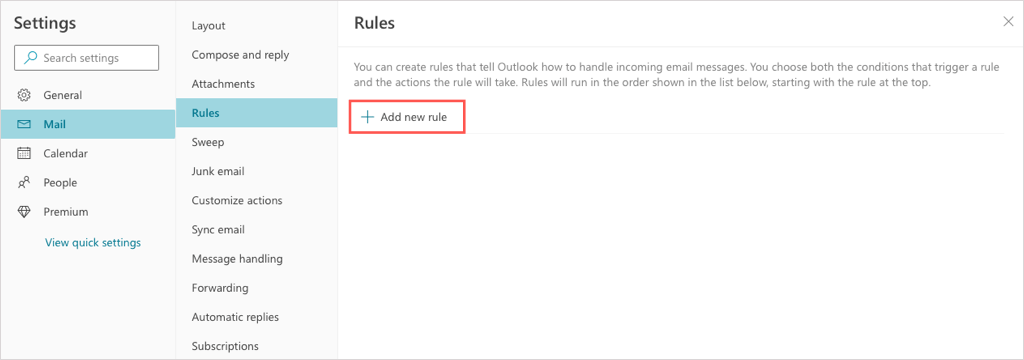
- In the pop-up window, pick Mail on the far left and Rules to the right.
- At the top, select Add new rule.
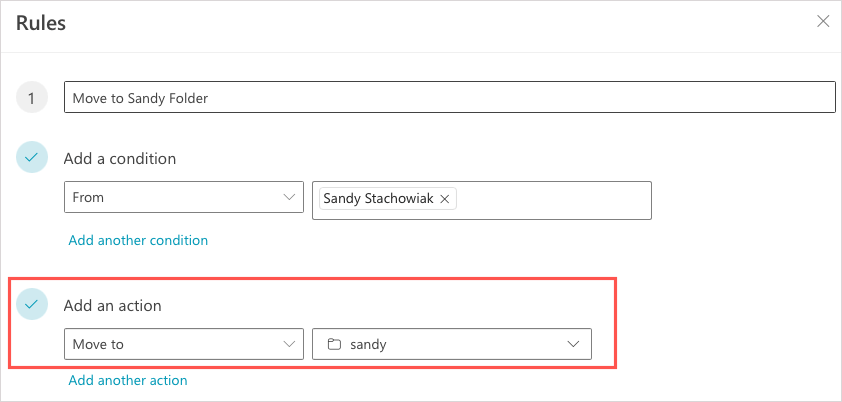
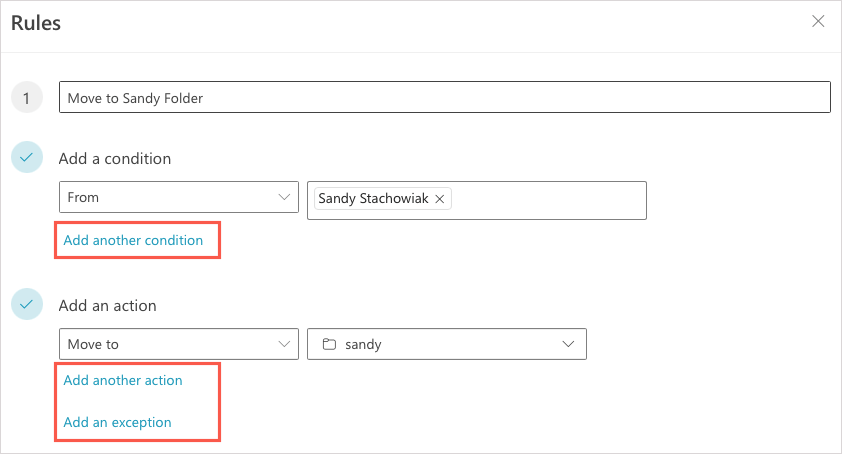
- Give your rule a name and then use the Add a condition box to pick the criterion. Depending on the condition you select, you may need to add to it. For example, if you choose From, you’ll be asked to provide the sender on the right.
- Use the Add an action box to pick an action. Again, you may be prompted to add to the action. For instance, if you choose Move to, you’ll be asked to provide the folder name or create a new folder.
- You can use the options in blue to add another condition, another action, or include exceptions as you like.
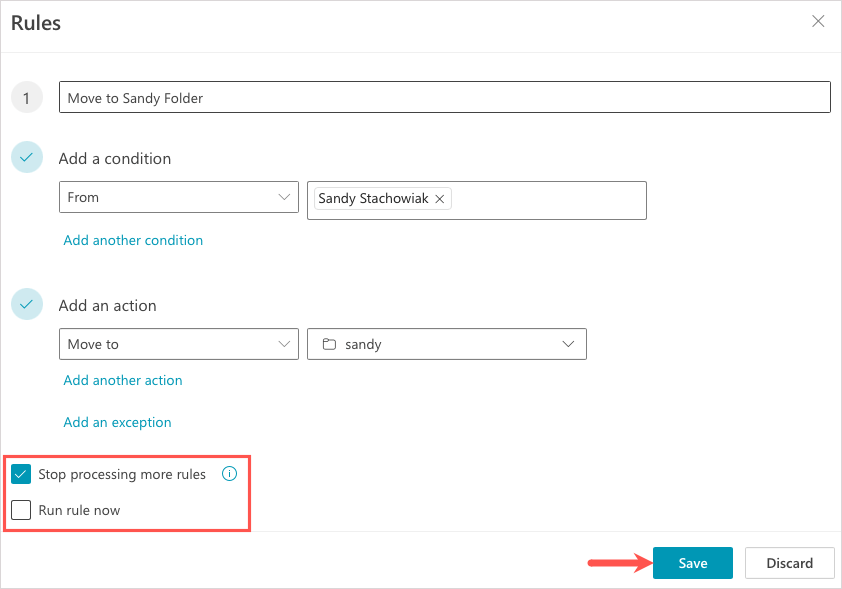
- Optionally, you can mark the boxes to stop processing more rules and run the rule on your inbox immediately.
- When you finish, select Save.
Will Your Emails Follow the Rules?
By creating email rules in Outlook, you can minimize the time it takes you to organize your messages, remember to follow up, or reply to certain emails. If you run into trouble, take a look at these fixes for when Outlook email rules aren’t working.
