Don’t feel bad for having trouble deleting a page in Microsoft Word. While it seems like it should be a simple task, deleting a page in Word can be extremely frustrating. Even the most tech-savvy of users can find it difficult to delete a page in Word.
The problem seems to happen most often when you want to delete a blank page at the end of your document. No matter what you do, you can’t delete that blank page. This can happen for a variety of reasons, but don’t worry. If you try the suggestions below, one of them is bound to solve your problem.
3 Ways to Delete a Page in Microsoft Word
Here are three ways you can delete a page from your Microsoft Word document. If one method doesn’t work, try the others!
1. Delete a Final Blank Page in Word Using Your Keyboard
This method is very straightforward and works most of the time.
- Position your cursor at the top of the blank page at the end of your document.
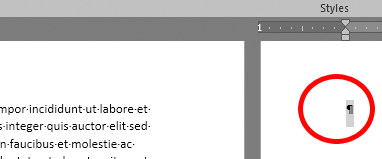
- Make sure there isn’t anything on that page. For example, there could be an invisible paragraph at the end of your text. Select everything you can on the blank page. In the screen cap below, the invisible paragraph is selected.
- Press Backspace to delete the selection.
- Press Backspace again to delete the blank page.
2. Delete a Blank Page by Removing the Page Break
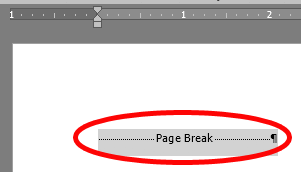
By turning on paragraph marks and other hidden symbols, you will see where Microsoft Word has inserted a page break. Once you know where the page break is, you can delete it. You can use this method to delete a final blank page in your document.
- In the Paragraph section the Home tab of the menu ribbon in Word, select the Show/Hide ¶ button, or press Ctrl+* (Ctrl+Shift+8).
- Now you’ll see any page breaks that have been inserted into your document.
- Find the offending page break and select it with the cursor.
- Press Backspace to delete the page break.
- Select the Show/Hide ¶ button again to turn off formatting marks.
3. Delete a Blank Page in Word Via the View Menu
This method of deleting a blank page from a Word document is good for deleting any blank page, no matter where it is in the document.
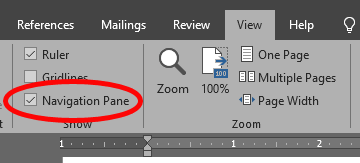
- Select the View tab on the menu ribbon.
- Next, in the Show section of the menu, check the box next to Navigation Pane.
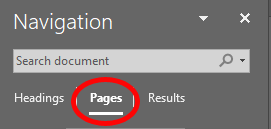
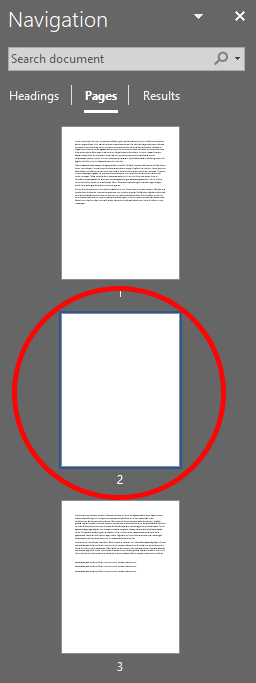
- Select Pages in the Navigation Pane.
- Select the page you want to delete.
- Press the Delete key.
Troubleshooting Deleting a Page in Word
Sometimes Word will add a paragraph to the end of your document that just cannot be deleted, even though it doesn’t have any text in it. If the methods above don’t work to delete a blank page in your Microsoft Word document, here are some things to try.
Make that Final, Invisible Paragraph as Tiny as Possible
- In the Paragraph section the Home tab of the menu ribbon in Word, select the Show/Hide ¶ button, or press Ctrl+* (Ctrl+Shift+8).
- Select the paragraph mark at the end of that non-deletable paragraph at the end of your document.
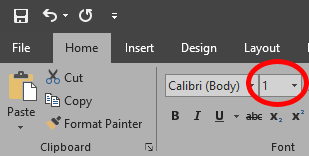
- In the Font size box on the Home tab of the menu, type 1. You’re making the font size for that paragraph as small as it can get.
Adjust the Bottom Margin of Your Document
If that pesky final paragraph is still pushed onto a blank page at the end of your document, you can try adjusting your document’s bottom margin to make room for it.
- Select the Layout tab in the menu ribbon.
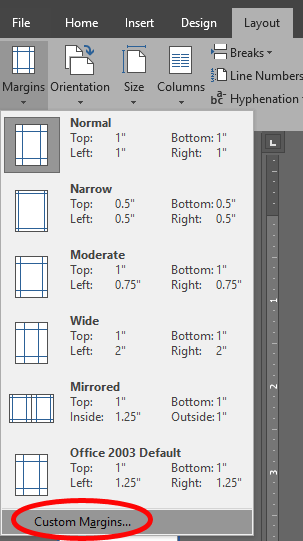
- Select Margins.
- Select Custom Margins.
- Make the Bottom margin smaller. You can try this by increments. For example, if the bottom margin of your document is set to 1”, try 0.9” first.
- Select OK.
- If that doesn’t do the trick, repeat the steps, making the bottom margin smaller until it solves your problem.
Convert the Document to PDF and Delete the Blank Page in the Process
If all else fails, you can delete the trailing blank page by converting your document to PDF.
- Select File and then Save As.
- Navigate to the folder where you want to save your document.
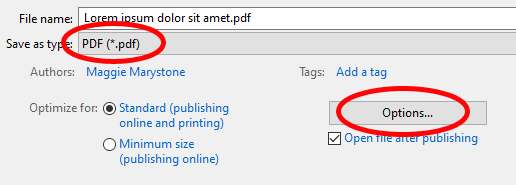
- In the Save As dialog box, under Save as type, choose PDF (*.pdf).
- Select Options.
- In the Options dialog box, under Page range, select Page(s), and enter the page range for your document. Do NOT include the final blank page.
- Select the OK button.
- Select the Save button.
Now you’ll have a PDF version of your document without the trailing blank page. If you like, you can convert the PDF back to Word.
How to Convert PDF to Word
Converting a PDF document to a Microsoft Word document used to require third-party software, and it was really a pain. Word now includes that capability natively.
- Open Microsoft Word.
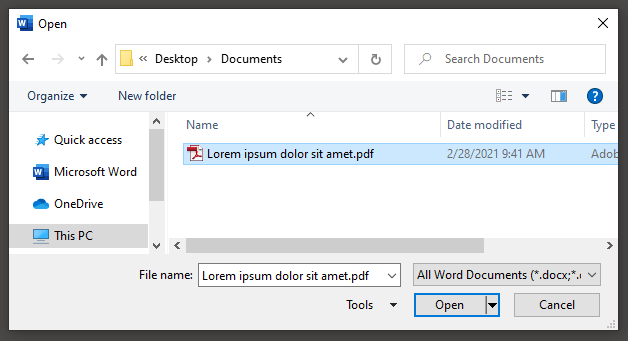
- Select File > Open.
- Navigate to the folder containing your PDF and select it.
- Select the Open button.
- You’ll probably see a message from Microsoft Word warning you that the conversion process might take some time to generate and that, depending on the formatting and presence of graphics, might not look exactly like the original PDF. Check the box if you don’t want to see that message again.
- Select OK.
Once Word is finished converting your PDF to Word, the Word document will open. Since you didn’t include that final blank page when you converted from Word to PDF, the blank page will be gone from the document when you convert the PDF back to Word.
