Are there times you decide to rearrange the data in your worksheet after you add it? If so, you can move data-filled rows in Microsoft Excel using a few different methods.
Instead of retyping the data in a different location or copying, pasting, and then deleting the original dataset, use one of these ways to move rows in Excel.
Before You Begin: (Optional) Insert a New Row
Before you use one of the methods below to move a row in Excel, you may want to insert an empty row. This is helpful if you’re moving the row between others that already contain data that you don’t want to overwrite.
Here are two quick and easy ways to insert a row in Excel on Windows, Mac, and the web:
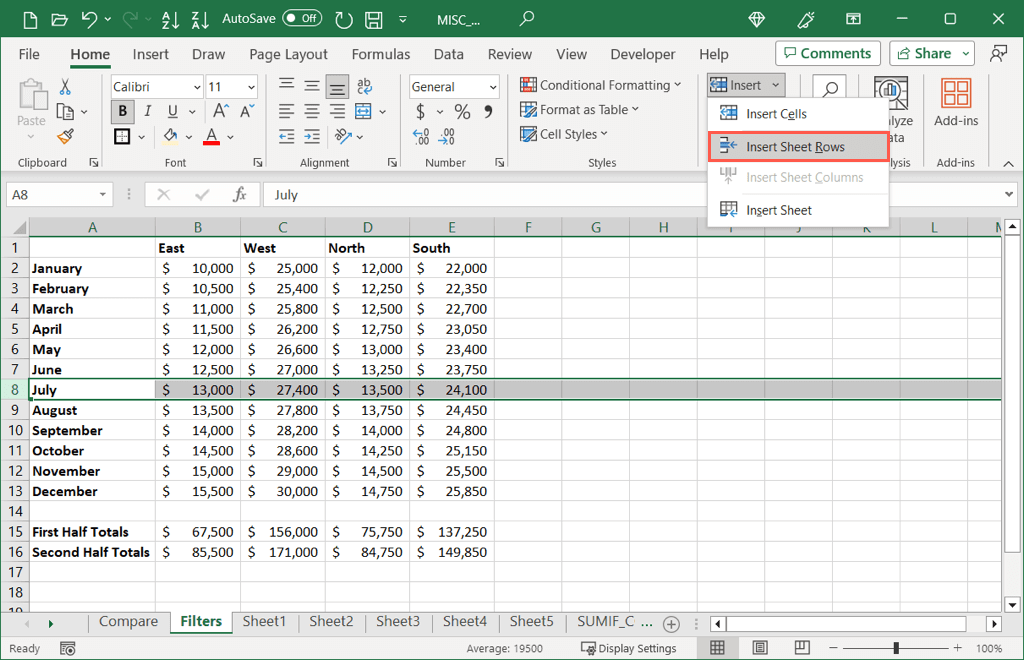
- Select the row where you want to insert one above, go to the Home tab, and choose Insert Sheet Rows in the Insert drop-down menu.
- Right-click a row where you want one above it and select Insert in the pop-up menu.
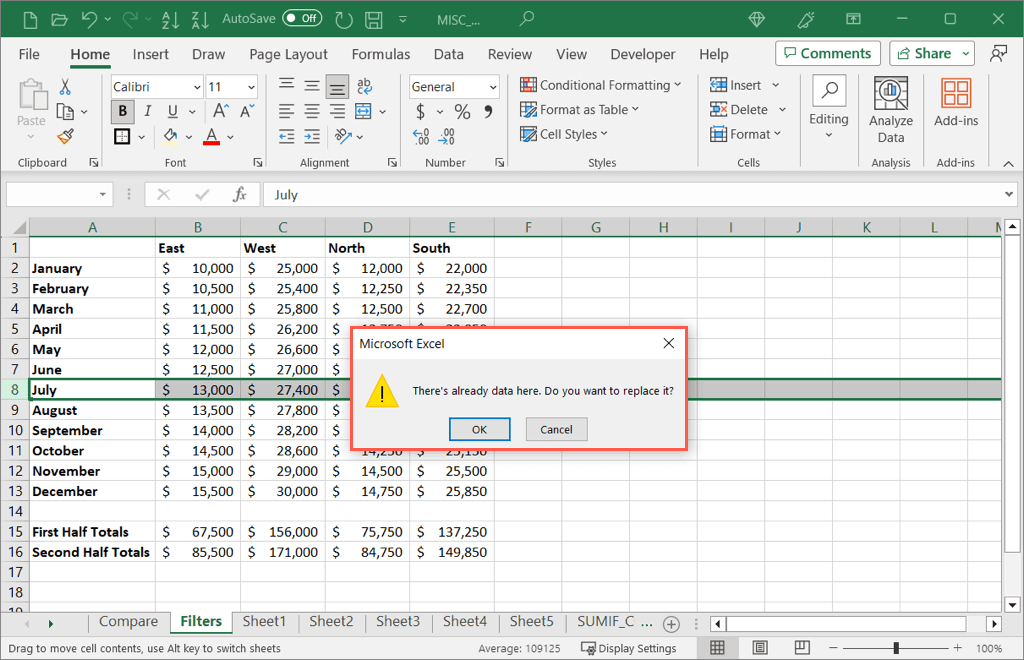
If you move a row to another row containing data, you’ll receive a pop-up message asking if you want to continue. If you want to replace the data, select OK, otherwise, choose Cancel and make room for the row you’re moving.
Check out our how-tos for additional ways to add a single row or to insert multiple rows in an Excel workbook.
Move Rows With the Ribbon
With a spot ready for the row you want to move, you can use the tools on the Ribbon to move it.
- Choose the row you want to move by selecting the row number which highlights the entire row. You can also select a group of rows if needed.
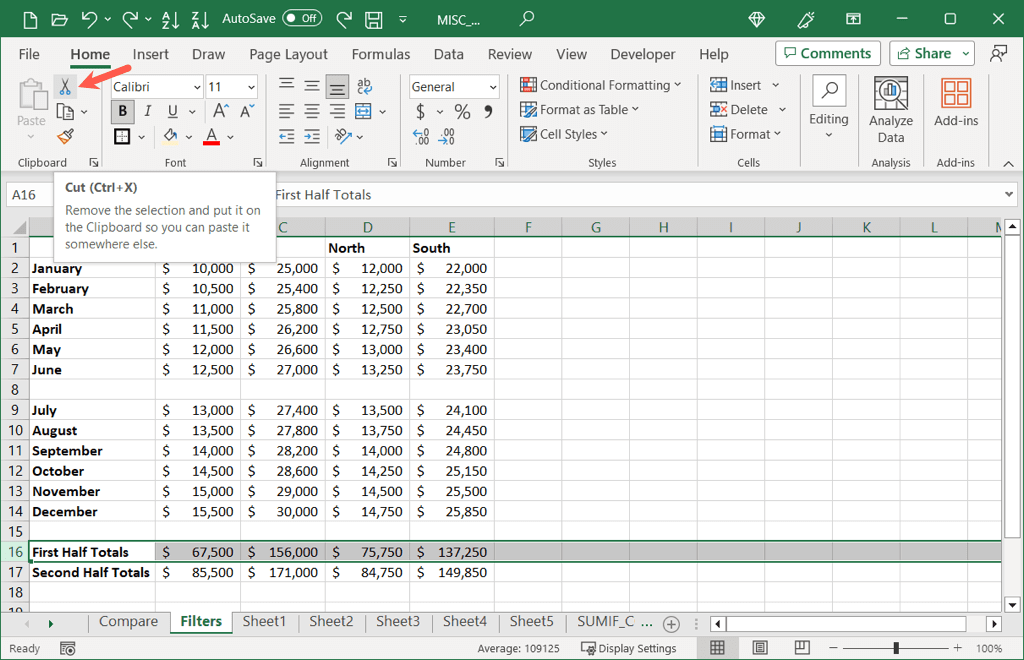
- Go to the Home tab and select Cut (scissors button) in the Clipboard section.
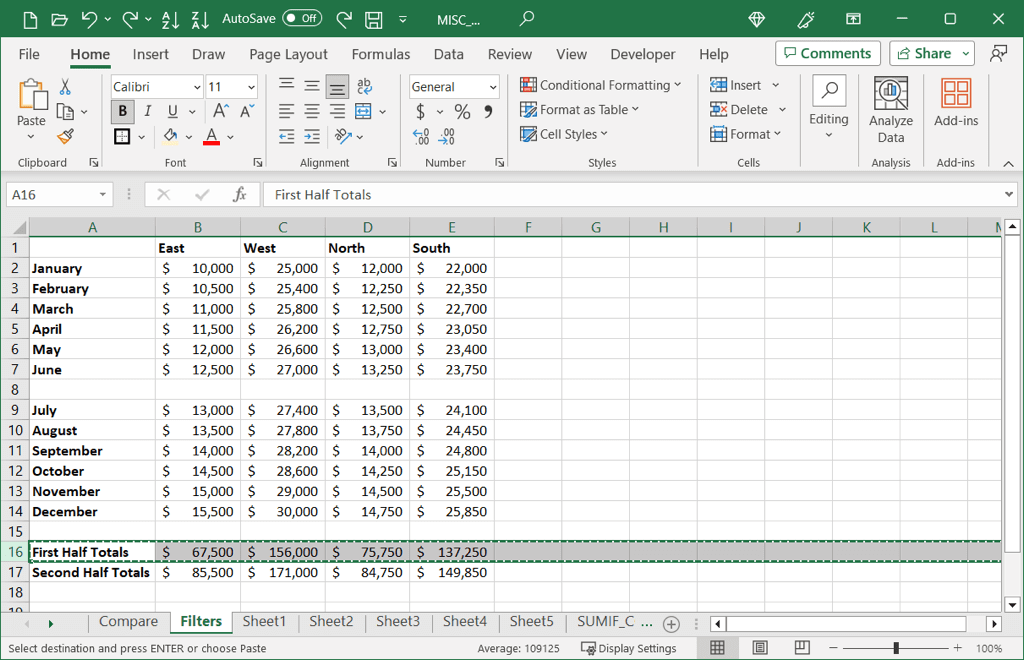
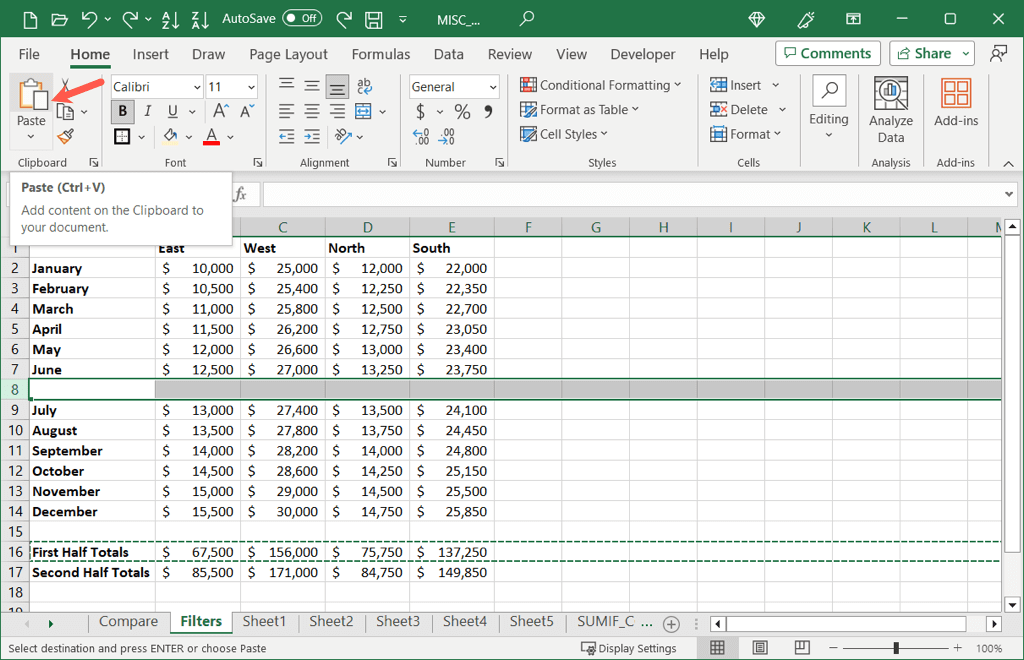
- You’ll then see the selected row with a moving dotted outline.
- Choose the row where you want to move the selected one, go to the Home tab, and pick Paste (clipboard button) in the Clipboard section.
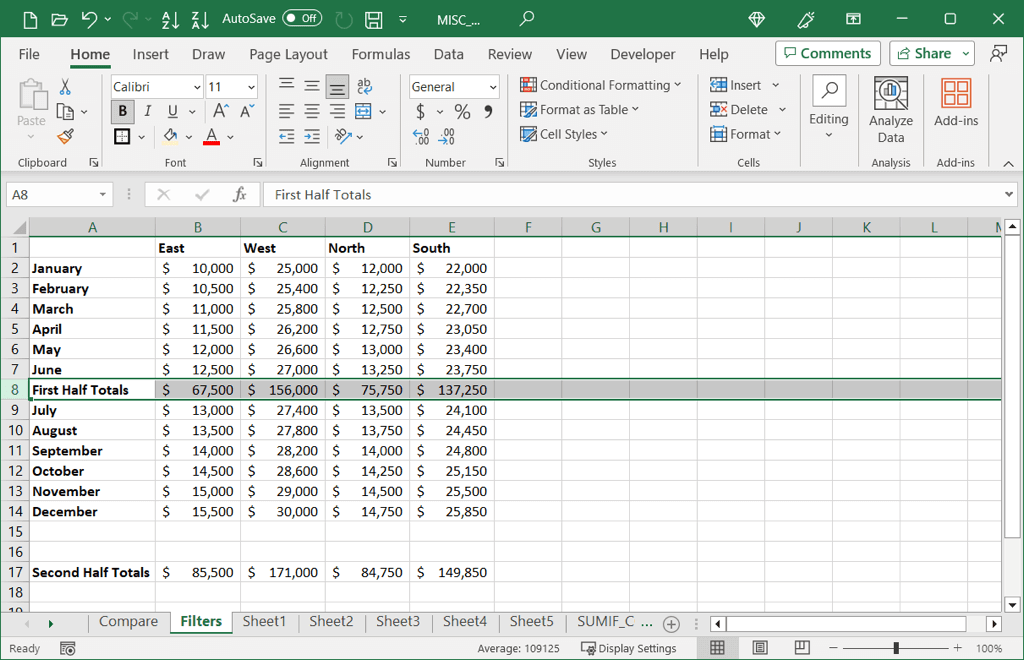
You’ll then see your row moved to its new location.
Tip: If you choose not to insert a blank row first, you can select Insert > Insert Cut Cells on the Home tab instead of using the Paste button. The cut row will be inserted between the rows without replacing the data.
Move Rows With Your Mouse or Trackpad
If you’re nimble with mouse gestures, you can quickly move a row using it or your computer’s trackpad. This method works on Windows, Mac, and the web as well.
Drag and Drop the Row
- Select the row or group of rows you want to move and place your cursor on its edge.
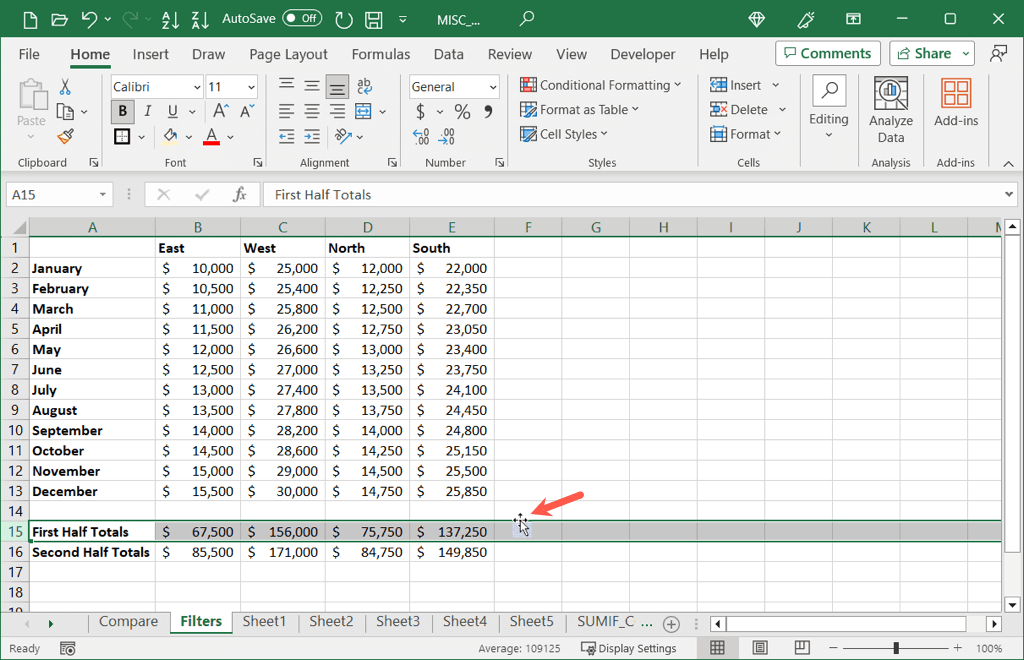
- When you see the four-sided arrow or hand, depending on the platform’s cursor, drag the row to your desired location.
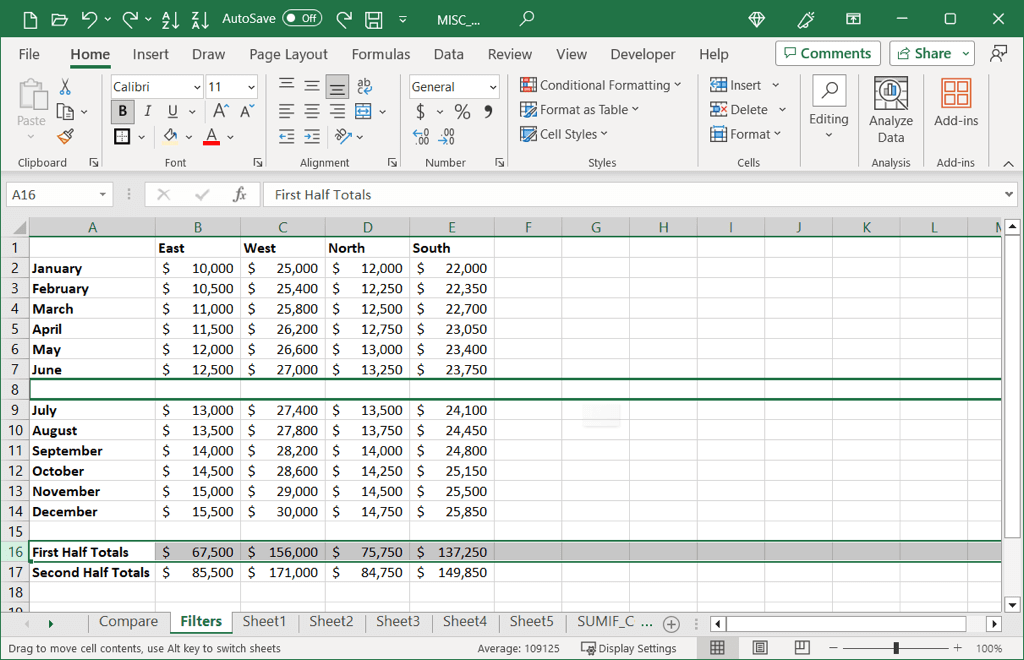
- Release when you see the bold outline and your row will be moved.
Use the Context Menu
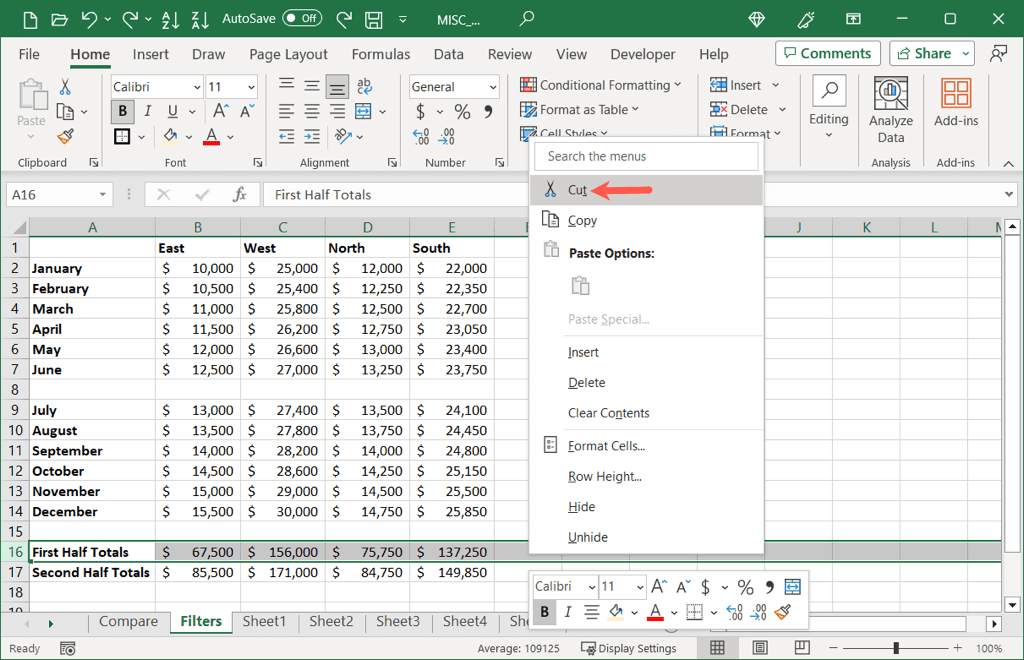
Alternatively, you can use your context (right-click) menu with a mouse or trackpad to cut and paste the row.
- Right-click the row(s) you want to move and select Cut.
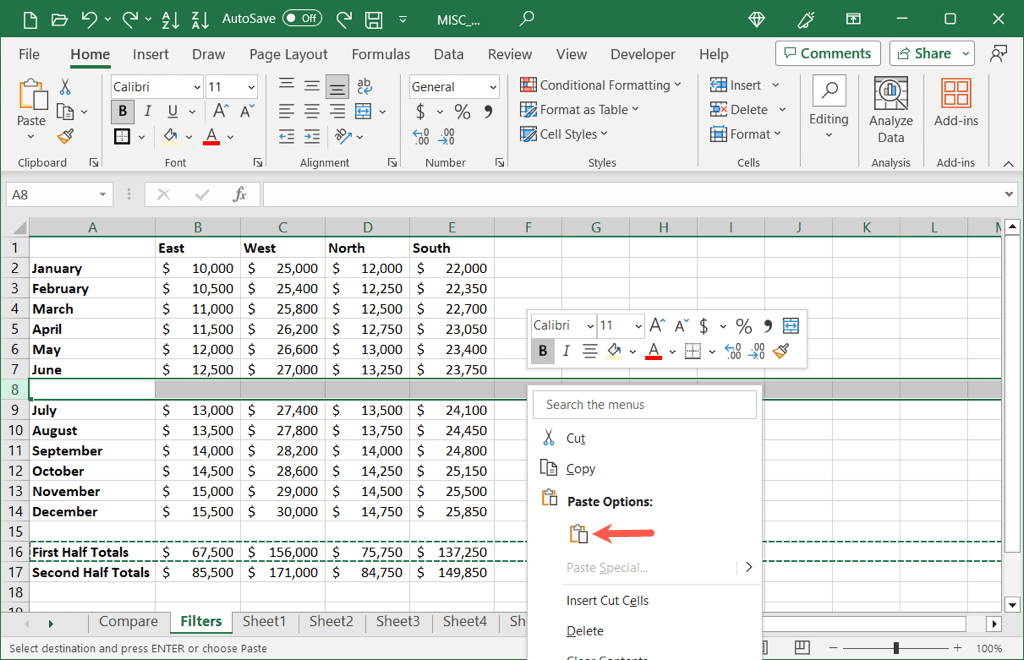
- Right-click where you want to move the row(s) and select Paste.
Tip: If you opted not to insert a blank row first, you can select Insert Cut Cells in the context menu instead of Paste and you won’t overwrite your data.
Move Rows With a Keyboard Shortcut
Maybe you prefer to use keyboard shortcuts to get things done. This is another option for moving a row in Excel. If you’re using Excel on the web, use the key combination below for your platform, Windows or Mac.
- Select the row(s) you want to move and use the Ctrl + X shortcut on Windows or Command + X on Mac for the cut action.
- Go to the spot where you want to insert the cut row(s) and use Ctrl + V on Windows or the Command + V shortcut on Mac for the paste action.
You should see your row removed (cut) from the first location and entered (pasted) into the second.
Move Rows in the Excel Mobile App
If you’re using Excel on Android or iOS and want to move a row or two there, you can do so just as easily using a couple of different methods.
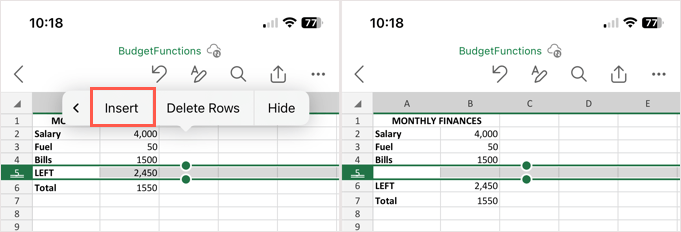
If you want to insert a blank row first, tap the row where you want one above and select Insert in the toolbar that appears.
Drag to Move a Row
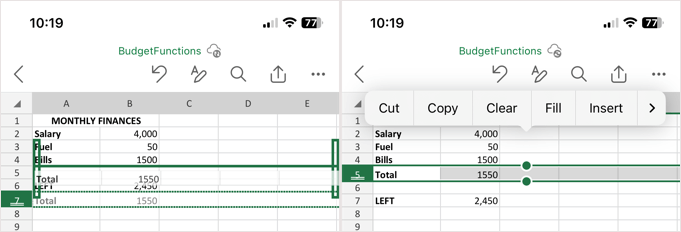
Select the row you want to move by tapping the row number. Hold an edge of the row as you drag it to its new position and release. Note that you’ll see a dark line as you drag the row up or down and existing rows move out of the way.
Cut and Paste to Move a Row
Select the row and choose the Cut icon (Android) or Cut (iPhone) in the toolbar that appears. Choose the spot where you want to place the row and choose the Paste icon (Android) or Paste (iPhone) in the toolbar.
It’s nice to know there’s more than one way to move rows in Excel. This flexibility lets you choose the method that works best for you or your spreadsheet setup.
For more, look at how to move columns in your Excel sheet too.
