Because they don’t print by default, we’ll show you how to print Excel worksheets with gridlines using both the desktop application and Microsoft Excel on the web.
If you’re printing an Excel spreadsheet with a lot of data, you may want to include the gridlines. These provide you with subtle borders around your cells without having to manually add them, thus making the data easier to read.
Gridlines Versus Cell Borders in Excel
The advantage to using gridlines versus cell borders when you print in Excel is that they appear around your data automatically when you mark the option as described below.
By default, the gridlines encompass only the data in your sheet. This means if you add or remove data later, the gridlines automatically accommodate those changes.
When you apply cell borders to your data for printing instead, those lines do not update automatically. So, if you add or remove data later, you must manually adjust those cell borders before printing.
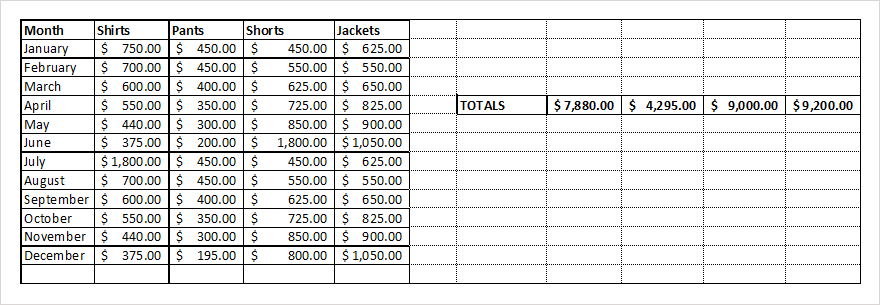
If you do add cell borders to your sheet for another reason and also want to print the gridlines, both display when you print the sheet. The borders you apply simply appear as bolder lines when you print (or in color per your border settings) as shown below.
How to Print Excel With Gridlines on Desktop
You can print gridlines in Excel on Windows and Mac by adjusting the same setting. However, Excel on Windows does provide another way to add gridlines when you’re ready to print.
- Open your Excel workbook on Windows or Mac to the sheet you want to print.
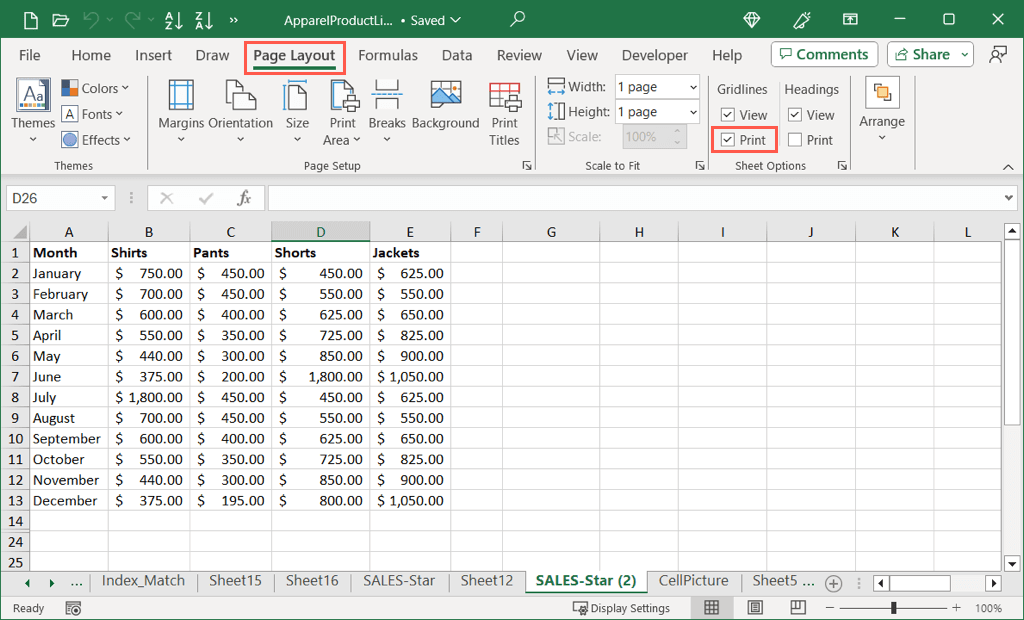
- Go to the Page Layout tab and check the box next to Print in the Gridlines section.
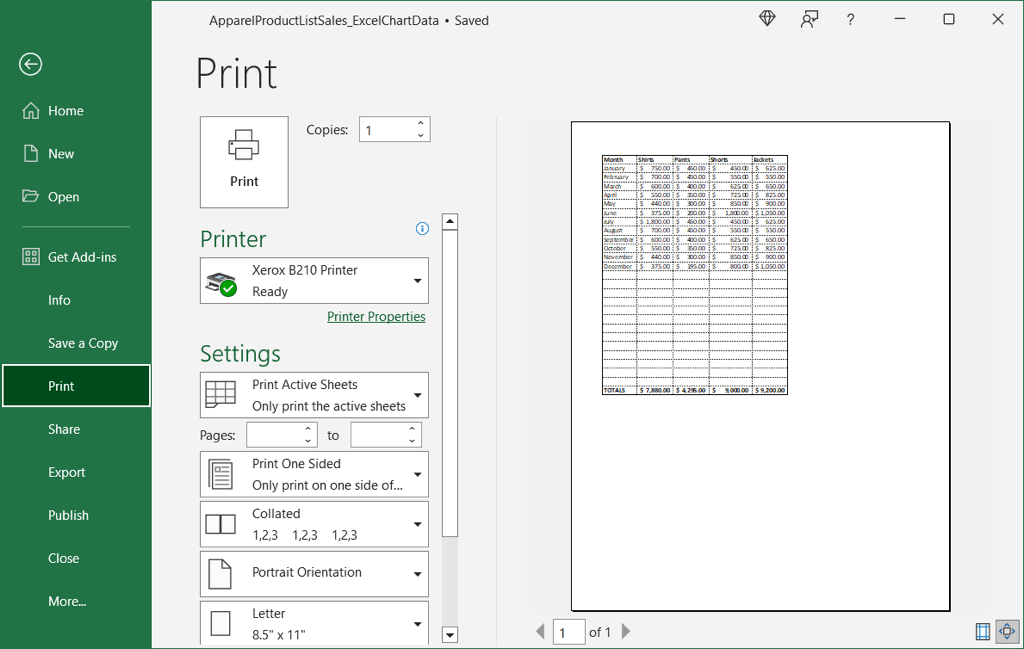
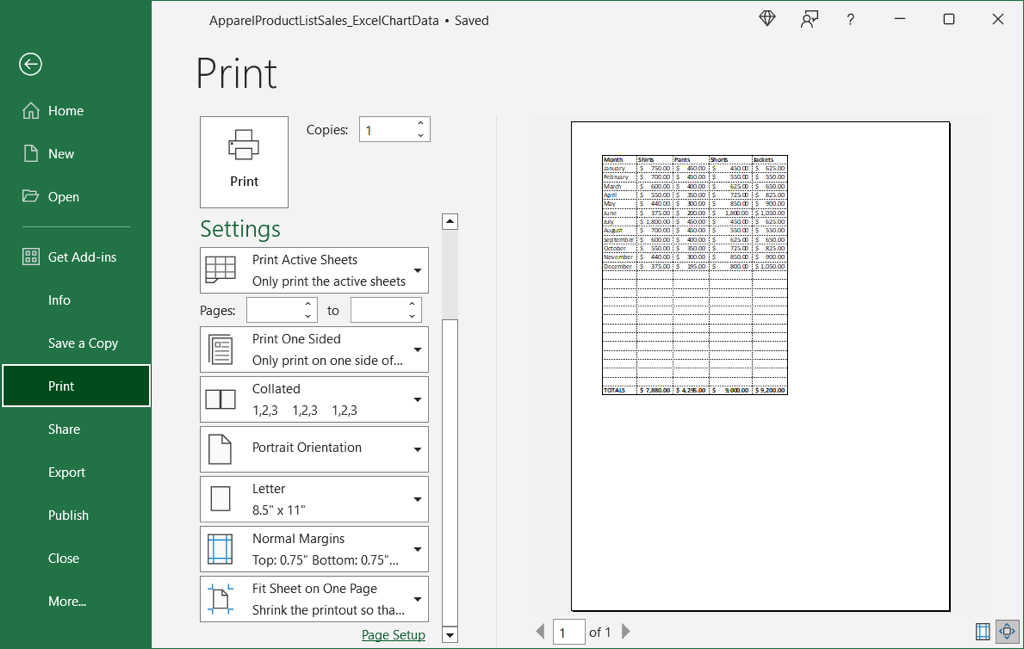
- To see a preview or print the sheet, head to the File tab and pick Print. You’ll see your sheet preview with the gridlines.
If you want to print the entire workbook with gridlines, you’ll need to add them to each individual sheet first by following the above steps.
Display the Gridlines in the Print Preview on Windows
If you forget to mark the Print option for gridlines on the Page Layout tab as described above and are already in the print preview, you can add the lines there if you’re using Excel on Windows.
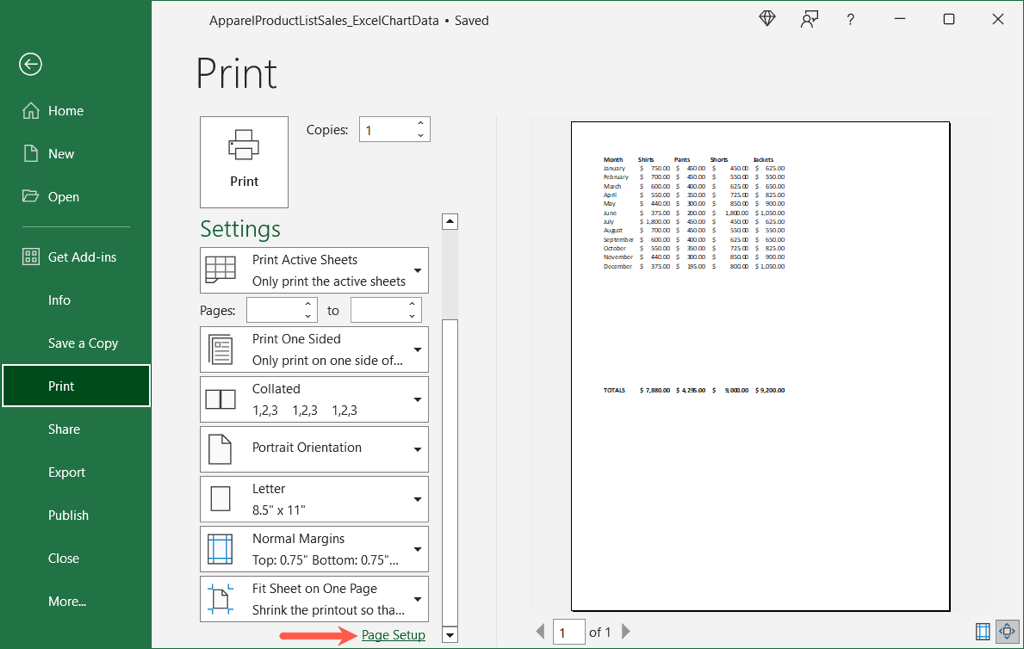
- In the preview, move to the bottom of the print settings and select Page Setup.
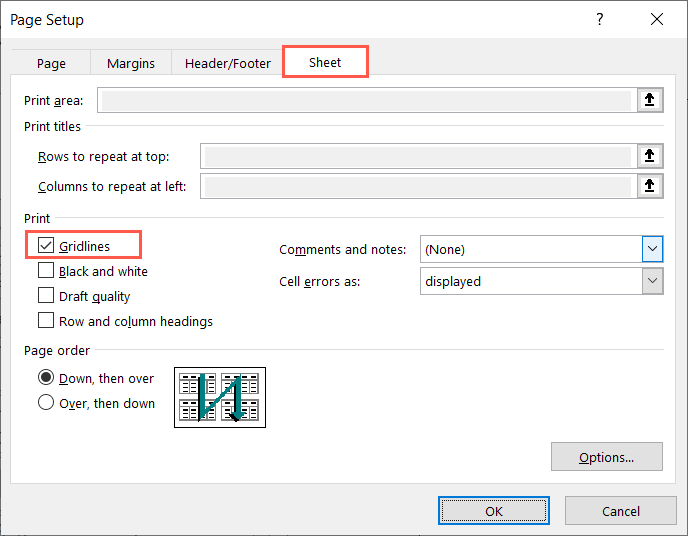
- Go to the Sheet tab, check the box for Gridlines in the Print section, and choose OK.
- You’ll then see the gridlines in the print preview for the spreadsheet.
Follow these same steps if you want to print other sheets in the workbook with gridlines.
How to Print Excel With Lines on the Web
If you’re using Excel on the web, you can easily print the gridlines for your worksheet.
- Visit Excel online, sign in with your Microsoft account, and open the workbook with the sheet you want to print.
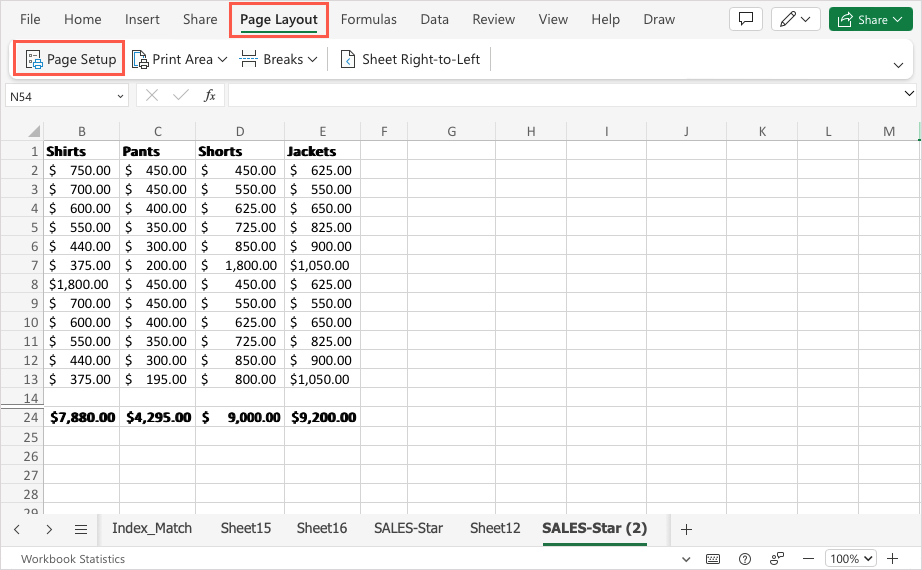
- Go to the Page Layout tab and pick Page Setup. Alternatively, select File > Print and pick Print.
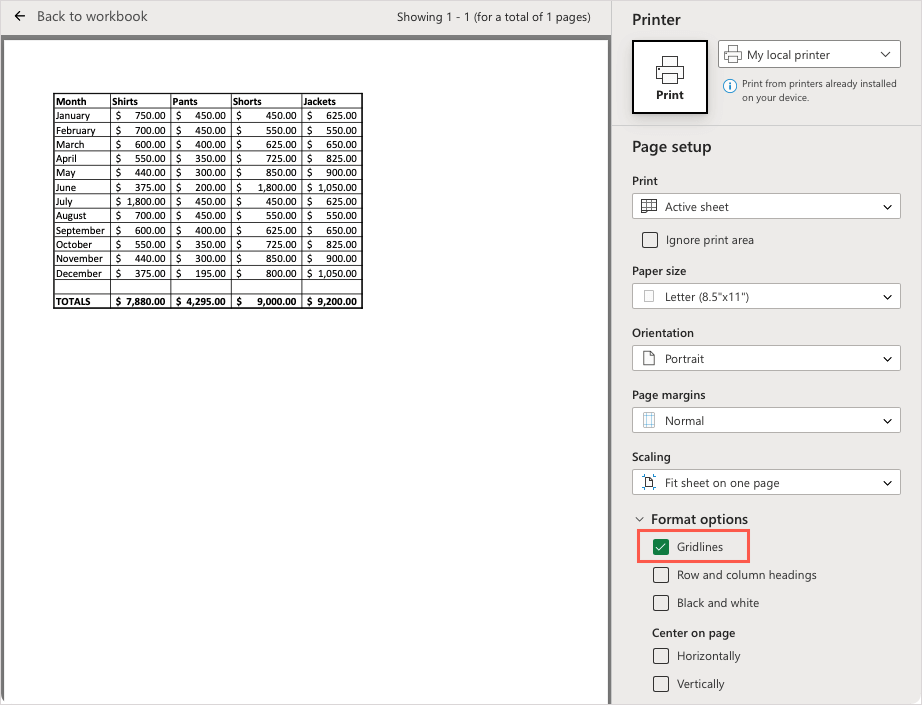
- On the right side, expand Format options and check the box for Gridlines. You’ll then see the lines displayed on your sheet, adjust any other print settings as needed, and print the spreadsheet.
Like in the desktop application, if you want to print the whole workbook with gridlines, you’ll need to add them to each sheet individually using the above steps.
Gridlines for Easy Reading in Excel
Not only can printing your sheet with gridlines in Excel save you time from manually adding cell borders, but gridlines can accommodate any changes you make to your data automatically. Plus, they make your printed data easier to read.
Now that you know how to print in Excel with lines, look at how to get rid of dotted lines in Excel too.
