Page breaks are handy for inserting a new page. However, there may come a time when you want to delete a break you’ve added. We’ll show you how to remove page breaks in Word on Windows, Mac, and the web.
Along with manual page breaks are those that Word adds automatically. Although you cannot delete automatic page breaks, you can decide where or how they are placed at the end of each page.
How to Remove Manual Page Breaks in Word
You can insert a page break in most any spot in your document by going to the Layout tab and selecting Breaks > Page. Unfortunately, there isn’t an option in the menu to remove a page break.
Because it can be hard to see where you place page breaks in your document, follow these steps to display and then remove manual page breaks.
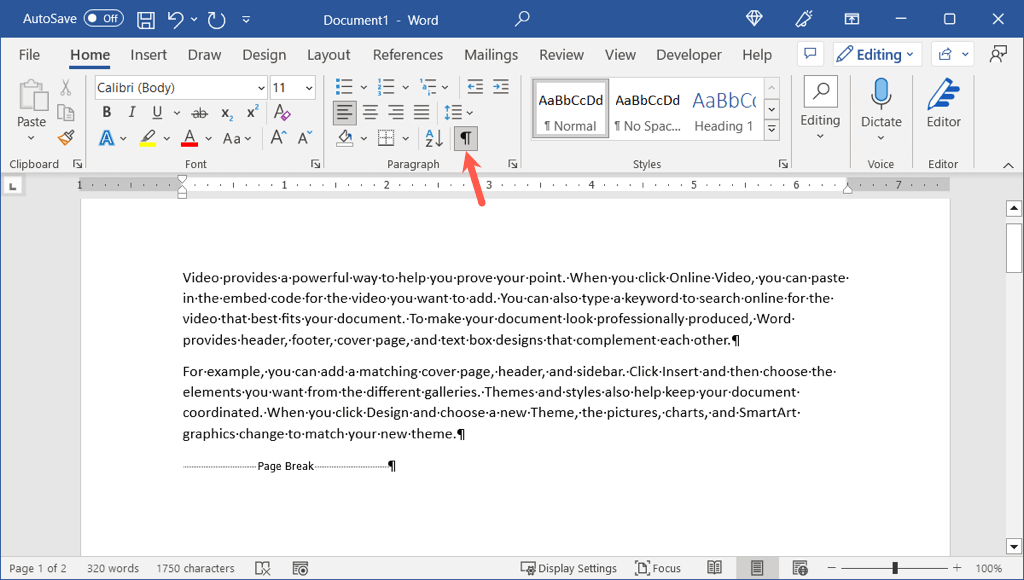
- Go to the Home tab and select the Show/Hide button in the Paragraph section of the ribbon.
- You’ll then see all paragraph formatting marks appear in your document including page breaks.
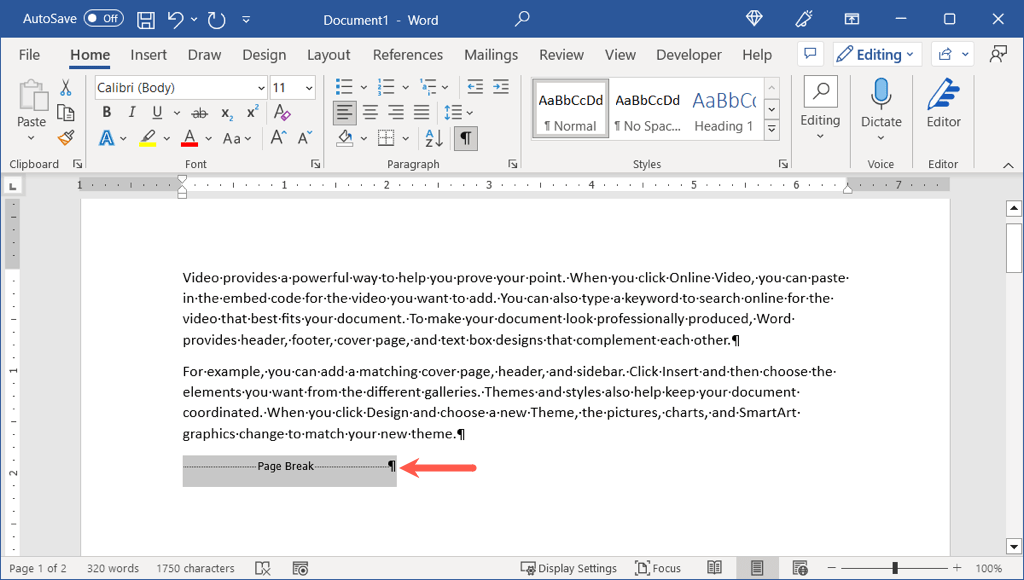
- Select the page break by dragging your cursor through it or by double-clicking it.
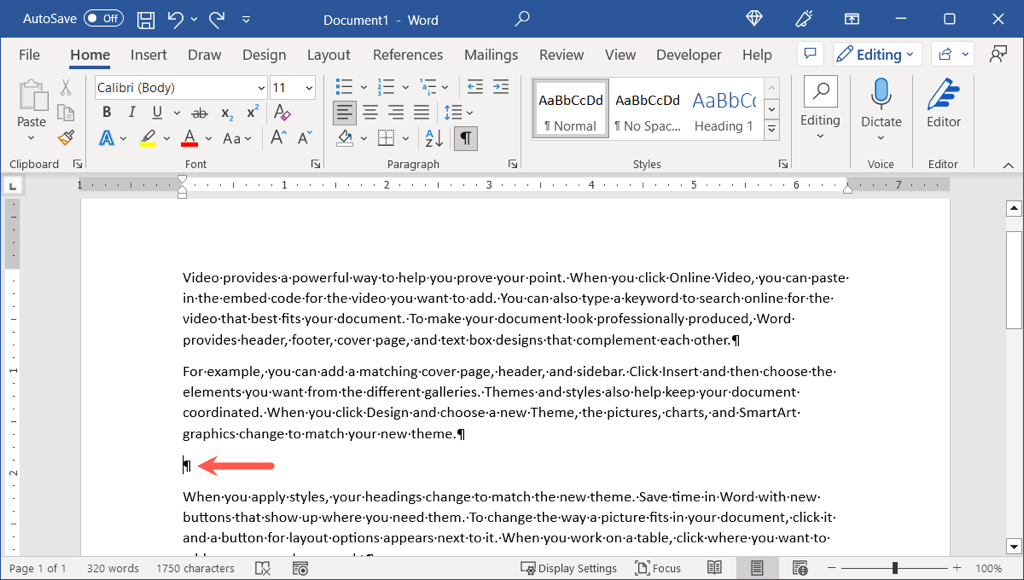
- Then, use your Delete key to remove the page break.
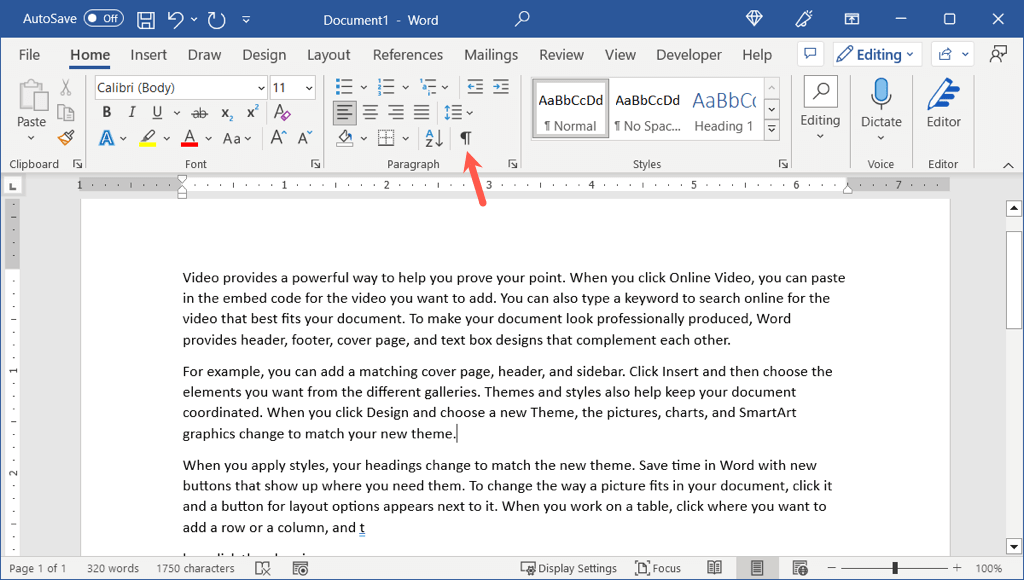
- You can return to the Home tab and deselect the Show/Hide button if you want to hide the paragraph marks once again.
In Word on the web, simply make sure you’re in Editing or Reviewing mode using the drop-down box on the top right. Then, select and delete the page break the same way.
How to Find Page Breaks in Word
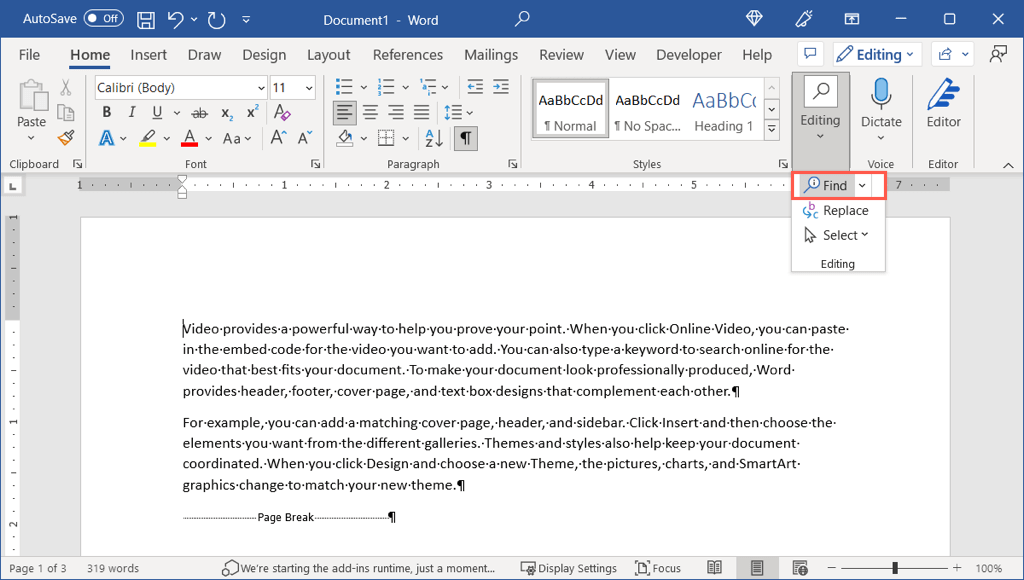
If you have a document with several manual page breaks, you can use the Find tool in Word to locate each one. Then, remove those you no longer want as described above.
Note: As of this writing, this search method does not work in Word on the web.
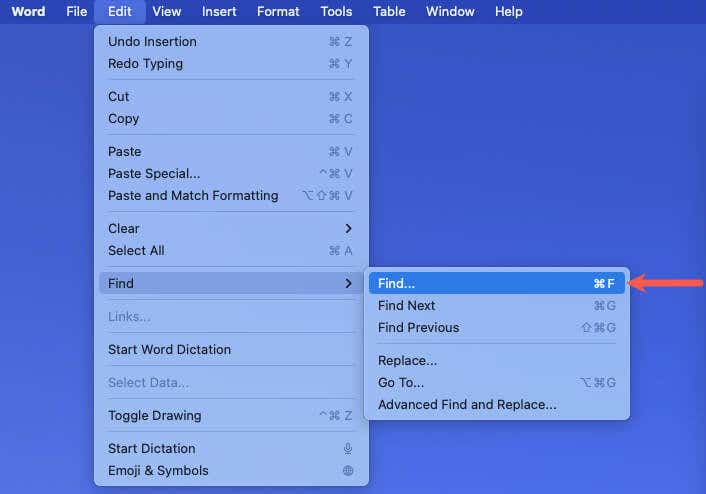
- Open the Find tool in Word one of these ways.
- On Windows, press Ctrl + F or go to the Home tab and select Find in the Editing group.
- On Mac, press Command + F or select Edit > Find > Find in the menu bar.
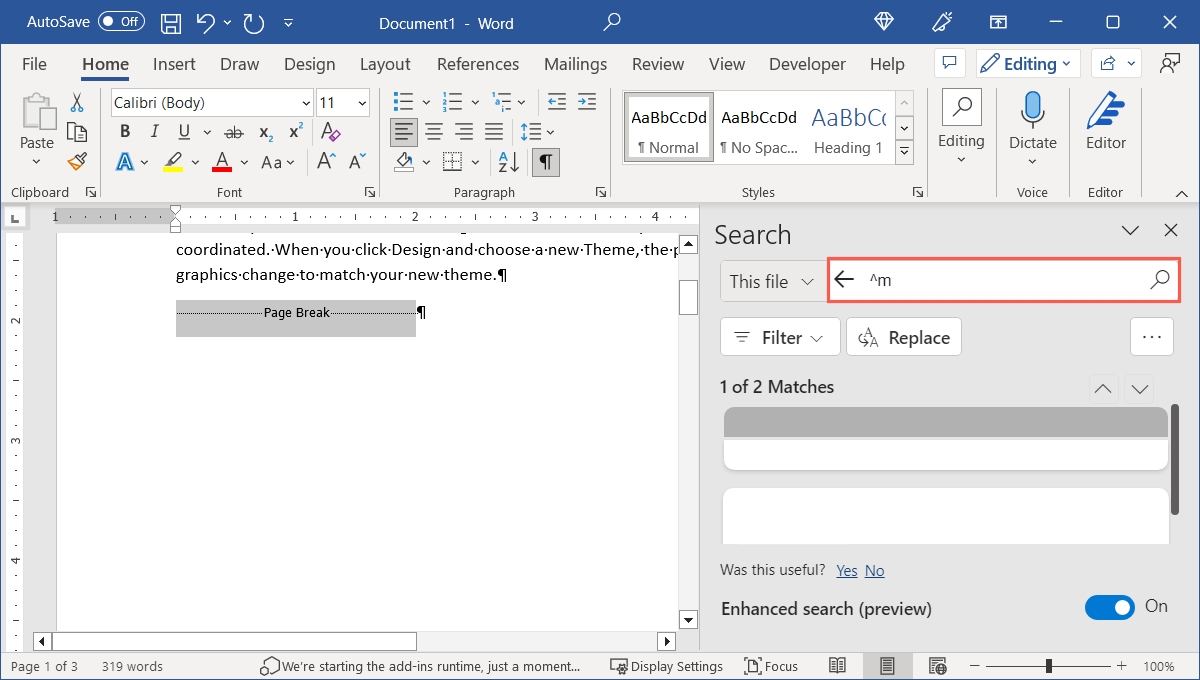
- When the Find tool opens, enter ^m (caret followed by the letter “m”) and use Enter or Return to start the search.
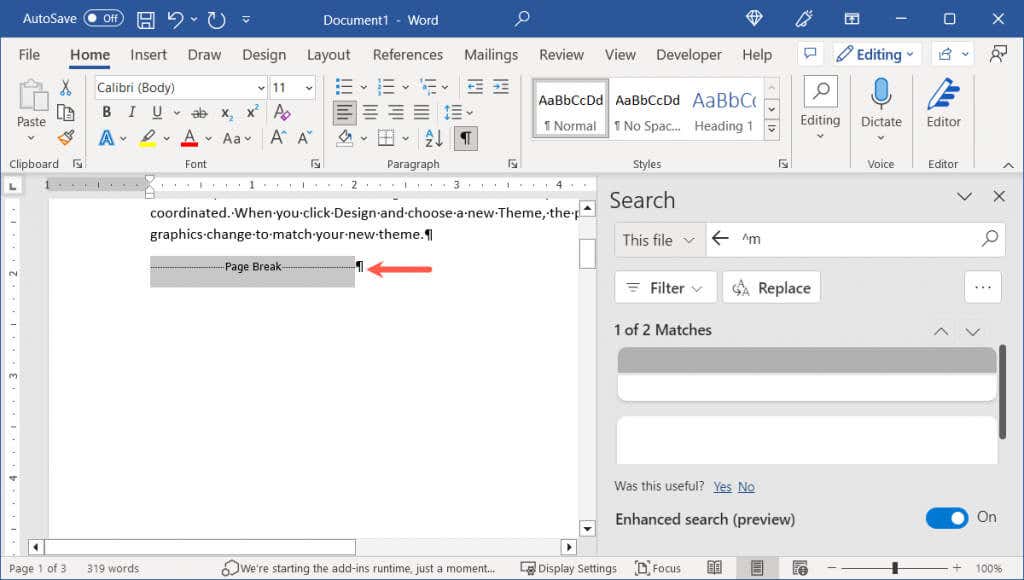
- As the tool locates each page break, it highlights it for you. Select the break, press Delete, and then continue to find and remove additional page breaks.
How to Adjust Automatic Page Breaks in Word
As mentioned, Microsoft Word adds automatic page breaks at the end of each page. Here’s how to adjust where a break should land on your pages.
In Word on Windows or Mac
You have a few options for how page breaks appear at the end of your document pages on Windows and Mac.
- Start by opening the Paragraph dialog box.
- In Word on Windows, go to either the Home or Layout tab and use the tiny arrow in the bottom corner of the Paragraph section.
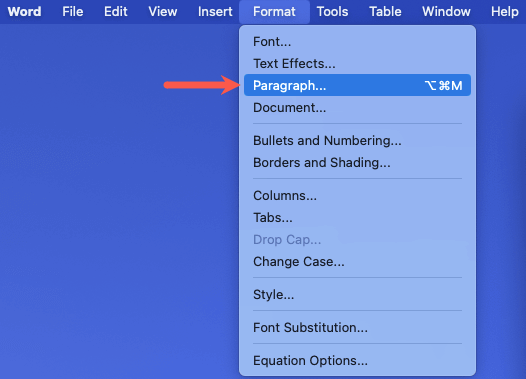
- In Word on Mac, select Format > Paragraph in the menu bar.
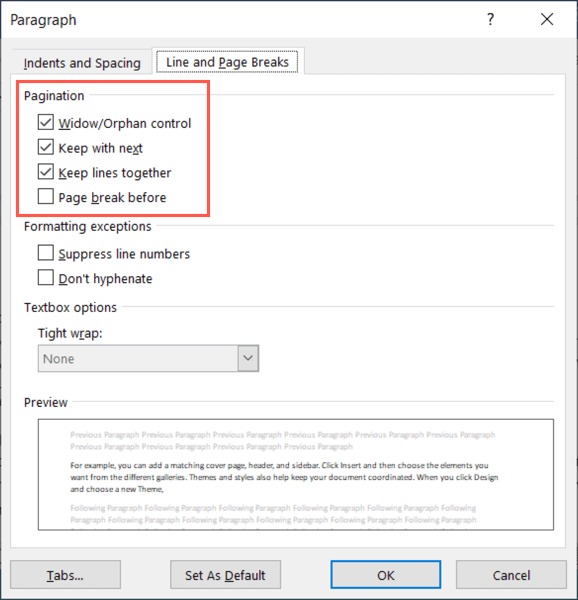
- Go to the Line and Page Breaks tab in the Paragraph window that appears.
- Choose one or more options in the Pagination section at the top of the window.
- Widow/Orphan control: This setting prevents single lines of text from appearing at the top (widow) or bottom (orphan) of a page. Instead, you’ll see at least two lines from a paragraph.
- Keep with next: This setting prevents a page break between paragraphs that you want to keep together.
- Keep lines together: This setting prevents a page break in the middle of a paragraph.
- Page break before: This setting adds a page break before a particular paragraph.
- Use the OK button at the bottom to save your change.
You should then see the automatic page breaks appear according to the settings you selected.
In Word on the Web
You can choose how automatic page breaks work in Word on the web as well.
- Go to the Layout tab and select More Options (three dots) on the right side of the ribbon.
- Pick Paragraph Options.
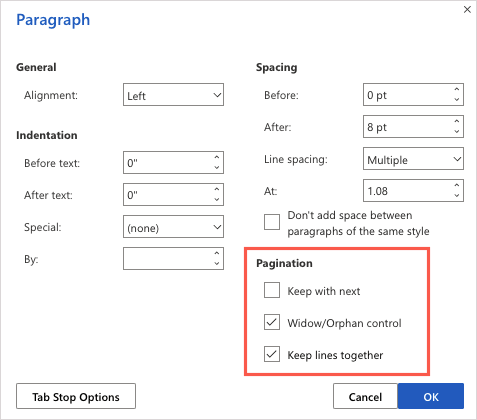
- On the bottom right, you’ll see the Pagination section. You’ll notice that all options except for “Page Break Before” are available.
- Check the boxes for the options you want to use and select OK to save the change.
While deleting page breaks in a Word document may not be obvious, it does take only a few seconds. Now that you know how to remove page breaks in Word, take a look at a related tutorial for how to delete a page in Word.
