
If you’ve ever had a shape cover up text you can’t click, or an image stubbornly sit on top of everything no matter what you do, you’ve run into PowerPoint’s stacking order problem. Every element on a slide — shapes, images, text boxes, icons — sits on its own layer, and when those layers pile up on a crowded slide, things get messy fast. Knowing how to control that stacking order is what separates a frustrating build from a smooth one. PowerPoint’s Selection Pane is the fastest way to manage those layers precisely, and it’s been significantly improved since most older guides were written.
What Is the Selection Pane?
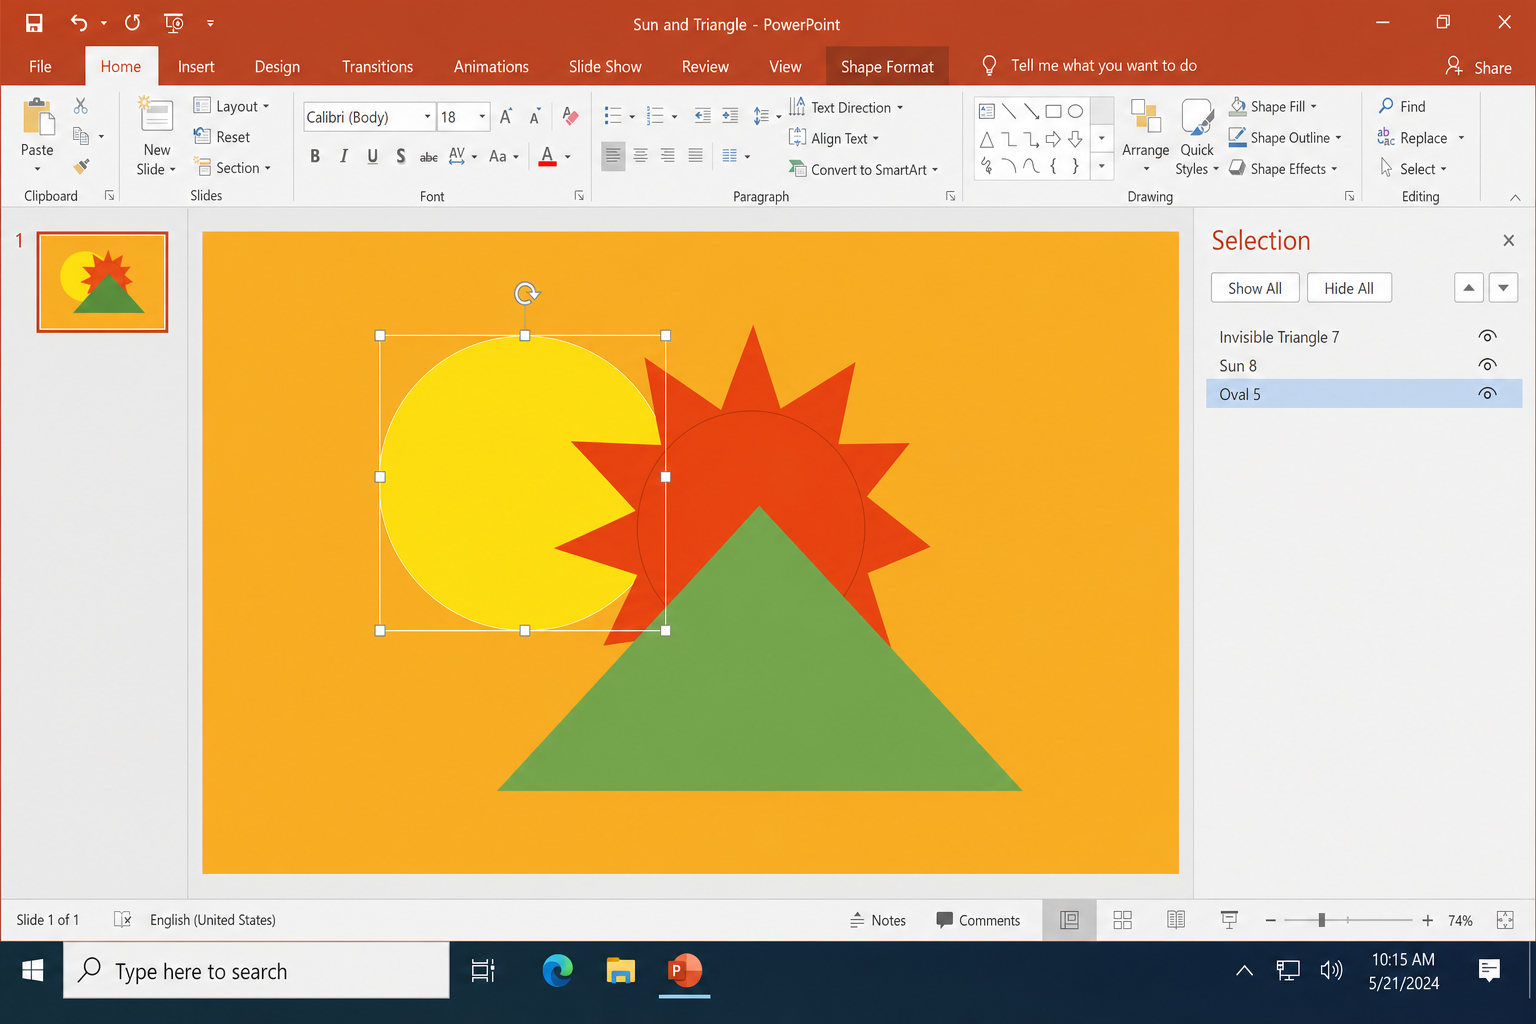
The Selection Pane is PowerPoint’s layer panel. It lists every object on the current slide, lets you rename them, hide them temporarily, and drag them into any stacking order you want. Think of it as the layer panel you’d find in Photoshop or Figma, but built into PowerPoint. It’s the tool this whole guide is built around, because clicking objects on a crowded slide to rearrange them gets frustrating fast.
How to Open the Selection Pane
There are two quick ways to open it depending on what you have selected:
- Home tab: Go to Home > Select > Selection Pane (no object needs to be selected first).
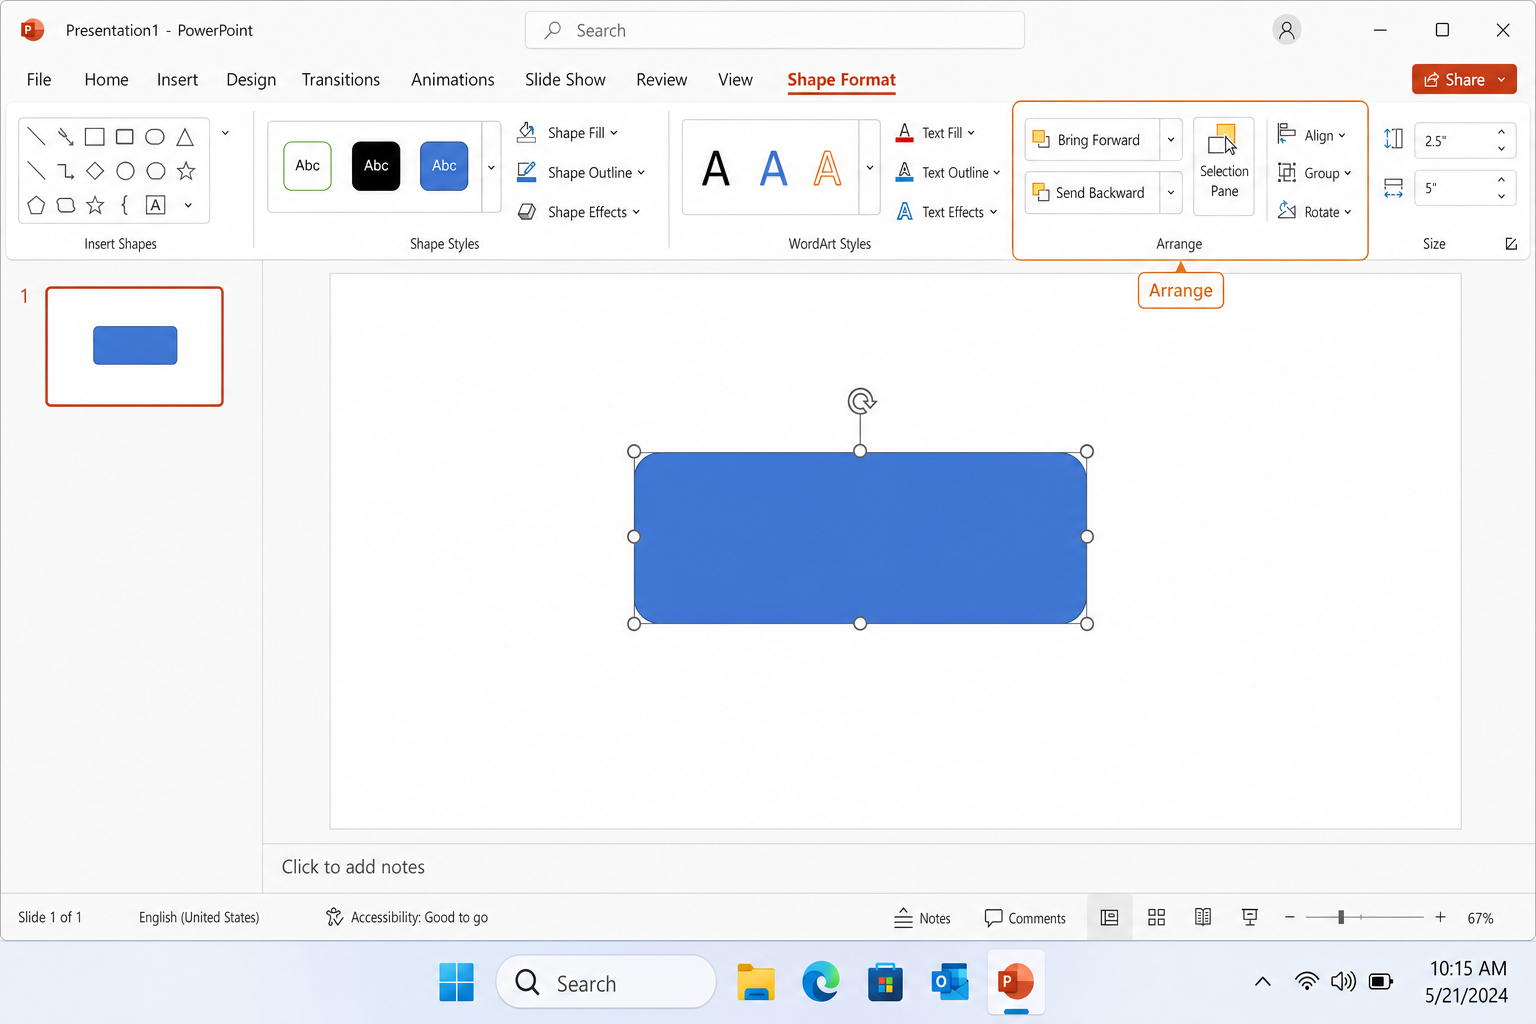
- Format tab: Click any shape or image, then go to Shape Format or Picture Format > Arrange > Selection Pane.
In PowerPoint for the web, go to Home > Arrange > Selection Pane.
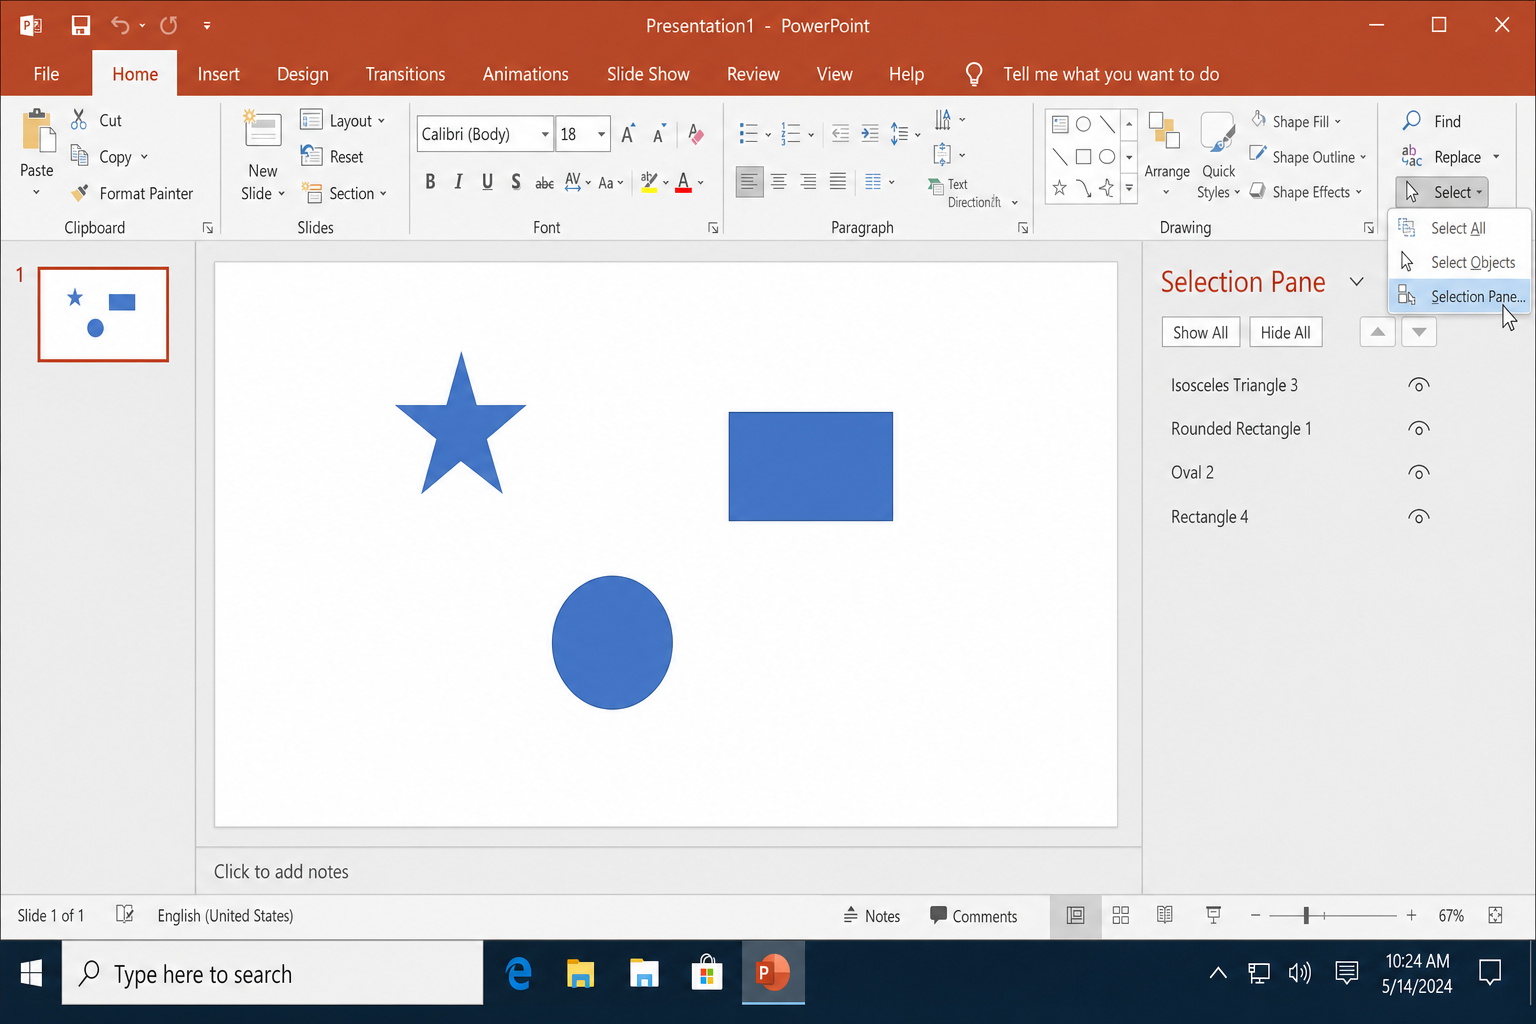
Once the pane opens on the right side, you’ll see a list of every object on the slide. The item at the top of the list is in front; the item at the bottom is at the back.
How to Reorder Layers
Method #1: Drag objects in the Selection Pane
This is the most precise method for complex slides with multiple overlapping objects.
- Open the Selection Pane using either method above.
- Find the object you want to move in the list.
- Click and drag it up (to move it in front of other objects) or down (to move it behind them).
- Release when the object is in the position you want.
The slide updates in real time as you drag, so you can see exactly what the new stacking order looks like before you let go.
Method #2: Use Bring to Front / Send to Back
For quick one-off adjustments, right-clicking the object directly on the slide is faster than opening the Selection Pane.
- Click the object you want to move on the slide.
- Right-click it to open the context menu.
- Choose one of the four options:
- Bring to Front: moves the object to the very top of the stack.
- Bring Forward: moves it up one level.
- Send Backward: moves it down one level.
- Send to Back: moves it to the very bottom of the stack.
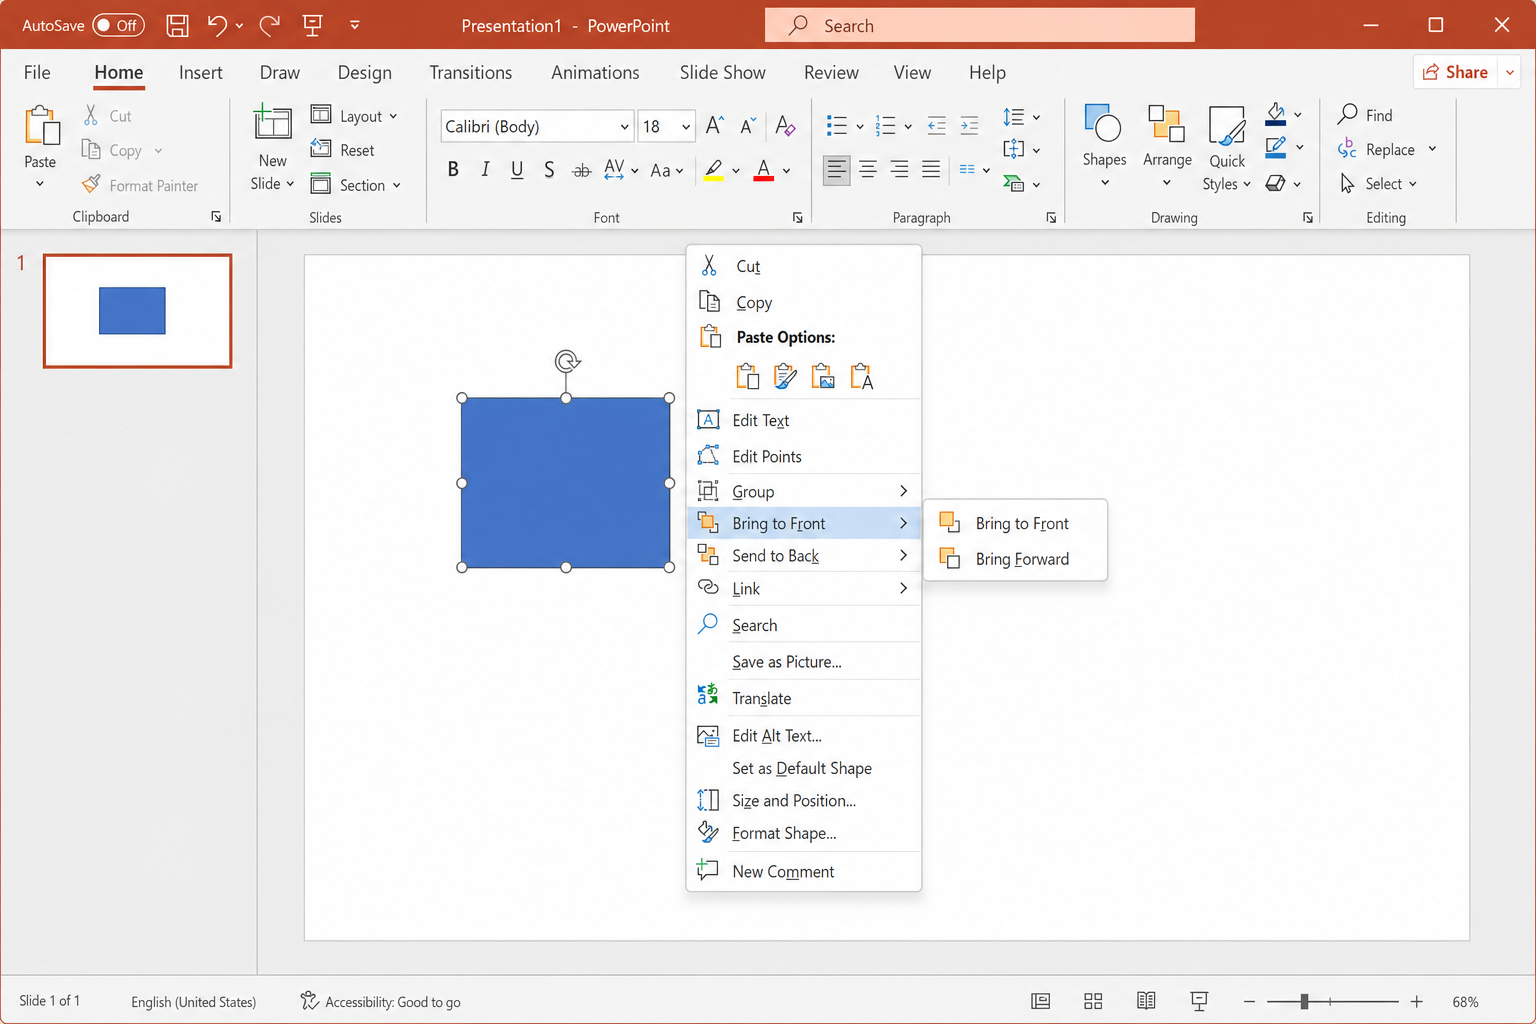
You can also access these same commands from the ribbon: with a shape or image selected, go to Shape Format (or Picture Format) > Arrange group and choose from the Bring Forward or Send Backward dropdowns.
Method #3: Use Tab to cycle through layers
If an object is buried under other objects and you can’t click it on the slide, press Tab to cycle through all objects in stacking order. Shift+Tab cycles in reverse. Once the object you need is selected, use the right-click menu or ribbon commands to move it.
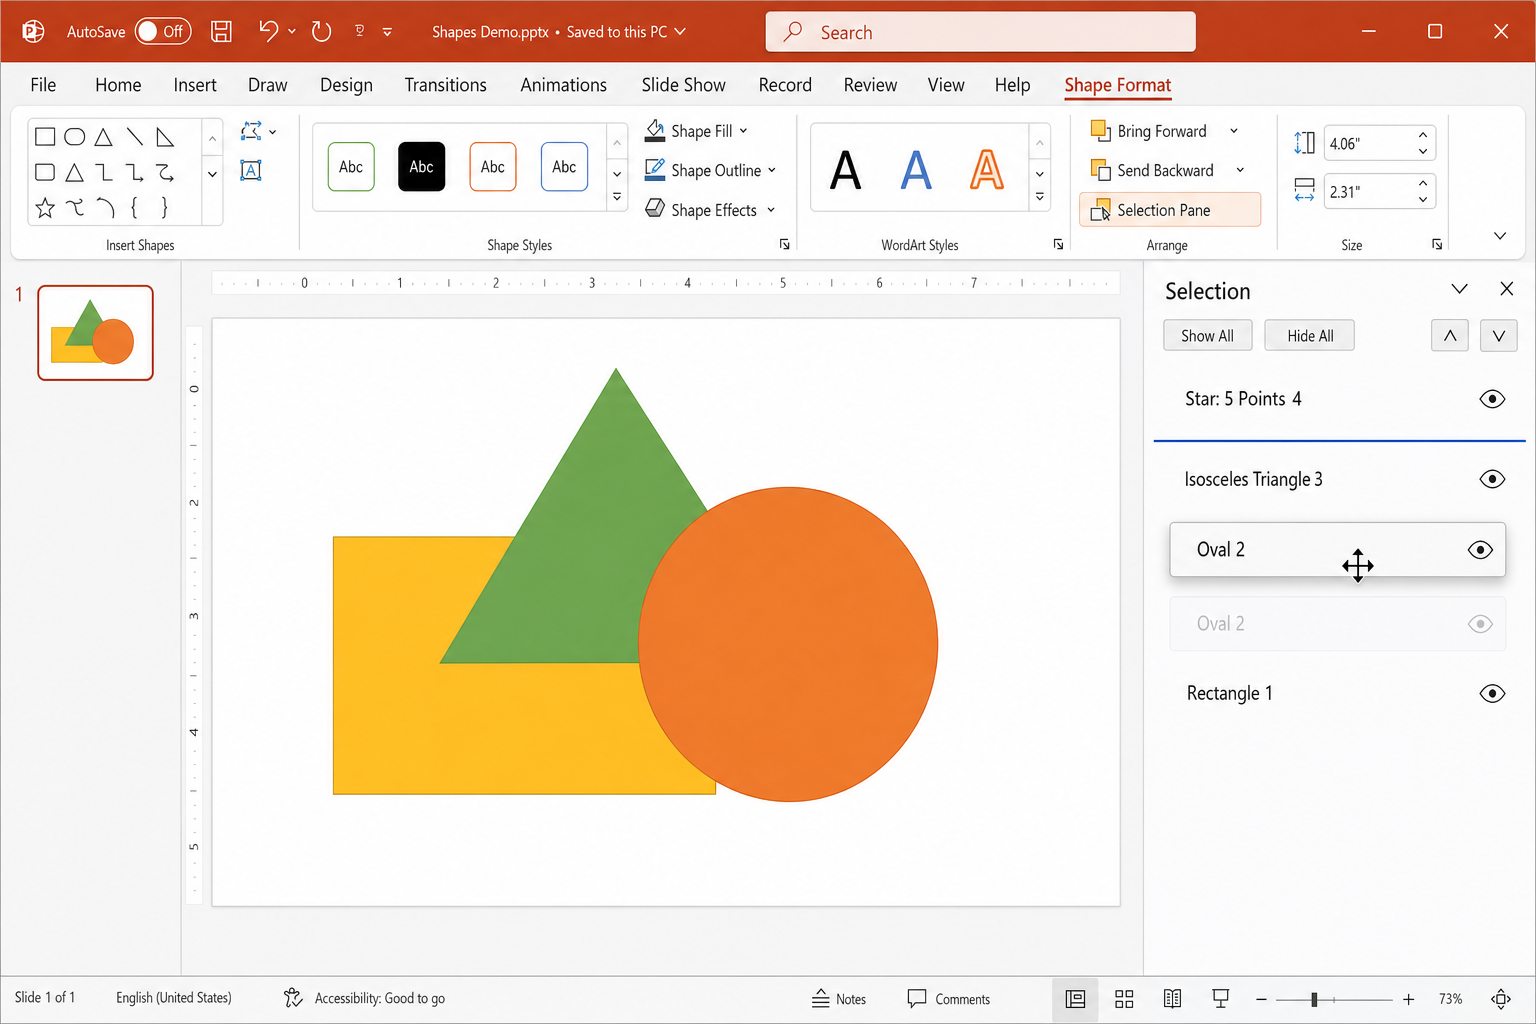
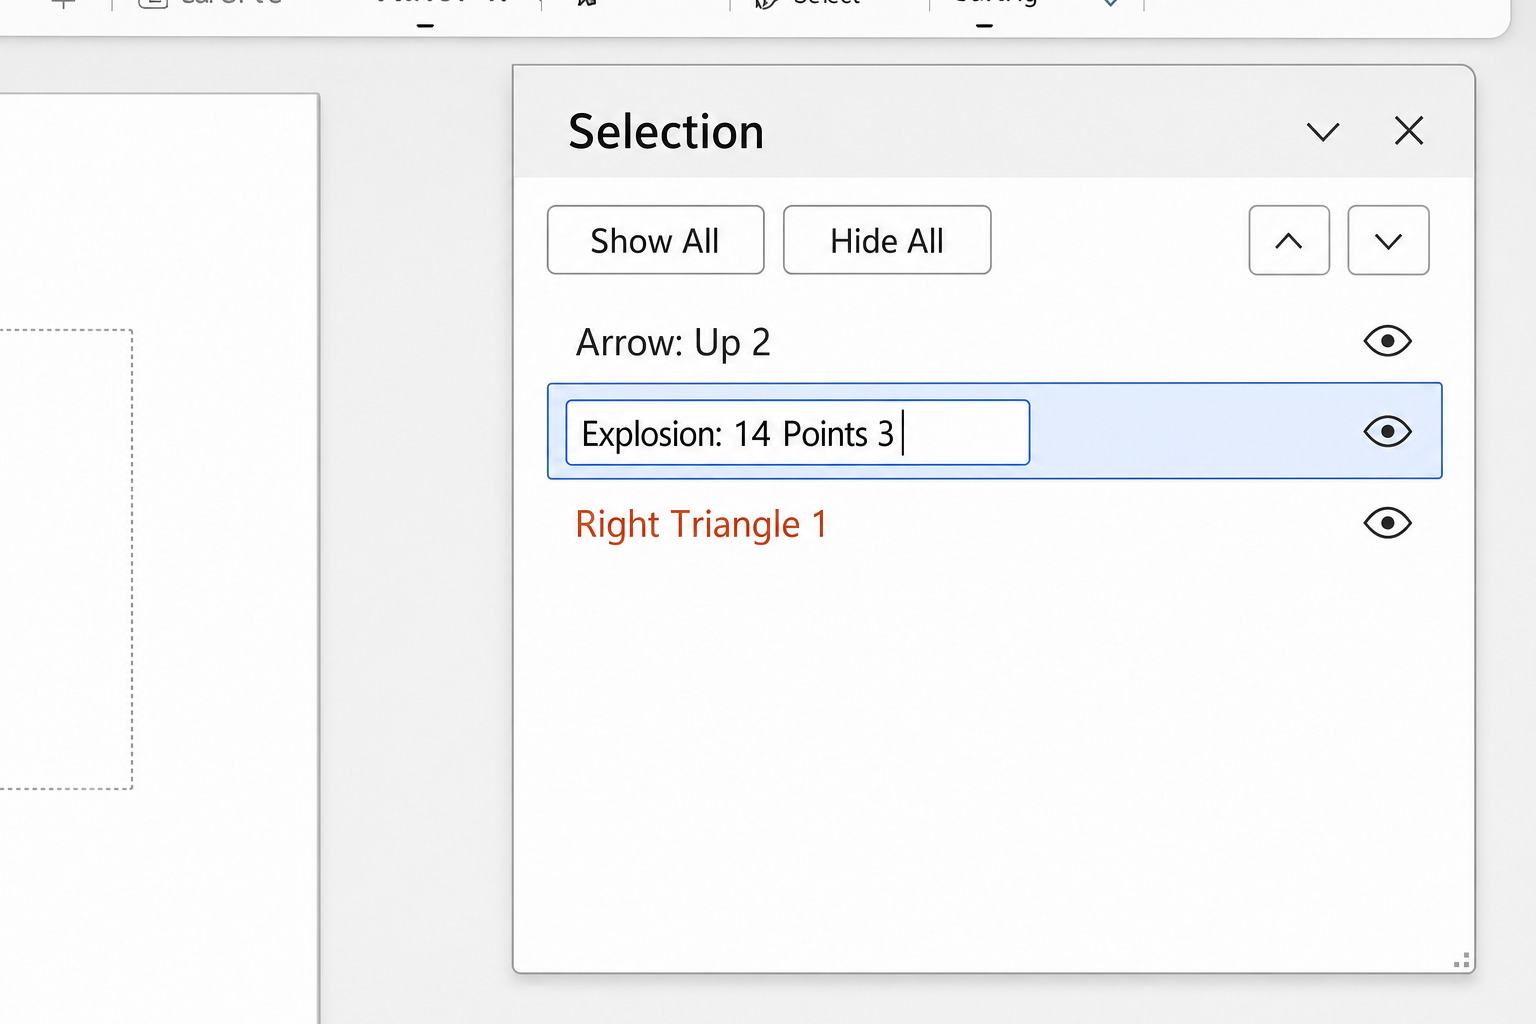
How to Rename Layers in the Selection Pane
PowerPoint names objects automatically (“Rectangle 3,” “Picture 7”), which gets confusing fast on complex slides. Renaming them is worth the 10 seconds it takes.
- Open the Selection Pane.
- Double-click the object’s name in the list.
- Type a descriptive name (e.g., “Logo,” “Background photo,” “Callout arrow”).
- Press
Enterto confirm.
Renamed layers also carry over to the Animation Pane, which makes building complex animation sequences much more manageable.
How to Hide a Layer Temporarily
If a large object is blocking something you’re trying to edit behind it, you don’t need to move it. Just hide it temporarily.
- Open the Selection Pane.
- Click the eye icon to the right of the object’s name.
- The object disappears from the slide canvas (it’s still there, just hidden for editing).
- Click the eye icon again to make it visible again.
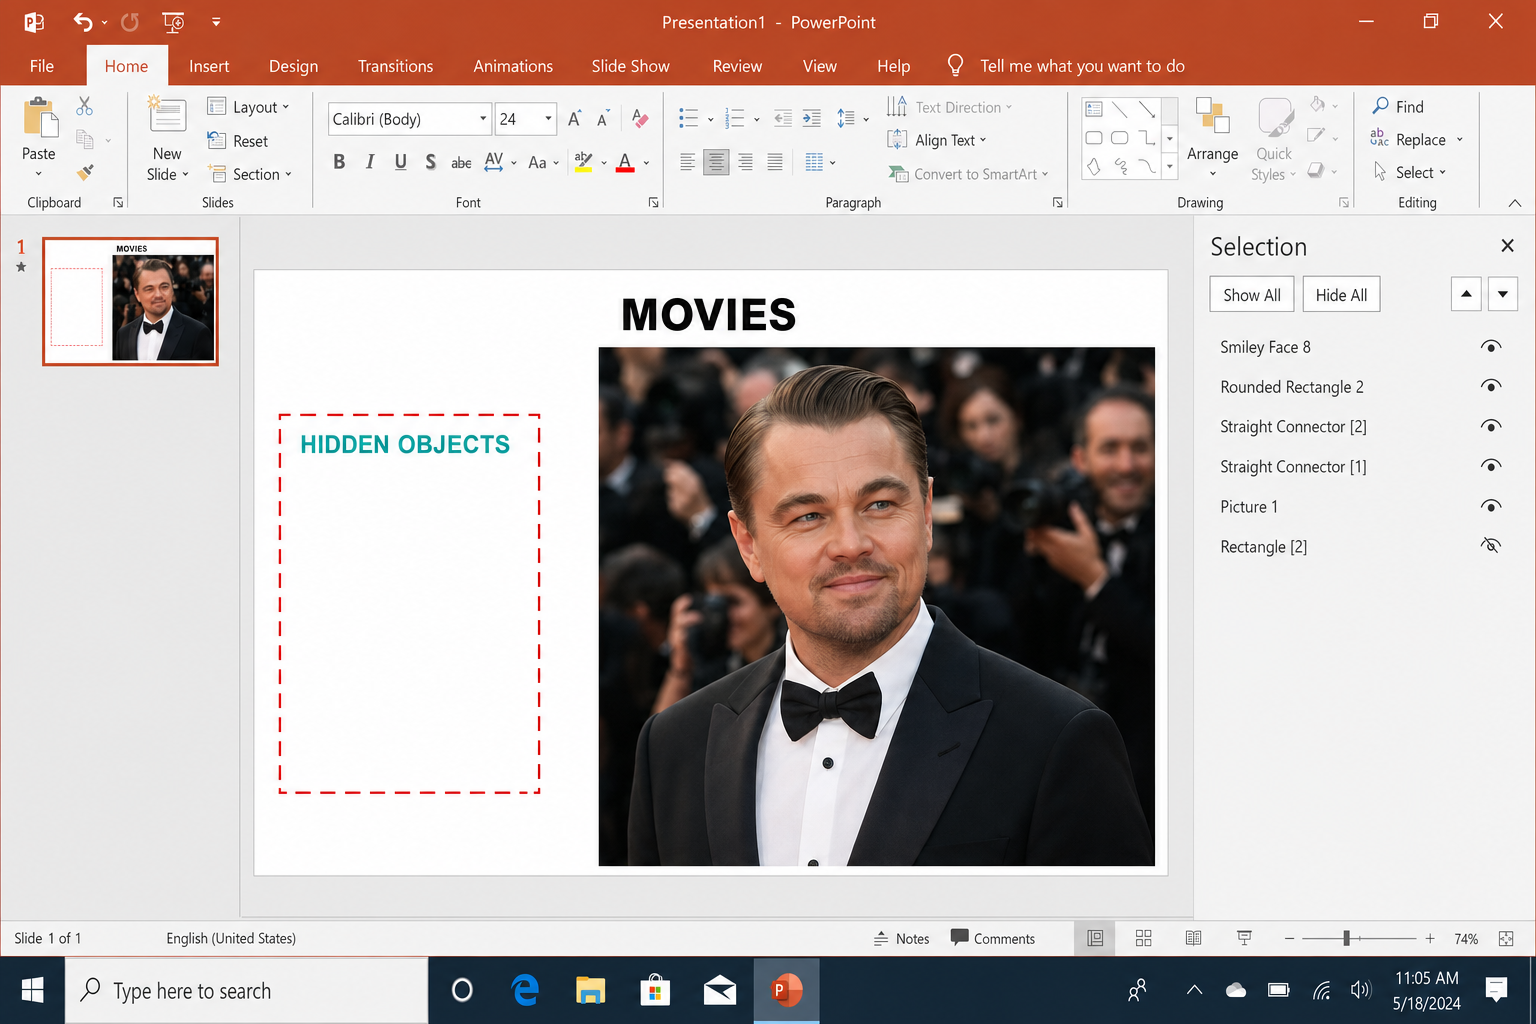
Objects hidden via the Selection Pane will also be hidden during Slide Show mode — they won’t appear to your audience until you unhide them. Always check the Selection Pane before presenting to make sure nothing is accidentally hidden.
Tips for Difficult Layering Situations
A few edge cases come up often enough that they’re worth knowing about before you run into them:
- Selecting an object inside a group: Clicking a group on the slide selects the whole group. To select an individual object inside it, click once to select the group, then click again on the specific object within it. Alternatively, expand the group in the Selection Pane and click the individual object’s name there — this is often faster and more reliable than double-clicking on the canvas.
- Objects that are impossible to click on the slide: If an object is completely covered by another (for example, a full-slide background rectangle sitting on top of everything), you won’t be able to click it on the canvas at all. Use the Selection Pane to click its name directly — this selects it without needing to click it on the slide — then use Bring to Front or drag it to the correct position in the list.
- Placeholder text boxes: Built-in slide layout placeholders (like the title or content boxes) can sometimes behave differently from manually inserted text boxes when layering. If a placeholder keeps snapping back behind other objects, try cutting it (
Ctrl+X/Cmd+X), then pasting it in place (Ctrl+V/Cmd+V) and reordering it in the Selection Pane.
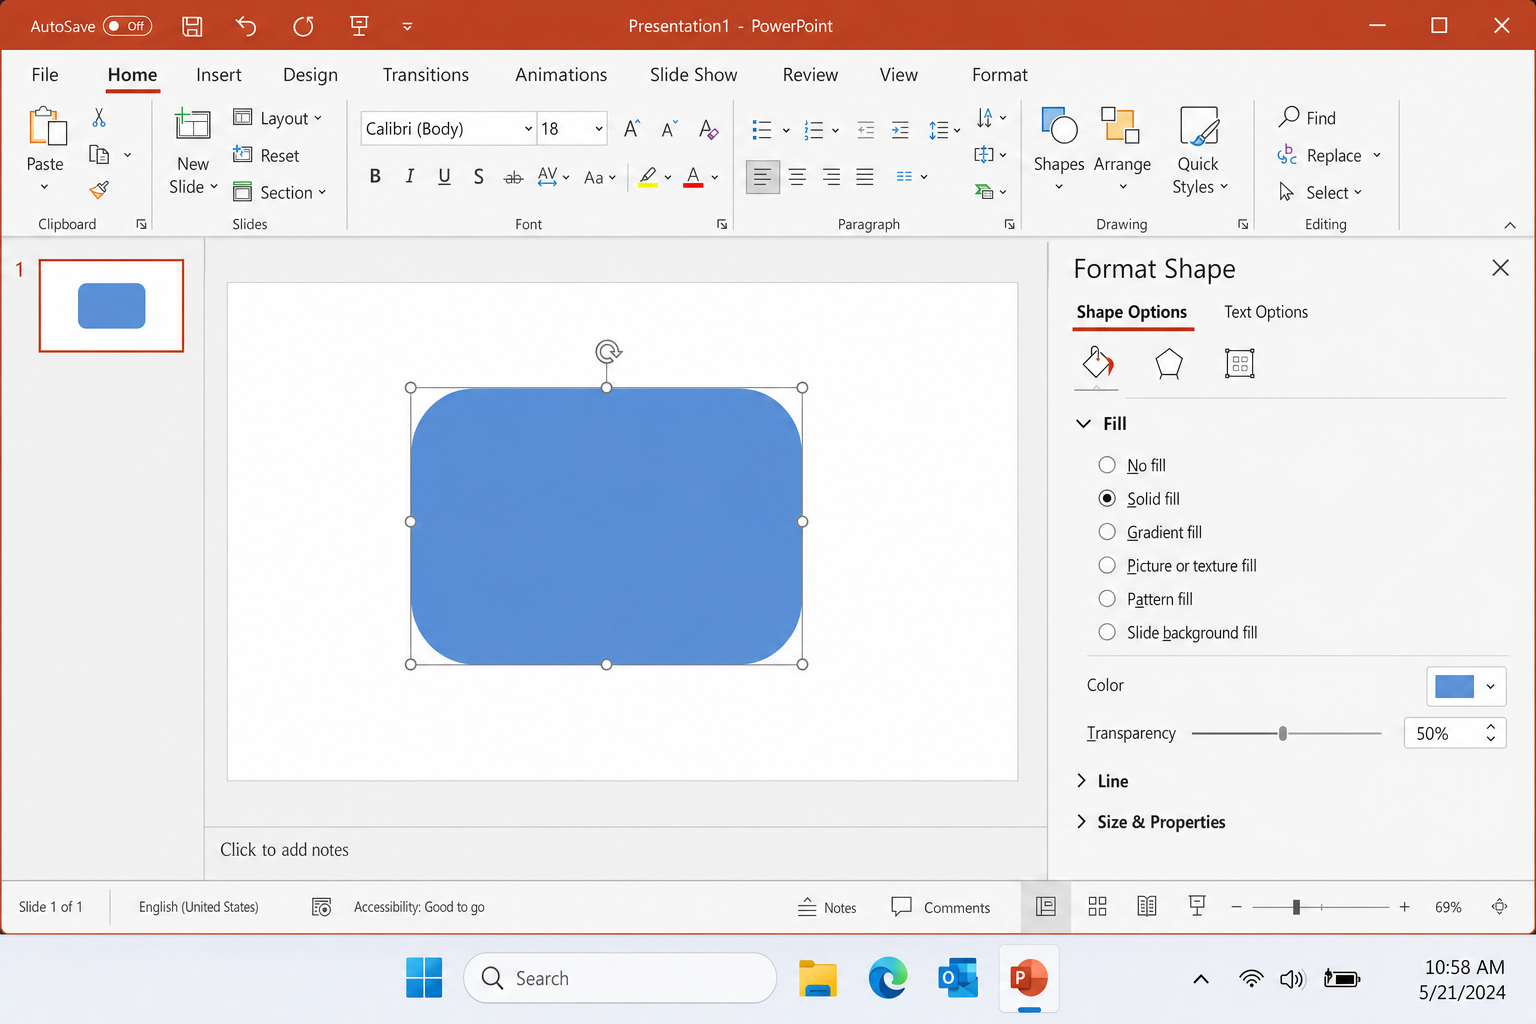
How to Make a Shape Transparent or Semi-Transparent
Layering a semi-transparent shape over an image or text is a common design technique. It softens backgrounds, creates overlays, and adds depth without covering content completely.
- Right-click the shape you want to make transparent.
- Select Format Shape from the context menu.
- In the Format Shape pane that opens on the right, click Fill to expand it.
- Drag the Transparency slider to the right to increase transparency. A value around 40–60% gives a good semi-transparent overlay effect.
How to Group Layered Objects
Once you’ve arranged objects the way you want, grouping them lets you move and resize the whole arrangement as a single unit without disturbing the internal stacking order.
- Select the objects you want to group. Hold
Shiftand click each one, or use the Selection Pane to select multiple (holdCtrland click each name in the pane). - Right-click any selected object and choose Group > Group.
Or use the keyboard shortcutCtrl+G(Windows) /Cmd+G(Mac).
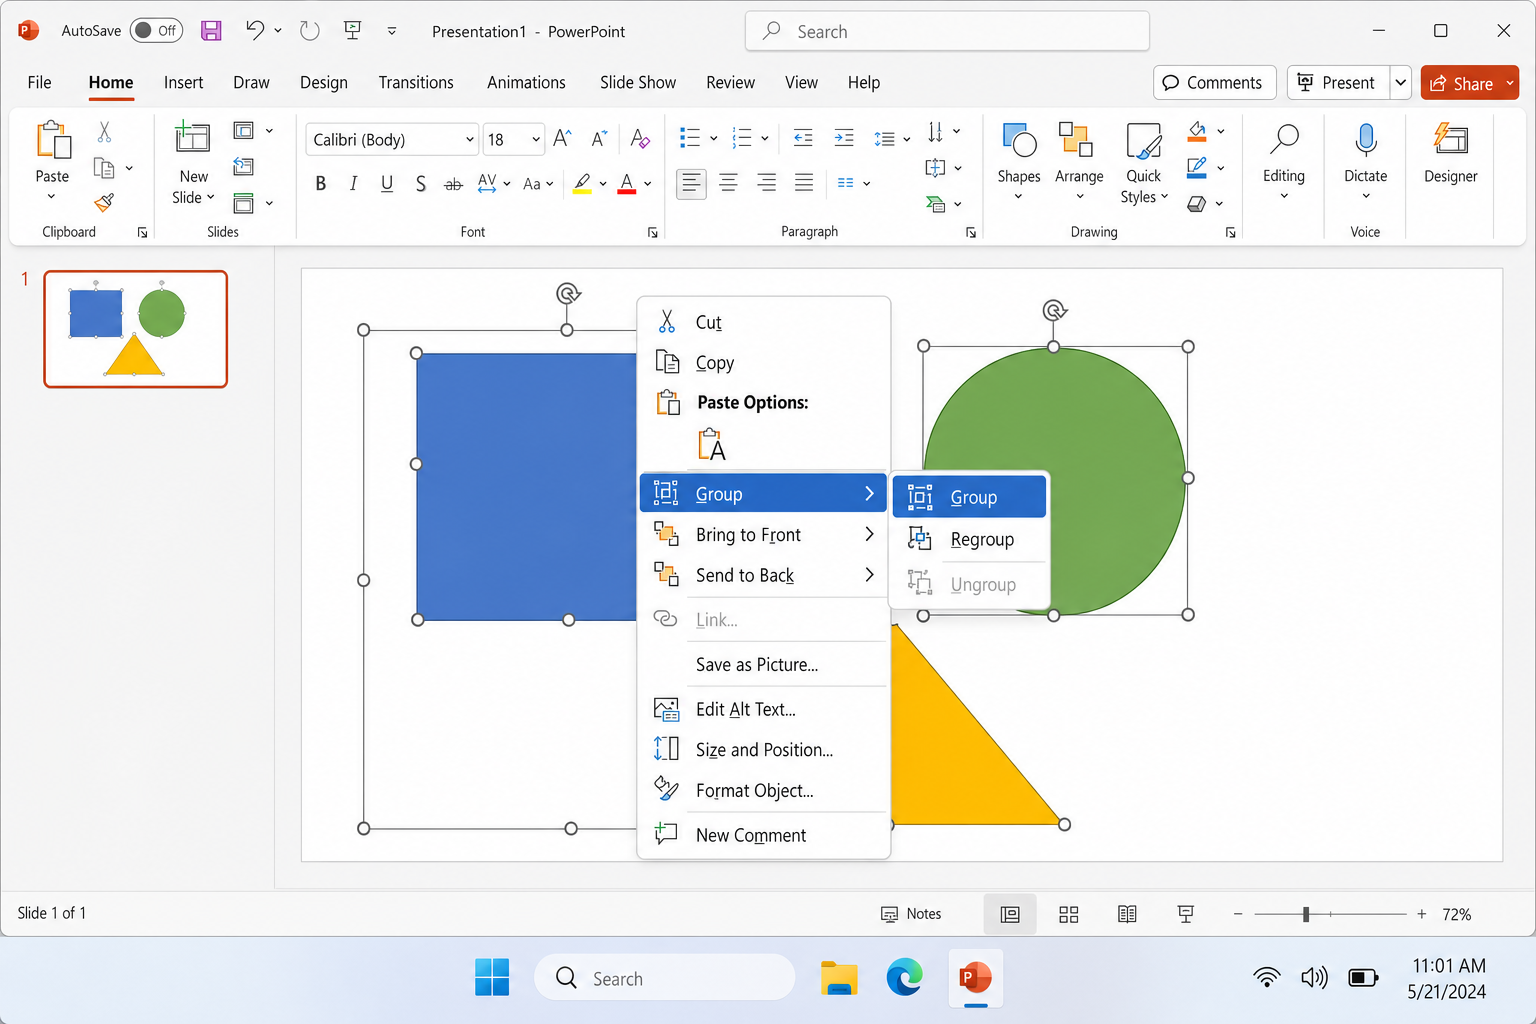
To ungroup later, right-click the group and choose Group > Ungroup, or press Ctrl+Shift+G (Windows) / Cmd+Shift+G (Mac).
In the Selection Pane, grouped objects appear as expandable items. You can expand a group to reorder objects within it, or drag the entire group up or down relative to other objects on the slide.
Using Layers with Animations
Stacking order matters a lot once you add animations. An object that’s supposed to fly in on top of another one will disappear behind it if the layering is wrong.
- Open Animations > Animation Pane to see the animation sequence.
- Object names in the Animation Pane match the names in the Selection Pane, which is another reason to rename your layers before building animations.
- If an animated object keeps disappearing behind others, bring it forward in the Selection Pane rather than trying to fix it in the Animation Pane.
For Morph transitions specifically, PowerPoint matches objects across slides by their names. If a morphed object jumps instead of smoothly moving, check that the object has the same name on both slides in the Selection Pane.
Quick Reference: Layering Methods
| Method | Best for | Speed |
|---|---|---|
| Selection Pane drag | Complex slides with many objects | Medium (most precise) |
| Right-click > Bring/Send | Quick one-object adjustments | Fast |
| Tab key cycling | Selecting buried objects | Fast |
| Ribbon Arrange group | When you prefer the ribbon | Medium |
Conclusion
For most layering tasks, the right-click Bring to Front / Send to Back commands get the job done in seconds. If you’re building anything more complex, such as overlapping images, animated reveals, or Morph transitions, open the Selection Pane first, rename your objects, and use it as your primary layer control. It’s a solid workflow once you get used to it, and it makes even complicated slides manageable.