
Word’s Spike is a hidden feature that lets you cut multiple separate text selections and paste them all together in one shot, without juggling the clipboard. It still works in modern Word (Microsoft 365 and Office 2024), and it’s genuinely useful when you’re reorganizing a document or pulling scattered paragraphs into one place.
What Is the Spike in Word?
The Spike is named after the old-fashioned metal spike that office workers used to impale papers as they finished with them. In Word, it works the same way: you “spike” multiple text selections by cutting them one at a time, then dump them all out at once wherever you want them.
The key difference from the regular clipboard: the clipboard holds only one item at a time (unless you use Windows Clipboard history). The Spike accumulates everything you cut into it until you paste it all out.
Important: The Spike cuts text, it removes it from its original location. It does not copy.
How to Use the Spike in Word
Step 1: Cut text to the Spike
- Select the first block of text you want to collect.
- Press
Ctrl + F3. The text disappears from its original location and is stored in the Spike. - Select the next block of text you want to collect and press
Ctrl + F3again. - Repeat for every additional block you want to gather. Each cut adds to the Spike, nothing is overwritten.
On Mac: The shortcut is typically Command + F3, but this varies by keyboard layout and Word version. If it doesn’t work, check Word > Preferences > Keyboard Shortcuts for your build.
Step 2: Paste the Spike contents
- Click to place your cursor where you want all the collected text to appear, in the same document, a new document, or a different open document.
- Press
Ctrl + Shift + F3. All the text you cut to the Spike is pasted at the cursor position in the order you cut it.
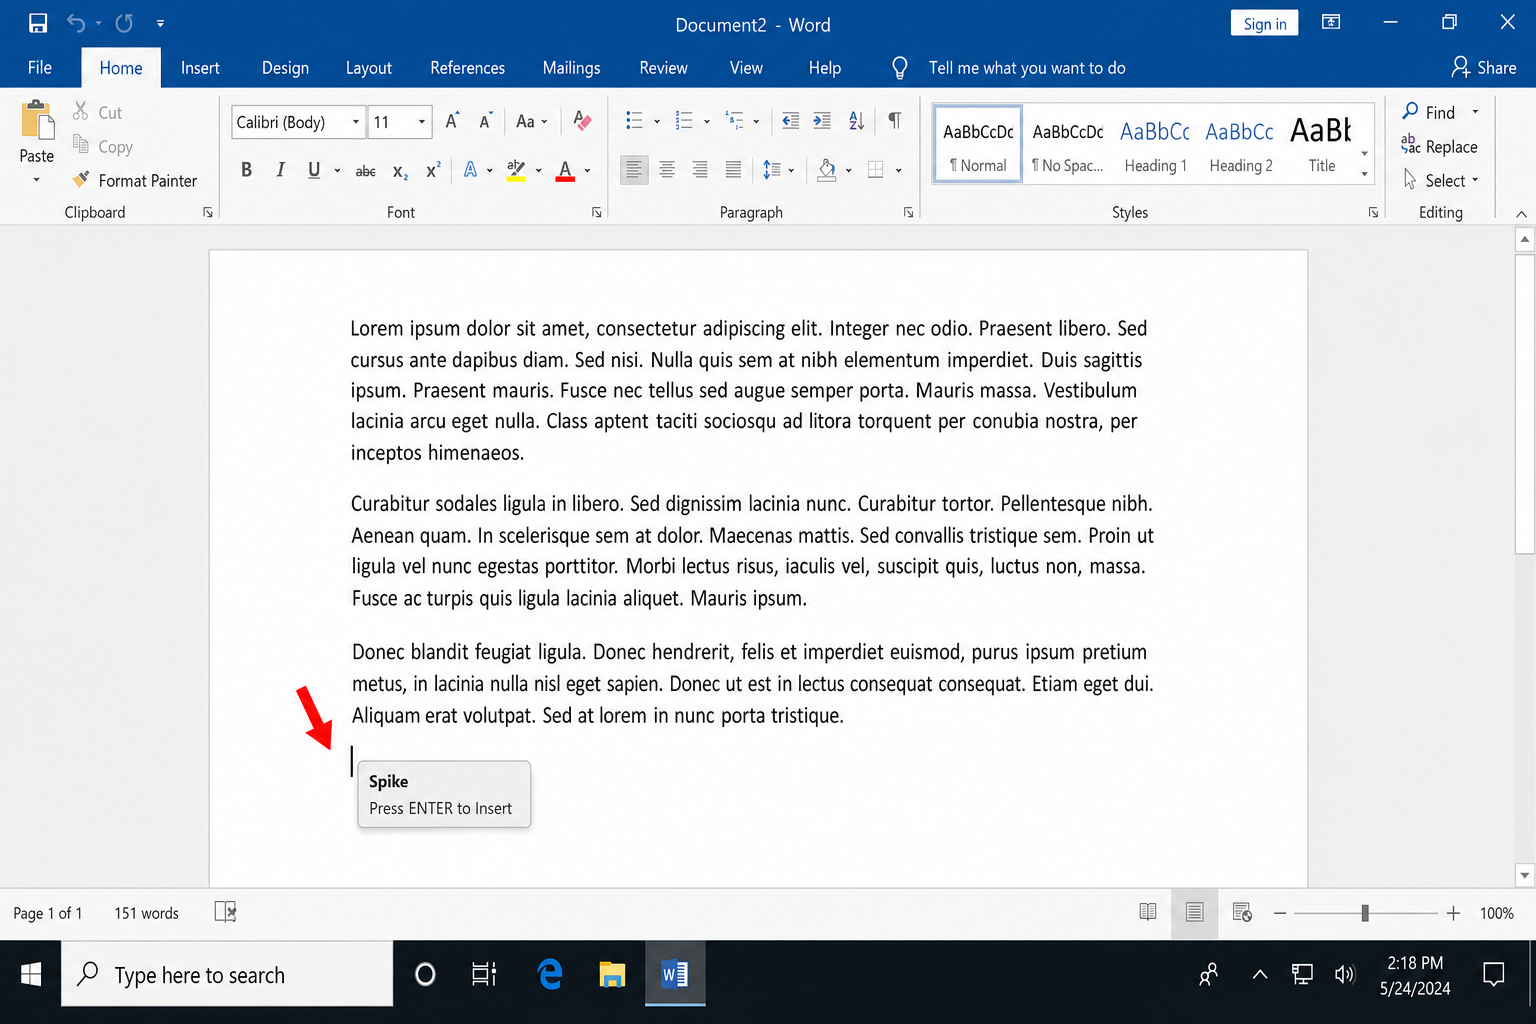
Note: Ctrl + Shift + F3 pastes and clears the Spike. After pasting, the Spike is empty.
Step 3: Paste without clearing the Spike (optional)
If you want to paste the Spike contents but keep them stored for another paste later:
- Place your cursor where you want the text inserted.
- Type
Spike(capital S, no quotes). - Press
F3. Word replaces the typed word with the Spike contents, leaving the Spike intact.
This method works in current Word builds but can be less reliable than the keyboard shortcut. The shortcut approach is the safer choice.
Step 4: Preview the Spike contents without pasting
To see what’s currently stored in the Spike without pasting it:
- Click the Insert tab on the ribbon.
- Click Quick Parts in the Text group.
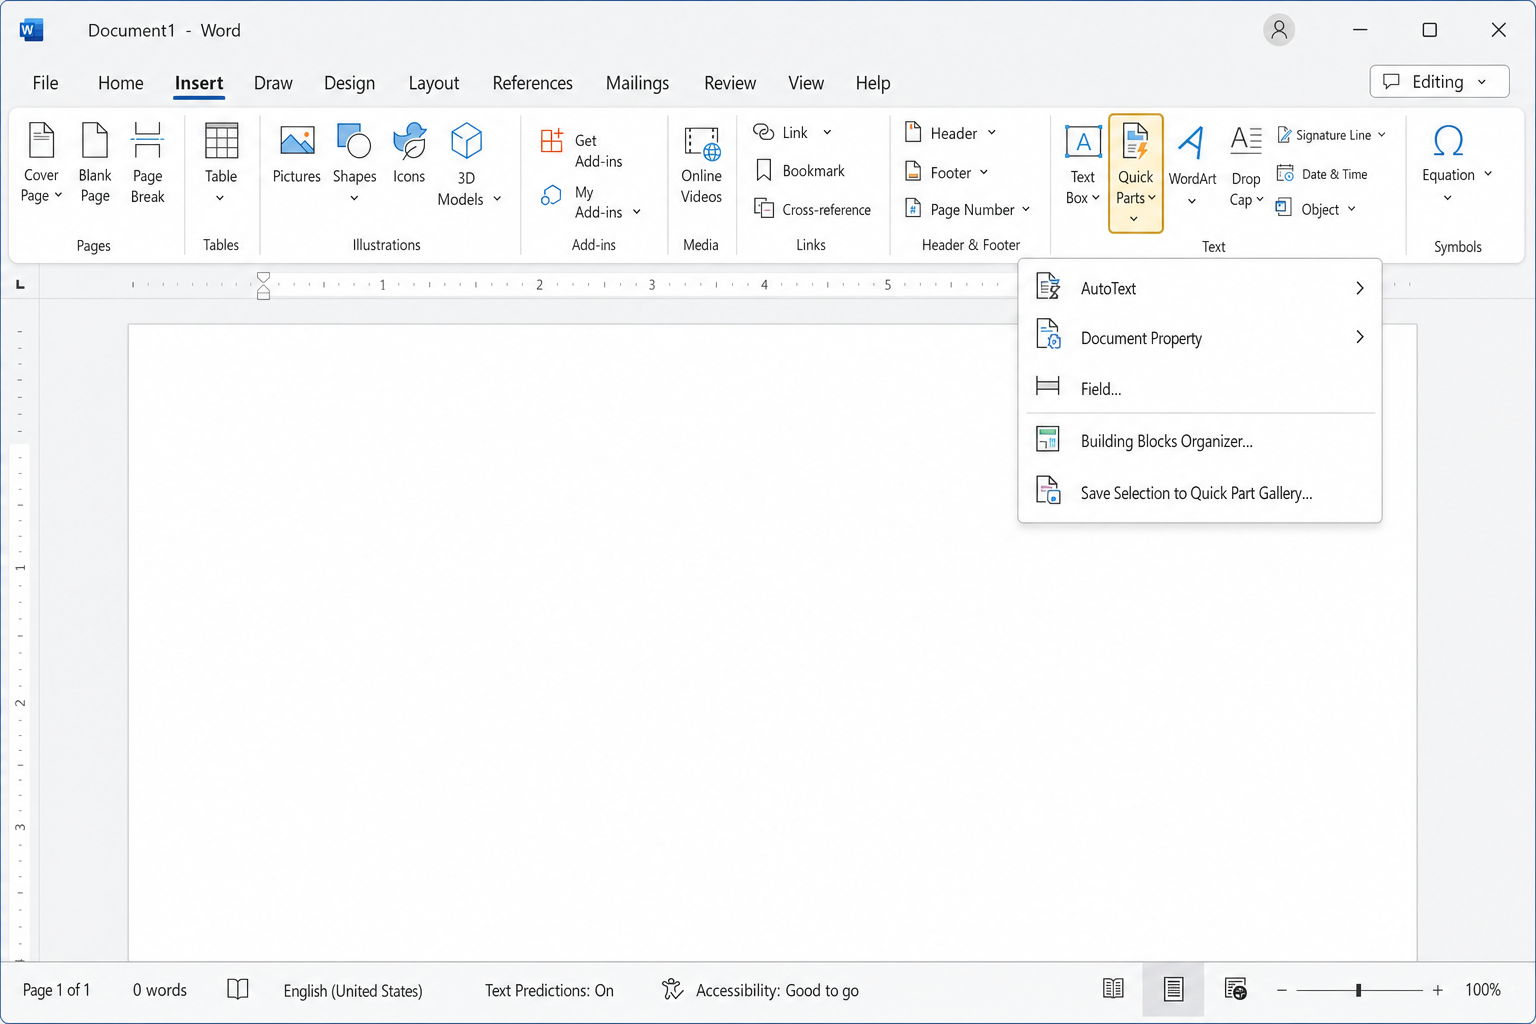
- Select AutoText from the dropdown menu.
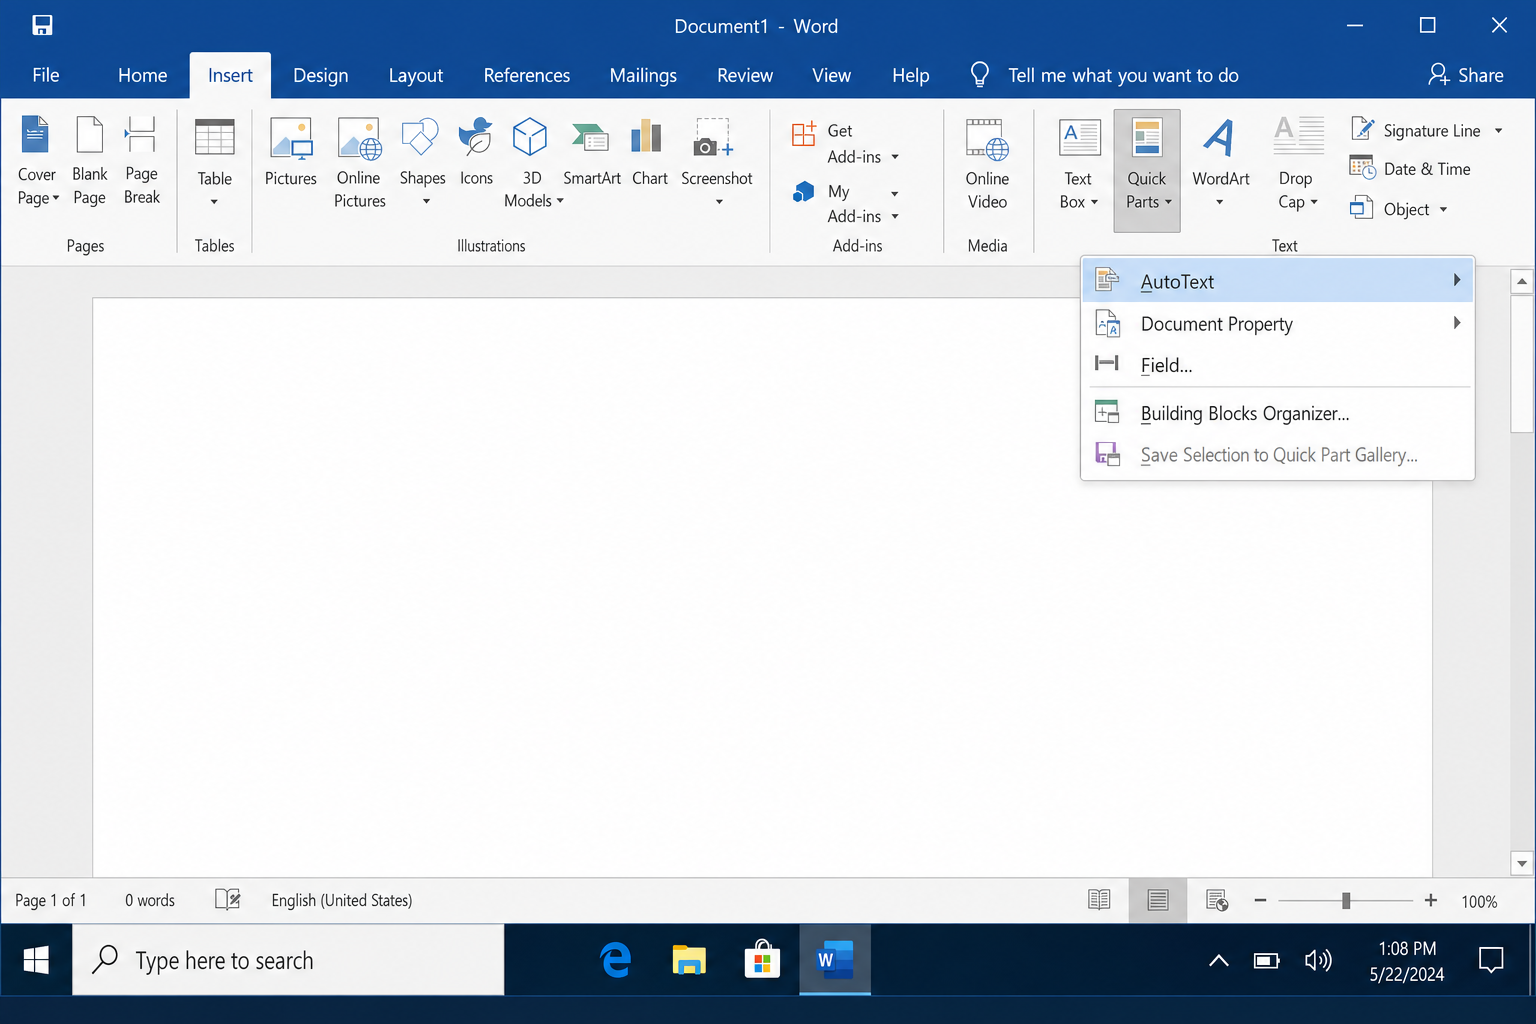
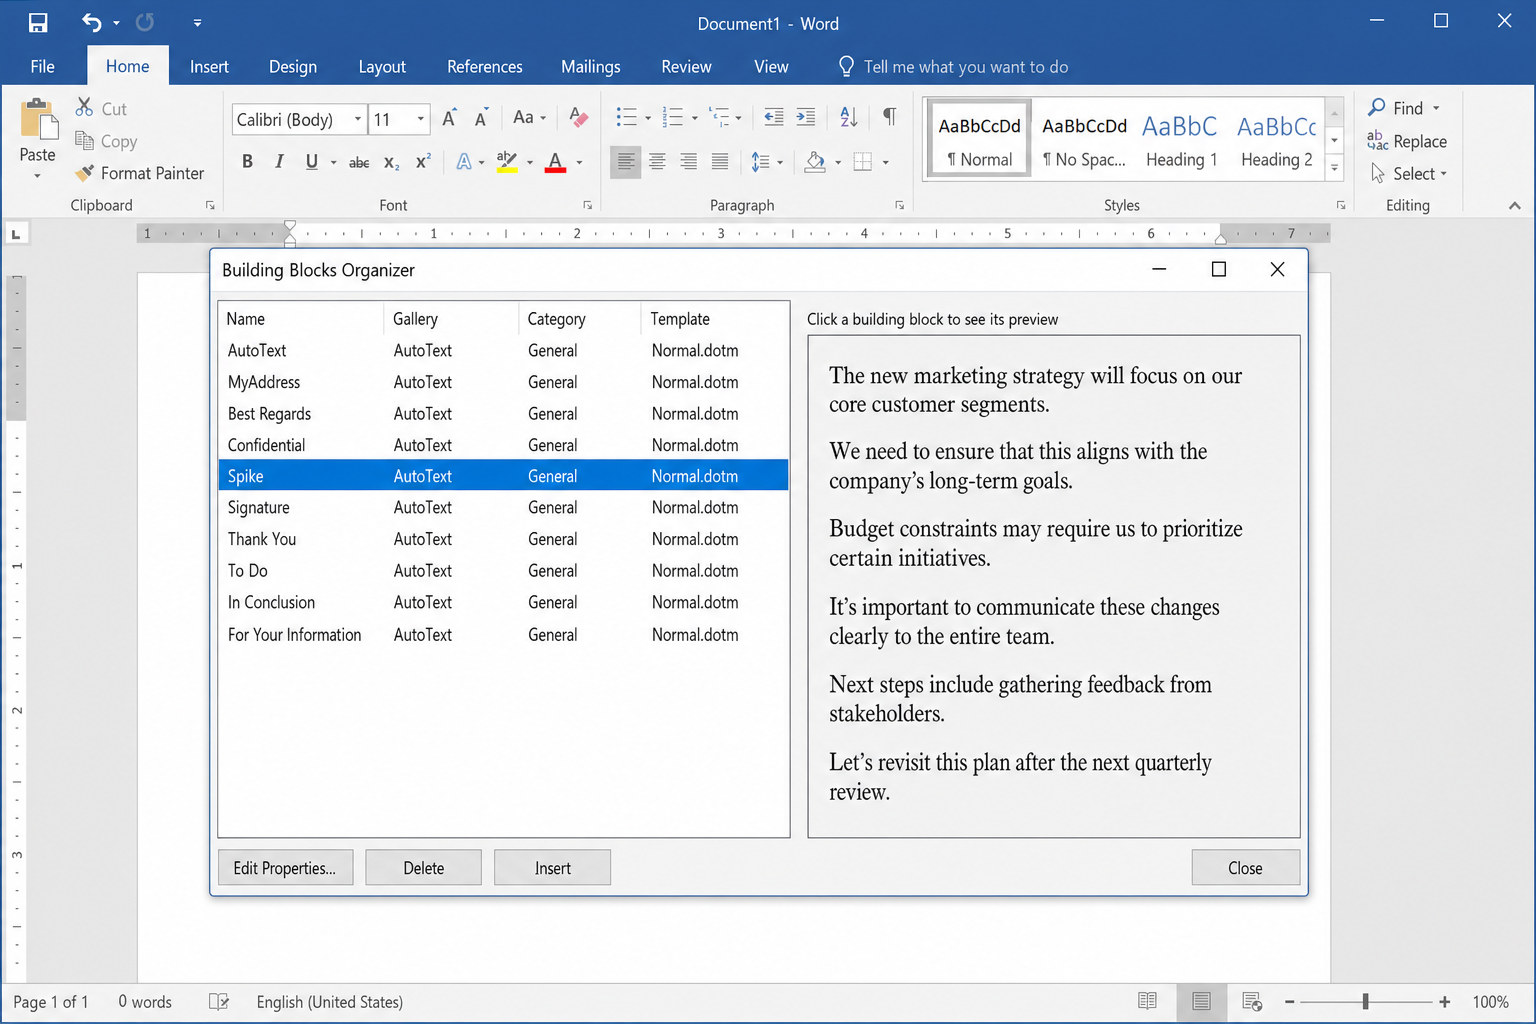
- Find Spike in the AutoText list. The preview pane shows the current Spike contents.
Fix Extra Blank Lines Between Spike Items
If you notice an extra blank line between each pasted item, Smart Paragraph Selection is the cause. When this option is on, selecting a paragraph automatically grabs the trailing paragraph mark, and that mark becomes a blank line in the Spike output.
Turn off Smart Paragraph Selection in modern Word (Microsoft 365 / Office 2024)
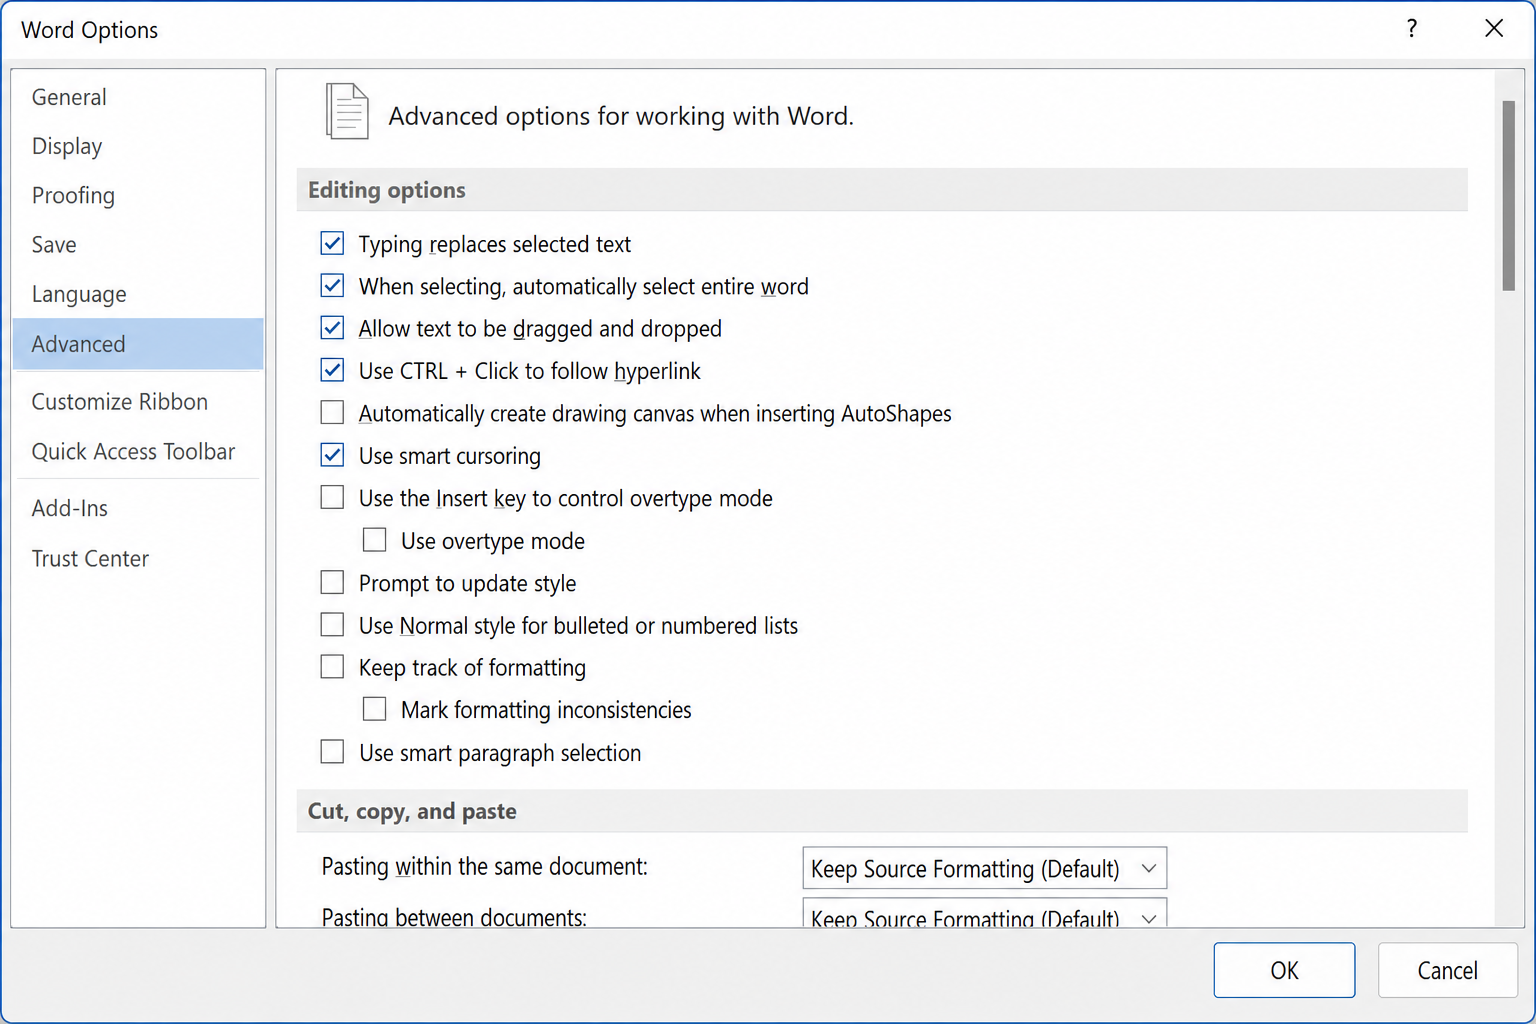
- Click File > Options.
- Click Advanced in the left panel.
- Under Editing options, uncheck Use smart paragraph selection.
- Click OK.
The option and its location are the same in Microsoft 365 and Office 2024 as in earlier versions. The dialog just looks more modern.
Common Problems with the Spike
- Ctrl + F3 does nothing: Make sure you have text selected before pressing the shortcut. Also check whether another app or your keyboard software is intercepting
F3. - Spike doesn’t work in Word for the web: The Spike is a desktop Word feature. It’s not supported in the browser version of Word.
- Formatting looks wrong after pasting: The Spike preserves the formatting of cut text, but mixing content from different sections or documents can produce inconsistent results. Use Paste Special > Keep Text Only after pasting if you want clean, uniform formatting.
- Spike cleared unexpectedly: Pressing
Ctrl + Shift + F3always clears the Spike after pasting. If you need to paste to multiple locations, use theSpike+F3method described above.
Newer Alternatives Worth Knowing
The Spike works, but two modern options may suit your workflow better:
- Windows Clipboard history (
Win + V): Stores multiple copied items across any app and lets you paste them individually. Better for mixed workflows, but it copies rather than cuts, and you need to enable it in Settings > System > Clipboard first. - Plain-text paste: If you’re only moving text and don’t care about formatting,
Ctrl + Shift + V(or Paste Special > Keep Text Only) keeps things clean without needing to manage the Spike at all.
Conclusion
The Spike is the fastest way to consolidate scattered paragraphs in a Word document. Select, press Ctrl + F3 a few times, move your cursor, and press Ctrl + Shift + F3. If you’re reorganizing a long document and pulling pieces from different sections, it beats cutting and pasting each block individually. For anything involving content from outside Word, Windows Clipboard history (Win + V) is more flexible.