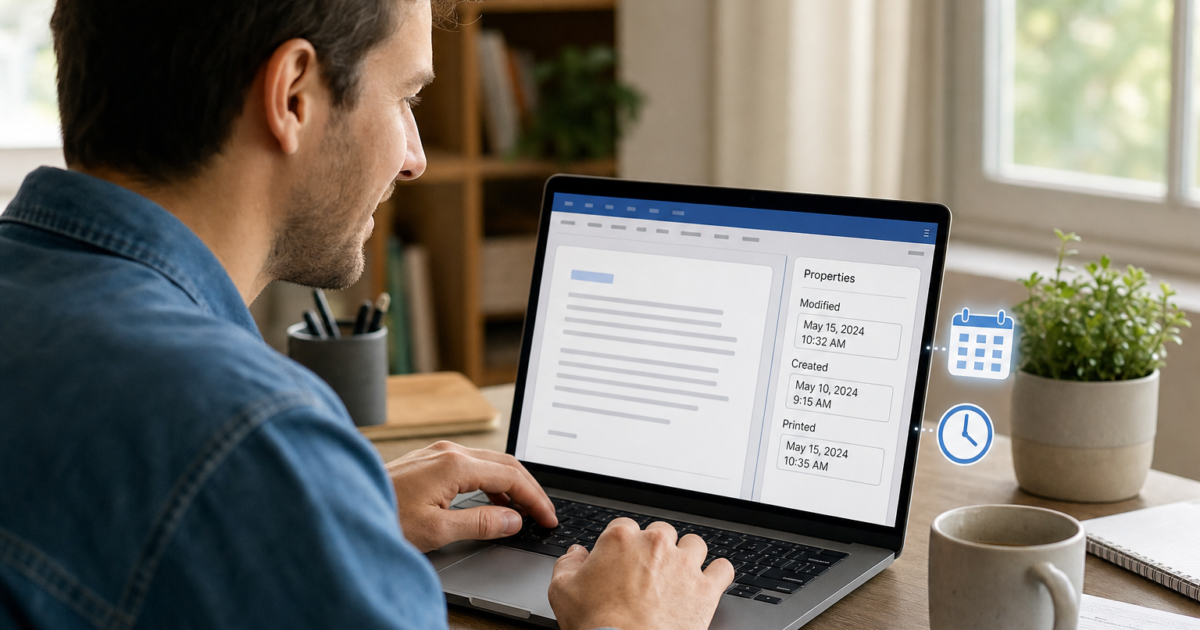
Need to check when a Word document was last edited, or show that “last modified” date on the page itself? You can see it in File > Info, or insert a SaveDate field that updates automatically. Both work in Word for Microsoft 365, Word 2021, 2019, and 2016.
View the Last Modified Date in Word
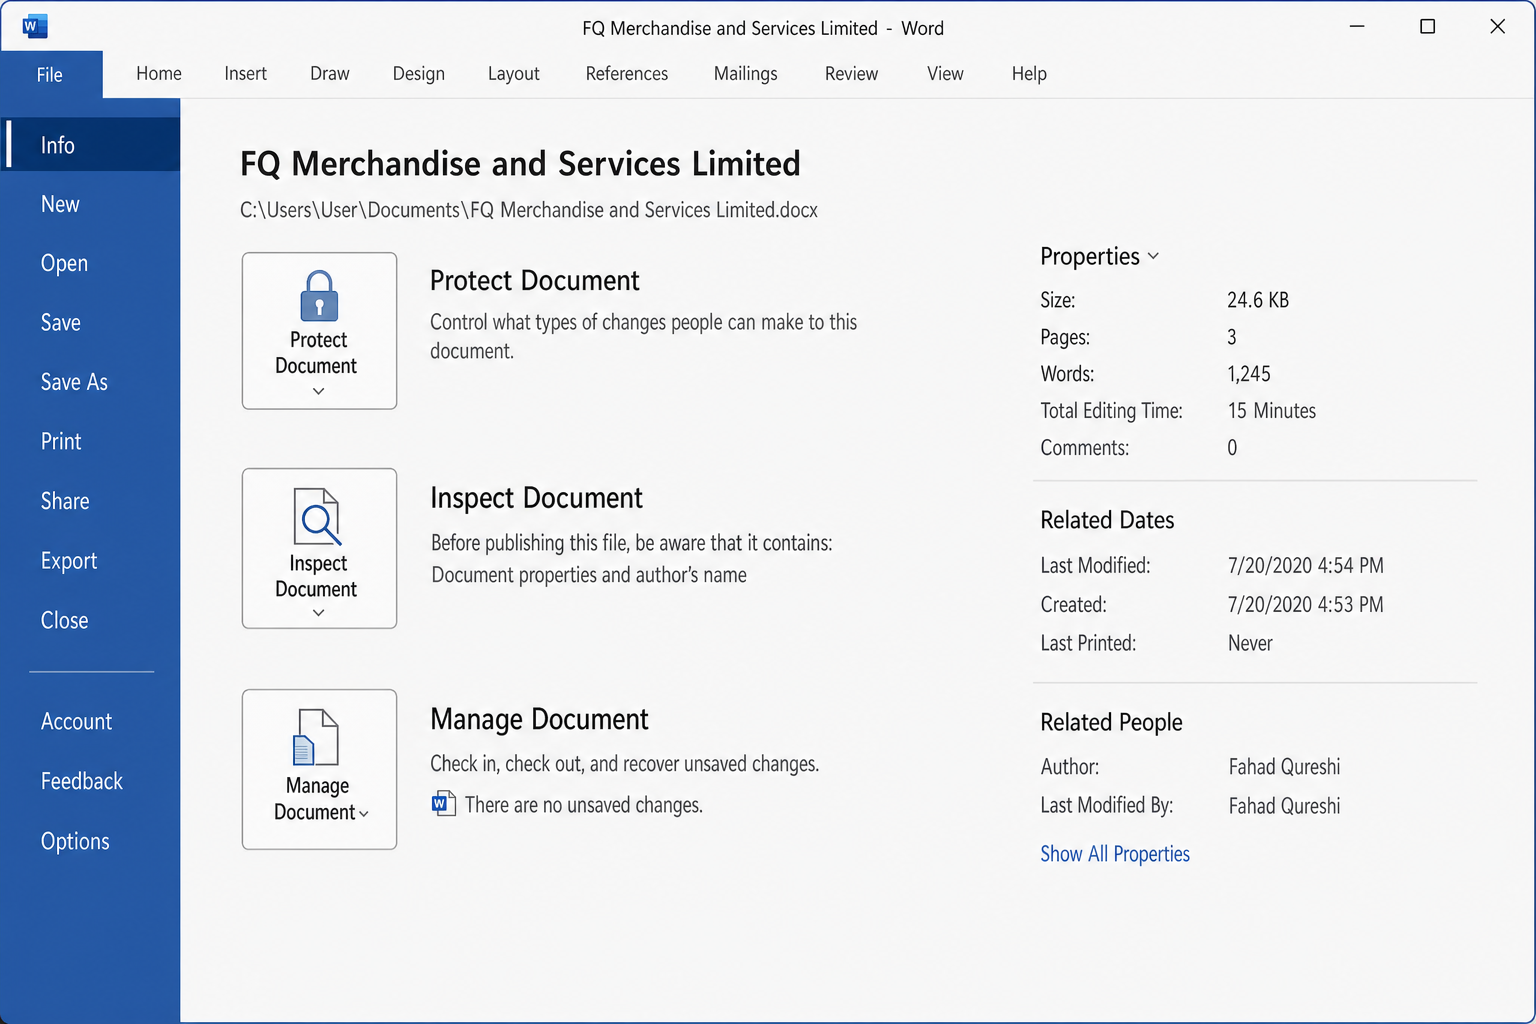
Method 1: Check it in the Backstage Info pane
- Open the document in Word.
2. Click File to open the Backstage view.
3. Select Info (it’s usually selected by default).
4. Look at the right-hand panel under Related Dates. You’ll see Last Modified, Created, and Last Printed.
Method 2: Open Advanced Properties for full date details
The Info pane shows the basics. Advanced Properties gives you the full picture, including Accessed date and document statistics.
- Click File > Info.
2. Click the Properties drop-down near the top-right of the Info pane.
3. Select Advanced Properties.
4. In the dialog box, click the General tab to see Created, Modified, and Accessed timestamps.
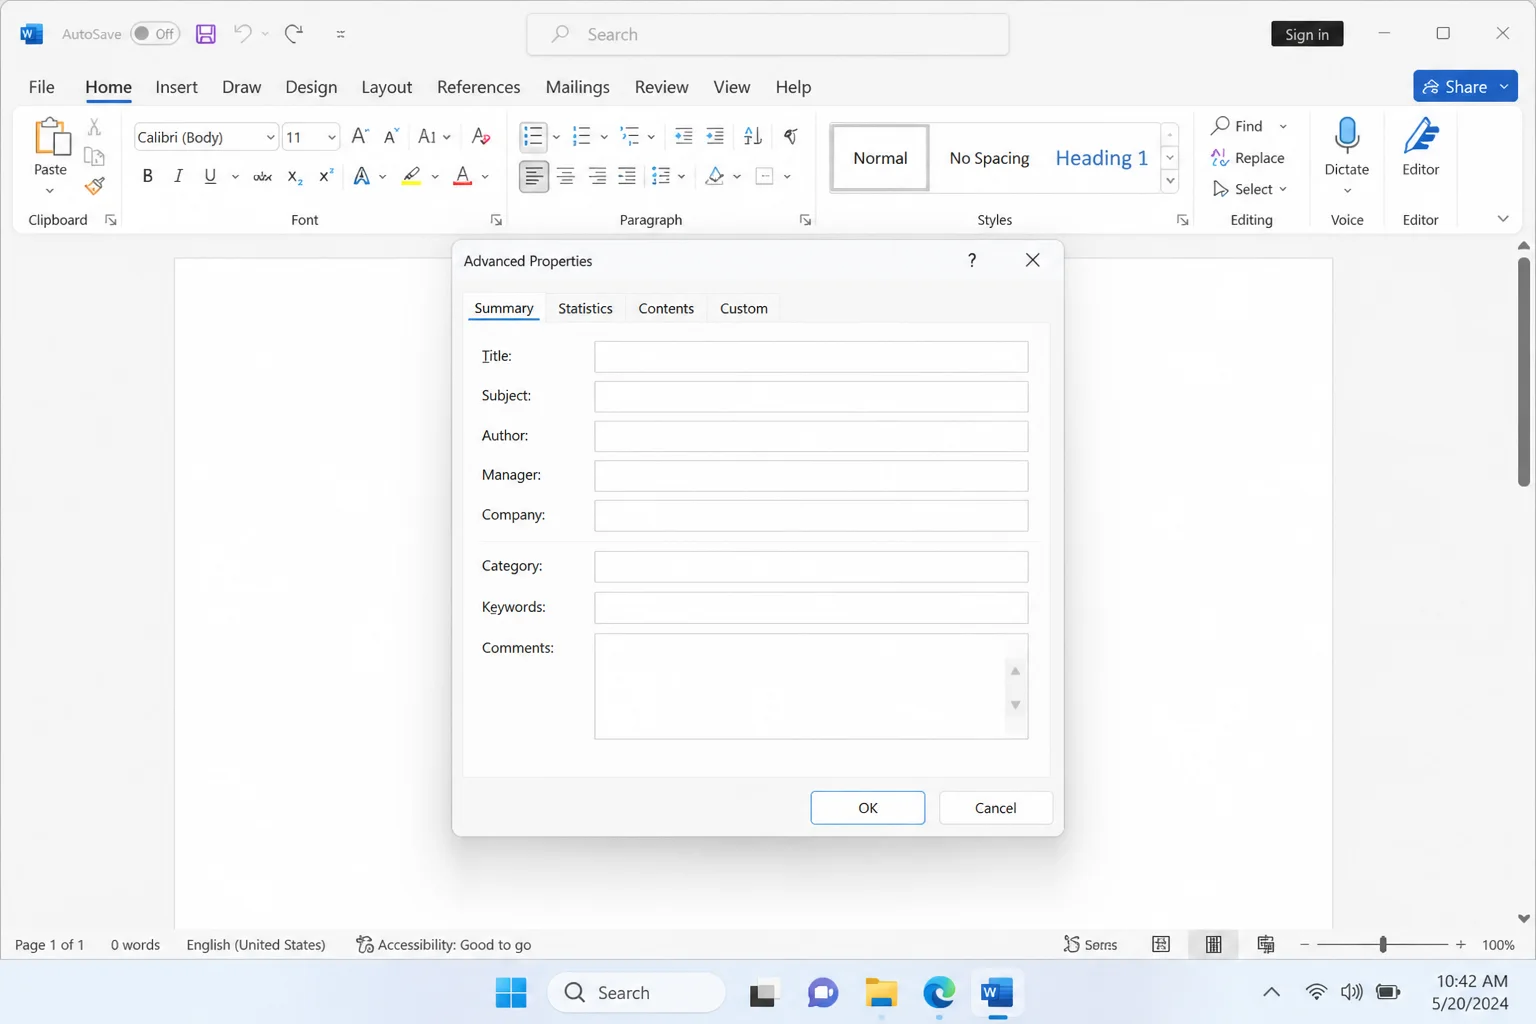
5. Click the Summary tab to view or edit editable metadata like Title, Author, and Comments.
6. Click OK or Cancel to close.
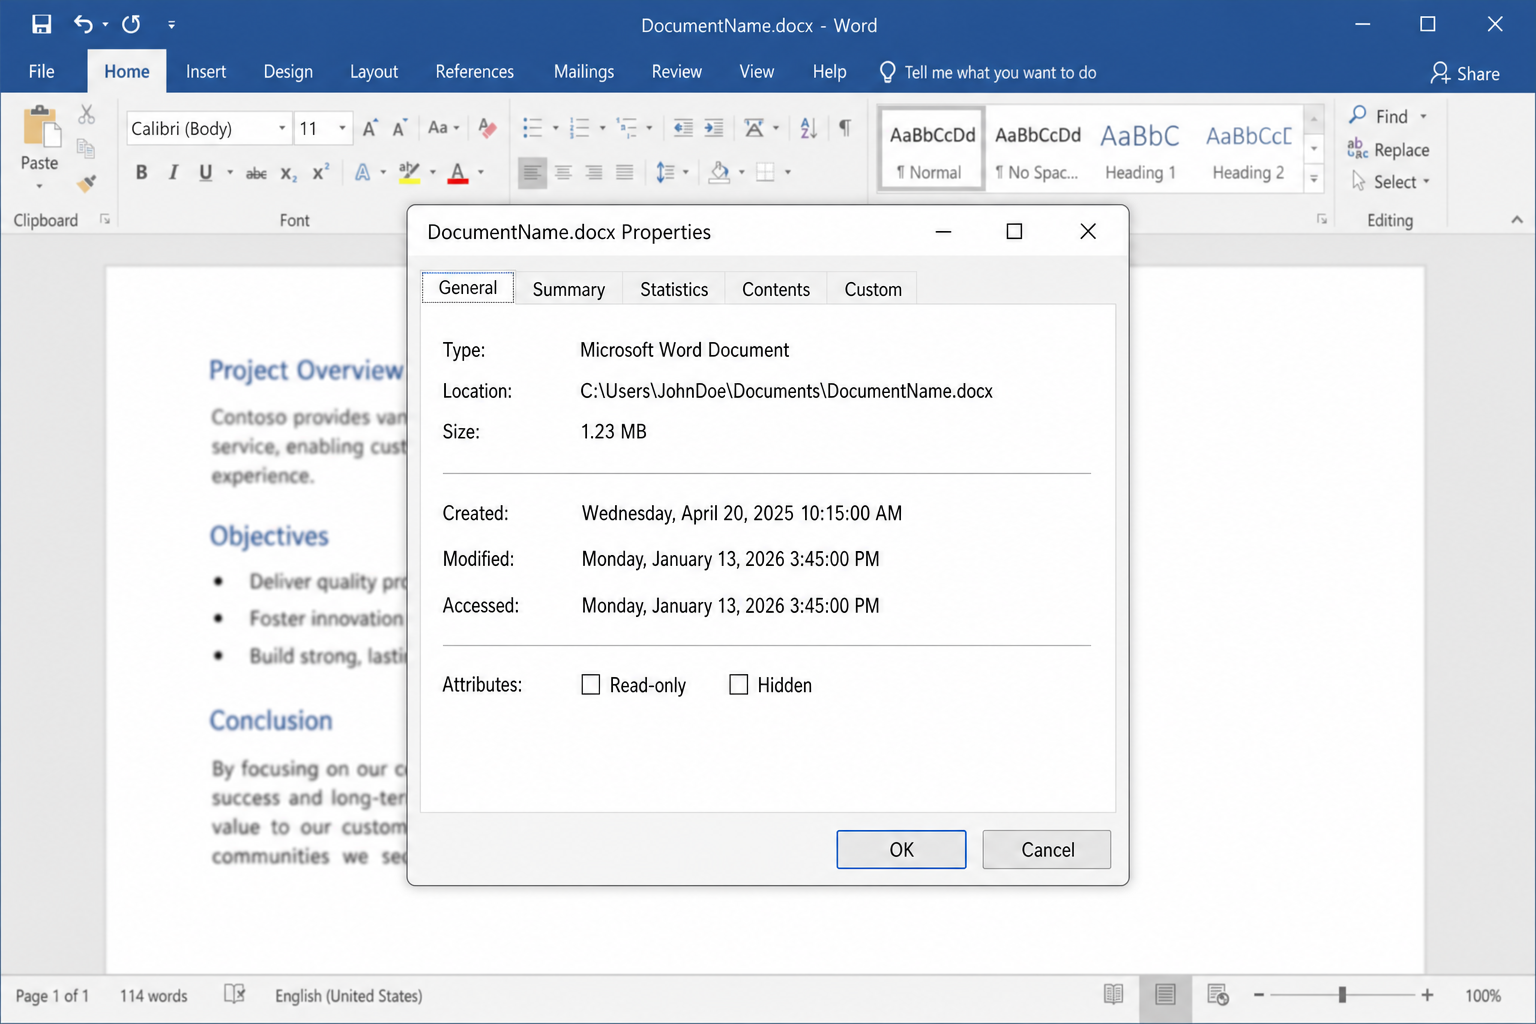
Note: The Created and Modified timestamps on the General tab are controlled by Windows, not Word. You can’t edit them directly inside Word, as they update automatically when the file is saved or accessed.
Method 3: Check it in File Explorer (no need to open Word)
- Locate the document in File Explorer.
2. Right-click the file and select Properties.
3. Click the Details tab.
4. Look for Date modified and Date created.
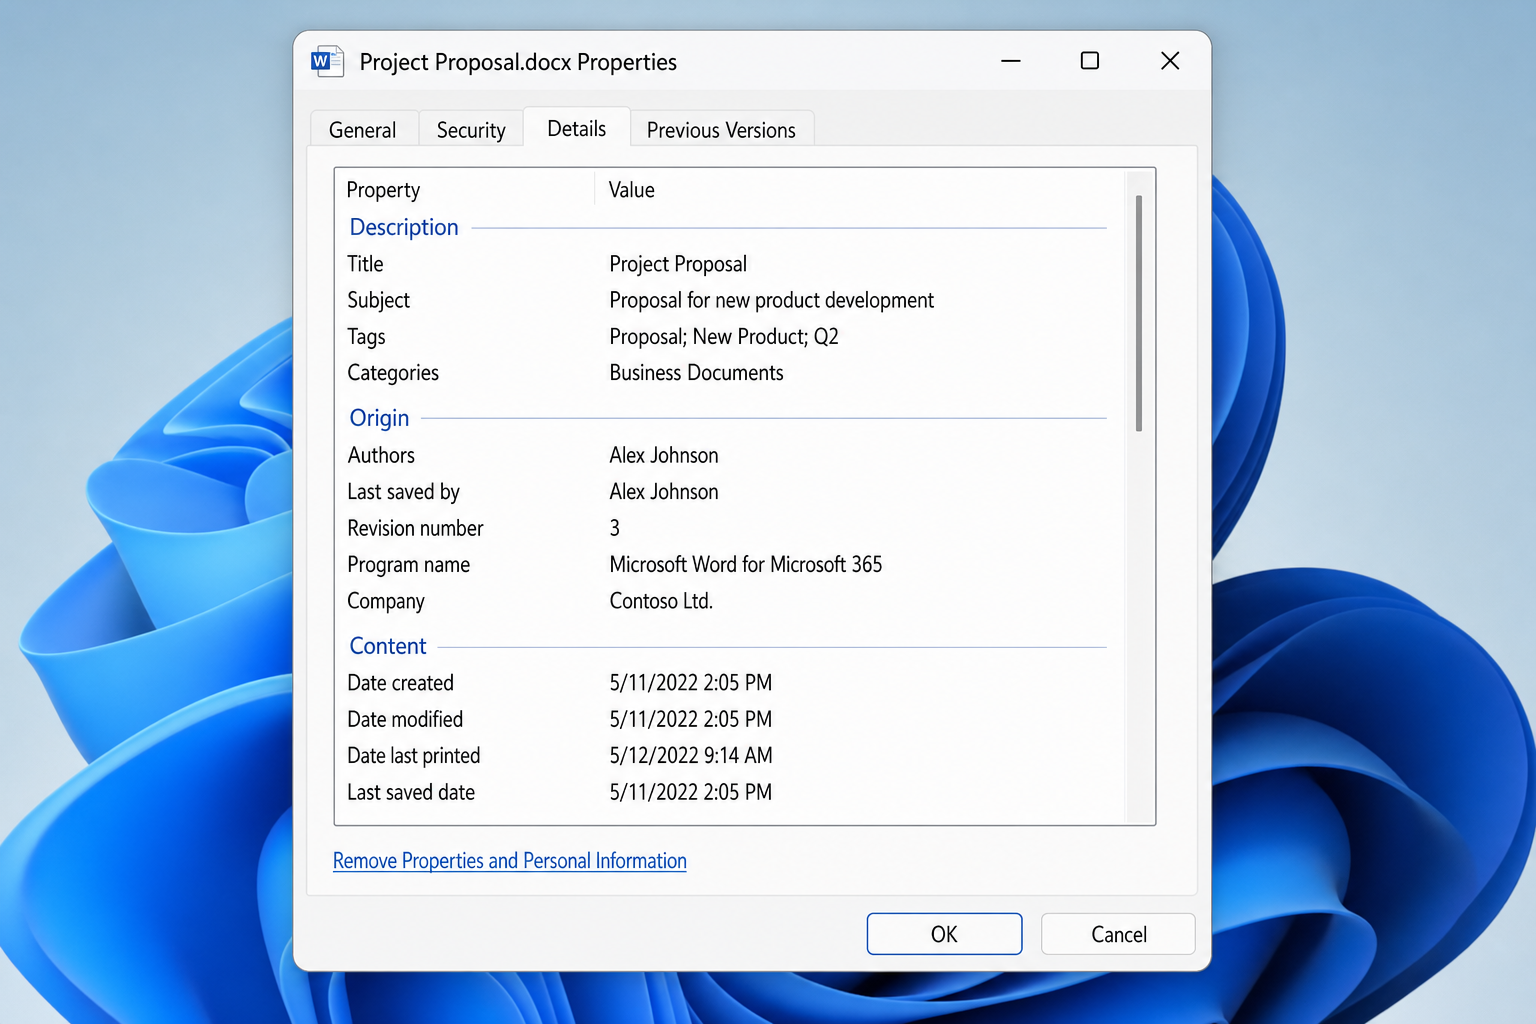
This is the fastest option when you just need the date without opening the file.
Insert the Last Modified Date into a Word Document
If you want the last-saved date to appear inside the document itself, in a header, footer, or body, use the SaveDate field. It updates automatically each time the file is saved.
Step 1: Place your cursor where the date should appear
Click in the document body, header, or footer, wherever you want the date to show up.
Step 2: Insert the SaveDate field
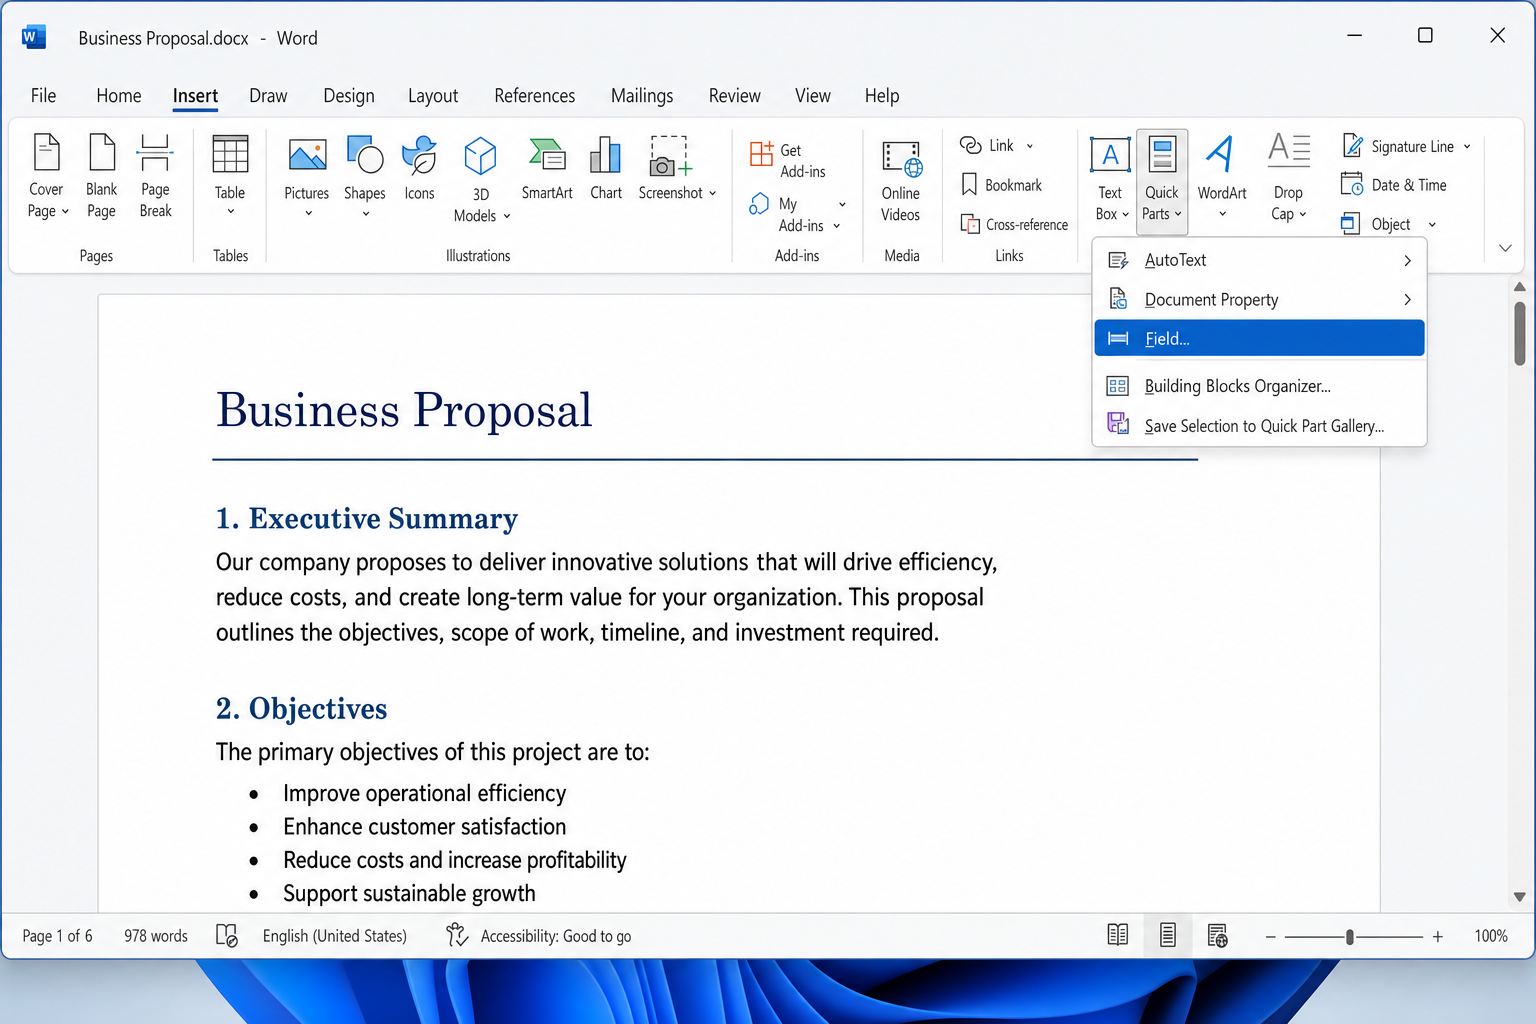
- Click the Insert tab.
2. In the Text group, click Quick Parts.
3. Select Field… from the drop-down menu.
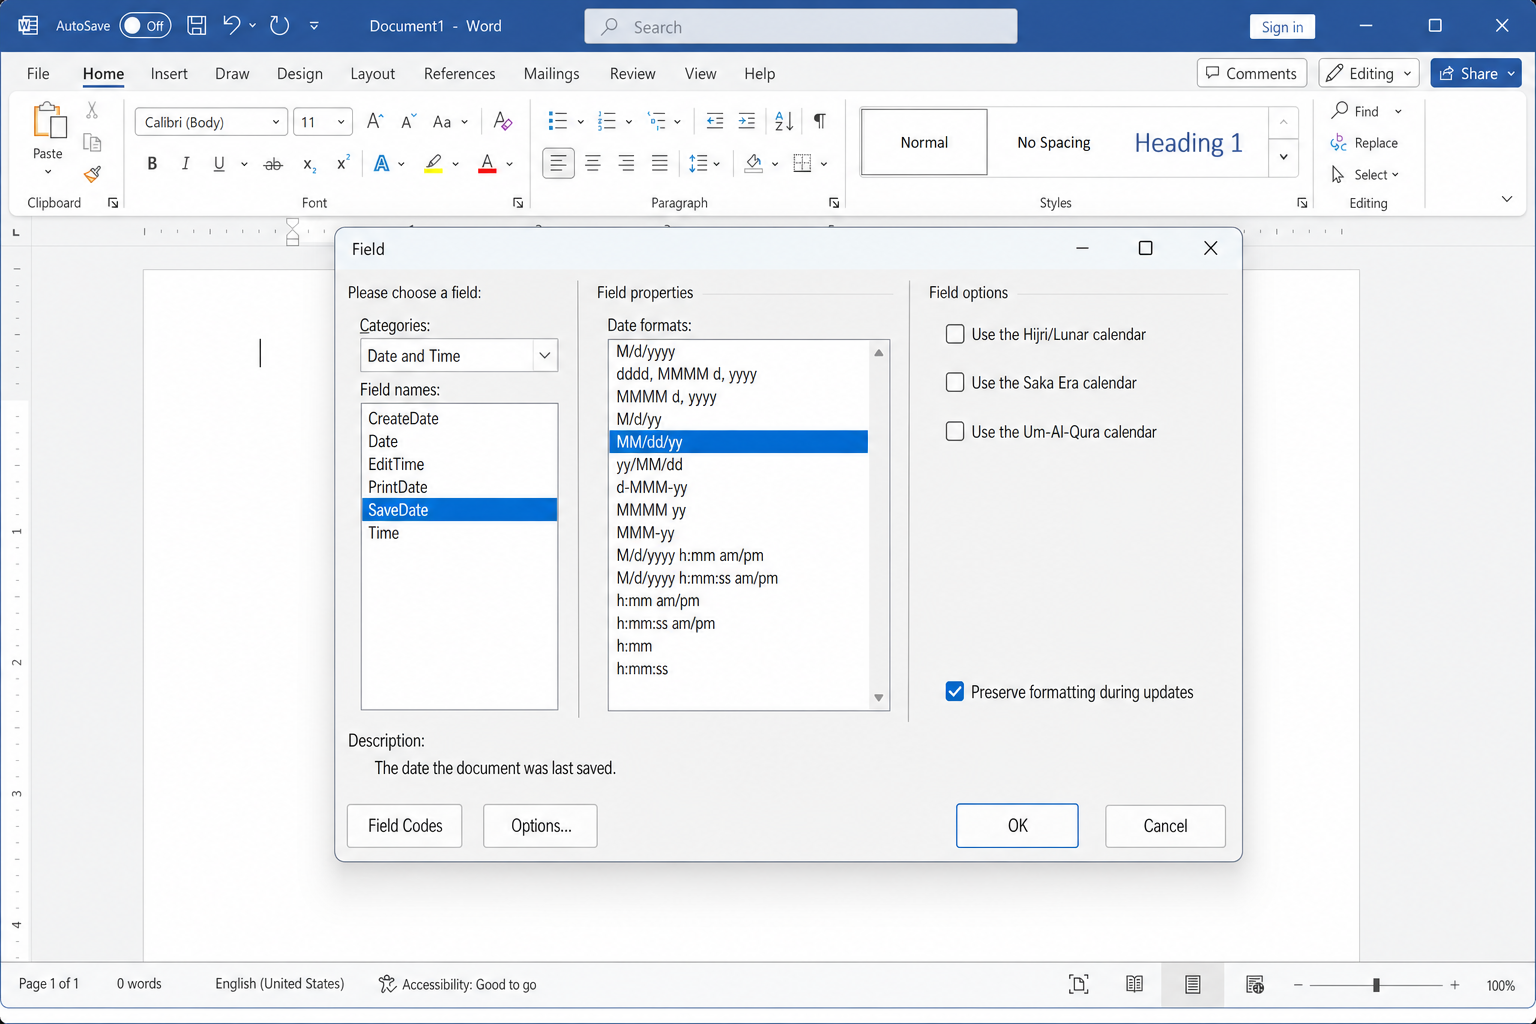
- In the Field dialog, open the Categories drop-down and select Date and Time.
5. In the Field names list, select SaveDate.
6. In the Field properties box on the right, choose your preferred date format.
7. Click OK.
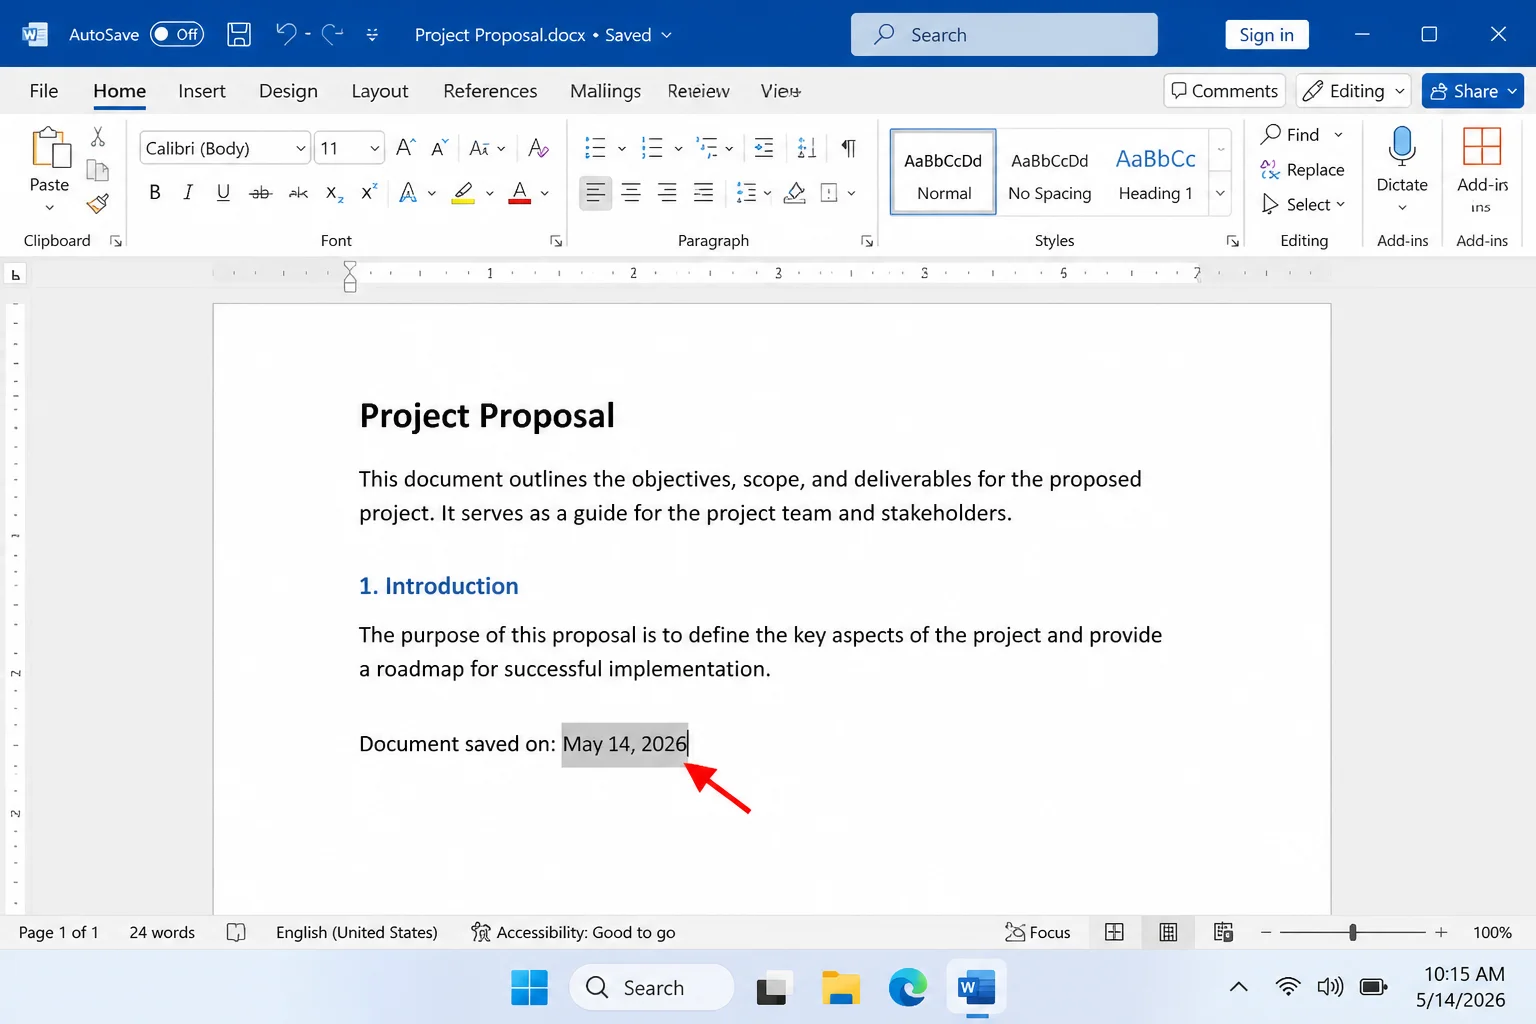
The date appears in your document with a gray background when your cursor is inside it. That’s normal. It just indicates the text is a field, not static text.
Step 3: Update the field manually if needed
The SaveDate field updates when the document is saved and fields are refreshed, not simply on open. If you’ve just saved and want to see the updated date immediately without reopening the file:
- Right-click anywhere on the field.
2. Select Update Field from the context menu.
Alternatively, click anywhere on the field and press F9.
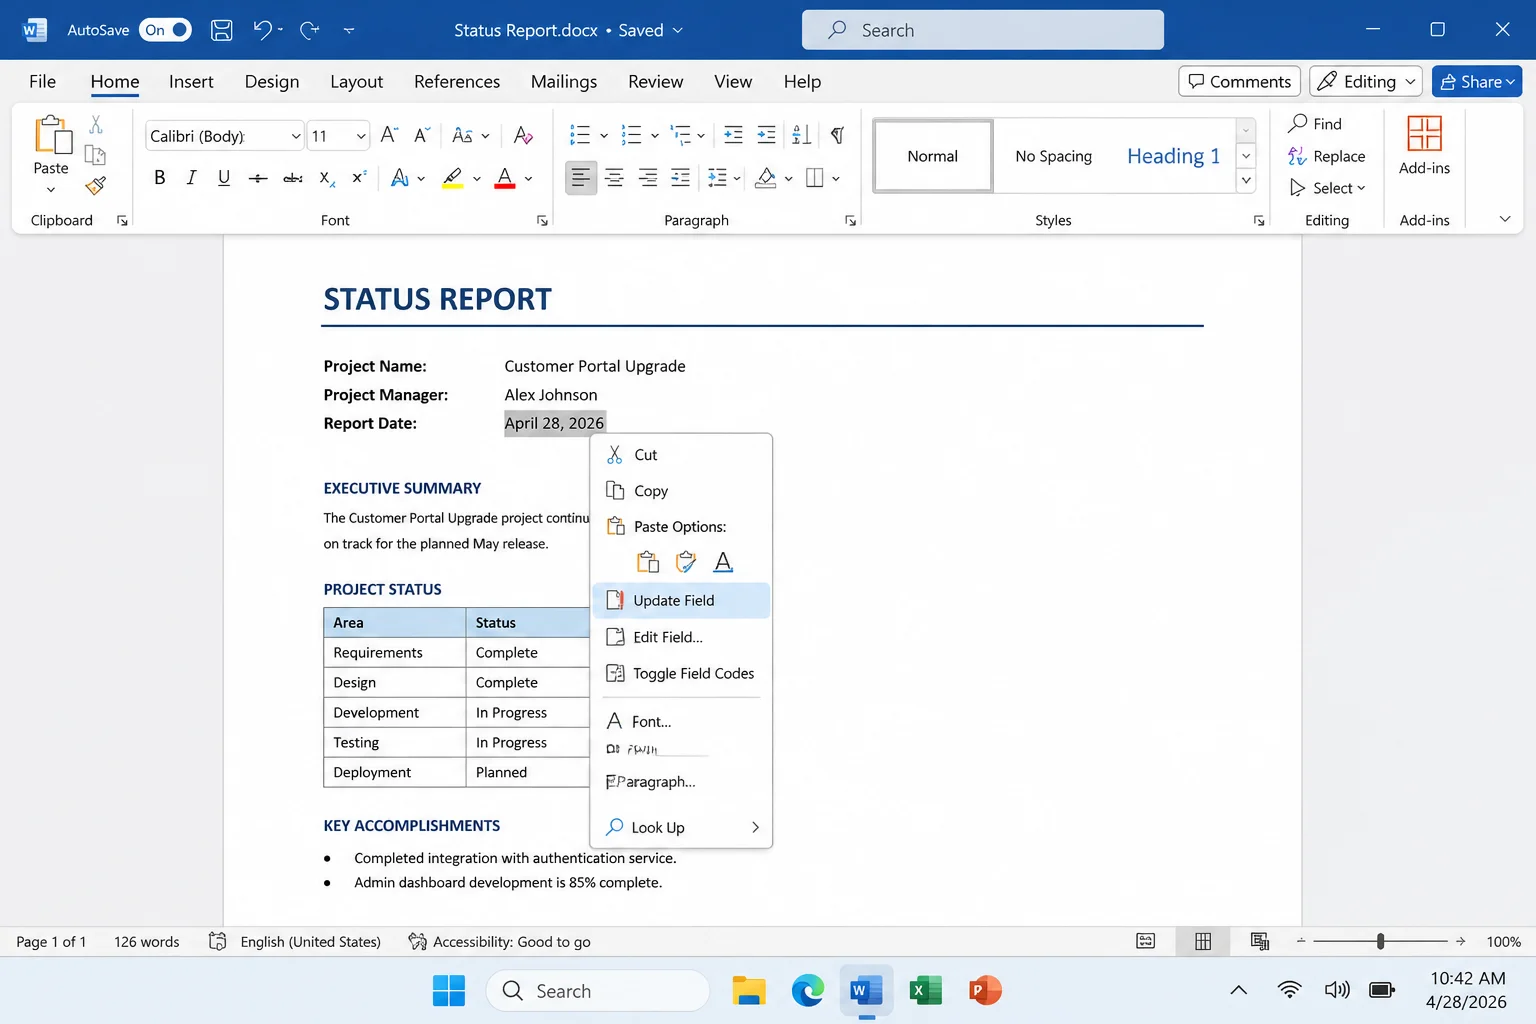
The date will reflect the most recent save time.
Insert the Created Date Instead (or Both)
The SaveDate field shows the last-saved date. If you want the original creation date, use CreateDate instead. The steps are identical; just pick a different field name.
| Field name | What it shows | Updates when… |
|---|---|---|
| SaveDate | Date the document was last saved | Every time you save |
| CreateDate | Date the document was first created/saved | Never (fixed at creation) |
| PrintDate | Date the document was last printed | Every time you print |
| Date | Today’s date (not the modified date) | Every time fields refresh |
Make the Date Static (Stop It From Updating)
If you’re finalizing a document and want the date locked in as plain text so it doesn’t change when someone else opens it, unlink the field:
- Save the document first so the field shows the correct date.
2. Click on the SaveDate field to select it.
3. Press Ctrl+Shift+F9.
The field converts to plain text. It will no longer update, even if the document is saved again. This is especially useful before emailing a document, as file system timestamps can change when a file is copied or sent, but unlinked text stays exactly as you left it.
Troubleshooting: Common Date Issues
The SaveDate doesn’t match what File Explorer shows
If you have AutoSave turned on (common with OneDrive and SharePoint files), Word saves in the background frequently. The SaveDate field reflects the last time any save occurred, including AutoSaves, which may be more recent than your last manual save. Press F9 on the field to refresh it and confirm the current value.
The last modified date changed after I emailed or copied the file
Some email clients and copy operations alter file system timestamps. If you need a reliable “last edited” date that survives being moved or sent, unlink the SaveDate field before distributing the document (see above), or paste the date as plain text from File > Info > Advanced Properties > General.
The modified date updated even though I didn’t save
With AutoSave enabled on cloud-stored files, Word saves automatically and continuously. The Modified timestamp will update even when you haven’t pressed Ctrl+S. If you need the date to reflect only intentional saves, turn off AutoSave for that document using the toggle at the top-left of the Word window.
Can I edit the Created or Modified date directly in Word?
No. Those timestamps are set by Windows at the file system level and can’t be changed inside Word. You can edit other metadata, such as Title, Author, and Comments, from File > Info > Properties > Advanced Properties > Summary, but the date fields on the General tab are read-only.
For most people, the quickest answer is File > Info. The Related Dates panel is right there without any extra steps. If you need the date inside the document itself, the SaveDate field is the right tool and works the same way across Word 2016 through Microsoft 365. Just remember to unlink it with Ctrl+Shift+F9 before sharing if you need the date to stay fixed.