Up through Windows 8, the Recycle Bin is just what it is—a container for your deleted files. However, in Microsoft Windows 11 and 10, you can force the Recycle Bin to behave in several new and valuable ways.
You can change the Recycle Bin’s maximum size, set it to automatically clean itself after a number of days, or bypass the Recycle Bin while discarding files. This tutorial will explain how to perform these three actions on any Windows 11 or 10 machine.
How to Change the Maximum Size of the Recycle Bin
The Recycle Bin in Windows 11 and 10 has a default storage space of around 5% of the total size of your disk volume. With that in mind, let’s assume you’ve assigned 500 GB of space to your volume. For this volume, the Recycle Bin will automatically delete your oldest files when over 25 GB of space has been used.
For most users, 5% is more than enough space in the Recycle Bin. However, you may be in the middle of an OCD-induced cleaning session where you want to be extra careful that anything you delete isn’t gone forever. In that case, you may consider changing the maximum size of the Recycle Bin.
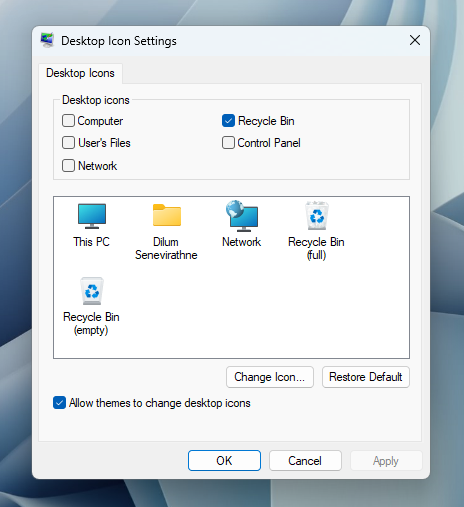
To do so, right-click the Recycle Bin icon on your desktop and choose Properties. If you don’t have the icon on your desktop, open the Start menu, search Windows for desktop icons, and select the Themes and related settings option. On this window, scroll down to Desktop icon settings.
Here, you’ll be able to restore the icon to your desktop.
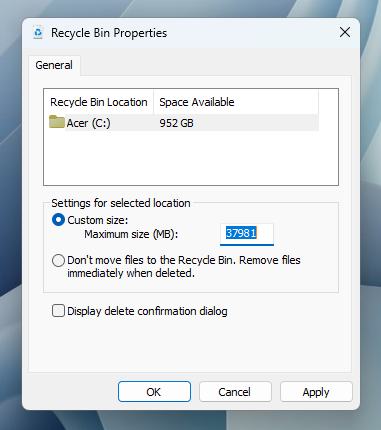
The Properties window of your Recycle Bin will allow you to set a custom maximum size for each volume.
By selecting the Custom size radio option, you can enter a maximum size, in megabytes (1,024 megabytes equals one gigabyte), that the Recycle Bin can grow to before files begin to delete permanently.
How to Bypass the Recycle Bin and Delete Files Permanently
If the Recycle Bin is useless in your workflow, you can set the default action for file deletions to completely bypass the Recycle Bin and delete permanently.
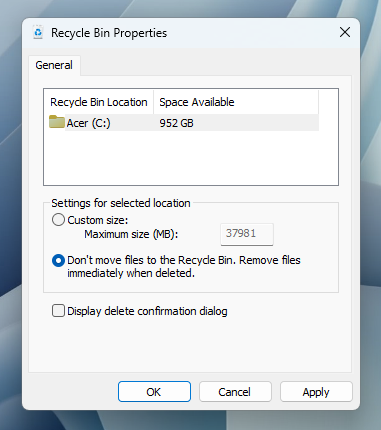
You can do so in that same Properties menu when you right-click the Recycle Bin icon on the Windows 11 or 10 desktop.
By selecting the “Don’t move files to the Recycle Bin. Remove files immediately when deleted.” radio option, Windows will do just that.
How to Make the Recycle Bin Delete Files After a Number of Days
A feature in Windows 11 and 10 that everyone can benefit from is the Recycle Bin’s ability to clean up after itself. It’s part of Storage Sense, which assists users in performing automated clean-ups of their drives. Storage Sense is comparable to a native Windows solution for something like CCleaner (which we don’t recommend).
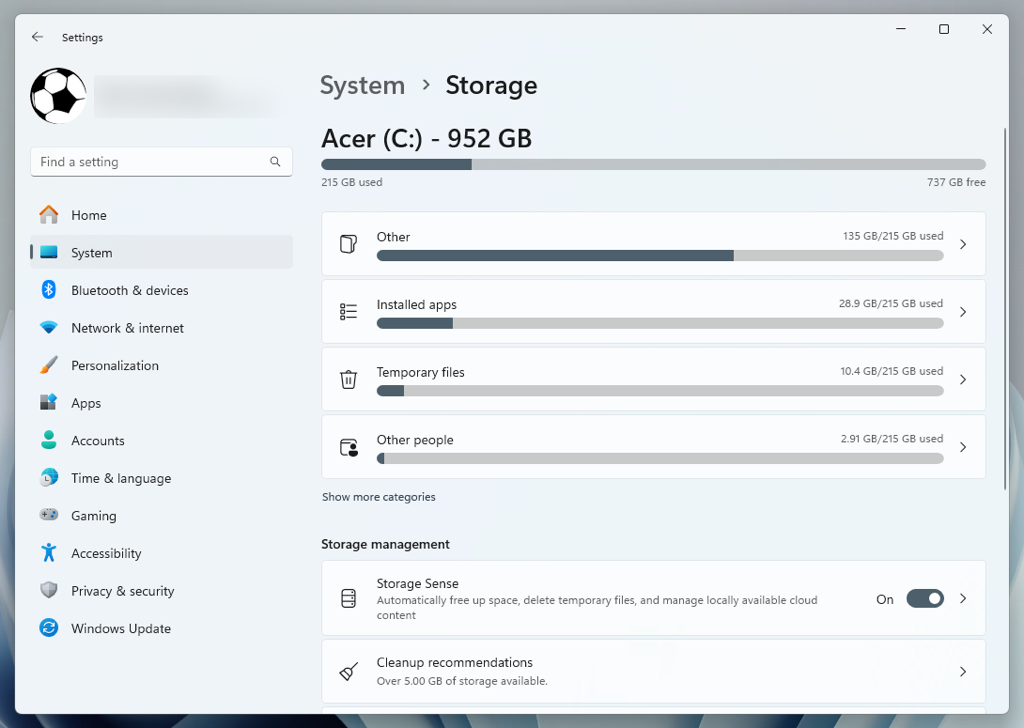
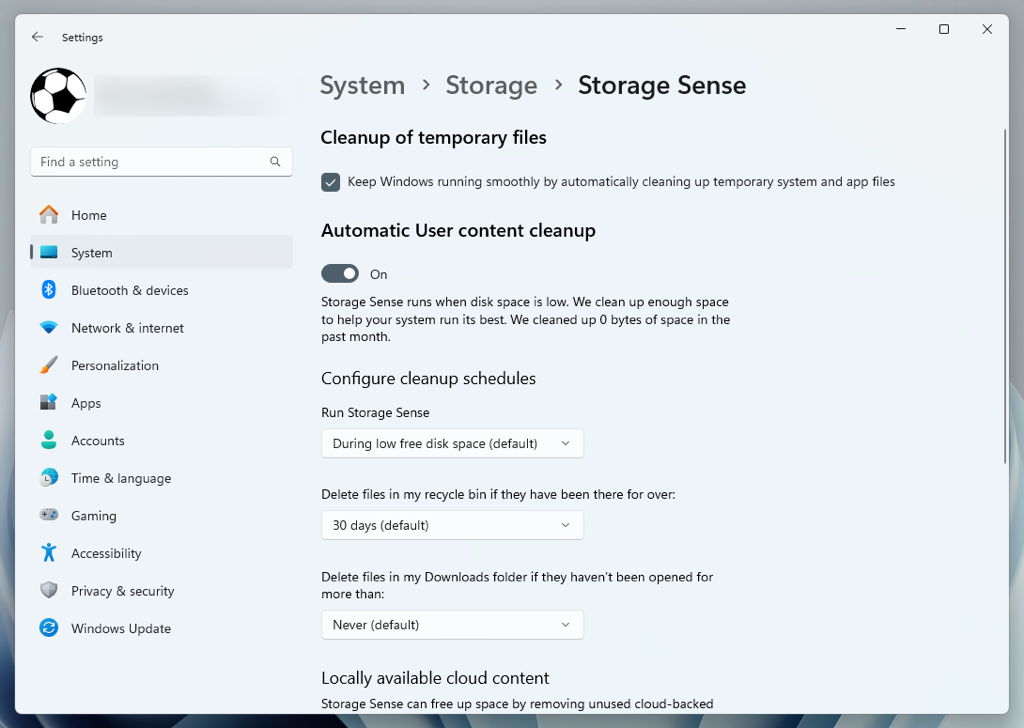
To begin using Storage Sense to free up your Recycle Bin’s space after a number of days, press the Windows + I keys to bring up Windows Settings. From there, go to System > Storage. You should then be at a window that looks like this:
Here, select Storage Sense within the Storage management section. In Windows 10, select Change how we free up space automatically under Storage Sense.
Note: If the switch next to Storage Sense is inactive, enable it before moving to the next screen.
On this window, you’ll see a dropdown box belonging to the Delete files in my recycle bin if they have been there for over setting. The available options are as follows:
- Never
- 1 day
- 14 days
- 30 days
- 60 days
Using the dropdown box to select one of these options will save this change to your Storage Sense settings. This change will apply retroactively, so if you have files that have been in your Recycle Bin for 80 days and you opt for Storage Sense to delete them after 60 days, they will be deleted upon applying this change.
Review and configure any other options related to Storage Sense—such as how the functionality manages files within your Downloads folder—before exiting the window.
Recycle Bin Maintenance Made Easy
While maintaining a healthy Recycle Bin in Windows 11 and 10 is as simple as a few clicks, Microsoft deserves credit for offering users settings to help automate and better control how one of the longest and most important parts of the operating system behaves. These three simple settings are worth checking out and only take a few seconds!
Now that you know how to configure and tweak the Recycle Bin, it’s time to start cleaning your Windows 11 or 10 PC.
Related Posts
- Preparing for Windows 10 End of Support: Upgrading to Windows 11
- How to Fix a “This file does not have an app associated with it” Error on Windows
- How to Fix an Update Error 0x800705b4 on Windows
- How to Resolve “A JavaScript error occured in the main process” Error on Windows
- How to Fix the Network Discovery Is Turned Off Error on Windows
Craig is a long-time writer, coder, and marketer with years of experience in the technology and gaming spaces. Since 2008, he’s worked remotely with some of the most notable publications in these industries, specializing in Windows, PC hardware and software, automation, and the like. Read Craig’s Full Bio
