When you cut or copy something on your computer, it’s automatically copied to the clipboard so that you can paste a copy of the item elsewhere.
The October 2018 Windows Update came with a new clipboard experience in addition to the ability to paste multiple files. You can also pin the items you want to use every time, and sync your clips across devices via the cloud.
Plus, you can track the text and images copied to the clipboard, and access the clipboard history settings and interface. While it’s good to have access to the clipboard history, it can turn out to be a security risk especially if you share the device with other people.
If you want to remove some items from your list or delete the history altogether, we’ll walk you through the steps to clear the clipboard in Windows 10.
How to Clear the Clipboard in Windows 10
There are different methods you can use to clear the data currently stored in the clipboard including using Command Prompt, shortcuts, and Windows 10 Settings.
How to Clear the Clipboard Using Command Prompt
This is a quick way of clearing the clipboard on Windows 10.
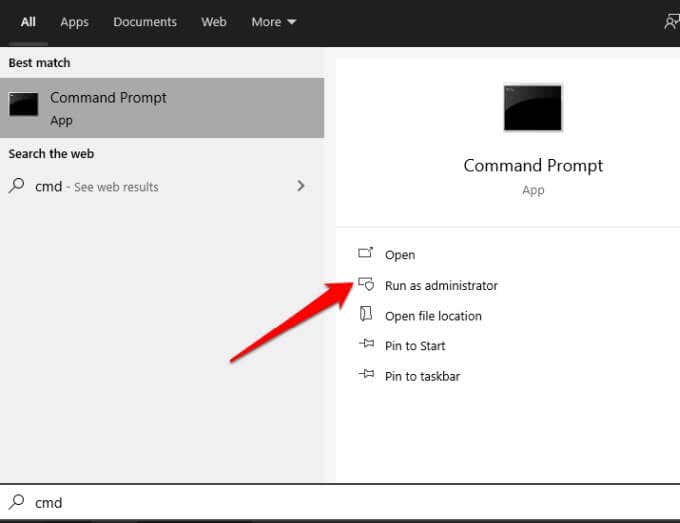
- To do this, type CMD in the search box and select Run as administrator.
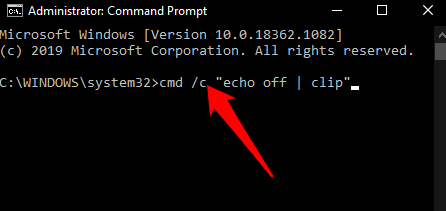
- Next, copy and paste the command below into the Command Prompt window, and press Enter.
cmd /c “echo off | clip”
- Close the Command Prompt window after running the command.
How to Clear the Clipboard Using Shortcuts in Notepad
If you’re using the modern clipboard on Windows 10, you can clear the data with a shortcut.
- To do this, select Start and search for Notepad. Pick the top result to open the Notepad app.
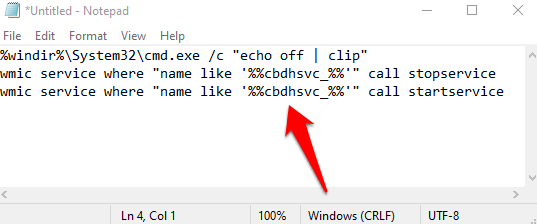
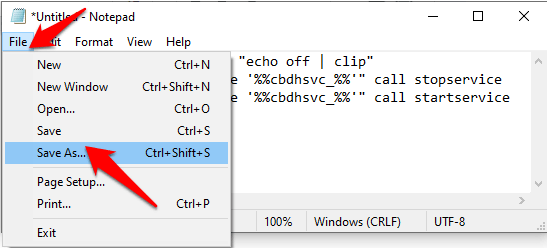
- Copy and paste these commands to the Notepad app:
%windir%System32cmd.exe /c “echo off | clip”
wmic service where “name like ‘%%cbdhsvc_%%'” call stopservice
wmic service where “name like ‘%%cbdhsvc_%%'” call startservice
- Next, select File > Save As.
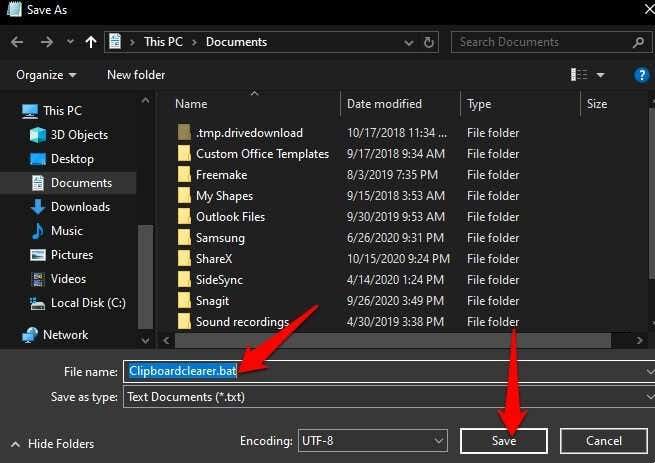
- Give the file a name with the .bat extension, for example Clipboardclearer.bat, and then select Save.
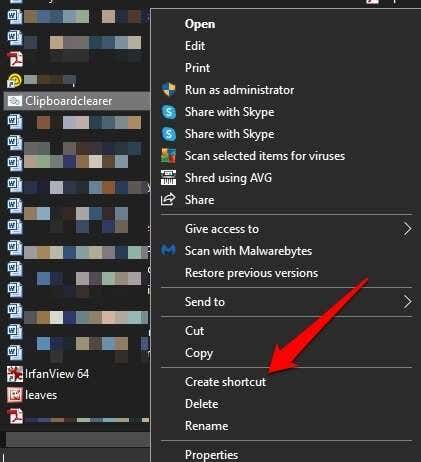
- Right-click the file and then select Create shortcut.
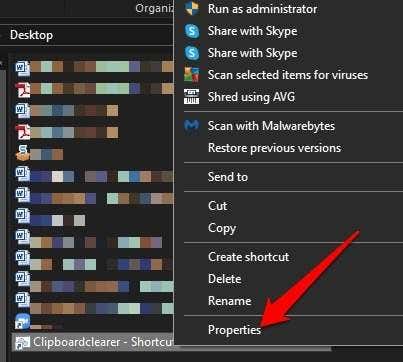
- Next, right-click the shortcut you’ve just created and select Properties.
- Select the Shortcut tab and then select Change Icon.
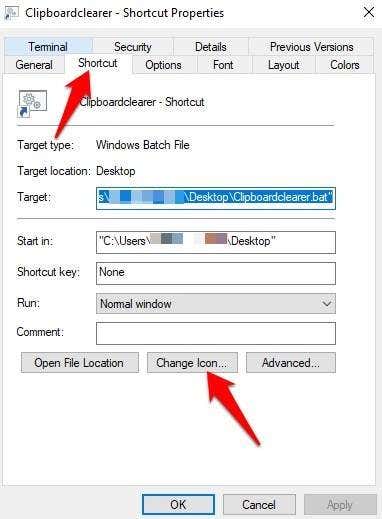
- Copy and paste the path below and press Enter.
%windir%system32imageres.dll
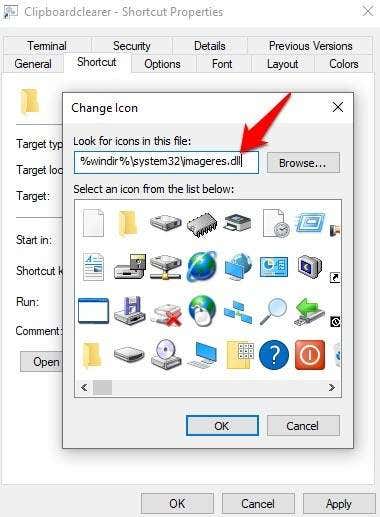
- Select an icon for the shortcut, and then select OK > Apply.
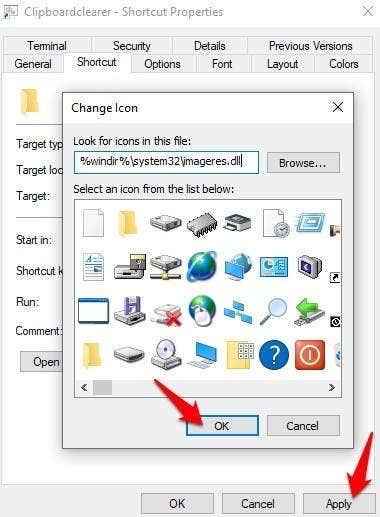
If you want, you can record a keyboard shortcut in the Shortcut key field. For example, you can use CTRL+SHIFT+X or any combination you want to clear clipboard content using a keystroke combination.
- Next, select Advanced.
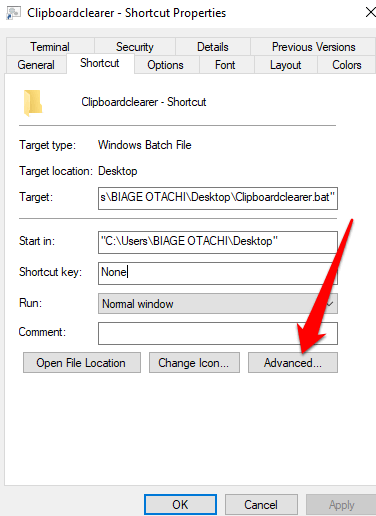
- Check the Run as Administrator box.
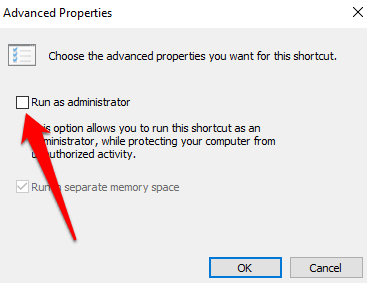
- Select OK > Apply and select OK again.
Once you’re done with these steps, invoke the keyboard shortcut or double-click the shortcut file to clear the clipboard history.
Note: If you use a shortcut to clear the clipboard in Windows 10, confirm the elevation of the shortcut so that the batch script can run correctly.
How to Clear the Clipboard in Windows 10 Using Windows Key + V
If creating a shortcut file or keyboard shortcut in Notepad sounds tedious, you can use the Windows Key + V shortcut to clear the clipboard on your computer.
- To do this, press Windows Key + V on your keyboard. A small popup window will appear containing the recent items you have copied. If you see a Turn on option instead, and there’s no clipboard entry listed, you’re not using the modern clipboard experience.
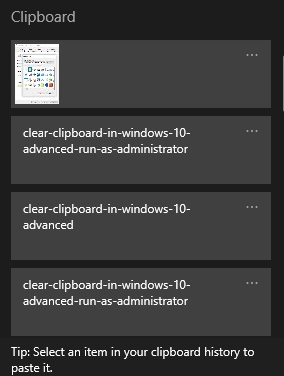
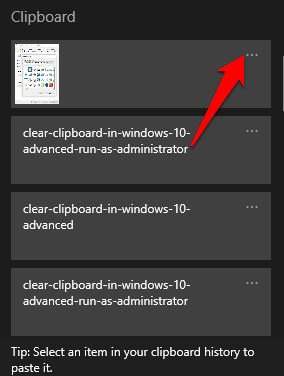
- Select the ellipses at the top right side of the screen to open the menu.
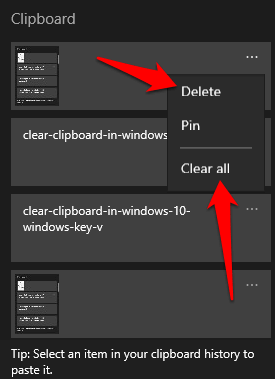
- If you want to clear one entry, select Delete. If you want to clear the entire clipboard history, select Clear all.
Note: Each time you restart your PC, the clipboard history is cleared except for pinned items. Also, the clipboard can only hold up to 25 copied entries at a go, so older entries are automatically removed to make room for new ones.
How to Clear the Clipboard in Windows 10 Using Settings
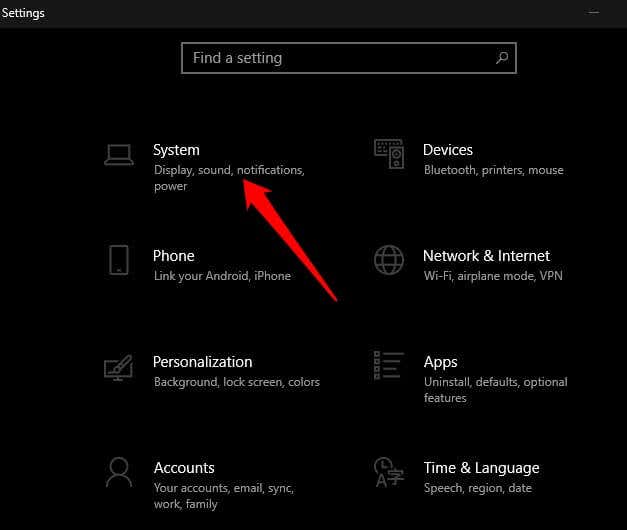
- To do this, select Start > Settings and select System.
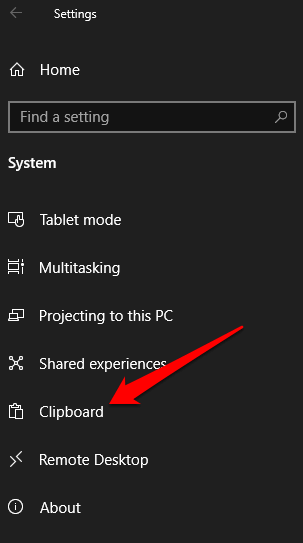
- Select Clipboard.
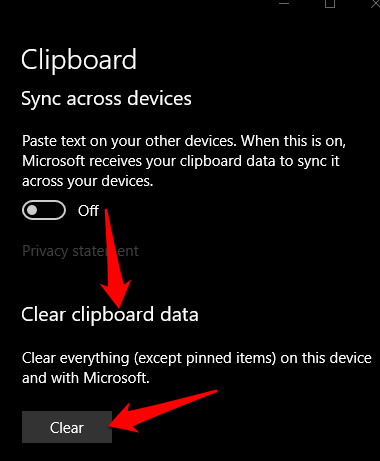
- Select Clear under the Clear clipboard data section.
How to Clear the Clipboard in the Legacy Clipboard Experience
If you’re not using the modern clipboard, you can clear the clipboard history using these steps:
- Open File Explorer and go to the Desktop or Documents folder, whichever you want to store the shortcut in.
- Select the Home tab and then select New item > Shortcut. Alternatively, right-click on an empty space in the folder and select New item > Shortcut.
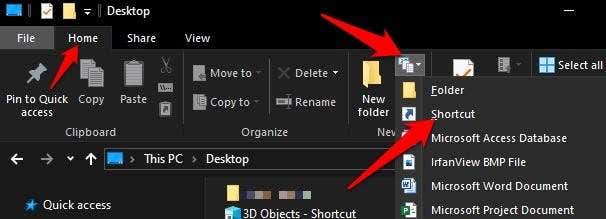
- Copy and paste this command in the location field:
%windir%System32cmd.exe /c “echo off | clip”
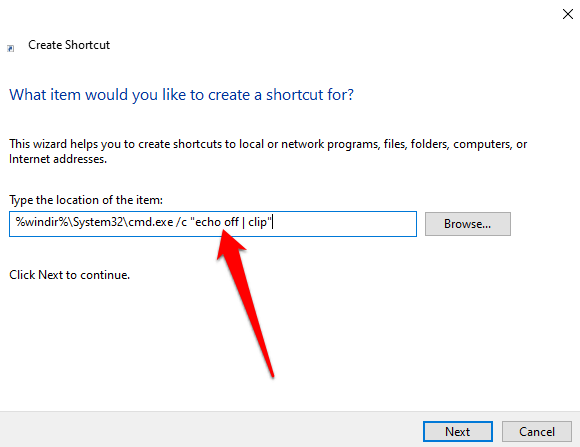
Note: You can run the command in Command Prompt if you’re on a public machine, instead of using a shortcut to clear the clipboard.
- Select Next.
- Give a name for the shortcut, for example ClipboardClearer, and select Finish.
- Right-click the shortcut you created, select Properties > Shortcut tab and then select Change Icon.
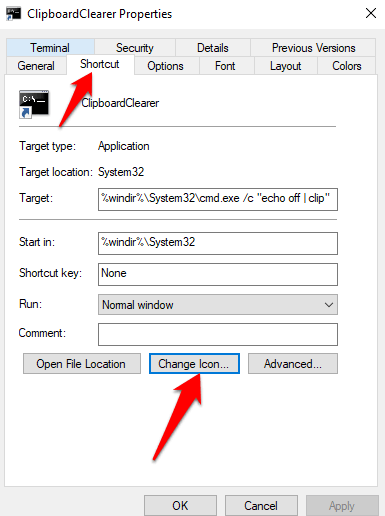
- Copy and paste the path below and then press Enter.
%windir%system32imageres.dll
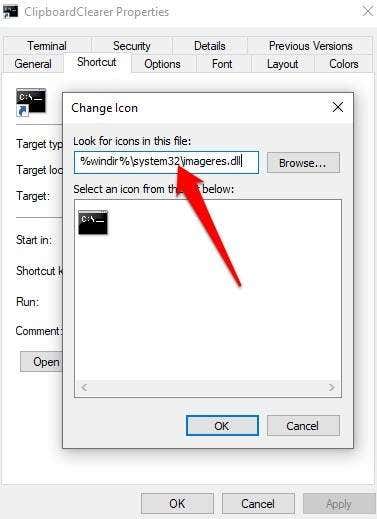
Select an icon for your shortcut, and then select OK > Apply. You can add a keyboard shortcut in the Shortcut key field if you want to clear the clipboard using a keystroke combination. Once you’re done, the clipboard history will be deleted.
Note: The difference between the steps taken to clear the clipboard in the legacy and modern experiences is that in the legacy clipboard, all the content in the clipboard is deleted. With the modern clipboard, you have to also clear the clipboard history, which is stored in a separate location.
How to Clear the Clipboard in Windows 10 by Disabling Clipboard History
If you don’t want the clipboard history to be available or seen by other users, you can disable or turn off the clipboard history.
- To do this, select Start > Settings > System and go to Clipboard.

- Go to the Clipboard history option and toggle the switch to Off.
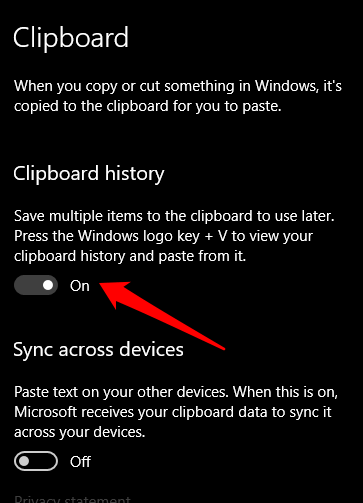
If you try to press Windows Key + V, a little popup window will appear notifying you that the clipboard history cannot be displayed because the feature is disabled. This allows you to copy and paste freely without worrying about others seeing your data.
To enable the clipboard history again, press Windows Key + V and select Turn On.

Empty Your Clipboard
While it’s convenient and time-saving to use the copy, cut, and paste functions, it’s also necessary to clear the clipboard once in a while. Not only is it good for privacy for obvious reasons, but also avoids errors that arise when the clipboard is full.
Were you able to clear the clipboard on your computer? Share with us in the comments.
Related Posts
- Preparing for Windows 10 End of Support: Upgrading to Windows 11
- How to Fix a “This file does not have an app associated with it” Error on Windows
- How to Fix an Update Error 0x800705b4 on Windows
- How to Resolve “A JavaScript error occured in the main process” Error on Windows
- How to Fix the Network Discovery Is Turned Off Error on Windows