Do you keep receiving a “Windows host process (Rundll32) has stopped working” error while using Windows 10? This error mostly shows up when you attempt to open or interact with specific programs—native or third-party—on your computer. But it can also pester you randomly for no obvious reason. Why does this happen?
Windows 10 uses the Rundll32 process to execute 32-bit DLL (dynamic-link library) files. These files contain functions that are shared across multiple applications. However, conflicting software, improperly configured settings, or corrupted system files can cause Rundll32 to break down, hence the reason for the error.
The “Rundll32 has stopped working” error has been plaguing Windows users for years, but there are several fixes that can help you get rid of it. We recommend working through the troubleshooting methods below in the order that they appear. Feel free to skip those that don’t apply.
Disable Thumbnail Previews
Do you keep running into the “Rundll32 has stopped working” error while using File Explorer? Turning off thumbnail previews can help.
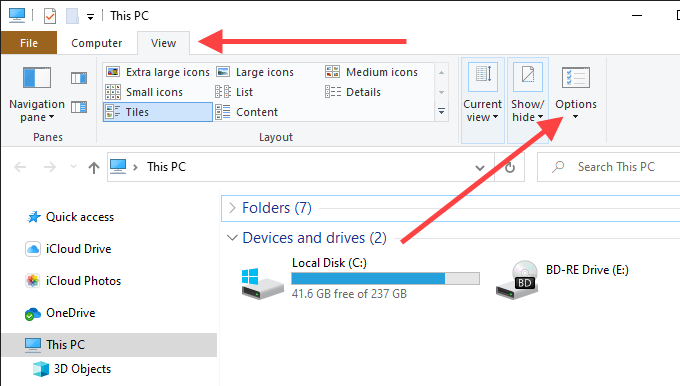
1. Open File Explorer.
2. Select the View tab. Then, pick Options to bring up the Folder Options dialog box.
3. Switch to the View tab.
4. Check the box next to Always show icons, never thumbnails.
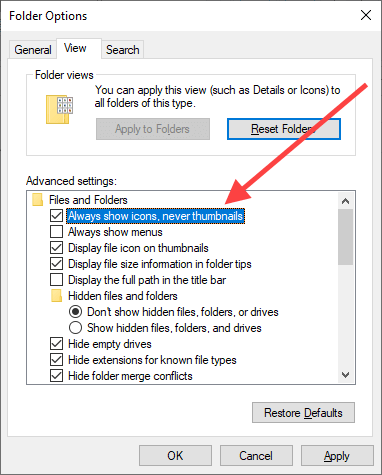
5. Select Apply, then OK, to save the changes.
Run File and Folder Troubleshooter
If File Explorer still keeps throwing out the “Rundll32 has stopped working” error message despite disabling thumbnail previews, try running the File and Folder Troubleshooter.
1. Download the File and Folder Troubleshooter from Microsoft.
2. Open the File and Folder Troubleshooter—you don’t have to install it.
3. Select Advanced, check the box next to Apply repairs automatically (if it isn’t already checked), and select Next.
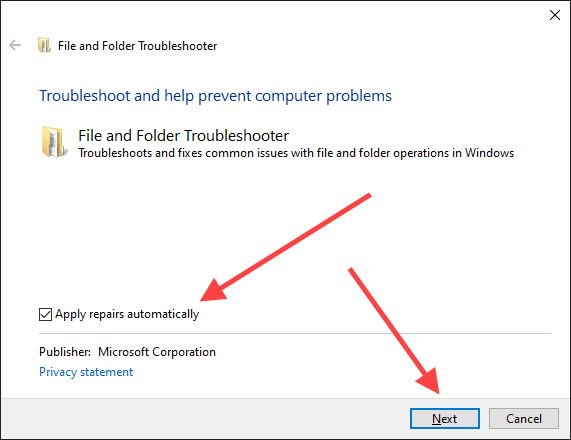
4. Select all options within the What kind of problems are you experiencing screen and select Next.
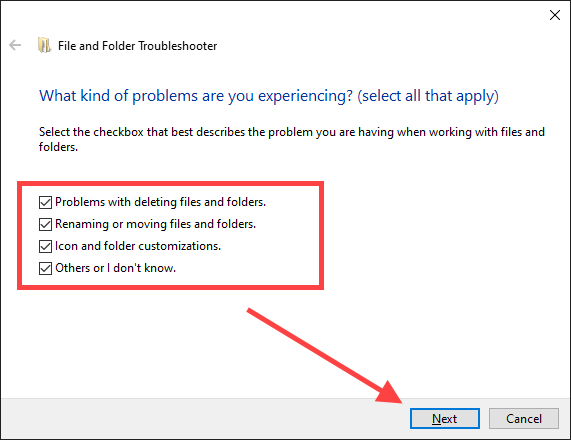
5. Follow the onscreen prompts to fix any issues detected by the File and Folder Troubleshooter.
Update, Reinstall, or Uninstall Programs
Did the issue occur after installing a particular application on your computer? For example, programs such as Nero and the K-Lite Codec Pack have a history of causing the “Rundll32 has stopped working” error.
If so, try updating or reinstalling the program. In case that doesn’t work, you may want to consider removing it from your computer entirely.
Disable Services and Startup Programs
Third-party background services and startup programs can also result in the Rundll32 error. Check if disabling these helps. You can then go through a process of elimination to figure out the exact item causing the issue.
Disable Third-Party Services – System Configuration
1. Press Windows+R to open the Run box. Then, type msconfig and select OK.
2. Switch to the Services tab. Then, check the box next to Hide all Microsoft services (which then reveals only third-party services) and select Disable all.
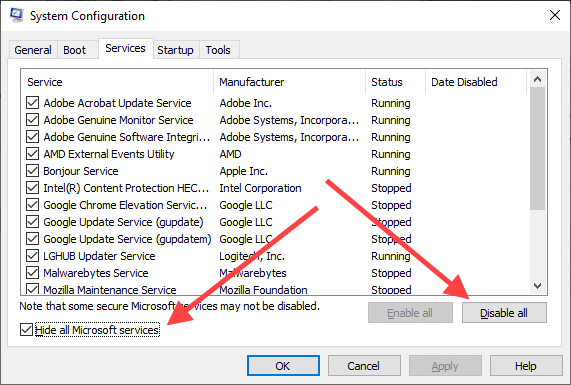
3. Select Apply, then OK, to save the changes. Select Exit without restart when prompted.
Disable Startup Programs – Task Manager
1. Right-click the taskbar and select Task Manager.
2. Select More Details.
3. Switch to the Startup tab.
4. Pick each third-party startup program and select Disable.
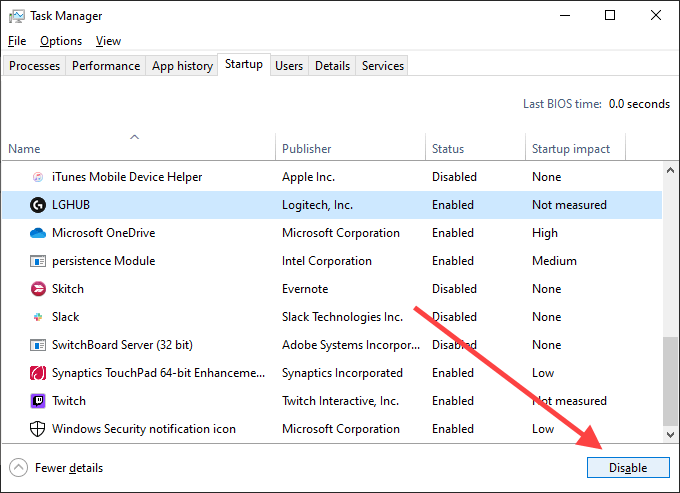
5. Close the Task Manager.
Restart your computer. If the Rundll32 error doesn’t show up anymore, start re-enabling a few services and startup programs at a time. That should help you pinpoint the problematic item. You can then update the relevant program or remove it from your computer.
Roll Back Audio/Video Drivers
The “Rundll32 has stopped working” error can crop up after updating audio or video drivers. For example, drivers by Realtek, Sound Blaster, and NVIDIA can cause that in rare instances. Use the Device Manager in Windows 10 to roll them back.
1. Right-click the Start button and select Device Manager.
2. Expand Sound, video and game controllers.
3. Right-click the sound driver and select Properties.
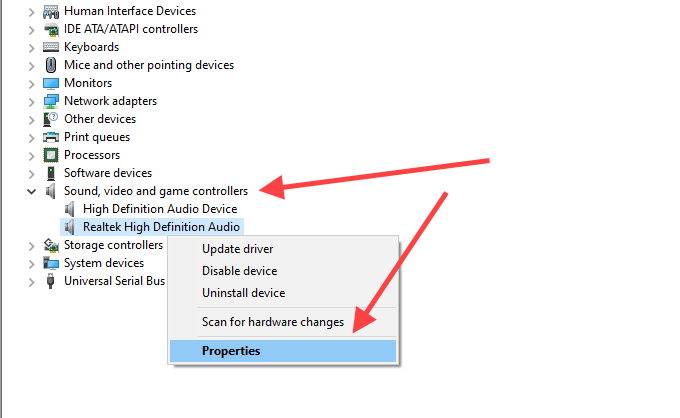
4. Switch to the Driver tab and select Roll Back Driver. Repeat for any other drivers within the list.
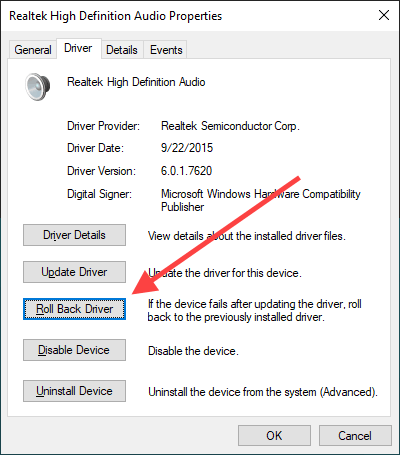
5. Expand the Display Adapters section within the Device Manager and repeat steps 3 and 4.
Update Audio/Video Drivers
If rolling back the audio and video drivers didn’t help (or if you couldn’t roll them back earlier), try updating them instead.
1. Open the Device Manager.
2. Expand Sound, video and game controllers.
3. Right-click the sound driver and select Update Driver.
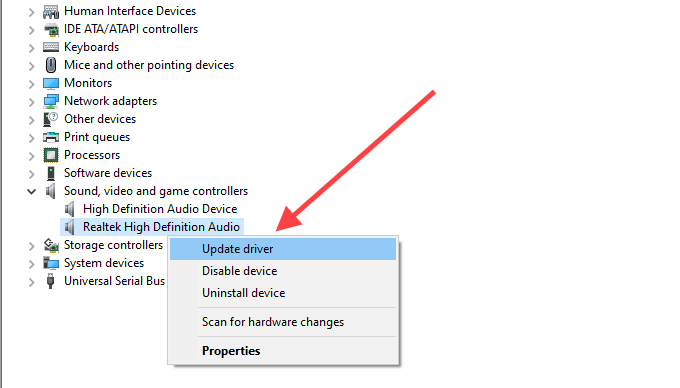
4. Select Search automatically for drivers to scan for and apply the latest drivers automatically. Repeat for any other drivers within the list.
5. Expand the Display Adapters section and repeat steps 3 and 4.
Alternatively, you can download the latest audio or video drivers directly from the manufacturer’s website and update them manually.
Update Windows 10
An outdated version of Windows 10 can result in all sorts of issues. If you haven’t updated your computer in a while, try doing that now.
1. Open the Start menu, type windows update, and select Open.
2. Select Check for updates.
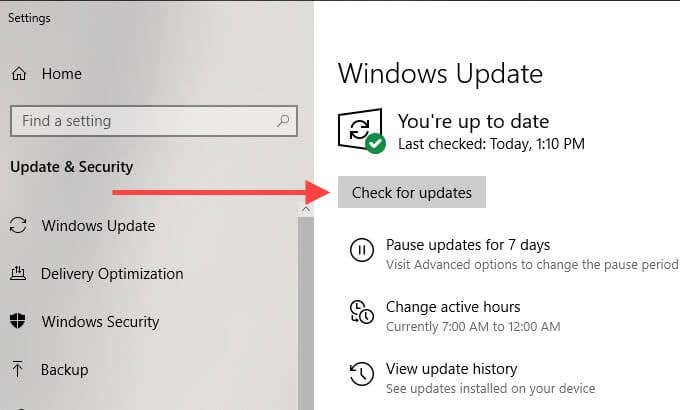
3. Install any updates, if available.
Disable Data Execution Prevention
Data Execution Prevention (DEP) is a Windows 10 feature that monitors and protects the system memory from malicious attacks. However, it can stop the Rundll32 process from working properly. Check if disabling DEP helps.
1. Open the Start menu, type command prompt, and select Run as administrator.
2. Copy and paste the following command into the elevated Command Prompt console:
bcdedit.exe /set {current} nx AlwaysOff
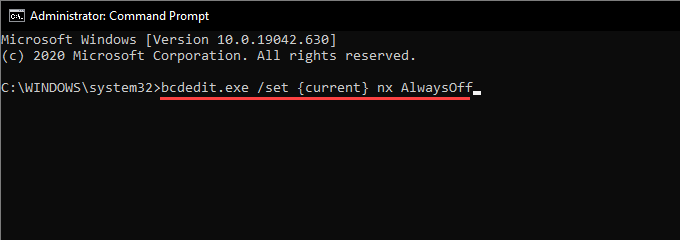
3. Press Enter to disable DEP.
Did that fix the “Rundll32 has stopped working” error? If yes, you may still want to continue with the rest of the fixes since keeping DEP disabled is a security risk.
Note: To enable Data Execution Prevention at a later time, run the following command in an elevated Command Prompt console:
bcdedit.exe /set {current} nx AlwaysOn
Scan for Malware
Malicious programs can masquerade as DLL files and end up causing “Rundll32 has stopped working” errors. Try using Windows Security to scan your computer for malware.
1. Open the Start menu, type windows security, and select Open.
2. Select Virus & threat protection.
3. Select Scan options.
4. Select Full scan. Then, select Scan now.
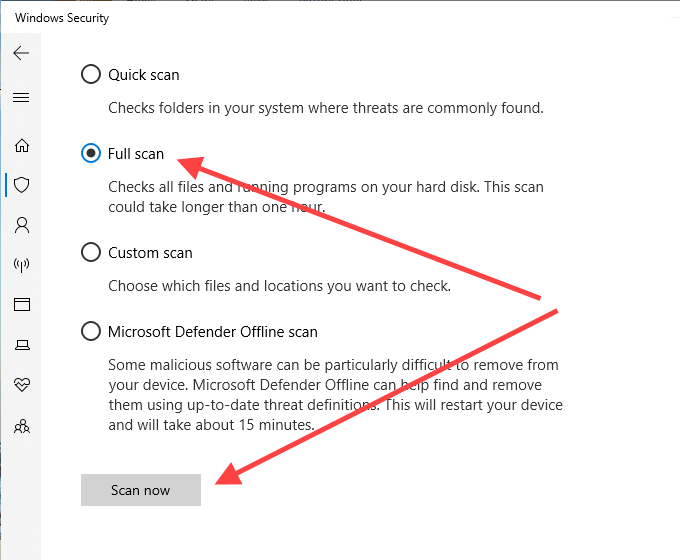
If Windows Security failed to dig up anything, we recommend using a dedicated malware remover such as Malwarebytes for a thorough computer cleanup.
Run an SFC Scan
An SFC (System File Checker) scan allows you to detect and repair corrupted system files that prevent the Rundll32 process from running properly.
1. Open the Start menu, type command prompt, and select Run as administrator.
2. Enter the following command:
sfc /scannow
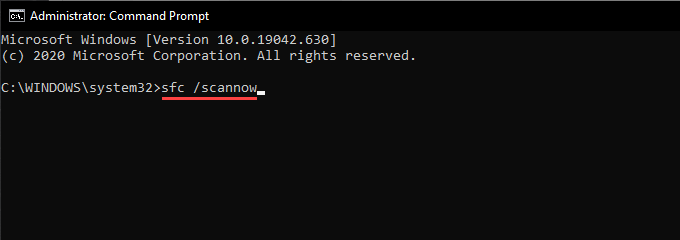
3. Press Enter.
The SFC scan may take several minutes to complete.
Run a DISM Scan
If the SFC scan failed to find and fix any issues, run a DISM (Deployment Image Servicing and Management) scan instead.
1. Open the Start menu, type command prompt, and then select Run as administrator.
2. Run the following command:
DISM /Online /Cleanup-Image /CheckHealth
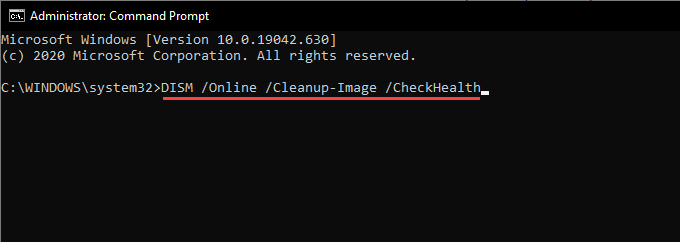
3. If DISM ended up detecting issues on your computer, run the following commands one after the other.
DISM /Online /Cleanup-Image /ScanHealth
DISM /Online /Cleanup-Image /RestoreHealth
What Else Can You Do?
If none of the fixes above resolved the “Windows host process (Rundll32) has stopped working” error, you may want to perform a Windows 10 factory reset by heading over to Start > Settings > Update & Security > Recovery. You can choose between keeping or removing your files and programs during the reset procedure.
You can also try re-installing Windows 10. There could be a deep underlying issue that only a complete reinstallation of the operating system can fix. Just remember to create a complete backup of your data beforehand.
Related Posts
- Preparing for Windows 10 End of Support: Upgrading to Windows 11
- How to Fix a “This file does not have an app associated with it” Error on Windows
- How to Fix an Update Error 0x800705b4 on Windows
- How to Resolve “A JavaScript error occured in the main process” Error on Windows
- How to Fix the Network Discovery Is Turned Off Error on Windows
Dilum Senevirathne is a freelance tech writer and blogger with three years of experience writing for online technology publications. He specializes in topics related to iOS, iPadOS, macOS, and Google web apps. When he isn’t hammering away at his Magic Keyboard, you can catch him binge-watching productivity hacks on YouTube. Read Dilum’s Full Bio
