The Settings app is crucial to configuring and managing the various aspects of Windows 10. You need it for everything from uninstalling apps, tweaking device-related settings, to installing operating system updates.
Of course—you can still use the Control Panel in Windows 10. But Microsoft keeps phasing the program out in favor of the Settings app, so it doesn’t provide complete control over your PC anymore.
So if the Settings app won’t open on your Windows 10 computer or crashes quickly, you must fix it right away. The list of troubleshooting tips below should help you with that.
1. Re-register the Settings App in Windows 10
If the Settings dialog fails to open or disappears from view immediately after launching, you must re-register it by running a specific command via Windows PowerShell.
1. Press Windows + X to open the Power User Menu. Then, type Windows PowerShell.
2. Copy and paste the following command into the Windows PowerShell console:
Get-AppXPackage -Name Windows.Immersivecontrolpanel | Foreach {Add-AppxPackage -DisableDevelopmentMode -Register “$($_.InstallLocation)\AppXManifest.xml”}
3. Press Enter.
4. Exit Windows PowerShell.
5. Restart your computer. Then, attempt to open the Settings app.
2. Re-install and Re-register All Windows Apps
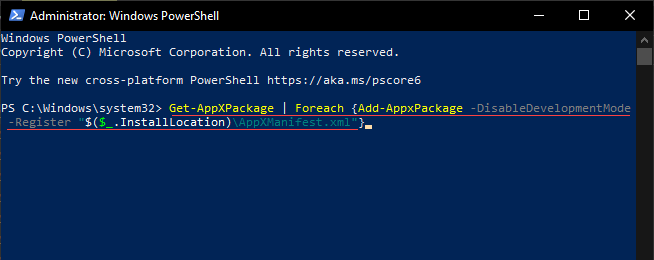
Supposing that re-registering the Settings app didn’t work, your next course of action should be to re-register all stock Windows apps on your PC. That requires running another command, but through a Windows PowerShell console with administrative privileges.
1. Open the Power User Menu and select Windows PowerShell (Admin).
2. Copy and paste the following command:
Get-AppXPackage | Foreach {Add-AppxPackage -DisableDevelopmentMode -Register “$($_.InstallLocation)\AppXManifest.xml”}
3. Press Enter.
4. Wait until Windows PowerShell finishes re-registering each stock app. That should take around 5-10 minutes.
5. Exit the Windows PowerShell console and restart your computer.
3. Run the System File Checker
If the Settings app still refuses to open or quits automatically upon launch, you must check for and fix corrupted system files in Windows 10. You can use the System File Checker command-line utility to help you with that.
1. Open an elevated Windows PowerShell console.
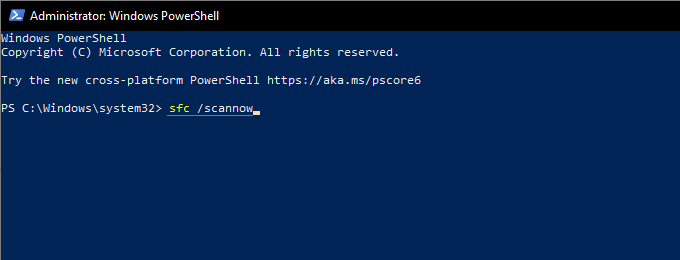
2. Type in the following command:
sfc /scannow
3. Press Enter.
If the System File Checker fails to detect or fix issues, run the tool repeatedly for a total of three times before moving on.
4. Run Deployment Image Servicing and Management Tool
The DISM (Deployment Image Servicing and Management) command-line tool helps diagnose and resolve stability issues with the operating system. You must run it regardless of whether the System File Checker manages to repair any errors or not.
1. Open an elevated Windows PowerShell console.
2. Type the following command and press Enter:
DISM /Online /Cleanup-Image /CheckHealth
3. If the command above revealed issues with the operating system, run the two commands below in the order they appear:
- DISM /Online /Cleanup-Image /ScanHealth
- DISM /Online /Cleanup-Image /RestoreHealth
The final command in the DISM tool can potentially take up to an hour to complete. If the progress indicator appears to get stuck, do be patient.
5. Update Windows 10 Using Windows PowerShell
The latest Windows 10 updates come with numerous bug fixes that help resolve persistent issues with the operating system. If the Settings app won’t open in Windows 10, you must update the operating system immediately. You can rely on the following Windows PowerShell-based workaround for that.
1. Open an elevated Windows PowerShell console.
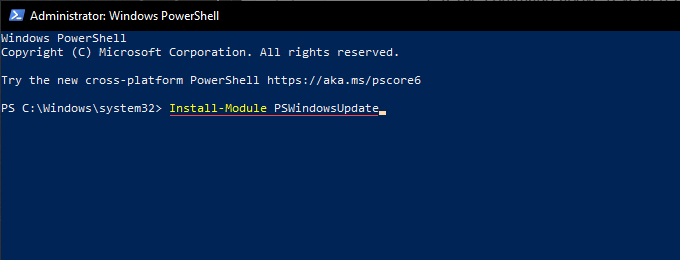
2. Type in the following command and press Enter:
Install-Module PSWindowsUpdate
3. Wait until Windows PowerShell finishes installing the module needed to update the operating system.
4. Type Get-WindowsUpdate and press Enter to scan for available updates, along with the relevant KB (Knowledge Base) identifiers.
5. Run the following command to install all available updates:
Install-WindowsUpdate
You can also use an alternative command to install specific updates. Substitute KB_Identifier as needed:
Get-WindowsUpdate -KBArticleID “KB_Identifier” -Install
After Windows PowerShell finishes updating Windows 10, restart your computer and check if the Settings app works correctly.
6. Run Windows Troubleshooters via Control Panel
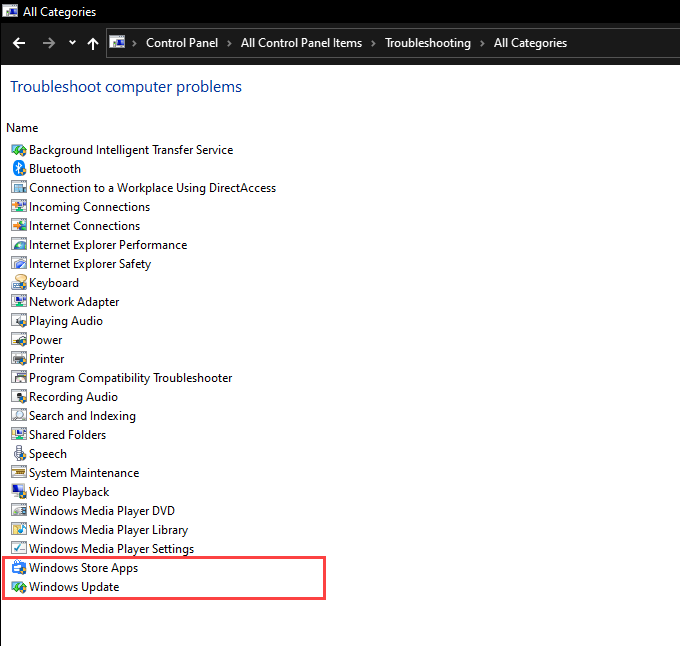
If you still have issues opening the Settings dialog on your computer, try running the built-in Windows Store Apps and Windows Update troubleshooters.
1. Press Windows + S to open Windows Search. Then, type control panel and select Open.
2. Set View by to Large icons.
3. Select Troubleshooting.
4. Select the View all option to the top-left of the window. That should bring up a list of built-in troubleshooters in Windows 10.
5. Select the Windows Store Apps troubleshooter to the bottom of the list. Then, select next and follow all on-screen instructions to resolve any issues that it detects.
If you couldn’t update the operating system using Windows PowerShell earlier, run the Windows Update troubleshooter.
7. Scan Windows 10 for Malware
Malicious software can hijack Windows 10 and prevent essential applications—such as the Settings app—from working correctly. You can initiate an anti-malware scan with Windows Security.
1. Select the Windows Security icon on the system tray.
2. Select Virus & threat protection > Scan options.
3. Pick the Quick scan option and select Scan now.
If Windows Security fails to find an issue, you should follow by running a Full scan and a Microsoft Defender Offline scan. Or, use a dedicated malware removal tool such as Malwarebytes for a more intensive and thorough scan of your entire computer. For more information, learn how to remove stubborn forms of malware in Windows 10.
8. Use System Restore to Revert Windows 10
If you’ve previously set up System Restore in Windows 10, you have the option to revert the operating system to a time when the Settings app worked without issues.
1. Press Windows + R to open the Run box. Then, type sysdm.cpl and select OK.
2. Switch to the System Protection tab and select System Restore.
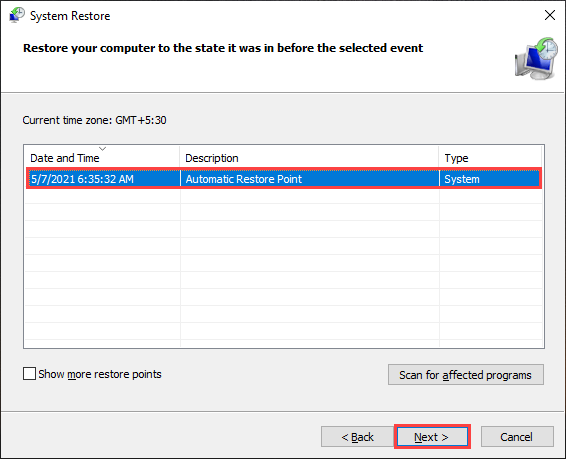
3. On the System Restore wizard that shows up, select Next.
4. Pick a restore point and select Next.
5. Follow the remaining on-screen instruction to restore Windows 10 to an earlier state.
9. Create New Windows 10 User Account
A severely corrupted user profile is another reason the Settings app won’t open or function correctly. The solution—create a new user account.
However, you can’t use the Settings app to set up or manage accounts, so you must rely on several Windows PowerShell commands to deal with that.
1. Open an elevated PowerShell console.
2. Type $Password = Read-Host -AsSecureString and press Enter. Then, type the password you want to add to the account you’re about to create and press Enter again.
3. Execute the following command string after making the necessary changes to User_Name, Full_User_Name, and Account_Description:
New-LocalUser “User_Name” -Password $Password -FullName “Full_User_Name” -Description “Account_Description”
4. Finish setting up the account as an administrator by running the following command. Substitute User_Name accordingly:
Add-LocalGroupMember -Group “Administrators” -Member “User_Name”
5. Open the Start menu, select your profile portrait, and switch to the newly created user account. Follow by signing into it.
Attempt to open the Settings app. If you can, you should move your data to the new user account. To do that, open File Explorer and go to Local Disk (C:) > Users. Then, copy and paste the contents from your old user account folder into the new account folder.
You can also head into Settings > Accounts to sign in with your Microsoft Account should you want.
10. Reset Windows 10 to Factory Defaults
If none of the fixes above worked, you’re likely dealing with a severe underlying issue in the Settings app that only a Windows 10 factory reset can fix. It’s possible to keep personal data intact despite erasing everything else, but we recommend creating a Windows 10 backup before you go ahead.
1. Open the Start menu. Then, select Power > Restart while holding down the Shift key to reboot your computer into the Windows Recovery Environment.
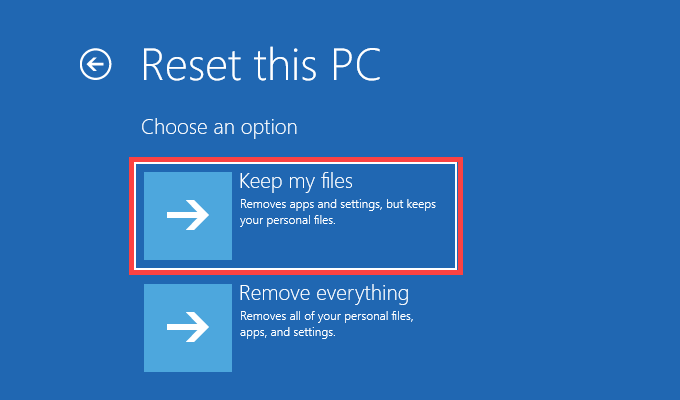
2. Select Troubleshoot > Reset This PC.
3. Select Keep my files and follow all on-screen instructions to complete the reset procedure.
For comprehensive step-by-step instructions, check out this guide to reset Windows 10 to factory defaults.
After the factory reset procedure, the Settings dialog should open and normally work in Windows 10 again.
Related Posts
- Preparing for Windows 10 End of Support: Upgrading to Windows 11
- How to Fix a “This file does not have an app associated with it” Error on Windows
- How to Fix an Update Error 0x800705b4 on Windows
- How to Resolve “A JavaScript error occured in the main process” Error on Windows
- How to Fix the Network Discovery Is Turned Off Error on Windows


